Description
About This Video
Transcript
Read Full Transcript
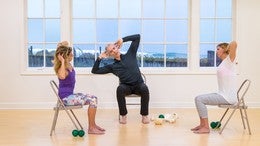
Hi everybody. I'm Tom McCook. I'm here with Christie and Nicole. And this class today will be on standing posture and balance. And um, the premise of this class is actually to make posture, feel comfortable and learn how to let go of tension, especially in the upper torso, in the feet. And see how that increased. Proprioception allow you to move better. You use your body better and put less wear and tear on it. So I think you'll find this very useful and you'll feel good just from doing these exercises on a regular basis.
So we're going to start by rolling out our feet. So we're going to take one of the balls and put it under the ball of the foot with the heel on the floor. Now. So I want you to just imagine for a moment that your feet have the same nerves as your lower back. So from an embryo perspective, your feet grow out of the same place as you lower back. So in reality your feet are your lower back. So we need to work with our feet to keep our lower back healthy.
So what we're going to do is just twist your foot four foot back and forth over the ball and imagine that the twist thing is happening in the middle of the foot right in front of the ankle, and that's a joint called your transverse tarsal joint. It's where the tarsal bones meet the bones that are right behind it, and that's one of the places in the foot that's absorbs and transfers force to keep the spring alive in our foot. We all want to keep our spring alive just saying. Now from there, we're going to reach into the bus and now from the ball of your foot to your heel, press into the ball and imagine you've got a rolling pin under your foot and you're applying a little pressure to get the tissue on the underside of the foot to lengthen. Yeah, just like a kneading dough. So it's like your plantar Fascia from the ball of your feet to the front of your heel. Notice you can let your shoulders relax and opportunity to get out of your head. Get down into your body, good brakes, station break in your day. To do this.
And now from there I would do anywhere, you know, 10 to 15 times. Then put your heel on the floor again. Now with your four foot, grab the ball and lift and spread your toes and you can consider that your foot is like a hand. You have all these small muscles that you're waking up, getting all the joints to move so your foot becomes more dexterous and in much more connected to your legs and your pelvis. That's it. Just two more and one. Now straighten the knee joint and touch the floor to the front and the heel to the back. Now the movement is in the ankle, so when I think of your foot is sliding back and forth underneath your lower leg bone, and that's an important joint. We want to keep moving well for life tends to get stiff as we age.
That's it. Then the last, let's move and you're going to do, so this is the funnest one. You're going to the bus, you won't roll it on anymore. You're gonna squash it and come into alignment from your ankle to your head and then step off. Now just to add your breath, exhale this step and just think of your arms are like heavy pendulums so you can I leave my arms heavy the whole time and then if you add just a little bit of a smile, it's way better. That's what they tell me and three more the back foot can float or it can stay on the floor, whatever you need. And three more and my breathing as I step telling yourself I have amazing balance. If my mom could see me now one more and then step off for a moment.
Now just take a moment to compare sides. Stand on the side that you worked and just do a little bend and stretch. You can use the other foot if you need it on the floor and compare it with the side we haven't done yet. I feel a little more widely, a little dense. All of that's happening, so you might notice that when you your balances better, they're a little more organization, you actually will have more strength. Also, let's take side too. So put it under the ball, the foot heel on the floor. Now twist the forefoot back and forth over the ball.
Imagine you're twisting right in front of the ankle, so you want the foot to twist opposed to doing a windshield wiper. Let it swift. That's it. And then bring your head right up over your spines, your nice and easy in the shoulders. There we go. So your foot has all these feedback loop in so you don't have to look at your foot. Your foot is always on. It doesn't adapt like your skin from your shirt. If that's shut off, we'd, we'd have really funky balance. That wouldn't be good. Now from there, you're going to actually, um, how, where did I go from there? But now we're going to actually roll out the foot.
I just had a little brain fart. Now reached from the ball of your foot to your heel and apply a little pressure to the bossy. I'm way down in my feet right now. That's it. And just sense that you're getting that tissue to spread, which makes the foot more resilient actually when it's, if it's being stuffed in shoes all day and then from there with the heel on the floor. Now grab the ball with the forefoot and lift and spread the toes. Grab lift been strategy. I noticed your hands like to help when you grab.
Let's say they want to participate too and again, two more and one. Now straighten the knee joint. Now the focus is the ankle joint. Touched the floor of the front and the heel to the back and just feel the glide of your foot underneath your lower leg bone. Still aware of your posture. You're right up on top of that standing leg. That's a very fluid, great to do before you hike. If you're a runner, do this before. Run the first mile. We'll feel good instead of the third. That's it.
And now from their last exercise, you're going to squash the ball and come into alignment from your ankle to your head. You just let your arms see. Can I feel the weight of my arms all the way through? The stepping and then add your breathing. Exhale.
Let's put your fingers where you believe the head sits on the spine. Very nice. So where they're touching right now is the mastoid process. It's just below the ear. You'll feel them bone, they are called the mastoid process. And that's exactly where the head sits on the spine. Straight in from your fingers.
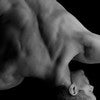
If you put your fingers and imagine there's a line touching the fingers. Right in the middle is where the head sits on the spine is to a very small nod and extend. And imagine that location stays in the same place. The head is just sliding back and forth on the top. And I'll just give you a visual of that so you can see it, which is always helpful. So right here I have half a skull and the first two cervical Vertebra, c one and C two. And if you look at him from this view, the sit bones of the head are just these two little cups are the sit bones of the head or here the the joint where they sit are like two cups and the head rocks inside the cups right at that level.
Now where you guys were touching was right here, the mastoid process. And you can see if you look in from there, that's where the sit bones are straight in. And the sit bones of their head are angled just like the sit bones of the pelvis. Very interesting design we have. So the, the more you get a sense of, that's how the head's supposed to sit on the spine. You have, you have a new level of awareness of how to self correct your posture. So let's actually play with that for a moment.
So let's put your fingers back there for a moment. That's it. Now, just starting from the ground, balance the weight on the front in the back of your feet where you have about 50 50 heel ball your foot, and then just soften your knee joints a little bit. Now Rock your head on the end of the spine and notice that the bones you're touching, that they're moving. Can you guys sense that a little bit? So notice when you nod your head, the bones you're touching, you're sliding back and they're mirroring the sit bones of the head that are stressing in your first cervical vertebra. And that interchange should be very useful. Yeah, a little sense of that. Now notice if you relaxed your jaw more, it might even get a little easier, a little more clear. That's it. Now let that go and just keep nodding your head a little bit.
Saying yes to whatever I'm saying. It's all good. Now we're going to do a little massage. So one of the things that inhibits sensing and feeling is tension. So I want you to take your Franklin balls and put them right on the side of your neck or a little bit back in this big muscle called your SCM, your sternocleido master, or just a little bit behind where you were just touching. Now as you press the ball towards the back, roll it into your neck, and as you do that, imagine you're massaging those muscles from the side to the back of the neck and just go really slow. Keep the tops your shoulders relaxed, Eco weight on your feet, and now slowly as you're doing that, start to not oscillate your head on the end. Really small.
Bringing your awareness of where the head rest on the spine and you can work your way down the neck a little bit.
You go and now let cause of the fibers of your chest go multiple directions. Take the arm up on a diagonal and then down on a diagonal. Exactly. What would life be without tapping his hand? Saying your appropriate reception that touched to your muscles gives you brain the feedback to let go of unnecessary tension. It feels kind of good.
Now we're going to tap up the side as you side bend the other way. And this is related to your lats and your side body, which will help free up the shoulder girdle a little bit more, a little bit of a bend in your knees. Who sent her? Gravity is low.
Then on the exhale, imagine your head floats up as your shoulder girdle relaxes down more. Let's do that for a couple of breaths. Letting yourself know that you're breathing deeply. One more breath. Now we're going to do a movement that's a little more rapid. I'll show you what it looks like. So you're going to inhale, lift the shoulders up, but I want you to imagine that the balls are floating your shoulders up.
It will look like this. You'll inhale. Then on the exhale, you're gonna rapidly drop onto your femur heads.
We have one more. Now we're going to do it with one foot off the ground. Now lift the shoulders up. Exhale, drop onto that femur head.
Flex center one more each way. Laterally. Flex Center laterally. Flex Center. Rotate center, rotate one more each way. Last one and down side to that's working, Huh?
Flex might be feeling that standing leg about right now laterally. Flex and now rotate center. Rotate one more each way. I'm touching the ground a lot. I just want you to know that back to the center. And then as you come down, catch the balls. Take a moment to notice. Boom.
And that's also, there's a couple important things happening there. The femur heads are pushing the pubic bone together. When you bend your legs, cause the back of the pelvis is widening, that's form closure. That's how the body absorbs force and it's designed to do that so that it makes the pelvis strong. If we feel that, and we haven't, good alignment. So I'm going to give you a little awareness of that. So the way you can find your hip joints, we'll do it while we're on the balls.
We'll stand on them. Now touch it, your pubic bone level right in the middle and go straight out to the side at the same level all the way out to the very side and even a little lower, even a little lower right there. Feel that hard bones. So that's your Turk canter. So that's the outer part of the thigh. And I'll put your thumb there. And when you bend your knees, stick your butt out a little bit. So a crease happens where the pelvis and legs meet. Now halfway between where your thumbs are in the middle of your pubic bone, put your fingers in the crease and then stand back up.
And just think when you're bending, when you're doing this, that the weight is landing there on your femur heads, not out here in the back of the pelvis is widening. So if the back is widening, the front is pushing together. That's the form closure of the pelvis. Let's just get a sense of now that we're here is we bounce. Let's just bounce for a second. Now relax the shoulders. Head over the spine.
So remember we talked about how the head sits on the spine and how to let go attention under the jar in the back of the neck here. Another place in the pelvis where it's not supporting weight is your tail. So let your tail relax cause it's, it's, it's down there. It doesn't have to tense because it's not supporting weight, which makes it a lot easier to actually feel the spring of your spine and your legs. And that's where we want, we want to keep the spring alive in our body and we're gonna be doing this a long time, so we wanna get really good at it. So we're going to add something to this. You're going to go like this, you're going to hinge, swing your arms back. And now on the exhale, let your arms go up and let your arms rest on the sh on the shoulder girdle, the arms on the shoulder girdle, and then your head and ribcage on your thighs.
And again hinge
Feel the head articulate on the spine. Now peel down through the spine. Relax the shoulders and arms. Now Watch your pelvis roll over the top of your legs at the bottom. Feel the weight of your head nodded at a few times. Yes,
Articulate down. Let the pelvis roll over the top of your legs. Nod their head a few times. Rotate a few. Take your breath now this time. See if you can keep your arms and shoulders even more relaxed in a roll the pelvis back over the top of your legs as you stack.
The back chain of your body is lengthening. Take a breath, feel the sit bones, get heavy in the front of the spine, starts to lift up,
So put your right foot on your left and step that. Drop your left hip out to the left. You're waiting for the bus. Exactly. Not now. Press, press the left leg to the midline to get up on top of that left leg and then drop it out again. Now imagine you're gonna keep the the bent leg relaxed. You're not going to generate any of the effort from there. Now press the midline again.
Now take the free foot forward and just touch the floor and you can use the floor anytime you need it during these six head positions. Now just bring your attention to where the head rest on the spine. Easy shoulders. Now slowly rotate your heads a little bit. Right Center,
Flex Center and down. We'll take side two and now drop your right hip out to the side. Press it to the midline and again drop it out.
Now turn your head to the left
I hope you enjoy incorporating those into your life. Thank you for joining us.
Comments
Thank you for your comments, really happy to hear you felt much better from the lesson. Keep practicing the concepts, I'm confident they will continue to serve your health and wellness. All the best!!
I recommend having your client use the balls supine for her upper traps. Place them just below C7 on each side of the upper back. Lift the hips a few inches off the floor and rest the head on the floor. Let the muscles melt over the balls for a few breaths and then do slow smooth small movements up and down and side to side. For the neck, have them just use their hands to gently hold the balls in place on each side of the neck and do small rotations and flexion and extension. Thank you for your feedback, wishing you all the best!
Tom
You need to be a subscriber to post a comment.
Please Log In or Create an Account to start your free trial.


