Description
About This Video
Transcript
Read Full Transcript
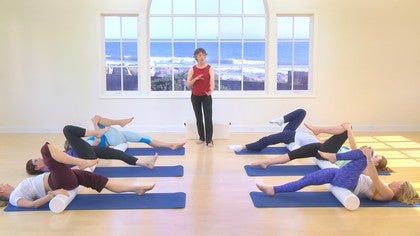
Hi, I'm Ruth Alpert and this is going to be soft foam roller class. I just got back from a two week trip to Santa Fe, New Mexico, and I drove. And it's about 14 hours. I break it up; two seven hour days. And when I got back I was like this.
And you know this is not so bad except if you're a Pilates teacher and your client, you have a brand new client and you say, yeah, eight lessons with me and you too can look like a car seat. (laughing) Right? So, the workout that we're gonna do today is what I give myself to get out of the car. It's great to do after traveling on airplanes because airplane seats are even more bizarre if you're not six feet tall and fit the seats. And this is great to do when you don't feel very well, but you still wanna get connected to your body.
It's pretty laid back. Pretty basic. Some of you probably have done fair amount of this stuff in varying places, but I've put it together in a series that suits my body. If it doesn't suit your body you can always make it up yourself. So, we're gonna start with a lengthwise, coming on to the roller.
Have your head at one end, your tail at the other, obviously. And the first thing to check is that your feet are equidistant. If you're really crooked one foot will be way out, one foot, yeah. Your feet do not have to be together, they can be wide. My concern is just that you're centered.
That the roller is centered between your feet being equidistant from it. Wherever it's comfortable for you. Good, so the first thing to do is just arrive on the roller. Just feel what you feel. Very often your body will draw your attention to the place in your body that needs the most attention.
So, give it the attention it's clamoring for. And just do a body scan. Just feel through where is your weight, how does the roller feel, where is your balance? And take your time to let your body settle down into the roller. You can close your eyes.
Notice your breath. Bring your attention to the tension in your body. Where is your body screaming? It's very curious, actually, that the word tension and attention are almost the same word. So, bring attention to your tension.
And then pay attention to another part of your body that's calling for attention because it's tense. There's a Far Side cartoon in there somewhere, but I can't think of it right now. And one place that I notice on my body when I do this is the lower part of the back of my ribs. So, check out that place for yourself. How far off the roller is it?
Is it connecting at all? Is it miles away from the roller? And just notice it as the before part of the before and after 'cause we'll come back to this and that way you can see if it's changed any. So just getting your initial reading on where your body is. Where your starting from.
And feeling gravity do the work for you, of letting your shoulders fall off either side of the roller. There's nothing you have to do, really. Gravity is doing it for you. And let your organs sink down to the back side of you. I always think of the Salvador Dali painting where the clock is dripping and all the stuff is dripping and just let, let all your gushy stuff drip over the roller.
And then very gently let your head roll from side to side. Don't push it, this is again the before of the before and after. So, just notice where your range of motion limit, where your edges are. Don't push past it. Now just easy let your head roll like it was a bowling ball.
Good. And then come back into center. And let your lumbar spine find the roller. So press your lumbar down into the roller, and release it back to neutral, or relaxed. And press your lower back down.
It may tip your pelvis a lot or a little, depending on the curve of your spine, and release it back. Just to let all parts of your spine locate the roller. Good, and then leave your pelvis alone. And still let your lumbar area know where the roller is even if it's not touching. Just have an awareness of that.
Good. The next part is an arm series. So, you arms are gonna be out, open to your sides. And four times you're gonna come up, bring your palms together over your heart, not over your face. And then back open.
And when they come to the floor, really be on the floor. Relax for a moment, and then reconnect and bring your arms up over your chest. And back down. And actually touch your palms to each other. And third time coming up, and opening back out, feeling the movement of your scapula, shoulder blades.
And come up, this is fourth time, and open back out. Palms down. Four times backs of your hands, come up, and back down. Register the floor and come up, and back down. I originally learned this series from a colleague named Carolyn Sue Albin who's a Feldenkrais practitioner and a Pilates teacher, and she introduced me to the foam rollers in the early 1990s, mid 1990s.
And my understanding is the foam roller was created by a Feldenkrais practitioner for his scoliotic patients, but that could be a rumor, I don't know if that's true. Four times thumbs together, palms facing away from you. And three. And four. And now pinkies coming together.
Your arm is rotating, four times. Two. And three. And last time, four. Good.
Let your arms slide down and reach for the bottom of your roller. So, fingertips on the bottom. You may need to adjust where you are on the roller. So, your fingertips are touching but you're still creating a pull, right? It's actually quite a reach.
And use that to lengthen your upper shoulders, right? Let your shoulders drop down and reach. Just stay there for just a little bit, getting that pull down. And if you'd like, be very careful with this, but if you want you can add a little bit of a head turn to get an even deeper stretch into the scalenus and upper traps. They don't call 'em the traps for nothing, these guys trap up your head especially when you've been driving in traffic in Los Angeles.
Or 50 mile an hour winds coming through Gallup on the way back. All across Arizona. Five zero mile an hour winds. Me and the semis. It was intense.
It's still in my shoulders. Okay, come back to center. Or a foam roller, I need to get on the foam roller. Let your hands go, palms up, and now you're gonna do angel wings. Here we do angel wings in the sand.
Most places you do angel wings in the snow, right? But your arms are gonna go to your upper diagonal, not all the way yet. Just the upper diagonal. If you can keep your hands on the floor, that's great. If you have a shoulder issue and you can't, it's fine to lift them off the floor.
So just go to the upper diagonal where your scapula can still drop down and out, and it hasn't elevated yet. It's the scapula going down and out. And then feel that upper pec stretch. Notice as you do this if your ribs wanna pop up, right? My image for this often is that wine bottle opener where the corkscrew goes down and the wings go out.
So, imagine your ribcage and your spine going down as your arms come up. Good. And on the next one that you do, now go up and go all the way straight overhead and let your ribs respond, and let your shoulders come up. I was doing this this morning on my, ha, it's California, on my sunny deck, I was doing this, and I was realizing you know, where in your life other than hanging laundry on a line, which some people still do, when are you ever in this position in your daily life? It's like a range of motion we're all losing.
We just don't go there and it's a really big, nice stretch and it can pull your ribs open so you get all the cobwebs between your ribs cleared out. So just stay there and breath and then when you get tired bring your arms down and then go back up again. So, on your own timing do a few of those. And all of this work today is to taste. You know, the way you'll be making a stew and you'll put salt in to taste so whatever feels good to your body.
If it doesn't feel good, don't do it. Do something else. Or do just as much as it feels good. So do it just to taste. Good, and then on your next one go all the way up and completely cross over your face, smush your face and go into full arm circles.
About five-ish, five or so in each direction. If you like you can alternate which arm hand, which arm crosses on top. Good. And then make sure you go the other way. And don't be afraid to have your arms really smush your face.
Go for the crossings so that your shoulders separate and protract all the way. Go for your full range of motion. Good. And when you've done enough, enough is to taste, let your arms rest and again let your head roll side to side and notice if it feels any different than it did at the beginning. It looks different.
(chuckling) Yeah. You all have much more range of motion now. Proving yet again that most neck problems start a lot lower down. And if you release your shoulders in your mid back your neck will release. Good.
Okay, so just find center again. Check out the back of your ribs and any other place that was really talking to you at the beginning. And then we're gonna go into your legs. Now, if you wanna do this on your own you could come off the roller at any point during that series, come back on, pick up where you were. I'm doing it as one flow through just for efficiency sake.
So, pick up your right leg and put it back down. Pick up your other leg, and put it back down. And notice what has to happen. Notice how, what you had to do to stay centered. And grabbing the edges of the mat is not gonna help, but nobody's doing that, so that's cool.
But your instinct was probably to grab something. And see if you can bring that, that desire into your center, into your low belly, and use that for stability. I actually once had a client, she was about 21 years old, who was born without a left arm. She just had a tiny little stump here and I gave her foam roller work to do and she could do it. And what it taught me is you don't need arms to stabilize, right?
She was strong enough and centered enough. I gave her the image of the four corners, pelvis and shoulders, instead of arms and feet. Good. So pick one leg up, pick up the other leg, keep it there. Notice what that does.
One leg down, other leg down. That leg up, other leg up. Leg down, leg down. And speed it up a bit. So, it's up, up, down, down.
Up, up, down, you can alternate legs, whatever you wanna do. Just tease yourself. Maybe that's where the name teaser came from. Just tease yourself, good. And then keep both legs up there and just waggle your feet.
Which also is gonna challenge your center. Good, and drop your feet down. Nice. So one more time, close your eyes, check in with your body. Where is the back of your ribs now?
Let your head roll side to side if you want again, just to check that out. Good. And come to center. Slither off the roller. Keep the roller by your side, but slither onto your backs and let your legs slide out and just take a moment to notice what that generated.
To feel your body where it is. To feel the texture of the floor. Good. And the pauses in between these sections are really, really important. To let your body absorb what it just experienced.
It's the pauses that we've lost in the pace of life in the 2000s. Okay, so the next part is to bring your knees up, feet on the floor and put the roller sideways under your knees, and you're gonna lift your pelvis. See if you can hold the roller, roll the roller up under your pelvis and then keep your hands there, right? The roller can slip out from under you and it's really important that you're hands can either be way out to the side, or on top, or wherever you want them to be, but really stabilizing the roller. Bend your knees, bring them up into your chest, and give yourself another very technical term for this is squoosh.
Bring your knees into your chest and just give yourself a nice squoosh. Let your back stretch out. If you need to adjust on the roller, like exactly where it is, feel free to do that and throughout as we do the leg series here. You might need to adjust and that's fine. So, the first thing is let your knees go side to side, right?
Let yourself roll side to side. This is the equivalent of the diagonal knee sway that we do just flat on your backs. So, yes you're massaging the piriformis and rotators and all the glutes, but don't make that the main focus. Let it really be about your pelvis and spine spiraling. So, your knees can be really squished in the way they are Dionne or they can be further away like they are for Karen next to her.
Whatever's comfortable for you is fine. But this always a little bit radical so be gentle. Good. Come back into center and straighten your legs up to the ceiling. And again, adjust on the roller if you need to.
And let's do some footwork 'cause there are your feet up in the air, and most of the time they're not up in the air. Most of the time they're pushing a gas pedal or a brake pedal or you're standing on 'em. And so it can take feet a little while to actually start to release the tension that they carry. So let's do ankle circles. Separate your legs just enough so that you have room to move, and again this is to taste, as many as you need.
And then reverse. And if your hamstrings are tight it's fine to have your knees slightly bent. Good. And then bird feet. Well I can't lie down with this thing.
Bird feet, and then Barbie feet. Pressing through the ball of your foot like you're on tiptoe. Bird feet, and Barbie feet, and bird feet, grabbing back, and Barbie feet. And bird feet and grab back, yeah. And Barbie feet.
And a few more times. Bird, and Barbie, and squeeze, make a fist out of your foot for bird feet. Squeeze all that blood and then push through in Barbie. And then go back to ankle circles or anything else your feet need to get the blood there and get your awareness in your feet and let your legs know that they're not dead fish at the bottom of your legs. Okay.
So feet together, now we're gonna do leg lowers, going up and down. Only as far down as you can keep your abs under control. There might be a slight movement of your pelvis, but don't let your pelvis go into a big arch and curl. But, you also don't have to be so rigid that your legs hardly move. So, just have a nice, a nice up and down.
Good. This is similar to doing the legwork on the spine corrector in a way. But, gentler, not so extreme. I'm lousy at counting so don't rely on me. Come up, I think that's probably enough.
Whatever number that was. I think I have a built in count of eight from being a dancer for too long. So that was probably somewhere near eight. Circles. Big, big ole circles.
Again, using your abs so that your pelvis doesn't wang around, but allowing enough movement in your legs. Very unlike Pilates, really go for big range of motion here. Good. And I would say do maybe six each way, if you're counting. Good, everybody.
Use your feet. Make sure your legs know, it's actually your feet that are leading. Your feet are arriving in the space first, and dragging your leg along with it 'cause it's attached. Good. Okay, scissors.
Big ole scissors. Paying attention to the leg that's going away from you. And we can do these a little faster just to make some dynamic change. Rockettes here we come. Good.
Okay, come back up. Let's do helicopter. So this is scissor, scissor, half circle on a count of one, two, and three and four. One, two, and three and four. One, two, and three, your legs are getting longer as you do this so you will start kicking each other soon.
Three and four. One, two, and three and four. One, two, and three and four. Good. Bend your knees in, adjust on the roller if you need to and let's do short spine.
I actually often used to teach for people who were nervous about going up in short spine I used this a way to introduce short spine. So it's basically just the leg part. Start in frog and your legs push out, come to parallel point, legs come up, but don't leave the roller, frog, and push back out again. So it's just the frog part, the leg part of short spine. And get that sense that when your legs go overhead your spine could follow.
Mm hm, nice. Good. And one more. Complete the one you're in the midst of. And then open leg stretch.
Just let your legs hang there. I have never yet in all my teaching found, well I take that back, one person was not tight in her inner thighs. No, that's not true. Actually, every single person. It's just you get bigger range of motion for the same tightness as you stretch out.
But everybody hits that threshold where these abductors, and I'm still trying to figure out why. Like what is it in this culture that makes everybody tight in their abductors? Even the most stretched out people will still have that tightness. As I say, they just have a bigger range before they hit it. You can, here you can do little figure eighty things.
You can rock side to side. If the pain is too much you can distract yourself with a little movement. But, it's a really important stretch. And it tightens up so quickly. So if there's anybody out in our listening audience who knows the answer to why everybody's so tight there start a discussion on the forum and I'd love to hear about it.
Okay. Bring your legs together, bend your knees. Go side to side again like we did at the beginning and see if it's any different now than it was at the beginning. A little looser? Yeah.
I'm gonna add something to this. This is again only to taste, it's rather extreme, but if you want you can take your legs over to the side, your top leg comes up, your bottom leg goes down, and you get a really big stretch. And then swing 'em back through and go all the way over. Yeah. You can keep your knees bent.
This leg bent too, but you're coming way over, like way, way over.
Amy's got it, yeah. Just whatever feels good, taking your twist to an extreme. But, only if it feels good 'cause it is pretty extreme. Yeah, good. It's almost like a baby roll from Feldenkrais, that idea of rolling, separating your legs.
Good. Okay, come back into center. The last thing we're gonna do is psoas. So, there are two ways to do this and I would say choose what feels best to you. You can keep one knee up and your other leg goes out to the floor.
Well, actually, the first variation would be foot to the floor. So, bring your foot, yeah. Just like that. For some people that might be enough of a stretch. If you wanna go past that, lengthen your leg out.
And you can also instead of having your knew up, your foot can be on the floor, with the knee bent. Yeah, that's another variation. So, whichever of those your body needs is fine. And you're just gonna stay there for a few breaths. Allow your back to arch here.
Having your leg pulled out that much will pull your pelvis and your lower back, don't fight it. Allow it to happen. But, if there's any pinching in your low back, don't do this at all. And then switch. So, the best thing, I actually like the Aaron Mattes' two second stretch idea.
He has a whole technique around stretching that if you stay in a stretch for two seconds with an exhale, you're stretching the muscle. At about three or four seconds the stretch reflex kicks in and that, we have a reflex to contract a muscle that's stretching because without that reflex our limbs would fall off, right? We'd stretch and stretch and nothing would pull it back and we could dislocate. So if you stretch for only two seconds you get in before the contraction reflex kicks in. So, now that you've been there for at least five minutes.
(laughing) Stretch, go side to side. I know, I'm terrible about timing. But, and I actually think that's one of the reasons why Pilates work so well, because built into the work, we move, we stretch, and we come out of it. We don't stay there for a long time and I really think that's one of the reasons why people get stretched and lengthened in it. Okay, so come back to center.
Both feet down on the floor. Lift your pelvis up, push the roller out, pelvis comes down. You can keep the roller there and straighten out your legs and your legs can rest on the roller, or you can move the roller off to the side and lie flat. Whatever you like. And again, just chill out for a moment.
Notice what you feel, where the back of your ribs are, backs of your ribs. Your dorsal surface. Notice your breath. And your shoulders. And notice also just the weight of you in the floor, on the floor.
How much of you is resting into the floor and not pulling up or holding away from the floor. And then if the roller's still under your knees use your feet and kick it out so that you're totally flat now. And rest there for just a little longer. And again just feel into yourself. Okay.
The next thing I'm gonna sneak in, we're gonna just be very sneaky and throw in the hundreds. So, you're gonna put your feet on your roller, right? Yeah, do you have it Dionne? That's it. Ideally your heels rather than your achilles tendon.
You don't wanna put pressure on tendons. Bone can take pressure. So here's your legs. When you do the hundreds you're gonna press down into the roller so your legs are not just lollygagging around, but they have a little work to do. Arms up to the ceiling.
Inhale for nothing. Oh, rest for a second, I forgot. I like to do the hundreds with a percussive breath. (deep breathing) Rather than the slow breath, 'cause those slow breaths are really the tens, right? If you do five in your nose, five out your mouth, that's 10 breaths.
You do 10 sets, that's 100 breaths. That's where the name came from. If you do (deep breathing) 10 times, that's 10 breathes, not 100. So, arms up to the ceiling. Inhale for nothing.
Exhale, curl up to your hundreds and start. In, two, three, four, five. Out, two. Two, two, three, four, five. Three, two, three, four, five.
Four, two, three, four, five. Five, two, three, four five. Six, two, three, four, five. Seven, two, three, four, five. Eight, two, three, four, five.
Out, two, three, four, five. Nine, two, three, four, five. Out, two, three, four, five. 10, out, two, three, four, five. And roll back down.
Very nice. How'd that feel? My mission in life is to make the hundreds feel good. (laughing) I think we did it. Okay, next piece is to put the foam roller under your mid back.
For ladies you can think bra line, somewhere in that vicinity. So, you can have your legs straight or your knees bent. Either one is fine. I happen to like my legs straight, but again that's to taste. Clasp your hands, support the weight of your head.
It's really, really important that your head gets to rest in your hands so that you're not overworking your neck. And the first thing is arch back. And just hyper extend that ribcage, let everything stick out. And then find your exhale, find your ribs coming down, find your abs pulling your ribs, pulling your head. And a few more times.
I actually used to teach hundreds. I would teach the concept of the hundreds with this because it helps people understand how you're abs pull your head up. And how that connection through your ribs and a supported head goes. Yeah, beautiful, Karen that's a great head, yay. Yes, everybody's got great heads.
Nobody's sticking their head out like I'm doing teaching you. Good. And again this is to taste. You can do as much as you like. You can change where the roller is to get a little variation if you want.
And then we're gonna add some things here. Good. This is the blind spot in the body, right? You can't see behind you. You can't twist your head and see that place, and it's also the root of our necks and heads, and it, having the roller there giving you feedback is just so important I think.
But I wouldn't do this first. This comes after your spine has already been lubricated and your pelvis grounded. Okay, so come up. I mean, stay in the curled up place and now go side to side. Your pelvis is really grounded, especially on the sticky mats.
The mats are sticky so your pelvis can't slide. So you're really getting ribcage movement. Yeah, it's a true lateral ribcage opening. Nice, everyone. And again you can adjust the roller to get a slightly different angle on it.
And then you can add, from that side place you can add a curl or an arch, or both. And then you can do full circles at a certain point. So just play around with whatever feels good to your body. Just make sure your head is still supported so there's no neck tension. Yeah, beautiful Corrine.
Ribs are pliable. There's supposed to be pliable. And this is a great place to really feel that expression of your ribs with a stable, steady pelvis. Good. So, when you've had enough you can, do you ever get enough of this?
(laughing)
Yeah, and what Amy's doing, you could do a heel rock from here even. That's great.
Good. And then with your head curled up, you're gonna roll the roller towards your head, just slide down on it until your head is on the roller. For some of you this might feel good, and if it does you can rest there for a bit. If it does not feel good to your neck, push the roller out and just lie flat. This is really an individual thing for your head.
And you can roll your head side to side or whatever. It's okay to hold the roller.
That's actually a great shoulder opening to do that. But, for those of you doing this at home, if it does not feel good, throw it out. Just go lie flat. It's not for everybody. Good.
And when you've had enough of that, push the roller out, and again, just lie completely flat. And again take stock, where did that bring you? How's the back of your ribs now in relationship to the floor? Where is your breath? And feeling everything just sinking down.
Okay, a couple more things. So, come up, just come up. We're gonna do a version of swan. So, let's have the rollers and your heads in the center, and your facedown. Now, again, this is gonna be particular to your shoulders.
If this does not work for your shoulders, throw it out. So your arms are pretty wide and maybe about your wrists, your hands are off somewhat, and your forehead is on the floor. This is where it can be dicey. If it doesn't work for you here you can modify it by maybe putting a pillow under your head, but probably best to not do it. And the first thing we're gonna do is a shoulder shrug.
So with your arms straight you just bring your scapula or your shoulder blades down and let 'em roll back, elevate. So, the technical, anatomical term is depress your shoulders and then elevate your shoulders. But, depression has such a connotation in this culture, I don't want any depressed, any shoulders with depression in 'em, 'cause then you have to start, nah forget it. I was gonna make a joke about Prozac for shoulders, but just let your shoulders drop down. Oh I'm getting punchy, okay.
I grew up on the New Yorker, you know, so I see the entire world in cartoons all the time.
Anything that feels good, is good. So, you can play with where your, yeah, you can play with rolling your arms out or in, or whatever, getting different angles on it. And this is really just a preparation for what comes next. So, it's just to activate those. Years ago in Santa Fe we nicknamed them the bandelier muscles because they feel like a band across your mid back.
It's the lower traps, serratus anterior, and the lats, all those shoulder stabilizers. And it was just a lot faster to say connect your bandeliers, which of course in New Mexico, Bandelier National Park, it was an in joke. Okay, so you're gonna drop your scap and you're gonna start rolling up into swan. Your weight is going to come onto your hands. Hand can be straight forward, yeah, that's the idea, come back down.
So, adjust where your hands need to be. If they're too wide, bring 'em narrow. If they're too narrow, bring 'em wide. That's where you're going, set yourself up. If you have lower back issues, your feet can be wide apart.
They don't have to be together. Pull up in your abs and connect your shoulders and just roll yourself up into swan, as high as you wanna come. Actually, how high is determined by where you start. So, if you wanna come up higher, have the roller higher up on your forearm. Good.
And coming on up. Find your ab support so that your pelvis actually gets to lift with you. No hyper extended backs, please. Not in this. Good.
Maybe two or three more. Nice. And Dionne is demonstrating a modified version. She's just not coming up as high, but she's still beautifully connected. So, that's fine too.
Just find that shoulder blade connection down your back. And when you've had enough you can take your arms off, yeah, just rest. Take your arms off. The next thing we're gonna do is knee stretch. So, come up to like a crawling position and put the roller right under your kneecap.
This is only gonna work for certain people with a bone structure that allows it to happen. If it doesn't fit you, like if it's too painful on your shin, I've never come up with a modification. It just works or it doesn't work. And it's just your body. So, let me demo, oh actually, you know this, right?
Oh, I'll demo, sure. I don't get to do any of this today. So, your knees are gonna be just under your kneecap, and you're supported on your arms and you roll. In and out, right? This is actually how I taught knee stretch to beginners because even though knee stretch is considered, on the reformer, is considered a beginning level exercise.
It is really complex exercise. And so what this does, doing it here, is you're forced to stabilize on your arms and allow the movement to be in your lower body.
Just let it be natural and I think because you're coming so far in the back is gonna round. But, definitely use your abs and do not hyper extend your elbows. Make sure your elbows are not hyper extending, 'cause then you'll lose your bandelier connection. That's it, beautiful everybody. Good, it's a great place to feel your abs.
And Corrine is up on your fists because she has some shoulder issues, and that's also fine if you need to do that. Good, that's enough. That's the one line joke. It just goes in and out, it doesn't really go anywhere. Stay right where you are because the next piece is your feet, right there.
I caught you in time, yes. So, have your, this is new, I've just recently made this up so I might have to demo it. Your feet are like this, but the roller is supporting your shins. So go there, everybody, and hands are on the floor in front of you so that you don't have all your body weight on your feet. You know what, I have to do this.
I'm not sure I can describe it. Let me have a roller. It's just about a month old. We discovered it in class one day, it just came out. Okay, so where are you?
You're here. And your feet, remember this Dionne?
Oh yeah, you're a little, oh no, wait, hang on. Bird, that's it, there I go. You're bird feet, and stretch. And bird feet, and stretch. So the first one is on the, what we used to call on the walk.
And you know, figure out something that works for your feet even if it's not exactly what I did. Just something that really gets the stretch going on in the sole of your foot. However it fits you. And then roll yourself forward a bit, and what I'm after here is stretching the top. I'm finding this is, it's becoming pretty universal that everybody is super tight here because our foot is on the gas pedal all the time, right?
We're always inflection. There's almost nothing that stretches the top here and it's really crucial. Yeah. So, doing it on the roller can be a little more forgiving than just doing it this way. So find, make your feet make the roller move, right?
Your feet are what's creating movement in the roller, however you need to do that. And see if that's useful for you. Or yeah, there's another one. That's a great one. Okay, follow, everybody do what Corinne is doing.
So your feet are up against the roller and you can just lean back into it. Yeah, how's that? That gets it. Yay. And as Mary Bowen once said in a workshop at the PMA, now is when you can sing opera.
(singing) (laughing) Good. Very nice. Wow. Cool. Okay, come back into the squatee place with the roller where you were before.
And let's see it, yeah. So, from there, put your feet down on the floor behind you and you're gonna lengthen yourself up with your hands on the rollers. So just come to standing but use the roller so you don't have to go all the way down to the floor. And drop your head and just stretch your legs, and your back, and just hang there. If this is not comfortable for you, you can keep your knees bent.
Make sure you can say yes with your head, no with your head. Feel your hair falling out. No, that's not what I meant to say. (laughing) Not your hair falling out. Feel your hair falling into gravity, still attached to your head, please.
Good. And here, too, as Amy's doing, you can lengthen your back out on the roller and roll the roller in. Just play around with what's possible here. Yeah, this morning when I was playing with it, you can roll the roller, you can move your sitz bones forward and back. So you can do it as a back thing or you could do it as a leg stretch, just basically rocking your sitz bones forward and back.
And sitz bones forward and sitz bones back, and the roller will roll with you. Good. And then roll yourself all the way in so that you're just hanging. Bend your knees and begin to roll yourself up. Tail is coming forward, don't lock your knees, keep your knees nice and juicy and free, and come all the way up to standing.
Vertical, what a novelty. Shoulders forward, and up, and back, and down. Forward and up, and back, and down. Slow, big, complete scapula movement. And forward and up, and back, and down, and reverse, squoosh back.
And up, and forward, and down, and back. And up, forward, down, and back. Up, forward, down, last time, back. And up, forward, down, let your arms hang, find your head on top of your spine. Unless your head rolled off to the side with the roller.
Put your head back on your spine. Have a nice little plie, feel the weight dropping down through your arches, and come up. So when you bend down there's a natural flattening of your in step, and allow that to happen. And come up, and feel the ground. Good.
Thank you very much. You're now ready to do a Pilates workout. That was all just to get the plane and the car and the travel out of your bodies so you're connected enough to go do something serious. (laughing) (applauding) Thanks.
Mindful Movement: Stress-Relief Classes
Comments
I teach this class every Tuesday at Montecito Yoga studio in Santa Barbara, and inevitably new things come up each time...so the repertoire in growing! If you know anyone visiting or in the area send them over. It's a drop-in class, 12:15 every Tuesday.
But please insert, because I forgot my favorite thing: in the first part lying lengthwise on the roller, add towards the end, sideways "ironing". As if your shirt is all wrinkled and you're ironing it by going side to side. This can be true lateral, or lengthening one side while shortening the other, creating a half-moon shape, sort of. I do some of each, since they're both useful.
You need to be a subscriber to post a comment.
Please Log In or Create an Account to start your free trial.
