Description
About This Video
Transcript
Read Full Transcript
Hi Guys, we're back for class number eight. Congratulations. Thank you so much for coming along in this 10 class series. So we're here for this class at the wall and I want you to consider the wall as your mat. So the wall is a wonderful place to gauge yourself and your awareness and space in a way and kind of feel where you are. So for one example, if your, uh, with your back against the wall, you can really feel the landmarks of the back of your skull, your shoulder blades, the back of your center rib cage, and your sacrum, much like you would on the floor. But it's interesting when you're standing and how gravity plays with our sense of alignment. This may give you more true reading of your placement. All right.
And, um, we'll be starting class with a standing roll down with your back against the wall. But I wanted to let you also know that you need to pound hand weights or maybe one pound is fine too, and a rolled up bath towel. Okay. So everybody stand with your back against the wall, look down and see your Palladia stance in Nice, even weight across the big toe joint and all the way over to the pinky toes. And then let's work our way up. Bring the calves together, the inner thighs together, your sacrum against the wall, your thoracic spine, shoulder blades, and finally the back of your skull. Not by tilting the chin down, but just keeping your gaze straight forward.
So allowing the hands, you just hold the weights and let the weight, um, lengthen your arms down slightly. You don't have to over pull. Okay, so let's do a nice easy, just half a roll down, meaning just to the, the center of the back or where your thoracic spine is. So this class number eight is a little of another part of our variation on the theme, keeping things, uh, interesting and different. You can always do this as a regular standing mat class or regular mat class. And also when you're traveling, this might be a really good class to do when you're traveling and needing some [inaudible] and you've got a wall. You wouldn't even have to do all the hand weight work. Okay, so here we go.
Let's go down further. Now I will peel off of the wall, but before we peel off, feel yourself for a second. Feel where your back is especially are you biasing your left back or right back? Do you have your body very even on the wall? So this is what I mean. You can really gauge yourself by your contact against this wall. Okay? And if you're not feeling even or square, take a moment and connect to that. No, continue going further.
My back will come off. I am an o. Come all the way down and touch the toes or get near the toes. Let the head come down. Feel that beautiful stretch of your body. Take a breath and let's begin rolling up. How do you do that? To keep those Pilati stance. Feet anchor to the floor.
And I have a sense that I'm trying to slide my sacrum down the wall, but there I am placing it and you want to feel like you're, they're evenly placed. Your spine, the muscular parts of your back. Even feel your shoulders even and then your head come up. Let's do one more full roll down and you're tall up this wall and you take that tall spine and bend forward. Really feel how is your back in contact with the wall? That would be your mat, right? The wall is really a vertical mat.
You can kind of feel that relationship. Here we go. Stomach is really lifted up away from those feet. Here we are. And so even on this one, where are your sit bones? Are you evenly weighted against that wall? You have the same amount of contact.
And the center of your back should be there to your sacrum, also the skull. Now, depending on the shape of your spine, you may not have your lumbar spine totally in contact with the wall. If you have a nice j Lo Derriere, you probably won't have your lumbar spine on the wall because your, your glutes are, um, you know they're going to be bigger and you're going to have your further away. I don't want anybody to compress their lumbar spine back on the wall anyway. It's really the landmarks of skull, shoulder blade, thoracic spine and sacrum. Okay? Carrying on, let's make some small circles. And what I mean small, you don't have to take your arms all the way back to the wall.
Just keep them in your peripheral vision, but feel the Scapula, your shoulder blades, they should see in contact with the wall. Stay in contact. Okay, that was four. Let's go the other way. And up to shoulder height right in front of you and down legs are actively together.
Bring that into your [inaudible] practice here today. Okay. And lower your arms. Pretty good honey. I don't know if anybody feels their back muscles working. I feel my back muscles working beautiful way a little bit more than I would feel on the mat. I think it has to do with being up in gravity and having to, um, and I'm also solid on the wall. Okay, so let's fit the weights down for just a turn around and face your wall. We'll do an elbow against the wall position and having your elbows ideally right down in front of your underarm, both sides, just your shoulder width. Okay. Please don't go narrower and you don't really need to be wider.
You want to set that frame, that's your shoulder frame. It's no one else's except for yours. So put that there. And then I want you to take from your, your forearm and your palm. Rotate into this pronation in palm against the wall. And index finger and thumb have quite a bit of weight distribution, but the other fingers do too. I would buy us at toward the index and thumb.
Okay, so let's talk about the shoulder blades. Now they don't have anything to be a touching like they did at the beginning, but what I want you to do is allow your scapula shoulder blades to glide back around that rib cage column. Okay? And then widen the scapula and we're going to overshoot it on the first one. What I mean you'll see it is that, that we don't want to repeat this. This is actually me pushing my rib cage back too far. And that's not, that's not what I'm after. It's the muscle of known as our Serratus, which is right around here and in us. Okay? That's going to be our, our focus. And when we bring those scapula back, let's just think of that.
Serita's is getting short or narrow. And then as we move the scapula around the ribs, it's that serratus that takes those scapula right there no further. So let's breathe in. Ah, and out. I straight ahead. Inhale, little Serita's pushups. Three more.
It's really nice to promote that mobility. Feel the work very deep part of our structure. We want that Serita's connection in so many things when we're weightbearing don't we? Almost all of them, actually, all of them last time and just hold in. Your scapula should be wide on the back of your ribs and the ribs stable in case we don't have to over push those ribs. Now straighten your elbows, walk back a little bit further and I want you to take your hands down just a few inches. You'll most likely need to do that to get that line right here in line with your underarm. Okay? Same thing. Hands are wide.
Nice weight on the index finger and some shoulders are rotated back. But then you've got your forearms pronated and let's go ahead and do some elbow touchdown. So elbows, forms touchdown and you press off. Inhale as you lower. Exhale. It's like our standing pushup, right? Great for toning the arms, but allowing that the rhythm of your shoulders, elbows, hands. Okay.
Really feel the weight on the index finger. Thumb heel of hand, it's just one more plain one. And then I'm going to add this thing called a push off. So we're really just doing kind of touchdowns. But now if you actually kind of spring off and go back again a little air time, we, that's fun. And L was down. Oh boy. Little faster, maybe one still kinda touch those elbows down from the rotation of the upper arm weight in the fingers index and thumb going three more of these push offs.
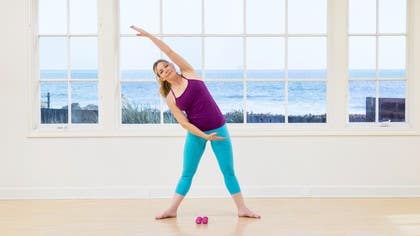
So if you're a person who doesn't love to do push ups from the ground, this is a great alternative really now. So nice alternative. Okay, good. How are you doing? Walk a little bit into the wall and what I'd like us to do as single arm reach, I'll start with this arm that's closest to the camera so you can see what we're doing. It's, it's a way to get some shoulder flection. Okay. Yup. And the other arm I'm going to have just reaching down by my hip.
So I'm kind of doing this with both arms and opposites. Now I don't want the spine to side bend. I don't want you to trunk to side. Bend this arm, reaching up this arm, reaching down. Nice along nation of your spine. See if you can walk up a little bit more so your shoulder blade will be elevated a little bit. Do not pull that scapula down. We're defeating the purpose.
We want to open. Lengthen. Now let's tap into the spine. Thoracic spine, right behind the breastbone. Three breath cycles. Inhale and exhale.
Alright, so this may be, what can you think of in the regular map program that this might be useful for? Swimming, swimming, and then things where your arms are overhead. Swan dive some Swan. Notice how we one shoulder may feel more coordinated. Fairly normal. Go into that bar, that part of your body right behind your sternum. Elevate those spaces and breathe.
Now Walk Up. Allow your scapula though. Just there kind of doing an ups and that kind of, they're doing it up. Rotation and upswing up this way. Don't pull them down. Okay. Get a little closer to the wall. Get a little higher in your spine. Let's do three breath cycles together. Index finger and thumb touching. Upper arm bones rotated back and from elbow to palm you're prone aided.
One more deep breath. Good. And then y Scapula wide. Scapula wide. Okay, so that's our alternative to swimming. I'll take that any day over regular swimming on the mat. Okay, time to get into the legs a little bit. Everybody said this isn't squat. Okay, pick up your hand weights, walk away from the wall. We're facing it. Facing out again. So recheck your landmark so your head, the back of your skull, shoulder blades.
They might feel like they're in a more balanced position now, your thoracic spine and your sacrum. Now for those of you doing this with me, of course if you have a knee issue or your knees are tender and you don't like to go too low, it doesn't matter about that. I really want you to use the back of your body and the landmark there to keep yourself balanced, okay? But if you feel healthy enough and you want to go a little bit lower, sure than a challenge your legs and your glutes, just hold the wall squat gray way to strengthen your thighs and your glutes and your back. I just really feel, I haven't said a lot about the abdominals yet, so maybe you can think about your abs e and against your lumbar spine. Okay, so great place to do a pelvic curl and we'll do three of them.
So I want you to breathe in first and as you exhale, take that tailbone underneath you. Oh my gosh, this feels so good. And just peel away. Now I'm not going to go too. How far away I want to just come to the tips of my scapula and I can still feel them on the wall and then roll back to the wall. So when you were down in on the regular mat, we Q often keep your collarbone wide. Well with your body against the wall. And if you keep your shoulders on the wall, your collarbone will probably be wide. You don't have to force that.
Let's do another curl. I'm gonna Change my hand position here though there is. I'm really trying to engage the hip extensors. My glutes, hamstrings, abdominals are in. Wow. That feels really good. And rollback can really feel how you mobilize and your weight distribution. One more time. Everybody going through curl?
Yeah, like you're pressing your legs toward those hand weights. Breathe and exhale. As we roll back to the wall, we're going to stay down unless you need to come up. I'll understand if you do, but I'll, I'm gonna stay down here. I've got fairly strong legs. Okay. In fact, it's a challenge. So I'm going to go a little lower. Let's see how long I can stay there for some arm circles. Now we can make them bigger out because we're more warmed up now. I think we can handle the load four times each way.
We're going to do this little wing leg movement, so I'm taking my arms out, leading with my sums and then down just four times like you're a huge monarch butterfly, maybe something. Then you're spreading your wings, spread those wings. Your back should be wide
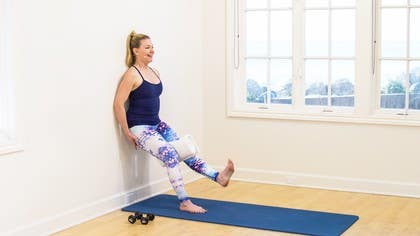
Hope you feel good. My back is feeling so great right now. Okay. Uh, squats with one leg. This is where this towel comes in very handy. So I want you to take yourself again into that squat position. This goes right between the knees. Get situated again. Now you, you don't have to go as low.
I'm going to stay up a little bit for this one and I'll tell you why. If I go too low, I know myself to be a little unsteady for this thing. [inaudible] and it has to do with the strength in here. Okay. Add duct, squeeze the towel, check your landmarks. And then I think for this, if you'd like to come along with me, put your hands right underneath your pelvis and feel the work. Okay.
Now shift very slightly to one foot. So slight that you can really just pick up the other foot and hold it. Hopefully you're not leaning off the wall and replace the, okay. Check that you landed evenly. And here we go to the other side. And what I mean by leaning is you'll feel if you feel like you're going to fall over, maybe you squeeze that towel a little bit and then put the foot down and come down just a Scotia. Okay, first leg against squeeze. Shift your weight and lift and let's hold, hold.
Check your landmarks and down. That was better. Wasn't as lift and hold. Check your landmarks, head, shoulders, ribs, pelvis. One more each side, little weight shift. Hold two, three and down. Try not to turn my head too much to you guys. I don't want to lose my balance. Here we go. Last one, find it. One side will feel better than the other. You just have to work.
That weaker side is all that means. So I'm going to do one more on that sites, my weaker side and the wall is telling me that I can feel myself leaning and losing it, losing my connection. So I want to repeat that side. That's what it's taught me to do. Okay, great. Take the towel away. Just put that down on the ground and then come on down to the ground. But we're still working with the towel. So here's where you unroll it. Maybe in a full that and it with the bath towel. It's kind of Nice.
It's a little heavier than just a regular hand towel. So you'll feel probably a little bit of the weight work with this. So here's how I want you to do this folded into the wall. Put your foot on this. That's going to allow you to slide this leg up the wall. Okay?
I learned this kind of idea from Madeline black a long, long time ago. We only, we did it with a quarter against the wall, mean lady. Love her dearly and thank you Madeline. So it was a quarter and she focused it. W had us do it with their heel. So you can focus right now your heel into that towel. Okay? But what I want you first again, just to get that nice sense of alignment through your head to foot.
And then as you start to abductor leg, try to keep the towel against the wall or in your heel against, you know what I mean? So here's me not doing that. You'll get there in a minute, but I want to first establish that you reaching into the wall so that you're getting full length from your hip, down your leg, out your heel. So let's try just four. So they're kind of tiny. You're gonna feel right into the side of your hip, your glutamine, and too, okay, three for two more. Keep them very balanced here. Now hold it there.
You're still on the wall and now externally rotate your femur without your pelvis dropping back and then come to parallel an x channel internally. Rotate your femur. Feel that and then back to parallel. And I have my, my heel against the wall. I'm trying to pivot and pivot and one more very specific stuff here. It's hard to feel that specificity for my boss, my own body without the wall. So I've got that feedback right, that end point, that ground close chains situation. Now as we do more open, you're going to lift it off the wall as high as you can, but keep the precision here guys. Keep it. Now the towel away, somethings you've got a little more work to do in here.
As you start to come down, find the wall and then just hold it in line with your thigh. Just four times. You don't need many. Allow that Femur to just glide. Tell always enough to feel. Do more. Time. Region lift. Okay. Simple, simple, simple is not easy. Oh boy. Alright, now it's time for the bottom leg. Just change.
So you're going to step in. See it's mat work. Ooh, I need to stretch my hip like that. Ooh, la La. All right, so bottom leg, same idea. We're going to reach and begin to lift our, it will pull off the wall a little bit. That's okay. And reach in. Try not to, but it'll come off the wall. I'm going to take us through eight of these.
Really Focus that work in that high inner thigh down the whole chain of the leg to the heel and links form or the foot is balancing the towel. Just hold and three and two. Last one. Everybody hold it there. Hold, hold, hold. Reach a little more. Maybe you can touch the wall and lower. Okay. Take your feet down. Let's just do a little spinal twist and just feel the stretch along that hip and it, we'll take that on the other side.
Okay. Onto the other side. I can't see you all so do good. Don't make any mistakes. So leg is long. Here we go. Top leg, feel that reach and let's just start that a, B, duction and try to keep your heel there. We did force low ones. Heel on the wall is lengthening out and up. Pelvis stays stacked.
And then we did our external rotation of the femur and parallel and feeling not spiraling. Action from the top of the leg to the foot and tore, rotate parallel and rotate in parallel, taking it higher. So reach into the wall. It does come off the wall. Hell, this doesn't drop and lengthened down. Touch that wall. Three more feeling to work in that lateral hip
And here goes the bottom leg. You've got a really reach and raise the leg. We went for eight of them. Try to keep it on the wall as long as you can, but do know it's gonna come off earlier than it was with the top leg. Just has to do with positioning and the action of the leg muscle and for, well me four more. Three and two. We're going to stay up there. Hold, hold. Well I'm shaking. They're good and all the way down. Okay. And then a little hip twist or a little spinal twist. Stretch, stretch. And then last thing we're going to do this little series is our pelvic curls and we're doing it against the wall. Um, I don't think we need our towel at the beginning, but having nearby tidy up. Okay, now get close.
Get yourself in a 90 degree at your knee and hip or thereabout. All right, now we're down, but use all the feedback you had in standing on that wall to put yourself here. So skull, shoulders, ribs and pelvis. Take a pelvic curl.
Breathe in and exhale. I'm kind of giving my feet a little traction down the wall. Inhale at the top or more hip extension and exhale coming down.
Point and touch the wall and flexing coming up way too more. The other leg is still working. This one's pushing that wall away. Thinking about pushing the wall away and that then your knee, put that foot on the wall. Reposition re step. If you need ready in. Lengthen. Flex. Now point the tone. Hold the wall for a second. Touch it, but use the other foot and push it away. Now Flex and lift, so really teach you. If you're dropping your hips, hopefully you're not once more and step. Okay, let go.
Roll your spine down. Now find your towel, unroll it, put it in your hands. This is a great for the upper back and your shoulders. Take your arms straight up to the ceiling. It's one more pelvic curl, but as you unroll your spine, bring your arms back first actually, and hopefully your arms can go all the way to the floor. If not, just take them where they can go now as you unroll your spine, reach back, reach back, stretch, elongate. Long Gate reach should feel really nice in your spine and your upper back. Take a deep inhale here. Feel that length, right?
You can leave the towel there. Just come on up or love. One more exercise. And that's our seated spine stretch. So just right from a regular mat. Scoot your hips way back guys. If you want the towel you can use it. But I'm just going to feel this anchored, anchored, anchored, anchored, anchored. Alright, so in a spine stretch forward, the intention is that the pelvis stays back and sometimes in regular mat classes that goes completely awry. The Wall is very honest. So here we go. We're taking her head forward. Take your upper spine.
I'm just taking my hands here. So how far can you flex your spine to be really honest? Come on. This is really it, right? If I, if I come away, I'm hedging. So use that. Whoa. Keep your hips against that wall. Lift up and bend forward, lift in Bence and now you should be feeling a lot more dynamic in your abdominals. A lot more work in roll back up. Okay, two more times. Inhale and exhale.
So next time you go into your, your Polonius room at home, wherever your workout spaces, your studio, and to look at these wall exercises or just take a glance at the wall and, and use it sometimes. All right. Really use that wall and rail acts over abdominals in and up.
Shoulders are back. Okay. Thanks for joining me at the wall. Lower your arms. Okay. We have two more classes only in this 10 class series. So what might I do next? I don't know. You'll have to stay tuned and come back and join me. I thank you very much. I hope you're getting a lot out of the sequences and the challenges and feeling the variety and how it's all adding to a really, really wonderful mat practice that you have.
Okay. Thank you.
Ascend Mat Challenge: with Amy Havens
Comments
You need to be a subscriber to post a comment.
Please Log In or Create an Account to start your free trial.
