Description
About This Video
Transcript
Read Full Transcript
Hi, I'm Julie Driver, and today we're going to do a pilates for equestrians class. We're using an unstable surface, which is a ball, which really helps to mimic some of the actions of being on a horse that might make unexpected movement, or that is moving with you, and, hopefully, in synchronicity with you. So, the first thing we're going to do is just feel where we are on the ball. 'Cause often when we first sit in the saddle we can be unaware of the weight distribution through the pelvis. So, just put your hands on your hips and just be aware of if the weight it falling equally through the sitting bones into your ball beneath you.
And then we're going to start doing a little lateral flexion. We're going to swing those hips. So, with my right hip I'm pushing down, the ball goes to the left, and when my left hip goes down, the ball goes to the right. But what I'm trying to do is keep my spine vertical. So, I'm trying to make sure that as I'm making this movement down here, I'm taking control of my torso.
I'm in charge of my body and I'm not collapsing into the ball, just hanging out on the trail. We're absolutely in charge of our own torso. From here start to move front to back. So, again, this is flexing and extending the spine. Stick the bottom out and then pull the ball underneath you.
So, now we are probably going to get a little bit of movement up into the thoracic spine, but we're just mobilizing, we're limbering up lumbar spines. One more. Now we're going to travel that and we're going to go through all those four points. You're going to draw the ball underneath you. Press it to one side.
Roll it 'round and back. We're going to do three times in the same direction. And then you're going to go the other way. Good. This just feels great as well.
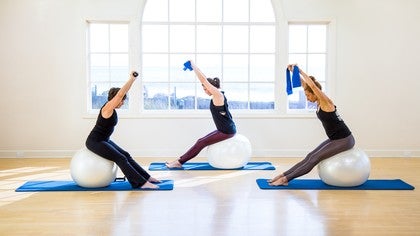
You don't have to be a horse rider to do this. And then we're going to bring the body back and really feel that you have your spine in a vertical position. Your head is over your ribs, and your ribs are over your hips. So, now we're going to add in the resistance band. Leslie and I are wearing these rather attractive scarves, and Bonnie has hand weights.
This is just to show you that if you don't have a resistance band your can use weights, you can even have nothing, or even a pair of tennis balls in your hands. So what I'm doing with the scarf, with the band, is I'm going to take it behind me, and I'm going to cross it behind me, and then bring it into my hands. So, what you can see that it's done is given me a sense of where my ribcage is. So I can feel that if I start to hang out too much into my upper body I'm going to feel the pressure of the resistance band against me. Okay?
I'm going to capture my ball. And I'm going to sit on the ball. From here all you're going to do is straighten your arms. And back in. And again, really simple.
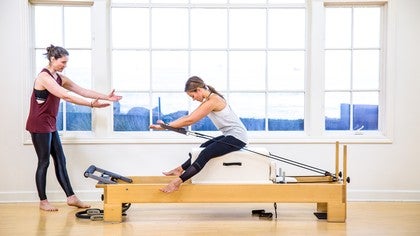
So, as you straighten the arms with the resistance band crossed behind you, can feel that the more you reach the arms away you can feel the body moving backwards into the band. So there we have our opposition here. Keep the chest lifted. And we're going to do one more. This time when the arms are out I want you to open them as if we're doing hug on the reformer.
And then close. And again. All the time we're doing this we're thinking of those exercises we did a the beginning. Have we started to push one way into the ball? Have we started to collapse into the ball?
Hopefully, we're getting feedback from that mobile surface underneath us. Gonna do one more. And then we're going to bring the arms back in. And this time we're going to reach forward. And we're going to do little circles.
One, two, three, reverse. One, two, three. Bring it all back in. Now this is where we start to have some fun. We're going to bounce.
Yeah. So, we're on a trail, and we're rising trot, posting, as we call it in America. We going to do the same thing. Okay, so, we're going to bounce, and you're going to straighten your arms. And in.
And out. And in. My riding instructor used to say, and up and down, and up and down, depending on how quickly your horse trots. Now hold the ball still. Reach the arms out.
Hold the arms out. Just lower them so there's a diagonal from the shoulders to the hand and bounce again. Good. This is more a sort of realistic position. Then we're going to bring the elbows in.
And the last one. We're going to keep the bounce, we're going to open the arms out. And in. Good. And really be aware of what's happening with your lower body.
Should be a clean up and down, not left to right or side to side. Now bring the arms back in. We're going to release the band. Bring it forward. So, Bonnie's just going to go to one weight.
And I'm going to turn sideways so you can see what we're going to do. So, we've been working with a vertical spine. Now we're going to challenge that. We're going to straighten out the legs, press the ball backwards, and we're going to bring the band up, or the weight, and bring it behind your head. So, I'm going to imagine I'm shaving my head like on the reformer.
So, I'm really trying to work the muscles of my upper back to make sure I don't round my spine or extend. From here, straighten the arms. And bend. So, we're working our scapula stability and mobility, and also the stability of our spine. So, make sure that we hold the spine without changing its shape.
One more. We're going to straighten the arms. Lower the arms and roll the ball back underneath you, walk the feet back in to sitting. Okay, how're we doing? Now, Bonnie, you can either continue with your hand weights, Leslie and I are going to hold our band in front of us.
So, we're going to have to do some rotation. What I want you to think of now is keeping the ball still. So, we're going to start our rotation by turning the head. We're going to turn the eyes, the head, the ribs, the waist. And come center.
And again. So, all the time when making this movement I want you to be aware of what's happening underneath you. So, as we rotate to the right, be aware that you're not moving your hips and swinging in the other direction. And again. Twist.
Stay vertical with your spine. So imagine you're barber shop, you gotta keep going, you gotta do one on each side. (laughs) And last one. Good. And come to center.
Good, and we're going to get rid of the arm weights and rid of the band. So, Bonnie and Leslie are going to lie on their mats and they're going to put their calves on the ball. A really good tip when you're working with the ball, as you can see there's all these circles 'round the ball, if you take the midline of the ball and place it inline with the midline of your spine, you've always then got a good idea if the ball's drifted to one side or the other. So, swivel your balls around, find your midline., and align it to your spine. Hands by your sides.
Now, if you want to link this to the apparatus you can think of breathing on the Cadillac. So, from here, as you inhale I want you to lift the hips into the air, like a spine curl, like a bridge. Can you straighten your legs, Bonnie? Awesome. And then lower the spine down.
Good. And again. The hips lift. And down. Good.
Now, I'm going to be challenging, and you're going to bring your arms up into the air. Palms facing in, that's it. Same exercise. So, I've made your surface area smaller, and we're challenging, yeah, how much were you using those upper arms. And down, good.
And Leslie hates me right now. And lift. (laughs) Last one. Good. This is making it more like the Cadillac, more like the breathing where the hands are holding the pole. Last one.
Lower your arms. I'm going to let you have your arms back, because now we're going to think of lifting and lowering your legs. So, we've been working symmetrically, now we're going to work asymmetrically. So, this time lift your hips. Left leg lifts off the ball.
And lowers to the ball. And lifts. And lowers. And lifts. And lowers, and then you will lower yourself down, beautiful.
Breath, and again, we lift. And remember this time it's the right leg, it comes up. And down. Lift your hips a little higher, Bonnie, beautiful. So here were really need to make sure the back of the leg is working otherwise you hang into the spine.
Good. And then roll your body down. And bend the knees to draw the legs in towards you. And we're going to turn. And you're going to come up to kneeling.
To high kneeling. Okay. Your hand is on the ball, and from here what I want you to do is let the hip just take some support from the ball. Not too much. Just enough so that you can free up your leg out to the side.
Good. There we go. You are going to bring your free arm up and behind your head. Let your elbow rest onto the ball. There you go.
That's it, there you go, Bonnie, beautiful. No, you're right, you're absolutely spot on, there you go. Now, try to make as little of an indent into this ball as possible. The more you lean into this ball the less you're actually stabilizing your upper body yourself. So, I want you to press the ball away.
Now lift your free leg. Come on, ladies, get those legs up. And kick forward. And back. And forward.
And back. And forward. And back. Land that leg in. Slide it back in.
We're going to elegantly roll our ball 'round to the other side. Same thing. Hand is on the ball. Extend the leg. Bring your hand behind your head.
When you place your elbow on the ball you almost want to not bend the surface of the ball. Okay, the more you press into it, the less you're taking responsibility for your own upper body. We're going to lift this top leg and kick it forward, one. Two. Anyone else cramping in their toes like me?
Three. And back. Bend the knee, place it underneath you. Now, we're gonna turn and bring the ball so our bodies, we're facing along our mat. And we're going to start to have some fun with these balls.
We're going to roll on these little suckers. So, you're going to hold the ball. Again, I always like to find the midline of the ball and align it to my spine. Just simply it's a little tool that helps you know if you've rolled off to one side a little bit more. So from here we're going to lift the ball up, and you're going to place it on the mat, and you're going to roll out onto the hips.
Good. Now, bend the elbows for a little push-up. Little supported push-up. Two. Three.
Now from here you're going to bend the knees and you're going to pull the ball underneath you into shell. That's it. And then press it out again. And roll back out to come back up. I know, darling.
Okay. If you guys scoot back, 'cause I'm just scared you're going to bang heads or something. Give yourself ass much space as you can. So, if you're teaching this in a large group, class, you really need to be aware of people's spaces. The last thing you want is crashes. (laughs) We're going to breath in.
And as you breath out we're going to come to that same position again, but this time we're going to use the ball as a pivot for our swan dive. So, this time as we bend our elbows, we're going to allow the legs to come with us and we pivot. And up. So, we're really challenging the scapula's ability here. And up.
And last one. And up. Good. Now roll back. Hang out on the ball.
Just allow your body to take on the shape of the ball for a little rest. And breath. (inhales deeply) And then we're going to tuck the toes under. And our final challenge for our balance, tuck the toes under, and stand up. So, I hope you enjoyed that.
The ball is a very useful tool. If you don't have access to large equipment you can add in an unstable surface to challenge your body, challenge your alignment, and challenge your stability and your mobility. Thank you very much.
The Teacher's Corner: Pilates for Equestrians
Comments
You need to be a subscriber to post a comment.
Please Log In or Create an Account to start your free trial.
