Description
About This Video
Transcript
Read Full Transcript
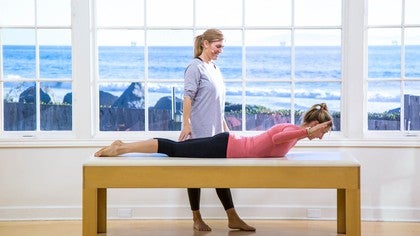
So welcome back. I'm here with Juliana who's going to be demonstrating most of the exercises today, if not all of them, and you have successfully completed the first two videos and now are progressing onto the next one, which is this one, your third video. Today we're going to be working with again on those core strengthening exercises. We're also going to continue working on your arm strengthening, leg strengthening and balance exercises, and let's see your props for today. You're going to be using a large plots ball, a small ball, kind of a squishy one, as well as two pound weights. So let's begin. Okay, I'm going to have you lay down on the table and you're pretty familiar with with this positioning as far as lying down on the table or a nice soft mat or your bed.
Okay? You're going to get yourself nice and lined up and centered. Take a nice deep breath in, just kind of getting your focus here, your breath here. Exhale. Good. Just really get that breath in one more time and exhale.
She's going into her hundred position where her arms are going to rise, her head lifts. At this point, you should be able to hold your heads up. If not, go back to the first videos and breathing in two, three, four, five and out. Two, three, four, five. You want to think of those arms stretching, reaching away from you, getting those core muscles really strong, getting that blood moving through your body, through the Lens, through the tips of the fingers, down to the toes. Now before I've only had you do 50 of these, I want you to try to challenge yourself to do almost a 400 go to where you can. It might be 60 it might be 80 might be 40 but hopefully you're able to hold your upper body up. I would say maybe one or two more and she's probably done the full set of hundreds. Inhaling and exhaling.
And then I'll have you go ahead and lower your legs and rest. Now keeping your feet hip width apart. I want to have her once again, bring her knees back into her chest, working those, that stability and that powerhouse. She's going to take one leg, not moving your head. And I call it a toe tap. She's going to take one toe or you're her foot and start to lower that toe tap and lift the knee back up. She's gonna alternate one leg and time. And you got to make sure that you're not letting your pelvis kind of rock around. You want to keep those and keep that engagement going in your court.
And the other thing to keep in mind here is you want to go to a level that is comfortable. You don't have to go all the way down. You go just partway down a back end, partway down and back end. If you want a little more challenge, you can go ahead and go all the way top and come back up and tap and one more. And then she'll rest by lowering her legs. Good. So now I'm going to have her turn her her side.
She's going to have both knees on top of each other. You've done this, it's called your clams. Only this time it's going to be a little different, a little more challenging. You should have more range in your hips because of the positioning. What she's going to do is have both heels off of the mat. Now you still want to think of being really tall, even though you're lying down, you still are long through your back. Your spine is stretching good and you can either rest on a pillow or your arm and now what she'll do is take her right knee, began to lift it as high as you can without letting the knee roll or the hip roll backwards and then lower it back down about 10 of these.
So she pushes up using that resistance in school. Wheezes to come back now to three. She's doing a really nice job not letting her hips move around. Yes, five,
Three. This is a great exercise to get that strength in your bottom and your hips and your lower abdominals. It's also you have to kind of support yourself with your arm.
Okay, I'm going to have her once again roll back to the other side. Back to where the right leg is on top. So I had her role. She could have stayed here for the whole time, but I believe that moving more is better. Keeping the flow in blood flow going through the body. So now she has her knees bent, but I'm going to have her extend those top leg out. Only the top leg.
She's going to take that leg about hip level and keeping her hips right on top of each other, hinder her waist lifting. She is going to do what we call a tick talk. She's going to try to bring that leg as high as she can and slowly bring it back. What we're looking for here is to keep those hips once again, right on top of each other. The tendency is for the hips to roll backwards, so you're now supporting your hip, you're supporting your back,
These are challenging exercises and that's the idea is to get those legs strong, to be able to support you
And I would say that's enough. Go ahead and bend your knee and rest. I'm going to have her sit up at this point facing whichever direction you want, but sit up however you're able to. And let's have your knees hip width apart. Your knees will be bent and she's gonna do what we call. I'm going to have you move backwards just a little so her feet will remain on the table here. Reach your arms forward.
I want you to just start to fall backwards a little bit. Kind of like you're going to lie down. So you're going to Tuck your chin at around your back so your pelvis kind of closed. That's far enough. Come forward. Grab the top of your knees and now stretch by holding the knee. She's going to lift her back, relax your shoulders, and she's going to do that.
Maybe two more times. Arms will reach forward. She'll go back to where she can control without physically falling. Come forward. Hold on, stretch two more times
She's going to straighten both legs. Same idea, but now the legs are long. As long as they can. She's going to drop her head and reach forward keeping hurt your heads down. I'm going to have her go a little bit back. Squeeze your bottoms, come forward. Try to flex your feet to reach for the toes.
So that's all she's going to do about four or five more times. Shoulders or lacks bottom squeeze. Come forward to you. What the idea is to go as far as you can without feeling like you're going to lose your balance and that you'll be able to come forward. And the, and she's gonna pull in two more back, getting those muscles strong and getting a stretch. Last one back. And then as she goes forward, she'll try to flex her feet.
I'm going to have her slide her feet towards her so her knees will bend. You're going to bring your legs in, grab the inside of your ankles, so hands are going to go inside your legs and she's going to let both knees open and she's going to hold on and just stretch. That's it. Okay? Okay. Go ahead and sit up tall. Extend both legs out if you can open them apart.
So now I'm having her go into a stretch, another type of stretch called spine stretch forward. She can take her arms up. Now, if you can't get your niche as straight as she has in your legs, go ahead and bend the knees, but still think of lifting the backs as you want to be as tall as you can't, you're going to squeeze your seats, continue lifting through the waist. Take a nice deep breath in. Drop your head, exhale and think of the top of your head going down to the mat. Go as far as you can, and then slowly stack your spine to sit up tall. Now we're going to go a little bit quicker now that you kind of know what you're doing. Deep breath in. Squeeze your bottom exit, go down. The straighter the legs, the more challenging this exercise becomes.
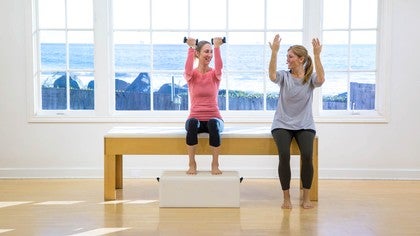
You'll get either way, you'll feel a stretch on the back of your legs, but it's also to kind of loosen up the lower back and about four to five of these. Good. Let's have you do one more and stretch and back up. All right. Have her relaxed because next we're gonna move into the arms series, so you'll want to go ahead and sit on a chair for this or a table as she is, but you want to make sure that your feet are firmly planted on the floor. But for our sake we're going to use a box. Okay, so now that you're sitting on your chair, you want to make sure you have your weights and a small ball. I'm going to go ahead and hand these to you.
Can you use your strong side or just your gesture? Strong side, depending on how where you are at. And we're going to start with some just simple little bicep curls. So she's sitting tall, she's going to lower her arms. These are lightweights, one or two pounds, and then she's gonna squeeze and come out. It's really about that resistance. So you're pushing down and you're squeezing up.
Really important here is to try not to let the shoulders roll forward. Ideally you want those shoulders to stay back. So the chest is really open and broad. And the other thing is to keep your elbows glued to those ribs, not letting them come up and down. So they're in one place and just the forearm is pumping up and down, I believe it or not, these get tiring eight of them as is a lot.
And then the, you're going to arrest, but you'll still hold them because now you're gonna take the arms to a 90 degree angle. So in other words, the elbow to the shoulder stays in one place, still sitting tall, and she's gonna push out and squeeze in. This is a progression from where you started with no weights. Well now she's got the weights. So now it's a little more challenging cause there's more weights at it. Three, four. So again, act as though you're pulling weight and pushing it away so you really feel those muscles working.
Seven I think one more time and eight and then I'll have her lower arms for just a pause. All need to come right back up. Elbows out to the side. Now you want to have that ability to be able to open the shoulders up. This is good to get those shoulder mobility and then she's going to push out the arms and schoolies back in and push out and squeeze. What's Nice is she's keeping her elbows line with her shoulder. She's not letting the arm droop down. Good.
This develops nice arms too strong. Five, six working towards eight. Seven last one.
You need a partner because I'm going to be tossing the ball to her. This is great to just start to get you more involved in moving and space, understanding how you're going to move safely. All right? So what I'm going to do is pass it to you playing toss freely and shall pass it back.
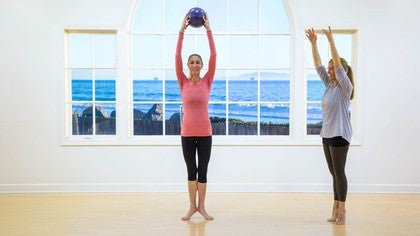
So we've found our wall, we've got the big platas ball cause that's gonna come into the exercises in just a minute. And now we're working more on the balance exercises. Most of these we've done close to similar exercises, but now the B ideas to get a little bit further away from the wall or basically having the wall there because you always want to remember to stay safe and be able to hold onto something if you feel like you're losing your balance but not holding it as much. So more of an Oh light hand tap, okay or hover. So again, we're going to start with those toe raises. So she got her heels together, toes apart, Shanna, get herself nice and lined up and centered and shoulders are aligned, hips are aligned and she's trying to keep a nice lift going through the waist. And then she's gonna have her hand on the wall for support. But just once again, trying to more of a hover position and slowly rise up and all the way down and rising up that the heels is together as possible too.
Three because when you get to the mart events level, the wall is going away so you won't have anything. Hold on to
Also squeeze your seat and think of zipping up those intervals.
Challenge yourself to kind take the handle a little bit away. Eight, nine and last one, add wrath. Go ahead and shake your legs out and then we're going to go to the next one, which is that crisscross that you did in the second video. So you're going to take the leg that's on the outside and you're gonna step forward and then bring the heel back to heel. Step forward and heel back to you. What you want to do is just have your leg just slightly turned out, not to far and put the ball of the foot. Then the heel down and push back ball of the foot down, push back. As you're doing these, you have your hand lightly on the wall and then every now and then you can move your hand away from the wall to sense where you're at.
And here you can do about 10
Shake the legs out. Ready for the forward. Chris Crossers, she's going to take her outside leg forward and shift and come back forward. Shift heel back to heel to front
He comes up very good.
The lower you go, the harder these become too. And the ball is really good at getting that sense of where you are. Three this is going to help teach you to stand from sitting to standing without having to use your arms.
Nine last one and 10 if you really wanted to challenge yourself, you could do another set. Alright, we're gonna put that down. And lastly, what I like to do is do a little walking exercise. So have you turned to face the other direction? You'll need a wall or you could do this on the back of a couch somewhere where you're able to walk while still being able to have something to hold onto that sturdy. Okay. But the main thing here is to think of walking in a straight line. You could either put a piece of tape or you can find a focal point on the floor.
That's the straight line, which we happen to have in these floorboards. So she's going to go ahead and get herself mentally prepared to place one foot in front of the other on a straight line. So she is going to have to look down to follow that straight line. And now not too far, I'll have her probably stop about right there to turn around and then I'll have her come back. Good. So the idea is to stay close to that line or on top of that line as you're going forward and back. Now I have her do that once again, but this time now you kind of have a sense of where that line is. I'd like you to keep your focus forward and try walking one foot in front of the other as though you're walking a straight line. Very good. And then I'll have her turn to come back, stand and great job and smiling through it and down the line. Okay. Now, if I were to have her turn, let's still have you faced this direction.
Um, actually I'm gonna have you come a little bit further forward about right there. I'd like you to try to still have that wall for support and step backwards and crisscross the leg so you can continue to step back. Stop. So just about three steps. Go back forward. One, two, three steps. One more time. Back. One, two, three. Add one more time. Forward. One, two, three, and turn to face forward. And we would call that a day. Very good. So now you're ready to move onto the next video.
Pilates After Trauma: with Adrianne Crawford
Comments
You need to be a subscriber to post a comment.
Please Log In or Create an Account to start your free trial.


