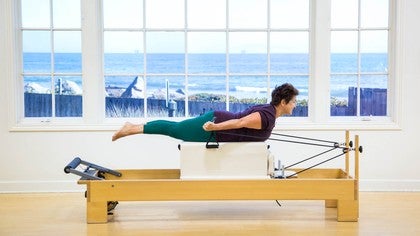
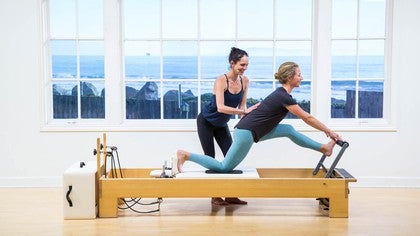
Description
About This Video
Transcript
Read Full Transcript
In this reformer session today, I'm creating an experience that moves a fundamental workout past beginner, maybe to advanced beginner, and I'll talk you through it. As I perform the session myself, we'll start this, uh, with three red springs, very traditional foot work. Start adding. First the breath, the legs are out long on top of the bar. Pelvis is in neutral. Inhale, expand the ribs. Exhale the ribs shrink underneath your shirt. Inhale, breathe. Excellent. Have to make a notice of your breath. Inhaling and exhaling.
Started to add the muscular contractions of the legs. Just kind of getting them ready for some work. I'm going to just have my toes pulled back. Take an inhale. As we exhale, the toes gently point the belly pulls in. I do a long legged bridge and then I flex the feet rolling myself down. So it's not a big lift. It's not a lot of lift.
It's mainly a posture, your body connection down and up. And then one more time, the arms are reaching long. The pelvis lifts the feet. Flex spine lowers down two feet on the bar and we start again. There's just three red springs on here. We'll get to 10 of these.
We'll do two more and continuing directly to one leg. So the three springs isn't a lot for both legs, but it's a lot for one leg. Taking the time to make sure we lengthen the entire thigh out. I call it like you have an iron down the front of your thigh without bulging it. We'll get four more here on the left leg. Toe is pulled back.
Last one going right into a leg switch. We're not looking for a perfected alignment, but we're looking for a nice experience of how the relationship of our core works with our legs and our arms. Right now the spine is stable. We'll do three more and two more. And then last one, switching to bird feet. I like to change my breath a little bit on this, so I'm gonna Breathe. Inhale, exhale, inhale, exhale.
Softening the face. Looking straight up at the ceiling and I'm going to do three more. That clicking you here is the unstableness in my ankle. Just a little bit working on that. And last one. Come in, switch to the Palladia. It's v heels are together, toes are apart. Heels don't move. Zipping the thighs and come in. Adding a heel.
Lower one bend in, adding a heel lower too, bending, reaching the arms. Long heel lower for three Bendin here's for reaching the arms long looking right at the ceiling. Everything comes in and then last one, five times two, three, four and five. Knees come in. Everything comes in heels back on the bar, arms down by the side. A gentle bridge, up and down. Not a big bridge. I don't want to lower my head rest just yet, so I'm not lifting up into a super high bridge. Just getting some juiced up, feeling in the back of my thighs and the back of my bum.
Rolling all the way down. I have three red springs on. I'm putting my arms in the handles. I am aware that I have three red springs legs come off of the bar. I pull my arms and I hold right here. I really want to pull my arms really badly, but I'm going to hold because I think it's really important that we play with the leg shape here as we hold these arms very, very strong. We release.
If you were to be jammed in the shoulder rest, you'd move a little bit further away. Again, arms press, legs come off of the bar and they hold, so I guess that would be a pull. Not really a press, but hold that right there. Squeezing your hands, juicing up your arms. Hold right here we go into double leg out and in two and three and four and five. I always love making a connection on the reformer that I can make it on the mat as well. One more time. Inhale, big exhale, arms pull the hold. We're going to put single leg stretch for five for squeezing the arms.
Three, two, and one directly into doubles.
I'm not gripping and my neck holding my belly, working the arms. Two more. Last one. Hold legs, reach out. Hold. Now I bend my elbows, bend my knee. Inhale, eh, programming for some type of coordination. Exercise, right? But we're just doing it here without lifting the trunk. We go press open clothes, knees, elbows. We press open, close knees, elbows. One more.
Press Open, close knees, elbows and rest. Feet come down on the same spring edge here than it take my feet and put them in the straps here.
Adding the circles. Inhale up open. Exhale down. Inhale up, juice the legs. Exhale down close. One more time in this direction. Arms long and then reverse open. Come up, close, open, come up zero last one. Then the knees into the frog.
Recognize your frog first at 90 degrees long torso pubic bone down. Press might be making a weird little video here, but I want you to notice that I'm not shortening the distance from my pubic bone to my ribs. If the spring is too heavy, please lower it. You want to create a connection in your legs to help you understand that relationship to your trunk. Last one, come in. Now you allow the spring to curl your bottom, but you're in control of the spring. The spring is not in control of you. I'm now in a posture, your tilt, because my knees are close in, my low back is stretched.
I'm going to pull my heels very close to my bottom, pull my belly deeply and you'll recognize this shape as stomach massage as well, which we'll also be doing in a little bit in a hold myself here and then I'm going to come out of this position until my thighs are vertical. Recognizing that pelvic position and adding the frog again, push, release, push, release. One more whole legs come to the ceiling. We also saw this exercise in a previous session on the fundamental because in this exercise it's really important to scoop the belly, watch this, scoop the belly and push the legs to the ceiling and then on scoop the belly. So try not to let the legs come way far ahead of you like this.
Try to let the legs stay very active. Press the feet up to the ceiling as the abdominal scoop into a posterior tilt and then unroll it down. My shoulders are staying along high scoop and then I roll it down one more time and get the scoop and then roll it down. Knees come in, legs come out, feet come down, rolling to your side. Come on up for the city seated exercise. I'm going to change my springs again. They were on three reds. Understanding that that's kind of a heavy spring edge for some of those exercises, but, but it's okay.
Sometimes the springs have to be heavy to give a little challenge. I'm now changing to one red spring in a start. Your program from here, the spine staying straight still. I'm going to go ahead and take the [inaudible] the loop off and just leave the handle on. Okay. In this exercise here, it's very important that we find her where our vertical line is.
Many people come and they lift the chest and feel that this is vertical, but this is actually kind of what I call a dumping or a diverting and of the spine. So I'm going to find my connection here. If I had super tight, I would sit up on a box, but I can get pretty corely connected just like this. By letting my actual spine come back without thinking I have to sit up real tall. Hug a tree, inhale, exhale. I like my legs straight and I like them. Connected, meaning muscularly connected. Two more. Last one, moving my arms without my blades.
Now I'm gonna take my arms in front and I'm actually going to approach to track my blades and then resist the retraction. But allow it to come back by the tension. Push the straps forward, protract, retract the blade. One more time, pushing the arms, retracting the blades, elbows come down and rest. Now we add that together. Now with spine stretch forward, which is the first part of our rowing series. So I take an inhale. I'm going to exhale, protract front ribs, two back ribs, making a flection connection. As I round forward, I continue to reach forward through my hands and my feet as I pull my lower ribs back and I stack my spine all the way back up to vertical.
Same exercise on an inhale. Forward to fill my body up instead of grip it up.
Now in the rollback in the fundamental work, we put the ban there to teach the back body how to roll. Now in this exercise, I'm going to hold the straps, actually gonna pull up a smidge on the straps to start to engage my upper body in the back and then take my abdomen and pull it back as I relax. I know it sounds weird, the cheeks of my buttocks, so I want to flatten out the cheeks of my buttocks to roll my spine down. My arms are a little bit pulling up. I curl myself back up.
I round all the way forward and pause right here. Stacking up the spine. Not a lot of tension, but a lot of control. Belly pulls in. Arms reach up using the arms. Yes, chest stays up, but I roll the lower back down. Inhaling as I exhale, scoop in my arms are gently pulling up. As I round myself back to the starting shape in this exercise.
Now I begin the act of chest expansion so my arms start to tie into the upper back of my body without changing my spine. We'll bring this to life again in kneeling, but this just gets the body ready for this. One more time. Hold, lift the arms up. The palms are facing back posterior arm connection. Hold for five for four.
It's hard to hold y'all three and two and one arms come down. Release the straps.
So I'm actually going to put on adding a green to the red, make it a little bit more challenging to do the overhead press. So the first part of this exercise says that I recognize that my forehead down is a length and neck posture or your part of my legs at my buttocks is what holds this connection here. Hands down on the bar, I push out, I return. I just get the feeling of what it feels like to have arms strength pushing over my head. Now I'm going to push out and stay out and I'm going to shrug and on shrug. Now for of you with this heavy spring, if your body weight is less than mine, you're going to be like a slingshot, so you might need to come down to just one green or one red purpose here, differentiate shoulder elevation and depression from the back of the neck.
Kicking in, bring myself forward. My head should come to the bar. Adding spinal extension. I take an inhale to prepare. Exhale, push back. Inhale, I lift my chest, I arch myself up. I pull my low belly up. Exhale, lowering down. Inhaling, head to the bar. Exhale, press. Inhale, lift.
Differentiate the action of the arms as they connect to your back body. The first exercise in pulling straps, you know, reach my arms as far up as I can, making a long arm connection. I'm going to imagine that that bar is right under my forehead as I squeeze and pull all the way back. Knuckles, reach long chest lifts, reach, reach, reach, exhale with control, keeping the same connection in the arms on the way back and on the way down. I take the time to monitor my spine position, its extension, my blade position, which is retraction and depression and my knuckle position, which is long and then everything comes down. Switching to t, I make my straps become longer.
My arms come out to the side. I'm still squeezing. I pull right when I get to my tee, I'm going to pause and the lift my chest. I'm going to grow my arms wide, keeping my arms parallel to the ground. I reached back and then I come forward with control. Inhale, Pol, exhale with control.
One more time. Inhale, pull and then exhale with control, lowering all the way down, upper back strength tied with the booty. Connection during spinal extension is so important to our posture. Continuing now with teaser, but it's a teaser. For a beginner, it's or for somebody fundamentally challenged, meaning that they don't want to lie down and sit all the way up. So the first place I actually do this is with one red spring sitting facing my handles. What is the teaser anyway?
Right teaser is a big flection load on the front of the body. I can get that by leaning back here. Teaser is not open leg rocker, so it's not a flex spine. Teaser is a lifted spy. I hold the shape here. I take one leg out, I take the other leg out.
I hold the teaser to the best of my ability. I lower my legs, I release the arms. That's pretty good. You're going to do that again. I'm going to pull my arms stupid, my belly. Hold the load. We have to manage the load. Right now I have one red spring. I'm a hold that load with my arms. Lean my torso back. I'm going to take my left leg up and out first this time and then my right leg.
I'm going to keep this connection right here. Inhaling and exhaling come all the way down. Building a successful lift of the torso with the arms and the legs being occupied is really important. I'm going to turn around and face the other direction, but first I'm going to add a spring. I'm going to add a blue spring to this red one, so now I have a red and a blue.
Remember the focus is to create a nice clear connection for the teaser exercise. So we're going to start our teaser exercise here in the up shape. So I'm going to find the position where I can first coax my body to kind of roll back. I'm going to use the strength of my arms to help me as I reach my legs out, reach my arms out, and then I sit up tall as I can here holding bend my knees, release the straps. That spring was actually too heavy. So now I'm going to show you what it looks like when I take that blue spring off and go to the red one. So I made an assumption and I was wrong.
That's okay. Get back on. Create the connection, create a successful feeling, make sure your straps aren't crossed right. We're not looking for perfection here. We're not looking for one minute segments where everything looks perfect. We're looking for for pieces that we can connect with another person we can connect with. So I have one red spring, oh, this is much better. And then I thought I needed more help, but actually I didn't.
So now my feet are lifted, my arms are listed, my chest is lifted. Maybe I can start to go back a little and come up a little. Or maybe I just hold inhaling. Maybe I have a little circle with my arms scooping in the belly and then release and then bring myself all the way back. Having an appropriate teaser is appropriate for you depending on your leg size and shape your body size and shape the tightness of your hamstrings.
Connecting now to the front of the body. Once again, in a flexed position, we switched to stomach massage. Many people don't think that stomach massage is really a beginner exercise. But what happens is we have to create the connection at the end of the frog shape that we did before. We assume the position of that stomach massage shape when your heels were in towards your crotch and your knees were kind of open. That shape looks a little bit like this. Alright, so I'm gonna have my feet on the wood first. My knees are towards my armpits, right?
So if I were lying down on the mat right now, can you see how that is still? That's like the end shape of my frog, right? So now I'm going to take that shape and bring it to stomach massage. I'm going to see how close I can be. I'm gonna have my feet on the wood first. Create a successful position here, and I'm just going to press out and then bring myself in. I'm going to scoop the belly a little bit more to give myself that little rounded shape, a little posture, tilt to the pelvis, and push and return.
I can do this without any problem. So now I'm going to take my feet up onto the bar, squeeze my heels, cut myself a little bit of slack here, and put my hands on the edge. Feeling the belly pull back. I'm going to press and then exhale like I'm pulling my buttocks towards my heels. Spinal flection through and through. Inhale and exhale. Adding the heels lower. One inhale takes you out. Lower res.
Exhale polling everything in
I'm going to do the part of stomach massage where the chest is lifted. I'm going to do it with the feet on the wood, taking my hands back to the shoulder rest to give me my first feedback. Have a lifted chest, but sometimes when you lift the chest too high, these posture, your ribs actually end up going like this and that's not what we want. So we still want the gathering back of the belly, the posture, your ribs there, and then the chest lifted. I don't know if you can see that, but that is really, it's like a seated footwork if you will, holding this shape and now the ultimate challenge to me is not to hang on, but to keep this feeling as I push out in, in from here and then I want to start to add rotation.
Now I'm going to take my feet up on the bar. Again. Challenged hands back, right. Lift chest. Now my feet are higher, meaning my hips are more flexed. So now when I flex my thighs, it's harder to pull in without collapsing. So I have to really work at push and pull. So keeping this, I'm going to see so I can't come in all the way, so be it.
But I can try to keep my chest lifted as I twist and then return and then I twist and then return. One more. Twist and return. Last one, twist and hands come down. Whoo. I am breathing now. So fundamental doesn't necessarily mean easy. It means make a clear, consistent, ongoing connection. Okay, continuing now with our long stretch series, so it's really important to me. In the long stretch series we addressed the shape of the spine, long stretches, flat down stretch is arched with support in the front of the body.
Up Stretch is flection to neutral with a pike and elephant I actually like to do very traditionally, which is rounded. We'll go through them all in a sequence. I first have on two blues in a red and I got on the wrong way because I want to get on and assume the position really important to me to do that plank position. Up comes the body 10 times
Whoa. Now I got a less spring for pulling my belly in. Now I'm sufficiently challenged to more. I hope my head's in line with my spine. Last one. Whew. And then come in and down and important to find where your challenges in that long spine. I mean long stretch down, stretch in the down stretch exercise.
I want you to feel the pulling forward of your pelvis, the pressing down of your arms and the lifting of your chest so that you're in this awkward position of a swamp. I inhale, press my thighs back, exhale, pull my arms down to pull my chest through.
Last one, protract elephant. If up stretch eludes you right now. It's something to work towards. We have all the pieces. Exercise here is elephant. There is a tendency to do this, especially if you don't have tight hamstrings. The elephant is not a downward dog. The elephant is toes lift, trunk forward front ribs to back, ribs, head looks at your knees holding this shape, the legs push the Billy pools. My body is staying as far forward as it can.
Two more and then last one holding it right there. Come close and then stepped down. A very typical progression there. Long stretched down, stretch up, stretch, elephant. Find the shape that you can speak to with the spine the most and then continue on with that, keeping it on to red springs.
Since I felt successful with that in the long stretch, I'm going to do an exercise that we call leg pull and start to build this exercise. It's a plank in the other direction. So since I know what my spring edge is, I can keep it there. I like to start this exercise sitting on the bar, so I know that I'm going to be facing this direction. Nothing fancy here. My hands are going to those shoulder rests. So I pick myself up, I take my hands to the shoulder rest. I understand completely what shoulder gauge engagement is because I've already created it in myself or in my clients.
I use my leg to push this carriage out. Maybe that's all I do. Maybe this is all you do to feel the arm relationship to your trunk. Or I start to go out, I take my other leg up, I lower my pelvis down, my arms are under my shoulders, and then I can move the carriage out in, in, or I can actually lift my butt up and down. So I just get a different feeling of where that plank is and when I make it a connection to the legs as well.
So I encourage you not to be afraid of that exercise, but to understand what your spring edge so you don't get caught with a carriage like all the way out with to light of his spring or too heavy where your body could be catapulted forward. Okay, so progressing. Now we're going to come back. I'm going to put on several springs here to keep the carriage stable and this is where I start to add the short box. Sometimes I separate them like this, just give the arms a chance to be involved, the leg and cha chances to be involved. And now we come back to our very traditional short box
So now I'm wanting to sit back and use my legs, keep my tummy lifted, keep my sacrum here. I'm going to keep my hands here for a second and I'm going to start this exercise with a spine stretch forward. So I'm going to pull my abdomen back to stretch my back body as I spine stretch forward and I'm going to stack my body up. This is hip flection forward. There's a difference. This is spine stretching forward.
Both are very valid exercises. I'm just making a differentiation. Now I'm going to go backwards, so I'm going to scoop my belly, start to roll this lowest part of my back, back. Reach my arms in front and then curl my ribs up over myself to round forward again. Rolling back with control. I'm not lying down as flat as I would be if I were supine on the carriage and curling up. Rolling, rolling, rolling myself up like a party. Favor. Shoot. I brought a party. Favor my backpack, but here, blow the party favor out and then curl the party favor up and then round forward.
Now stock up the spine with the spine sack. Sometimes with the hands actually on top of the head, I can give feedback up. So I just narrowed my torso up everything long and strong from here. So now when I hinge back, I don't change my spine and then I sit up. Spring didn't break, strapped, didn't break, just became on, nodded there. One more time back.
And then one more time forward. And then we add rotation. Give a twist to the left, reaching your left leg long as you twist to the left and then come center. Twist to the right, reaching the right leg. Long as you twist to the right twist to the left. Hold. Come back to center, twist to the right, hold. Come back to the center.
You can also do this with your hand behind your back if your shoulders limit you. We did this in the fundamental workout in the knee stretch position with a hand behind the back. Okay, we'll come off of there. Continuing now with knee stretches to red springs for knee stretches.
We want the buttocks to be down about a hands distance. Fist distance hook, 'em horns, distance away, belly scooped in holding this shape strongly with the arms. I scooped my belly. I'm in trying to maintain this rounded spine here. Posture. Your ribs right here. Push. Pull the name of the exercise knee stretch.
So when you come back Ian, you want that need of stretch, which means you need to keep your buttocks back to get the knee stretch. We're gonna do this two more and last one and now we're going to change this up. I'm going to offset my hands to the left. So two hands are now on the left. My feet push and they pull as if my carriage could push to the right.
It can't of course, but as if it could. It makes me use different parts of my body in this offset position. Two hands to the other side as if my legs were pushing to the left. Five times, two more. And then last one and then bringing myself up to a more neutral position or a more flat back position. Push. Pull.
Name of the exercise. Knee stretch. Stretch the knees, stretch the knees so you gotta bring the knees forward. Sometimes we're afraid to flex the knees. This is a safe position to do it. Push, pull. Three more, two more. Last one. Rest. Sometimes.
What I like to do after that particular exercise is let my shins come down, sit back, start to open my knees, take the crown of my head and put it right on the carer.
Inhale, big exhale. One more time. Inhale, and then one more time. Exhale. And then I'm going to roll myself all the way up to high kneeling, taking off one spring on the way. I now have one red spring on my toes are curling under. Bringing myself up again for the position of kneeling arms front in this position, I want you to notice the thighs, the hip crease, and the abdomen size of the abdomen is one thing. Position of your thighs is another.
So we want the hip crease to be back. You want the pelvis to be over that hip crease. Everything else is just your body. What we don't want is this, and what we don't want is this, so we need to keep all the work that we just did in the body lengthening up, zipping up a nice posture. Your connection here and Tierra, your thigh crease is long. We're not going to use straps. If we had some weights, we can do that to start the programming.
It's important in this knee kneeling position to get the feeling of where the thighs are and how much the legs are actually working before you start to load springs. Then your reverse. You can do your traditional arm series that you do like at the end of a [inaudible] mat class. You know when you, when you raise the arms, you do chest expansion arms, you do circles up in circles down, right, hi, Bicep, bicep in front, et Cetera, et cetera. But right now during all of that, I am really connected through my buttocks, through the front of my thighs, being long belly all the way zipped up. So really important in that particular exercise to find the connection through your buttocks.
So now I have the the shoulder rest giving me to push forward, but I'm not bulging my thighs for it. You see the difference between that? I want to link, then I want to get my posture. You're the center of my butt. Cheeks, chest expansion. One side, one side center release. Inhale, one side, one side center release. One more pull, one side, one side center release. You can make great connections just by getting the legs in that ideal position.
Okay? Coming off now putting on two red springs going to come to lie back down.
Look at this as shrugging my shoulders. This is reaching my arms long and then lift the head. Curl the trunk.
Tiny little bottom lift holding my back. Ribs down, pressing out, pulling in.
So I buoyant my breath and then I can pick it up.
Beginner Reformer: +50-Minute Classes
Comments
You need to be a subscriber to post a comment.
Please Log In or Create an Account to start your free trial.
