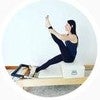
Description
About This Video
Transcript
Read Full Transcript
Hi, I'm Kathy Ross Nash here for PyLadies anytime during foundational number reformer number four. In this exercise, we are going to be working on movement. Now we've worked on finding our powerhouse. We've worked on finding our box. Now we're going to add a little fluidity to this workout. Okay, so we're going to begin with three or four Springs if you have a light carriage, but four if you have heavy, put three standing on the side, full fingertip to elbow, lift up, anchor the tailbone down and lift to lower yourself to the carriage. This is your preparation for lowering yourself all the way to the mat. One day make sure your sit bone is on the carriage and off the carriage.
Please. One hand here and this time try not to use the second hand. Just use one hand to bring your legs over the bar and lie down into position. Place all your toes on the foot bar with your heels glued together. Knees are right in line with the center of the foot. Make sure that you're not rolling in that that baby toe is aware and present on the foot bar. Arms are open, chest is relaxed, ribs are soft, throat is relaxed.
You really want to be relaxed before you engage to move. Bloodies is not tightening. It is freedom of movement within the joints. Pull the stomach in and up and 10 repetitions in the first position. One lifted me caps to three as you elongate, imagine that your feet are encased in cement and they are not moving.
Lift by keeping this hip joint open. So even as the knees bend, this hip joint stays open and the tailbone stays anchored and there's no tension in your upper body whatsoever. The stomach is doing the work. When you get to 10 bring the carriage in, pull your knees in for a double leg pulls to find the powerhouse. Put your feet in the second position. Bird on a perch, balls of the heels together, knees together. Outer edges of the foot firmly on the bar. Arch is lifted and stretch heels under two three I'm not focusing on your breathing yet. That comes later.
You add into each workout. Another one of the principles and breath is later on. Soft chest. Eight, nine heels. Push under 10 well, leg pull. Flex the feet lead with the ball of the foot. Peels glue together. Balls of the feet together.
Toes pull back as if you're standing an imaginary floor. Press through the heels. Pull the toes back one. Keep the knees in your center line. Lengthen the spine. Relax the rib cage. Soft chest, soft jaw, soft face. Easy breath. Now we're going to go to our tendon stretch. Bend both knees into your chest, heels pressed together. Place both feet onto your foot bar.
You're going to draw the right knee in and parallel hugging it to the chest just like we did in our second reformer workout. Pull the stomach in and up. You may drop it to two Springs if you want, and stretch this leg out. Lower the heel and lift the heel. Lowered one, two, three. Lift. Keep the knee cap lifted. What you're teaching on your reformer is going to correlate with what you're teaching on your mat.
Usually around this time where I'm introducing this opening of the hip. I'm introducing the single leg kicked back and I want them to understand how to reach out of that hip as they're going to be lifting the leg. 10 bend the knee in. Bring both legs into anchor the pelvis. Place your feet on. Hug the left leg in parallel. This heel lines right up with your sit bone.
The knee stays in that slight turnout. It can work parallel, but we're working slightly turned out right now. Lower two three lift two three lower two three feel the pelvis lower. Two three, lift two, three lower and lift. Lower and lift and you can guide their ankle so that they're strengthening their ankle. Alignment as well. Lift and lower. Lift. One more lower and lift. Bend the knee in.
Hug both knees into your chest. Now we're going to go into the hundred. This time we're going to keep the foot bar up and place our legs long on the foot bar. I love introducing the lifted leg like this so that I don't have to hold the weight of my legs yet, but I have that same angle that I have to understand of the pelvis to roll up into, and it makes a safe workout so that my back does not have to support the weight of my legs until my powerhouse is ready to hold it. So you're going to take two handles in your hands. When you take your handles, bend your elbows directly back. This is actually your first preparation into the Highbridge, which is an ultimate expression of extension.
Lift the arms straight up. Bring the head up, and as if you're executing a roll up, press into your straps and inhale, two, three, four, five. Exhale, squeeze every last drop of air out. Inhale to four, five. Exhale through the nose. Two, three, four, five. Head down. We're going to do complete hundred counts now, but lift the head and lower the head so that it doesn't become an exercise that is in your neck, but an exercise that is in your powerhouse and roll up. So you're going to have 20 counts where you're up and 20 counts where you're down, and inhale, two, three, four, five, reached the legs long out of the pelvis. Exhale, two, three, four, five, lie down. Inhale, two, three, four, or five. Pull the stomach in XL two, four, five. Inhale, two, three. Always want to gradually build that next ramp and gradually build that powerhouse strength so that you don't stress and create bad habits. Inhale, two, three, four, five, reach for your legs. Exhale, two, three, four, five. Last set. Put a little pepper into this one. Inhale, two, three, four, five. Exhale. Exhale, exhale, exhale. Exhale, exhale, and down. Put two straps into one hand, a little teaser up. Take your foot bar down.
Now what I'm going to do is I'm going to put it on two centers, Springs taking two outer Springs off, drawing a little bit more towards the midline. Play around with that. You'll see that when you have two outside, you're going to engage the outside of the body a little more, and when you have two inside, you're going to draw a little bit more towards your midline, which we're doing in this workout. As we increase our speed, we have to be more aware of the connection in our midline and where our midline sits. Because once you start going faster, things go crazy. Okay? Now what we're gonna do is we're going to actually hold our straps because we've been opening up our chest as we've developed our workout. We're going to have it like a Cape with our chest open. Swing our legs over. Notice the movement is getting more mental malistic as we get onto the reformer.
Two legs go up into position. Every workout hones a little bit cleaner. Stretch out circles.
Mount your apparatus, pull the stomach in and up. Bring your legs up into your stomach massage position. Place your feet in the position that you use. Remember, this is going to be personal lift up and over, keeping the shoulders over the hips nice and smooth. Here we go. Lift the waist and in two in three the shoulders stay over the hips and you zip the legs together. Knees go right in line with the shoulders. Stomach pulls in an up and only the hip and knee joint are moving and the stomach is lifting back and the knees press against the body to give a massage.
Right from here. Lift your arms up over, open the chest. Lift those heels so that you make sure if I'm down here, there's space. I'm not getting that pressure of my thigh against my abdomen. Pull this stomach in one. This is your double leg. Pull seated right. Three, four, five. Open the chest. Feel the shoulder blades draw down back in together. So if I wanted to lift my hands off, I could lift my hands off and not adjust. Lift, lift and lift from here, don't shift anything. Lift up.
Bring the two hands in the middle to remove the center. Spring arms go up, lift the waist. Parallel, lift, grow, grow out, lift grew, grow out, lift, grow, grow and come down. Swing your legs over, take your foot bar down. You're already on onto. Now what we're going to do finally is a short box short. I will go back and forth between using a short box and a long box. At this point I want to start them to stretch their legs and feeling the elongation going from a bent leg to a straight leg.
But if I start them rolling back, I'm going to be one hands with distance from the back edge of the mat. You are that way so that when you roll back, your sacrum has a place to go. Your sacrum is the same width as your hand, so we only do that for rolling back exercises. We're going to do something called lock and load. I always lock and load my straps.
Your feet go underneath, you press out on the strip that engages this part of the thigh. I push away with my heels that takes it out of my hips. And then I draw my inner Zise together, which engages my Trinity, my tummy, my Toshi, and my inner thighs, which gives me the lift. So here's your lock. Push to load and ready to fire. Pull the stomach up and in and let's be daring and take our hands behind our head. Pick a focal point, lift your head and keep looking at that area.
As you push the heels away and you try to keep your head where it is as you roll your low back down, pull the stomach and open that hip hinge and lift up to sit upright. Pull on the head, grow tall. Notice that I am teaching you that it is not about dropping down, but about lifting up, up, up, up, and lift. One more time, lift up, pull the stomach up in in lift, lift, lift, lift and up. We're going to drive that point home. Place your hands by your side. Roll your shoulders back, press to lift up.
Now imagine the hands are behind your head and you're going to roll back, but keep pressing with the hands. Do so you get that same lifted feeling. Pull the stomach in any long gate. Up. Relax. Press with the hands. Lift the waist. Roll the low back. Keep that vocal point.
Pretend that you can still feel your hands pulling on your head. Push through the heels, lock in low. Draw the inner thighs together and come back up and relax. Shoulders back. Engage that spring. Push through the heel. Draw the inner thighs together. Lengthen.
Roll the low back back. Keep the focal Pally. Roll it back more. Keep that land. Push on your hands. Open the front of the hips and come back up and relaxed. Same thing for flat back shoulders. Back. Press onto the hands to lift up. Hinge just from the hips and return.
Relax. Lift up, push you the hands. Grow tall up. Get that waistline long and relax. Lift, press on the hands. Lift the stomach, open the chest, open the chest, lengthen and relax. Once again, learning the connection between using the back body to find the length for the front body. Now side to side, I want you to up your hands. Fold your hands so that one hand is right over the other and your knuckles line up. Open your elbows. Take this hand and you're going to wrap it around the rib and hold the rib and you are going to reach over to that side, bringing the rib back with you and lengthen to come up.
Change your hand. So I use this for the person who goes like this. When they side bend, take the rib, pull it so they have to go up and over in imaginary barrel. It's as if I brought the ladder barrel into my reformer and lengthen other hand reach, hold the rib, make it feel like a barrel. Lift up and go up and over that hand, lifting with that hand. Keep the elbow in line, pull the stomach up and in hand goes up, hand goes around, hold the rib cage, lift up, pull in, stretch over. Over.
Where's that barrel? Anchor, that left tip. Find your barrel and peel yourself off. Now many times when we teach a twist, what happens is the arms disconnect. Once again, we want to connect with that back body. You're gonna make a fist place into your hand as if you have a big beach ball in front of you. Press in that hand and twist, pressing the fist into the hand to engage the left side of the body and keep it strong and center. Other hand you walk. This is what it looks like without now. Watch when I engage that hand, that whole side of the body supports me as I twist and I find my midline, which I'm working on in this workout, much stronger.
Fist hand. Keep it right in line with your solar plexus. Push in that hand. Lift the waist, press the hand, press the hand, press into that hand center. Relax, push, lift. Make a fist, press, press, press, press. Keep it in line with the solar plexus. You should feel that whole side body firing and relax as if that wasn't enough joy. Wait, you do this tree lift up. Remember what I said in the member. Remember what I said in the last workout that it's about lifting the back.
I want you to place your hand on your hand and keep this elbow right by your side to help keep your box in alignment. Glue the leg right into your chest and stretch and stretch and stretch. Flex it pointed. Push through the heel. Push to the heel. Now walk to your ankle. Don't move the leg. Bring your nose to your knee just on the inside and up.
Don't bring the leg center still keep it in line with your hip. This is a foundational workout. It gets more complicated. The more close, the closer you bring your lens towards your midline to keep your box square and sit up tall. Don't move the leg. Pull the stomach in, stomach off of the thigh. Crown of the head goes to the inside of the knee as if I was doing a single leg pull straight, which I'm introducing around this time in the workout. Lift all the way up. Bend the knee in for another stretch of the back and leg and place it under and place the foot out towards the side. Hug the leg in.
Now Palm is to Palm. Elbow is in. Helps to keep the box square so I'm not going into that rib cage. Lift up, lift the back to lift the back. Three flex point. Flex point. Good flex point. Walk to the ankle, lift up round the crown of your head towards the inside of the knee and lift up tall. Lengthen up, lift the stomach. Bend the elbows.
Here's a shaving position with my arms. Can you see the shave
Let's put up your foot bar. Make sure it's secure. Always makes sure it's secure. I'm on two Springs already. I'm going to take my pad throat into their, lift my box with my box and put it on the end. Bring my head piece up and place the bar in the center so it is in a safe place. Always be careful where you put your toys cause you don't want to trip on them.
Okay, we're going to go into our elephant place the hand, your heel against the shoulder block. Now I want that leg straight hand and another straight leg comes in. Why? Because like I said, we're introducing the straight series at this time. Pull the toes back, your reformer, and that always correlate what you're adding into a dig your heels. Exercise begins out, pull in one stop.
Pull into pull in three. Pull in for pull in five. Now press and extend your upper body. Push into the heels with this extended upper body. Press one,
The reason I don't introduce it like this is because they have to get the feeling of the round spine and that's the most important thing is that I get that curb and it's really difficult sometimes to keep the box square, but this will really get them to understand this left leg has to be lifted, so you sit down, square the box off press one,
Long neck, relaxed chest, freedom of motion timing, one heel arriving at its apex as the other arrives at its apex with equal weight distribution across the ball of each foot stretch rah wide. We're going to go onto our heels to get a little more bottom engagement, which is going to also start preparing us for our side split series, which is going to come at the next level. Roll the tailbone up, push through the heel, stretch the legs, scoop the stomach, come in, roll down, push through the heels, roll up, stretch, flex the feet, roll down. I like to roll down in between so that I don't get into shortening that opening up my back. Roll up, press out school, roll down. If you're really pushing through the heel, it's a lot of work. Tailbone, press it. Roll down. Three more. Tailbone up, press flex.
Elongate. Open that back. Roll up. Press scoop. This is the same scoop that you're going to use when you're lying on the mat, on your stomach. Draw your legs together. Swing off to one side and we're going to come into our front split position from our knees. Stretch, pull it in and up. Drop to two Springs, bring the hip forward. This lines right up where my single leg pulled it right by my ear and where my tree stretch was. Same position.
Here's my trick that I just did with my nose to my knee. Lower increase the stretch lift. Come in, hugging my knee into my chest for my tree. Stretch out. Here's my nose to my knee in the tree. So everything that you do throughout your reformer builds cohesively. You should be able to see what you add into one exercise into the other
Begin Pilates: Reformer Foundations
Comments
You need to be a subscriber to post a comment.
Please Log In or Create an Account to start your free trial.
