Description
About This Video
Transcript
Read Full Transcript
Hey, I'm Mariska, and I am thrilled to be back at Pilates Anytime with a new Pilates-ish series. So we're going to start out with my arch nemesis, the magic circle. So this is a Pilates-ish mat class for people who hate the magic circle using the magic circle. So we're not gonna be having it between our ankles, doing the 100 and stuff that's really hard and miserable. We're going to try to use this in ways that's actually supportive or friendlier.
So there'll be a lot of focus on lats, and extension, and things that don't feel terrible. So all you need is a magic circle and a mat. We're gonna go ahead and start lying down with bent knees. So however it is that you wanna get there, you can get there. And so I'm just gonna let my arms lift up, and hold onto the padded part of the circle.
And you wanna feel your shoulder blades kind of just sinking into the mat, whatever mat you have, hopefully, it's more padded 'cause that's just a nicer experience. So we're just kinda sinking down, and then the tiniest, tiniest little bit of pressure with the pinky side of your hand. So when you do that, you're slightly externally rotating your shoulders, and you should feel maybe a little more contact, a little more pressure with your shoulder blades and the mat. And then just to get a sense of what it feels like to not have your shoulder blades against the mat, we're just going to lift the magic circle up towards the ceiling. So when you lift the magic circle up towards the ceiling your shoulder blades come away from the mat, and then we're going to just relax your shoulder blades back down.
It's not like an active smushing, it's an active relaxing. So we're just resting them down into the mat. So from there you're just going to bend your elbows out to the side, keeping a slight pressure on the outside edge of the magic circle on the pinky side, try to get your triceps to touch the ground at the same time, and then lift back up. I always think it's interesting when you say try to touch down at the same time, and you realize that you don't (chuckles) because we're all crooked, so we all find out the ways that we're crooked. So just doing a couple of presses, not actively smushing the circle, we are just resting our hands on the circle, which should be a more pleasant way to use the circle than trying to crush it.
So come up about halfway, so your elbows are out to the side, you feel your shoulder blades evenly pressuring into the mat. And here we're just gonna do a tiny little press, tiny, tiny, tiny and release eight times. There's, one, two, three, four, five, six, seven, and eight. If your feet aren't pretty close to your bum, go ahead and bring them a little bit closer. Take the circle up, reach it up towards the ceiling a little bit, so then your shoulder blades are reaching away from the mat, and then relax your shoulder blades back into the mat.
We're gonna take the circle to the right, you're gonna begin to feel your left shoulder blades start to lift off the mat, and then keep your eyes looking like right in the middle of the circle. And you're only going to go so far as you feel like your hips don't need to do something as well. So we're going over to the side, like if I go much further than this, I feel like I have to balance out my hips, and I don't wanna feel like I have to force my left hip down. So I'm gonna come back up to center, and then I feel my shoulder blades relaxed into the mat. Go over to the other side.
Notice if there's a difference, there's a huge difference for me on this side, like I already feel like I'm pushing down into my right hip. We're gonna do just the tiniest little bit of rotation, you're arm that's reaching towards the floor is probably gonna bend some. If you're not really reaching your shoulder blade away, then we'll go ahead and come back. From here let's make this nice. Bring the circle right behind your head, so it's right at your occiput, you still have your hands on that outside edge.
We're gonna do a little chest lift up, it's like an assisted chest lift. And then lower back down, lift up, and back down. Lift up, hold it there. Now, see if you can lift up a teensy bit more without pulling on the circle, and pushing your head more forward, and lower back down. Lift teensy bit higher, and lower back down.
Lift and higher, and lower back down. Last one lift, lift, little a more, and lower down just release your hair, the back of your head. Take the circle and you're just gonna rest it on your right thigh to where your right arm, the heel of your hand can be on the circle. From there, just press down into the circle a little bit to feel your lat engage and release. We'll do this four times.
Two, three, you might feel your abs engage a little bit as well. And four, tip it up a little bit higher so that it's angled up towards your leg, so that you can then lift your leg up and down just a little bit. Lift up a little bit of your pressure, just from your knee to your hand and your hand to your knee. Lift and lower, we're doing six. I think that's four, five, and six.
Same hand opposite leg. From there I just want you to press your hand down into your leg and feel how your obliques kick in a little bit. And we'll just do four presses, two, three, and four. Tip the circle up so it's closer to your knee, and then you're gonna lift up a little bit of weight from your leg into your hand, hand into your leg six times. Two, three, four, five, and six.
Keep it where it is on your leg, bring your other hand down, actually lower it down a little bit, right hand down by your side, shoulder blades are relaxed into the floor. We've got four presses, hand into your leg, so you should feel your lats kicking in. Then we're gonna tip it up, just basically gives us a little bit more freedom to lift that leg up six times. Two, notice how it feels different on this side than the other side, maybe it feels better, maybe it feels worse, it feels worse for me on the side. And then we'll take it lower on your thigh across to your right thigh, we've got four presses.
One, two, three, four, tip it up towards your knee, and then we've got six lifts. One, two, three, four, five, and last one is six. From there, take the circle, walk your legs in a little bit, and you're gonna place it on the outside of your legs. So the little pads are kind of on your thigh, arms by your side, We're gonna press out engaging your hip rotators and then release, press out and release. Push and release, push and release.
We'll do four more, one, two, three, and four. Now, don't actively press out, tilt your pelvis so that your low back makes contact with the mat. And then untilt your pelvis. So just a little pelvic tilt, so bring your pubic bone towards your ribs, lengthening your low back, and release. Tilt and release, tilt and release.
Now tilt, try not to push out into the circle. Peel your back away from the mat, coming into a straight line from your knees to your throat, and then from your throat down, begin to roll through your spine. Bone by bone at the bottom, lengthening your tailbone to the floor. So pubic bone towards your ribs, peel your back away, lifting up, lengthening your spine, lowering back down. Now, on this one we're going to do the same thing except at the same time as we lift, we're going to press out.
Lifting up, pushing out with your knees. You should feel your glutes way more than you did before. And then lower all the way back down, coming back to center. Again, pressing up, pushing out at the same time as you lift up, and lower back down, sort of releasing that outward pressure. Do two more like this, lift and slowly lower back down.
Last one, lift up, and slowly lower back down. Go ahead and take the circle, you're gonna bring it again back in your hands the same way as it was before. And then take your legs all the way along on the mat. Reach your arms overhead, so you're gonna just touch the top of the circle to the floor. And we're going to roll slightly to the left, and back to center, and roll slightly to the right and back to center.
Slightly left, and it's really a roll with your upper body. Your lower body is staying planted down on the floor, roll left and roll right, a couple more like this 'cause it feels nice. I'm trying to show you that the magic circle can feel nice, I mean, I hardly ever use it and I'm really only, you know, using it for this class, and that's gonna go gather dust again. But you know, I can make a magic circle not be the worst thing in the world. Go ahead and reach your arms up towards the ceiling, you can hold on a little bit more tightly if you want, think about little tiny squeeze again, pinky side of your hand, chin towards your throat.
We're gonna roll up to a seated position, and reach forward. From this reached forward position, make sure your shoulder blades have stayed attached to your back. We're gonna bend your elbows and extend eight times. One, two, three, four, five, six, seven. Catching the ponytail there, and eight.
Arms are forward, look between the circle as you slowly roll back down. Keep looking between the circle as your arms lift up towards the ceiling. Take the circle and turn it. So now it's like you're holding it with your fingertips like right in line with the pad, and it's like straight up towards the ceiling. Reach your arms overhead, try to relax the circle on the floor, and then lift back up.
Reach overhead and back up. Just kinda warming up your shoulders a little bit, do a couple more like this. Reach and back, and reach and back. Turn it so it's back to its normal operating position, pinky side of your hand. So you feel your shoulder blades kind of engaged slightly, but they're on your back, meaning we're not pushing forward, we're not protracting your shoulder blades.
Keep looking between the circle lift head and chest up, begin to roll up one vertebrae at a time, keep looking in between the circle. And then from there sit up tall, bend and extend. So if you need to bend your knees because it's the first thing in the morning, or your hamstrings are tight, or for whatever reason, go ahead and do that. Bend and extend, a couple more times. Bend and extend, and bend and extend.
Keep looking between the circle. Go ahead and slowly roll down bone by bone. Bend your knees, and we're gonna take the circle, it's a little strange. We're gonna place it so that the circle is on your thighs, and your heels are resting on top of it. We're gonna take the circle, squeeze the little thigh, little hamstring engagement and release.
Press, squeeze and release. Press squeeze and release. Squeeze hold, little squeezes more, so eight, two, three, four, five, six, seven, and eight. Hands behind your head, release the squeeze thumb. Lift head and chest up, find the squeeze and release.
Lift, squeeze, and release. Lift, squeeze, and release, couple more. Lift, squeeze, and release. Lift, squeeze, and release. Take the circle, extend your left leg.
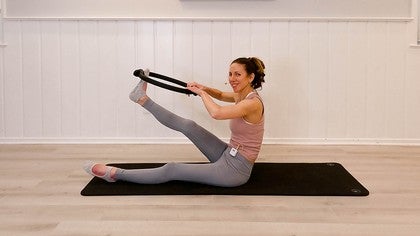
We're gonna take the little pad, hook your right foot, extend your right leg up towards the ceiling, and bend. Reach up, stretch, and bend. So on this one I'm holding like right outside of the pad with both hands. I don't know, that just feels correct to me for some reason. Do a couple more like this.
And last one like this. And we're just gonna take your leg and pull it a little bit closer, so I think bicep curl. Hamstring stretch, calf stretch maybe, pull in and release. Pull in and release. Bend your knee, lift your head and chest up.
Get a little bit of momentum, and extend your leg to come up to seated. And then slowly lower down, bending your knee. Coming back down to the bottom, extend your leg. Bend your knee, lift up, extend your leg. Bend your knee, lower down, extend your leg.
Bend your knee, lift up, extend your leg. Bend your knee, extend your leg. Pull your leg in four times, two, three and four. Slowly bend your knee as you lower back down to the bottom, and then you can extend your right leg long. Hook your left foot, extend your leg, bend your knee.
Reach up and bend. Reach up and bend. And we'll do a couple more of these non-sucky, evil ring exercises. And then leave your leg up, and then we're just pulling it in. So this is my MS affected tight, tight, tight legs, so it's not coming in as far and it feels way tighter.
Go ahead and bend your knee, I'm less gifted and talented on this side. Lift your head and chest up, might need a little bit more of a boost to come up. And then slowly lower back down, reach your leg up to the ceiling. Bend your knee, lift up, extend your leg. Lower down slowly, extend your leg, bend your knee.
If you get stuck, just rock. Lift up And now pull your leg in four times. One, two, three, and four. Now, take the circle, and then rest your left leg on top of it. Kind of adjust as needed, and then we'll slowly lower down to the floor.
Take your right leg and just bend it. Externally rotate your left leg some, like not a huge amount. Push your left leg down and release. Press down and release. Press down and release.
Next time you press down, lift your right leg up, press down and lift. Press down and lift. Press down and lift. Press down and hold, extend your right leg up towards the ceiling, slightly externally rotate your right leg. Take your right leg across, around, and up.
Across, around, and up. We'll do six each direction. There's three, four, five, and six. Opposite way. And try not to go so far that you start to tip, over to the side.
And I feel like having your leg on the circle really tells you if you're tipping 'cause the circle will roll. And last one, go ahead and just make your way up, however makes sense for you to get there. And then we'll switch. So right leg is going on top of the circle. Left leg starts out bent, right leg starts out externally rotated.
Press down and release. Press down and release. Press down and release. Add your left leg coming in, press down, lift your left leg. Press down, lift your left leg.
Press, lift at the same time. Press, lift at the same time. Press, lift at the same time. Hold it there, stand your left leg. Circle around six times two, three, four, five, and six.
We'll switch one, two, three, four, five, and six. I decided I don't like that exercise. So if I did a redo of this class, I might have to get rid of that one 'cause doesn't count as a magic circle exercise, that doesn't suck a little bit, it did kind of suck a little bit, so sorry about that. This one is much better. So go ahead and come to a kneeling position, and then you're gonna place the circle.
There's something on my mat and it's bothering me, it's like a little piece of leaf from outside. I don't know if you're like me, and you see something on your mat and then you get totally distracted from your workout. There's also dog hair, but that's everywhere. Okay, upright circle in front of you, hands on the circle, or heel of your hands are on the circle. So maybe have it be a little bit forward of you.
So we're gonna take your shoulder blades and pull them back some. So it's a little bit, it's not that like crack a walnut between your shoulder blades, I feel like that's a little aggressive. It's just making sure your shoulder blades are on your back. And then we're gonna take the circle and press down. When you push down, you should feel your abs kind of kicking in, and release.
Press down and release. Press down and release. Now, press down and curl your low back and release. So make the press happen with a curl of your lumbar spine and release. Press down, curl, and release.
This should feel generally pretty good. Press down, curl, and release. Press down, curl and release. Press down, curl and hold. Take your arms, just press eight times, one, two, three, keep your curl, four, five, six, seven, and eight.
We'll come out of that, pick up the circle and turn it. So it's now to the diagonal left side of your mat. And then turn your torso diagonally to the left side of your mat, but legs stay where they are. Press down curl, but you're gonna curl a little bit to the right. Press down curl.
Press down curl. Press down curl, hold it there. So hold that curl, bring your right hand behind your head. Open your right elbow out to the side, twist your right elbow to the left. Open and twist, and open and twist.
Pick up the circle, move it to the diagonal right side. Shoulder blade stay on your mat. Press down round and lift. Press down round and lift. Down and lift, couple more like this.
Hold it there, right hand stays where it is, keep the pressure. Twist around to the right sum, open it back up. Twist around some, open it back up. Twist around some, open it back up. Bring the circle forward of you, and place just your right hand on it.
We're going to reach forward, and have your left arm go back, tuck your pelvis under a little bit to lift your hips off. And then come back, reach your left arm forward, Press forward, tilted pelvis, rounded low back. Left hand back, right hand forward. We're gonna do, so you should feel a little thighs here as well. We'll do five of these, four I think, and five.
Just hold it there and release. Slightly to the left, right hand forward, push it forward, reach your right hand back, and back to center. Four more, one, two, three, four, and just hold And then come back to center. Take the circle, place it so it's like kind of, I'm gonna actually turn it on its side. So the little pads are out to the side, 'cause I think it's gonna be more comfortable.
So you're gonna place it so it's hooked on your heels and underneath your gluteal fold or your butt. If you have a butt, I barely have one, but if you have one it will stay more securely there. Reach your arms forward, lean back into a thigh stretch. Isn't that way better than a regular thigh stretch? And lift back up.
Lean back, you can lift your arms up if you want. Reach them forward, lift back up. Lean back, reach, forward, and lift. Lean back, reach, forward, and lift, a couple more. Reach back, lift your arms.
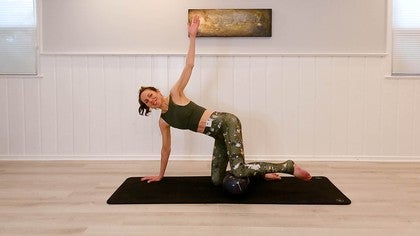
Reach your arms, lift yourself. Last one, reach, lift, reach, and forward. Grab the circle, turn it so it's facing this way (chuckles). So the circle is facing to the front of the room. You're gonna rest your left elbow on the circle, right hand down on the floor, coming into a semi quadriped position.
So first trying to find our stability here, shoulder blades on your back, extend your right leg. You're gonna lift your right leg up and down, eight times. Two, three, four, five, six, seven, hold it on the eight. Point your toes, and then reach your arm forward a little bit, almost like it's going to go straight, and then bend it back in. So your arm might be a little bit higher up so you might be a little bit crooked, which is fine in your upper body.
I feel like if my arms were shorter, that would work out better, or if the circle was smaller. And then go ahead, lower your right knee down. Take the circle to the opposite side, rest your right elbow down. Adjust yourself as needed to feel balanced, shoulder blades on your back, left leg extends. We're gonna lift your left leg eight times.
Two, three, four, five, six, seven, eight, point your toes, reach your arm, bend your arm. Reach your arm, bend your arm, three more times, Two more times. One last time. Lower your knee down. Go ahead and have a seat down.
Just hold onto the circle, shoulder blades again on your back, not aggressively. There's no walnut there, so just hold it, and then just twist towards the side. So I'm gonna try to keep my eyes looking right through, the circle back to center, twist to the other side and back to center. So right now, weird things are making noise in my body. And this is something that happens to you well, really when you get over 30.
And so I'm 17 years over 30, and your body starts to make a lot of sounds when you're that age. I think crepitus is the best onomatopoeia name ever because that's kind of what it seems like. So we're trying to get as much of that nice kinda juicy twist in our spine as possible. So we're gonna start to come into some back extension. So I actually really love the circle for back extension, but I also love certain types of back extension.
Not all back extension, but I like this type of back extension. So I'm gonna start with the circle kind of in front of me, and you can rest your hands on it. I'm not gonna have my hands all the way together because that doesn't feel feel great, so I'm gonna have my hands a little bit kind of out to the side of where the little pads are. If the pad tilts forward, that's totally fine. So you're gonna press down, lift yourself up.
So that was an unsatisfying amount of lift, so I'm gonna bring it a little bit closer. Start with it tilted forward, not so much that it's slipping. Lift yourself up and then reach down. Lift yourself up and reach down. Lift yourself up.
Now, we're going to steer our circle, so we're gonna steer it to the left. Look over your left shoulder and back to center. Steer right, look over your right shoulder, and back to center. I'm gonna make an adjustment 'cause I actually think it's gonna steer better if it's on the rounder part. And I was correct, so steer look, left and center.
Steer look right, and center. Steer look left, and center. Steer look right, and center. Go ahead and lower yourself down, so it's gonna tip forward totally fine. Kind of aiming your head towards the floor.
Legs are gonna be in parallel. Lift up, lift your legs at the same time, lower down, lower your legs. Torso and legs lift, torso and legs lower. Lift, now hold it there. Begin to flutter your legs like you're going for a swim.
And we're just gonna do a little tiny tip over to the right, and a little tiny tip over to the left. So I'm actually tipping my whole body from one side to the other because it just seems like a good idea right now. And then go ahead and lower all the way back down. We're take the circle in front of you and come to, let's just do your right hip. So you want your right shoulder underneath you, and your elbow kind of underneath your shoulder, so I'm gonna move it back a little bit.
and then bring the circle closer than you think you would want it, and you can have your bottom leg bent, but you want your hips to be stacked. We're gonna lift your top leg up, I'm gonna move the circle a little bit down. And then I want to push the circle away as I reach my leg back 'cause that feels really, really nice. And then come forward, and I'm actually going to let myself kind of sink back so I'm sinking into my shoulder. Go ahead and sink into your shoulder.
We always say not to do that, but you know what? Many people in the world have sunk into their shoulders at one time or another and lived to tell the tale, so I believe you will as well. So just trying to get a nice yummy twist, twisting around, And back, twist reach around, and back a couple more because this feels very, very, very good for me. And come back, twist, reach around and come back. And then we're just gonna go over to the other side because there's a lot of side lying magic circle stuff that's not fun, it's like, you know, trying to like lift it up with your legs, and it's like very unpleasant.
And we're only trying to do pleasant magic circle stuff today. So leg lifts, we're gonna push, twist around and then reach around kind of sink into your shoulder. Leg comes forward. Leg reaches away as your arm reaches away. And then leg reaches forward as you sink into your shoulder.
Push and reach forward. Push, ooh, something cracked. And reach forward. Push and leg goes forward. Do two more of these very satisfying stretches.
And last one. And then back to center, we're gonna do one last little thing here. This is something I actually do with my clients all the time, and it's called, it's my teapot exercise. So just sit cross-legged, and you want the circle kind of reaching away from you. We're gonna take your ear to your, it's same side shoulder.
Make sure your shoulder blades again, set on your back. So this is a mic that's kind of stuck. So take your right ear to your right shoulder, and then begin to bend at your ribs. So think you're sending your left ribs, you're not really sending them to the left, you're just trying to create a stretch by tipping over to the side. And you could probably go further than you think you can.
And then think about trying to get less wrinkles in the left side of your shirt. And if you're shirtless, think about getting less wrinkles in the left side of your skin. And then lift back up. We'll go over to the other side. You can change the cross of your legs if you want to.
I don't want to, so I'm not going to. So left to your left shoulder. Begin to stretch out the wrinkles in the side of your shirt, see if you can stretch out the wrinkles more. And you want to feel evenly heavy in both sits bents, so you don't wanna feel like your hip is lifting off. You want to feel like you're getting a really big stretch through your skin on the right side.
Skin, muscles, tendon, whatever, all the stuff that's there. And then go ahead and make your way up. So hopefully that was a non-miserable, magic circle class for you, and gave you some ideas on how to use the magic circle if your students are insisting on using the magic circle, which they never are, but let's pretend they do. So if your students ask to work on the magic circle, you have given them something that they will not hate you for later. So you'll probably never see me use the magic circle again, I'm gonna put it away, let it collect dust.
But I will be back with more non-magic circle classes soon.
Pilates-Ish with Mariska: Strengthening Classes
Comments

You need to be a subscriber to post a comment.
Please Log In or Create an Account to start your free trial.
