Description
About This Video
Transcript
Read Full Transcript
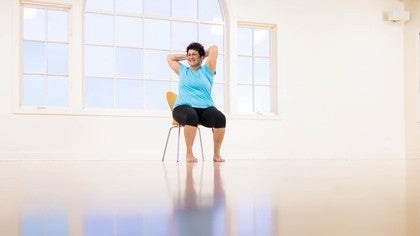
This class will be done entirely sitting on a chair. I was motivated to do this class when a client asked me, "Can you do a class entirely in sitting?" And I said, "Sure." So here we are. We're going to address feet, ankles, toes, knees, trunk, ribs, breath, shoulders, elbows, hands, fingers, head and neck. Who knew we can do all those things in the seated position? But we can.
So starting first in the sitting position, feet are gonna press down. And just because we're doing the class entirely in sitting, doesn't mean that it's going to be very, very easy. It still could be challenging for many people. So starting by pressing your feet down, your arms gently on the thighs, kind of tidy up your ribs and your belly. And don't grip anything just take a big breath in, like your elbows are a bellows.
The elbows are the bellows and they lift up you. Inhale and then exhale. So we're gonna inhale for three counts. Inhale and exhale. Inhale for four, three, two, one, exhale, three, two, one, again.
So our side ribs work like the bellows are a handle on a bucket. Our front ribs, our higher up ribs work like a pump handle. So it's like you're lifting your chest up and down. So let's do a couple of breaths with a pump handle. This would be a little more of an extension breath.
Inhale, exhale. One more time, inhale. We're lifting the chest, lifting the pump handle, and then come down. And now we have to do them all. So we have our bucket handles on the side and our pump handle in the front.
And I'm gonna hold my hands out big like this because I want our whole torso to feel like it's supported by these big ribs like this. So now when we breathe, we breathe sideways and backwards and outwards, and exhale. Let's do it for four counts. Invite your inhale. Exhale.
Try to keep your neck very quiet and maximize these space between your ribs. One more time, inhale and exhale. So throughout this class, we'll be resorting back to the bucket handle or the ribs reaching up and down and the front handles going front and back. Starting now, rounding your torso forward. We're gonna nod the head and breathe in.
And when you get down here, you exhale pressing your feet down. You could even imagine that your arms are pressing down. Take one more inhale while you're down here. And then when you exhale, press into the feet as you slowly stack up your ribs till you return to the vertical position. Again inhale, begin to round and press your feet.
Exhale, continue to round, press your feet, pause. Take a big inhale as if you're kind of forcing some air into your back body because we've actually contracted the front body because we're leaning forward. And then build yourself all the way back up. Another way that helps our breath is to start with our reach and our rotates. So I'm gonna take my left arm and reach it forward, rotate, and then come back.
Take the right arm, reach and rotate, and then it comes back. Now on an inhale. Inhale, I'm exaggerating the breath. I encourage you as well to exaggerate the breath so you fill up and try not to grip up. One of my favorite things.
We fill up, filling up the back body, pressing the arms forward. The ribs respond by pulling back and then release. Three times in a row. Feet press down and away as the arms press forward, go. Those are reaches.
Now we have one more reach and rotate to the side. So I'm gonna take my left hand and reach and rotate to the right and then bring it back. Taking my right hand, reach and rotate, and then come back. And then reach and rotate, come on back like my ribs are a spiral, and then come back. Giving those arms a little rest now.
Talking to the feet. Our pelvis also moves when we rotate. So this exercise, I call it like scissoring your thighs forward and back. So it looks a little like this. I'm gonna quiet my shoulders and just rest my hands down, and then you can see me reach my left knee forward.
And in turn it pulls my left pelvis forward. And then I'm gonna pull this leg back. And then this leg responds by going forward. So all this is happening because my feet are pressing down to the floor like they have sticky tape on the bottom of them. And so I can either push my foot forward, that brings this knee forward and then I can take that same right foot and drag it back and it pulls this leg back.
So I can talk to just one of my legs or I can talk to both of my legs where one pushes forward and the other one pulls back and then they switch. So I always have something to talk to when somethings pressing on the floor. Be sure at home, if your feet don't touch the floor that you have something underneath your feet, so of course they can. So now we're gonna combine those two motions together with your hands on your shoulders. Your elbows are a little bit in front of you.
So I'm going to reach forward with my elbow and then pull back, and then reach forward with the right side, reaching the right knee forward as well. So we're doing same side knee, same side elbow, and rest. And now we'll do reverses. So we'll do opposite knee, lifting the heel. Opposite knee, opposite, and opposite.
All to get information on the trunk for rotation. Stopping the rotation for just a little bit. We're gonna switch to side bending. So we'll take your left arm up high and start to side bend. Now if you're in a chair that has arms and you need it so you don't tip over, you of course press on it.
But if you can just reach your arm down to the side as far as you can, never let your feet stop pressing. You're opening up that left side of your body and then you push down into your feet to help yourself come back up. And then we'll switch sides. So we call this exercise spine stretch side, right? So we go over now to the left, pressing down on both feet, reaching, and then come back up.
One more time big inhale up and over. Exhale, return. And then the arms come back. Now arms come in front. We're going to turn our arms, like this one would be turning clockwise yet they're like turning away from each other.
Elbows pull back till their level with the ribs, chest stays tall. Remember that chest staying tall doesn't mean that you arch your back. Chest staying tall means that you fill up your chest and you expand it with your breath. So now we're gonna inhale, pull, look left, look right. Center, exhale.
Chest expansion. Inhale, exhale. So you use that breath starting now to the right, holding your breath almost if you will to get the expansion in the ribs. And then release. So the pulling and the twisting of your arms.
So important to get through that. So let's do that now as an exercise. Okay, so present your hands forward, turn your palms down. Reach your arms enough that you almost feel a stretch if you will or lengthening in the front of your hands. You're looking for sensation.
It may not be a big old stretch. It just might be sensation and also might be work. Turn my hands forward. I call this my stop sign hands. Like stop in the name of love, right?
And then we're gonna turn them back down. And then turn them back up. Now I'm gonna turn my palms this way and make them go in a circle. Inhaling, especially inhaling as the arms press forward because that inhale draws those ribs back without shrugging the shoulders up. The next one brings your palms together.
Elbows rise, just a little bit. Just enough, right? To get that work and that lengthening through the bottom of the wrist and the crease of the wrist on the top. Reach, press. Inhale, exhale.
Reach and press. Inhale and exhale. Now arms come all the way out in front. Lace your fingers, turn your palms to face away, and now slowly inhale your arms up like you're taking off a really tight shirt. And when you reach up, you want to be sure that you're not gripping, but that your feet are pressing down and your shoulder blades are actually pulling behind you as the arms go up.
And then we come down, turn the palms in. Now look at your hands and switch the cross of the finger, sometimes that's the hardest part, and then reach. If you wanna go up slowly, go up slowly. If you start to feel tightness in your arms and your shoulders, then do a little reach. You see how I'm reaching with my arm bones?
So reaching with your arm bones allows your shoulder blades to have some freedom so they can go up without arching your spine and then come down and then release. Always a good lengthener there. Okay, continuing now with some leg and feet motion. So we're gonna raise the left heel. I'm gonna bring my feet a little bit closer together.
As I raise my heel, I'm pressing down on the ball of that foot and then I switch. So this is an exercise in standing, we call running. But I want you to pay careful attention to the balls of your feet pressing down. I'm using two fingers 'cause I want the ball of the big toe and the ball of the little toe, if you will, to keep pressing down. And we're gonna do this 10 more.
One, two, three, four, five, six, seven, eight, nine, 10. Check in with your breath. Check in with the alignment of your ribs stacked over your pelvis. In your brain, think to yourself, "Hmm, I wonder if I'm overarching my back to try to sit up taller or if I can just feel the whole package of my ribs grow me up taller," right? So we want that rib package to kind of stay lifted over the pelvis.
My feet are pressing down. My legs are very active. Continuing now with this left leg, it's gonna go a quarter of the way out and then all the way out. Quarter the way in, all the way in. Other leg, quarter leg out, all the way out, quarter way in, all the way in.
Okay, continue. Inhale and exhale. And inhale and exhale. Inhale and exhale. Are you filling up or are you gripping up?
In this instance, we want it to be filling up. So the answer is not the second one, it was filling. Fill and out and out and rest. If you can, try to do both legs at the same time now. If you need to do one at a time, you certainly can.
So when you lift both legs up, it's now gonna take a little bit of work in your core to kinda lift your legs. So I'm holding my tummy, holding my ribs. It's kind of like I do up and out, and up and out, and up and in, and up and in. Up and halfway, up and all the way, up and halfway, up and in. One more time, up and out and in and in, and now all the way out.
Kick, in, return. All the way out, kick. Woo, little cramp in the thigh. All the way out. Right here, use this quadricep to straighten the knee, and return.
All the way out, kick, and return. One more time, all the way out. Kick, in, and return. Last one, all the way out. Reach, in, and return.
After all those, we're gonna go back to a rotation. It looks like this. Arms will come down partway, feet are pressing. I'm gonna use my ribs to reach and reach and then come back up. Okay, then I'm gonna use my arms to go down, pressing into the floor.
And now I'm gonna reach my left arm further down and invite that shoulder blade down as I start to turn my chest to the right. So I'm really reaching this bottom hand down by way of my shoulder blades, which ties into the side of my abdominals, and then my other hand reaches all the way behind me. If you've done a mat Pilates class, this kind of mimics the action of Saul. Take three breaths while you're here. Inhale, fill up.
Exhale, blow out. Can you rotate further? Inhale, fill up. Exhale, blow out. One more time.
Try to come up in that rotation, stack your ribs up and then return. Other side, going down, taking the right hand, reaching that blade. If this is all the motion you have today, then you just do this. If you can start to press your feet and go further, then you keep reaching that shoulder blade. Now down on this side, this right arm pressing down other arm, going back.
Stay here, breathe. Pressing, I'm wiggling my toes, pressing those feet down. So you're not twisting your head off, you're reaching the shoulder blade down and that invites more rotation. Do you have more? Maybe yes, maybe no.
Inhale three times. Stay rotated, start to come up, and bring yourself back to center. Rotation and rotation plus space is always a good thing. Now bring your feet closer together. Start to raise those heels up and down again.
And now you're going to reach one leg out, other leg out. I'm gonna put my hands on the side of the chair just to kind of keep me from some sliding. And I'm gonna work one foot back, other foot down. So these are these kind of ankle motions. They're just for range of motion.
It's just getting through the ankle doing it with the leg straight. Now both toes point. Do they touch the floor? Maybe yes, maybe no. That gets the front of your foot really long.
Can you flex them back? And reach your heels long as you reach through the back of your legs. Now can you hold this? And go up, down, up, down, up, down, up, down. Like you don't know that's up and down, right?
Now watch, we're gonna go out and out. Now we're gonna start here. So now we go up one, down one, up one, down one. If you press on your arms, if I exaggerated this, you'll see that it starts to be a little spinal rotation force, okay? So that's fine.
Make it be a spinal rotation force. So we lift the leg, ties the trunk. We call that trunk integration. Bringing pieces together to create new motions. Now we're gonna start with your hands like this.
And we're gonna call it stir the pot. Feet press down, stir return, stir clockwise. Now I'm gonna switch the clap of my hand because that's the side that I push to do the stir. All the stirring motions are not just straightening and bending your elbows, but it's reaching and rotating your trunk by way of inviting the shoulder blades to that party. So continuing on now with the legs again.
We're going to now lift the thigh up and down, going to our marching. Now this exercise is a little bit harder than it seems because you're shortening your leg all the way through a shortened muscle because you're in the seated position. So keep doing this for 10, nine, eight, seven, six, five, four, three, two, one. Now we're gonna add the arms to this. So if you can't put your arms behind your head and your elbows come forward, just bring your arms to your shoulders, elbows come in front.
So now I'm going to reach this left elbow towards this right knee. Looks like this, inhale. Do that same side over and over again till you feel like you're really making a good connection. The first time you do it, you might lean back, you might do it kind of jerky. But then after about three more, you really feel this diagonal connection from your upper side on the elbow side to your lower side on the hip lift side.
Let's do two more Rest and rest. We'll go to the other side. So hands on the shoulders, elbows a little bit forward, kind of inviting a little press forward. And then this knee lifts up. This elbow reaches.
Try to keep your eye gaze kind of the same. So you minimize collapsing, but you maximize rotating. You might notice that one leg lifts easier than another leg. That's great. Making a notice is important because we have to make a notice before we make any change at all.
One more time. Very good. Now with these hips kind of working like this, I feel like these hips have to lengthen. So I'm gonna take my torso, I'm gonna rotate to the right. I'm gonna let my left knee kind of come down to the ground off of the chair.
So my toe is curled up underneath me to give me something to press on. If you couldn't do that, you could certainly have your toe down but you might need a stick or a chair over here so you didn't feel like you were collapsing. So I like the toe curled up for several reasons. One, it gives me something to press down on. And two, it works the toe and the ankle range of motion.
Okay, on this side now. With this left knee down, this left arm comes up, eye side bend. I come up. This arm comes forward, I rotate. Back arm goes back, other arm goes forward, I reach and I rotate.
I come back to center, arm up. I stay gently pulled back in my ribs. Now pulling back in your ribs, it doesn't mean you have to grip anything, it just means you pull backwards in the ribs and you lengthen all the way over and then come up and then we rotate again. Reach, rotate, minimizing any neck and arm shrugging, maximize the shoulder blades, participating in the trunk rotation. And then return to center.
Other side, toes down. So this is my right leg down. This right arm comes up and eye side bend. As I lengthen on this outside, I am shortening on the other side and then come up. I am not using my other arm to pull me in any way.
The main area of contact is my butt and my pelvis on the chair and the ball of my foot pressing down. This is work, side bend. Breathing into those side ribs, opening them up and come back. Now this hand goes forward. It invites the shoulder blade.
I keep my ribs drawn back as I twist my torso any bit more in this direction. Reach, see my fingers, reach away, and then come back. One more time, arm up, side bend. Inhale while you're over here, exhale. Maybe I can snake that leg, sneak that leg back a little bit and then come up.
And then one more rotation, reaching out, adding the other arm back. And then twisting and twisting and reaching. And then come all the way back. So in this exercise class, on the chair, you see that we touched a lot of different motions of our ribs. We touched a lot of different movements of the hands and the elbows.
We're gonna do one other thing with our hands and our elbows again. And your arms are gonna start way up over your head. You're gonna make a fist like you're squeezing something and then you're gonna pull down. Inhale, exhale. Inhale, exhale.
One more time, feet press down. As the arms pull down, you hold. Now see my feet? Press them down, twist. Inhale, exhale, two, three, four.
I'm not leading this motion with my arms but my arms are staying in this motion as I use my opposite leg to pressed down, turning my trunk to the opposite side and then return. One more time each side. Pressing left to twist, right, and then center, pressing right to twist left, center, and then come down. So I hope you enjoyed this class done in the seated position. And it always gives us an opportunity at our desk when we're doing other things to realize that our breath and our rotations and our leg actions are still important regardless of the position we're in when we do our class.
Thanks for joining me.
Begin Pilates: Pilates ABCs
Comments
You need to be a subscriber to post a comment.
Please Log In or Create an Account to start your free trial.


