Description
About This Video
Transcript
Read Full Transcript
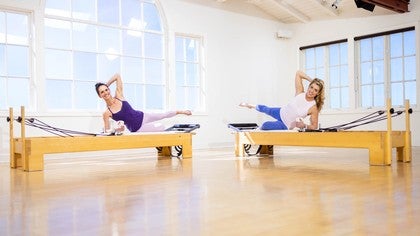
Welcome to Beginning on the reformer. This class is designed for people who have little or no experience on the reformers so that I'm gonna go slow enough and and really kind of dive into some of the details, but it would also be very useful for anyone who wants to revisit the fundamental principles of Pilates and try to go a little deeper into the work. So I'd like you to pay attention to what we have here. I do have a small ball, the ball will be used for, spacing of the knees. So if you don't have a ball available, a cushion or a towel or something, but that's really all we're gonna use that for.
So you have one less thing to think about. Let's stand with our feet underneath our hips and feel our ideal alignment went upright. So Feel that your head is back where it belongs. Your heart is open. Turning the palms forward helps with that.
Try to feel that you have equal weight on both of your feet. A little bit of weight forward, a little bit of weight back, and then fine center. And let's all take a breath together inhaling through the nose. With your exhale, will you roll down one vertebra at a time? Let your shoulders relax.
This first time, see where they wanna go, notice where your hands are. Allow your knees to bend so that you can find ease in your back in this forward position. I'm not trying to touch the floor. I'm just in a position where I'm in a rounded back. Here, will you plug your shoulders first and then activate your abdominals, and then roll up through your back.
Now the second roll down, I'd really like you to think about where your shoulders are the whole way through. So chest is open, gaze is forward. Use your exhale to roll down. Keep your shoulders on your back body. Plug back. Feel your abdominals engaged. Feel your head relax.
Notice that your hands should be facing one another. So make that arrangement. In hell here. And exhale to roll yourself up one bit at a time. So if you're at all unsafe on your back or your body, you can use your hands to support yourself.
Rolling forward, you might use your hands on your legs. You might bend your knees more. If you're comfortable with straight ish legs and without using your hands, please do that for this roll down. Inhale here, head is relaxed. Exhale, you're going to roll yourself up.
One vertebra at a time, and then stand tall. So let's come have a seat on our reformer. I am currently set with 2 reds in a blue spring, which is a little lighter than I would normally work, but this is geared toward first time or new people. So you really want to keep your spring lighter. When the spring is too heavy, you'll find that you slip and slide on the equipment.
And here, you wanna make sure that the spring is light enough for you to feel your legs are for you to not slip inside, but heavy enough to be able to feel the legs. So that doesn't work right for you, the spring we have, then you'll make an adjustment. Always important to think a little bit about where your straps are before you begin your workout because Oftentimes the straps can be off. So what I'd like you to do with your spring loaded is, spin around and look at your strap and gently with 1 or 2 fingers, pull on the straps and find the center of your reformer and do make sure that your straps are even. If they're not even, you're go going to want to adjust that because the uneven straps will certainly throw you off. That's something you should get in the habit of doing on a regular basis.
So I'm gonna scooch now to the very edge of the white part of my reformer. I'm gonna pick up the ball so I have it when I'm down there. And here, the best way to get into the reformer, the most safe way to get into the reformer is to kinda just, grab a hold of one of the shoulder rests and sort of slide yourself onto your side, roll your head into where the headrest is, and then settle in. We'll place this ball between the legs, between the thighs, technically. So think about not being at the knees and not being too close to the pelvis, but somewhere right in the middle. Just right.
Of moments here. Take your time noticing where you are. I like to use my hands next to the shoulder rest and feel the amount of space between my neck and my hands and the shoulder rest and try to sense that it's even. Also, since the amount of space you have next to your pelvis, on either side of the reformer. That's going to help you know if you're even enough.
And then always use your eyes to look up to see if you have the equal amount of bar on either side of where your feet are placed. Find a position here where it feels comfortable. To, use your feet to do a pelvic curl. So I I generally will be on the heel, but a little bit near the arch on the heel. So some people like to be right on top of the back of the heel, I like to be on the heel here, but, you know, you do you.
Give a little squeeze on the ball and then feel your 3 body weights. Your pelvis is heavy. Your rib cage is heavy and your head is heavy. So just be there for a moment. Lift your arms up to the ceiling and allow your shoulder blades to lift up.
And then feel your shoulder blades down on your mat. And then do that again. Lift up and down. One more time. Lift your shoulder blades up and then fill your shoulder blades down on your reformer. And since that, as you take your back of your arm down, and then your forearm down, you wanna be able to keep that open chest feeling.
If you keep your palms facing up, you will be more likely to be able to keep the shoulders open. When you turn the palms down, oftentimes people compress their chest to see if you can avoid doing that. Okay? So palms up perhaps. Palms down if you can do it. Inhale. With an exhale, will you engage your abdominals to flex your spine? That means round your low back Check-in your glutes and hamstrings should be relaxed. Lower back down. So here, we're going to exhale, flex the spine.
That means I'm grounding the low my pelvis shifts, but that's coming from my abdominals, not from my legs, and lower down. And let's do that just one more time. Exhale. And lower down. So now we'll go into the full pelvic curl here. So exhale to engage your abdominals first find the hamstrings and the glutes and bear down through the bar to lift up to your pelvic curl or bridge position. Inhale here and exhale to curl down. One vertebra at a time.
I realize my feet have slipped a little, so I'm gonna move them just a little bit. Take a breath and exhale to curl up. Backs of the legs are active. Squeeze the ball. We're endeavoring to find a hybrid here.
But because the bar is high, it is it does require you to lift a fair bit higher than if you were flat on the mat. So make sure you feel safe. Lengthen and lower yourself down one vertebra at a time. Use an inhale perhaps to initiate to prepare and exhale to initiate the abdominals, backs of the legs, squeeze the ball, lift up nice and high. Take a breath.
And then lengthen and lower down. Check-in with your shoulder blades and try to feel that your shoulder blades and arms stay grounded. Check Just feel since that this time. So here, I use my arms a little bit to help me find this height and then lower down. Beautiful. So let's go ahead and remove the ball. And just place it.
Hopefully, you'll be able to find it. I just put it down next to me because I do wanna retrieve that again. And here, you can hold the pegs by your ears. Or if your shoulders allow you, you can hold the frame of the reformer. Move your feet down so you have more the arch on the foot bar and roll your legs over to one side.
And then come back to center and roll your legs to the other side. So I'm purposefully saying legs because I do want you to feel the hip movement and then lean into the spinal rotation. Use your breath to pull back to center. What does that mean? Legs go first. And then you're gonna twist a little more by pushing into the outside and inside of the foot, and then you're gonna exhale to pull back to center.
Hopefully, using your obliques there, inhale to twist, feeling a nice little stretch, and exhale to pull back to center. Inhale to twist, nice, easy warm up. So I really do talk a lot about these exercises in another class that I do beginning with Matt. So if you want a little bit more detail, you should look at that class, exhale pullback, Breathing and moving is important here. Last one.
Exhale to pull back. Beautiful. Let's float the hands up to the ceiling and work our abdominals a little bit. So let's put the heels on top of the bar here. And bring your knees together and feet together. So my heels are just resting.
The back of my heel are resting on the bar, and then settle your shoulder blades onto the mat. Take a breath. With an exhale, we'll lift the head and chest. Hopefully, you feel you can lift with ease here and lower down. Should you feel neck tension? You're gonna try to lift a little higher. You're gonna ground through your low back.
Perhaps you'll need to use your hands. As a cradle to hold your head. And certainly in that beginning with math class, we've done a towel modification, which is a little tricky on the reformer. One more time, we're gonna lift and hold now. So can you lift and hold this shape? Will you breathe in for me?
And exhale deepening the abdominal connection. Inhale and exhale reaching through those arms. And one more breath inhale and exhale deepening the connection, and we'll lower down. Put your hands together so that you feel all five fingers connected in the same spot. Keep your elbows straight, but plug your shoulders or ground your scapula for now to your back body.
Take a breath. Lift the head and chest. You're gonna reach your hands as high up beyond the knees as you can. Again, no neck tension. Take a breath. And we're gonna exhale and twist to one side inhale through center.
Exhale. 2 twists. Inhale to center. Think about keeping your low back grounded as you twist and as you come back through center, maintaining the height of the curl. We'll do just one more on each side. Here we go a nice big twist.
Back to center reaching and a nice big twist back to center, lower down. Put your hands somewhere comfortable for you just to do 1 or 2 more spine sways. Again, I highly encourage these hips waist spines ways just as a nice little reset of the pelvis and the spine, use it regularly. So if you can reach down and find your ball, please do. Or you could use a a towel or a cushion or anything. Let's place that between the thigh bones. Again, I'm in the center of the thigh. I'm gonna find my heels.
Look at your feet and make sure that they look centered. And then once you feel that they're centered with the heel on the bar, put your head down. Place your arms by your side. Palms facing up. Reorganize your shoulders.
Feel your head heavy. Feel your pelvis heavy. Now here, will you all slide out to straight and hold for a few moments? So one of the things I like to do here is really pay attention to what it feels like Your body feels like when you're standing straight here. So can you really feel that you're endeavoring to keep your pelvis grounded? Can you feel head heavy Parms are maybe facing up, chest is open. If you can keep the open chest and put your palms down, please do.
Sense that you're squeezing the ball a little bit, and sense that you have equal weight on both feet. Try to feel your backs of your legs supporting as you come in. Press out. Perhaps that's an exhale. And come in. That's an inhale. Exhale to press out and inhale to come in.
So you're breathing and moving. If my breath patterning is confusing you, don't worry about it. Just breathe and practice the movement. You're simply straightening your knees. Strengthening your legs.
You shouldn't feel any discomfort in the knees. If the knees are bothering you, there's a chance you're not using the back of the leg or perhaps you're pressing too much spring around. So you might think about lightening your spring one more time here, and then we're gonna gently come on in. We're gonna put the toes on the bars to placing the toes on the bar. When I say toes, I don't actually mean the toe toe.
I mean the toe toe. That sounds funny. I really want you to feel the ball of the foot. So it is I should do it with this foot here. The ball of the foot is on the bar with some activity in the toes. So find this sweet spot where you feel you've got a connection to the ball of your foot and your toes are available. Squeeze your ball. Feel your pelvis grounded, chest is open, out we go.
When we straighten our legs, we're endeavoring to keep that ball squeezed, Drop the tailbone down, feel the inner quadricep pulling up through the kneecap, use the backs of the legs as you come in. So what I see happening the most is the pelvis wobbling all over the place, especially when we have too much spring. So oftentimes, my new clients will say, I don't really feel this in my legs, and their pelvis, they're still learning how to move the pelvis. So or how to stabilize the pelvis. So if this is happening to you right now where you feel like, this feels really light, Put some more attention on where your pelvis is and which muscles you're supposed to be using to do this. So Backs of the legs initiate at the top, squeeze that inner quadricep in the ball, create a little bit more intention, As you come in, you're controlling the movement with the back of the leg. The pelvis is grounded.
Breathing and moving. So our abdominals are engaged, but I'm not gripping for dear life, my abdominals, instead by grounding through my head in my pelvis, With a little support from my pelvic floor, I feel my abdominals engaged. Last one here. And let's go ahead and make small v. So just once again, place that ball out of the way, slide the heels together, feel again that first metatarsal, which is that ball of the big toe should be connected, chest is open, squeeze the heels tightly before you press out, and then press out.
When you straighten your legs, you wanna feel those heels glued together. You wanna feel the inside of the leg ideally matched up. Tailbone is down, rib cage is heavy, head is heavy. Everything's in place, gently come in. So what's interesting about Pilates is the magic really happens in the eccentric control portion, and I think that in a lot of more traditional forms of exercise, we don't pay attention to that as much. And in Pilates, you really wanna pay attention to where it's seemingly not that hard or not that important.
And that's when it's pretty amazing the work. So what that means is as you come in, you're controlling the spring. You're pushing in against the spring. Versus letting the spring just control you in. So think about that a little and certainly come back to this class and back to this idea. And see if it becomes a little bit more apparent as you practice more.
Breathing and moving, I like to exhale to press out and inhale to come in. So let's put your heels wide on the bar. So everybody's wide on the bar is gonna be different. Oftentimes, we're coaching people to go really wide and there's a strictions somewhere in the hips. So my recommendation actually is to lift the feet up, open the feet, and legs out to the side.
Feel where you feel that it's easy to do this. Comfortable and then see if you can find a place on the foot bar in that shape. So you're at ease in your hips. Look up and make sure that your legs feel pretty even on the bar. Doesn't need to be perfect.
Organize your spine, all your pieces. Feel. Here, my feet are flexed. That means my toes and ankles are being pulled back, but then I keep them like that as I straighten my knees. Stay with the straight knees for a little bit. Feel your pelvis heavy.
Feel your abdominals active. Feel your sternum. Kinda grounding your rib cage a little bit and your chest is open, breathing, and moving. Check-in with your legs and make sure that they're both working equally to the best of your ability. Many people will overwork one leg or the other and not have any idea.
When the spring is a little bit lighter, sometimes it's hard to know which leg is working more if there is one. So, you might find that, just, like, actually focusing on one leg a couple times is useful and then focusing on doing the movement with the other leg and then kind of finding that marriage between the two is a useful thing to practice. So let's do 2 more here. Reading and moving. We're just straightening the legs comfortably, controlling the spring as you come in. One more straightening.
And controlling to come in. So bring your feet close together so that they're touching. Look up and make sure you're centered. And then separate your feet a little bit for calf raises. Once again, you wanna have the ball of the big toe first metatarsal on. Prest your legs to straight stay here. Here, when we're doing our calf raises, first assess you have equal weight on both legs.
You've got your nice neutral spine. You're grounded. You're comfortable. We do wanna be lifted as high as we can without rolling out on the ankles. So there's this feeling of tethering the ankle bones.
It could be useful to put a ball between your legs or a ball between your ankles if you don't quite understand what I'm speaking about. Shortly, though, you wanna feel that you have equal weight across all five metatarsals. Lower your feet under the bar, heels under the bar, and then you're gonna lift back up. When we do this properly with inner thigh engagement, it's going to feel for most people a little bit when you lift back up, like you're rolling slightly in with the knees and squeezing an imaginary ball. Lower the heels down, and you might be rolling slightly in through the big toe, squeezing imaginary ball. So think about that a few times.
And if you feel you need to put your ball back between your thighs, I would recommend that anytime do calf raises with that. It's useful for a lot of people. Here's the thing, though. If we're training for life, we have to make sure we learn how to do things without props because we can't necessarily walk around with those props. So we're doing one more calf raise here, nice and controlled, press up and stay.
So just bend one knee, move the foot that, so I bend one knee and my other heel is under the bar. I'm gonna move my foot up on the foot bar so that I feel really secure with that foot. So I'm stretching my left foot, my right foot, the knee is bent. And the foot is just kinda comfortably on the bar for me. So just really sink into the heel that's going under the bar in order to feel that beautiful calf stretch. Play with straightening your knee completely.
If you tend to be a hyper extender, you might keep that knee just a tiny bit soft But if you can straighten the leg completely, that's great. Breathing in and breathing out. You might try bending the knee a little bit and enjoying a little stretch through the ankle, perhaps that feels interesting, breathing in, and breathing out. And let's change sides. So other side, I've moved my foot.
So I feel like I can just relax here. Sometimes you get to just relax. Feel your pelvis is heavy. Your chest is open. Your head is heavy, but easy movement. Like, you can roll side to side without a problem, breathing in, drive the heel underneath the foot bar, feel the stretch, Breathing out.
Bend the knee just a little bit and see if that changes the stretch in a way that feels useful to you. Remember to really think about how you feel in your body. And if you feel stressed somewhere or uncomfortable, there's always another path, so you just have to seek it. Press both legs to straight, find a comfortable position for the feet on the bar, bend the knees in here. So Let's work single legs, and we're gonna keep the same spring. If you feel that it's too heavy, you can get up and change it. But for now, I think we'll keep the same spring.
I'm on 2 reds in a blue. So two heels are on the bar. Let's keep the right foot on the bar. Lift the other leg to a tabletop. With the right foot on the bar, we're gonna feel that pelvis grounded, feel the support system of our core, and press the leg out to straight.
As you come in, the key is getting the hand in the glute to be engaged. So pressing out with some hamstring and glute engagement and pressing in hamstring and glute engagement. Some people will feel their knee is when they do single legs. Usually, it's an, indication that the spring is a little bit too heavy, or you're not using the back of the leg properly to to participate here. So you might just really touch that tissue and see if you can get it to wake up. Or you might choose to, lighten the spring.
We're gonna do 5 more here. Here's one. Nice and controlled and methodical and exhale to feel the back of the leg. Try to feel that you're squeezing an imaginary ball Just two more here. Nice and slow. So I usually use a fair bit more spring when I do my single legs, but I'll tell you with the thought that I'm putting into this. I really feel them today.
I hope you do too. Beautiful. Let's go ahead and do the other side. So just look up, make sure you feel centered and aligned, put your heel on the bar, lift your other leg to tabletop, ground your pelvis, feel your body, Feel your neck and shoulders at ease and out. We go back of the leg is working and controlling as you come in. Use an exhale to press out and an inhale perhaps to come in.
Think about the upper inner thigh at the top, the inner quadriceps, and gently come in. Remember back of the leg initiates an even more important on the way in the back of the leg is participating. And here's 5. Breathing 4, inner thigh, pelvis, 3. Ease across your neck and shoulders.
And one more time, please. We'll come all the way in here, and then just roll yourself. Your legs are gonna go to one side. You're gonna use your hand on the shoulder rest. And come on up to have a seat.
So we will change the spring here. We are going to be using our hands and the straps to challenge our abdominals. So one spring is gonna be ideal for that, so I'm gonna leave one of my red springs on and take the other 2 off. At some point, we wanna build up to use the same spring, that we'll use for hip work a little bit later. But it's best to start light on this.
So one spring is ideal. You could use a lighter spring or more if you choose. So we're gonna lie back down on our reformer. And once again, take the few moments to say am I straight, am I settled, You know, do I feel aligned? Then you'll retrieve your straps, which you've already checked for length, and you'll take your hands and the strap and set your arms so they're just above your shoulders.
A little bit of space between your shoulders and the shoulder rest. That's important here. So make sure you're not right up against it. Plug the shoulder blades and arms to to the back body. And then here with support from your abs, lift your legs to tabletop.
So just holding on to this shape is a challenge. Stay here and breathe. Make sure you don't feel tension in your neck or your back or anything. Breathe into using your abdominals. With an exhale, we're gonna just move the arms down, opening the chest until you maybe touch the mat.
Gently come up. What I often see is the arms going and the shoulders lifting forward. That is not good. So you really think about what your shoulders are doing. They're still on your back body. There's a point midway through where you've turned the corner. What you mean, what I mean is you open your chest as you reach those arms away from you in how up engaging the abs and hail, there's halfway point turn the corner, opening the chest as you reach into the back body. Inhale up, and exhale opening the chest.
So this is really beautiful abdominal work. It does look a little like arm work, but the focus here is abdominal work with some arms. Okay? Now let's take the arms up, take the feet down for just a moment check-in. Am I okay here? If you feel too much tension, you might just go back to that same exercise.
If you're ready to push it, we're going to lift our head and chest. So with the arms straight up, shoulders are plugged, re engage your abdominals, lift your two legs up. Take a breath. Exhale to lift your head and chest, grounding through your low back, finding yourself in a gorgeous chest lift. Lower yourself down.
Exhale to lift the head and chest. You still have to turn the corner with the arms there. Opening the chest as you reach. And lower down. That's the inhale.
Exhale to lift. And lower down. We're gonna hold this time. Exhale to lift, and we hold inhaling. Deep in the lift with each breath, feel your pelvis, Feel your legs.
Keep reaching with your arms. One more breath. And we lower down. Beautiful work. So let's put the straps back on the pegs, roll to one side, and adjust the spring for the hip work. So that feels really nice in my abdominals.
I'm adding a blue spring. So I'm now on a red and a blue spring for hip work. Now if you happen to be a larger body, longer dense legs, You might feel like a little more spring is is worth trying, but with the hip work, it's tricky because more spring is harder, but easier in different ways. Less spring is harder, but easier in different ways. So I find that for most people, a red and a blue is ideal, which is the equivalent of about 1a half springs.
Give it a go, but change as needed. K? So I'm gonna once again roll myself back into the reformer, getting quite good at that. I hope settle in, make sure that I feel that I am, you know, aware of where I am in space. Proprio section is a big part of Pilates. Grab the straps with your two hands, use your 2 feet on the foot bar, press out. Now if you've never actually put your feet in straps, it's a little bit weird at first.
But it's quite lovely once you get used to it. Let's lift one foot up and put that foot in the straps and feel the spring with that foot. So now push into the spring just enough to feel like you have control of it and lift the other leg away. So if you don't feel like you can do that safely, then perhaps you're not ready for feet and straps just yet, or you need to practice a few more times. But if you feel that you can do that safely, then here we are.
We're going to have the straps somewhere comfortable on the feet with the heels together, flex your ankles, and then bend your knees. So we're going to feel that I'm not super wide with my knees. My knees are gonna be just outside of the ropes, basically. Flexing the ankle ankles is useful here. So try that, but if too much to think about. Let it go for now.
Feel your pelvis heavy. Feel your rib cage heavy. Feel your head heavy. I'm looking for the knees to be about over my hip not too much further than that. Chest is open. We're gonna press the two legs to straight.
We're gonna come back in controlling the spring. Feel this point and then actively use the back of the leg to press out. What are we trying to do here? By pausing in this bent position, you're gonna be able to access, hopefully, the back of the leg to initiate the push out to straight. So let's think about that a few times. Pause. Feel the shape. Feel the pelvis.
Use your legs. Press out. Sometimes we're a little quad dominant, and we end up using just the front of the leg to do this. So you really wanna try to find the tone the access to the back of the leg. Also check-in and make sure both of your legs are participating. Sometimes we have a lazy side. I know I do.
One more time. Frogs will keep the legs straight and stay. Here I like to point the feet, and we're gonna work on an arc. So the legs are straight. The feet are pointed.
We're gonna come up not even to 90 degrees. Don't make that your goal. Make it your goal to know that your low back is staying as it was. So there's a little bit of space. Your tailbone is heavy.
Your abdominals are engaged. Both legs are working. Try to have your knees straight if you can. And then you're gonna press down through center to about where you just were at the end of your frog. Inhale to come up, tailbone stays down, try to straighten those v's.
Use the exhale to use both legs to come down maybe a little further this time. Inhale to come up, keep the heels together, keep those legs energized, and exhale to press down. Two more just like that. Nice little arcs. So this just gives us an idea of how high we can go before the pelvis gets squirrely, and you may not quite notice where your pelvis is yet.
I think I'm gonna have you do a couple more because I would like to queue that as you come up, it feels like you have to push your tailbone down a little, or most likely it will lift. And as you go down, it feels like you have to keep your abdominals engaged, or you'll catch. So feel tailbone down as your legs come up, and then feel that point where maybe you'll catch and try to manage it by staying engaged in your abs. We'll do one more now, please. Come up to your middle range, little tiny bit higher than the middle range, and we'll open the legs out to the side.
And then we're gonna use those inner thighs to squeeze the heels together. We'll just do five there. Open out to the side and squeeze both legs equally. There's 2. Find some breath, please, inhale to open.
3. Feel your chest. Open. Feel your rib cage. Feel your tailbone down. Your head heavy.
Last one here. Bend your knees for me. Allow your knees to be open and your legs set your feet to be together. This should feel like a real nice rest position and also an opportunity to kinda just stretch and reset. It's also an easy place to take your feet out of strap.
So push out a little, find one strap, and take it off the foot, reach down, find the foot bar. Avoid going to the wood frame. See if you can really find the foot bar. Take the other foot out, and then bend your knees in. See if you can find your straps. Hopefully, you can proprioception, meaning you know where it is right by your ears.
Roll your legs to one side and bring yourself up to a sitting position. And now let's move into some stretches. So one spring for that is ideal. I have one red spring. You can choose whatever color you'd like.
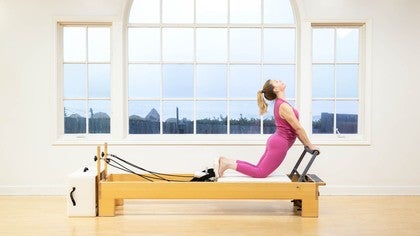
And, setting up for the standing lunge, take your foot up near the foot of the reformer, and then take your other foot and put those toes up against the shoulder rest. You'll put your knee down. And then you're just gonna kinda find a lunge that feels good to you first. Okay? Where do I feel? Good. Now check-in with your back knee and make sure you're not leaning all the weight of your body on that knee. Sometimes people will feel feel knee pressure because of that. So put some weight in that front leg.
And while there's a little bit of weight on that back knee, it's really just the weight of the leg. It's not the weight of the body. So lighten that. So see if you can maybe lunge a little deeper now. And then will you think about taking your pelvis slightly forward with your abdominals? Look forward Open your chest, maybe even slightly gaze above the horizon, not fully up, but above, and then see if you can go a little deeper.
So my front knee is bent. I have half my weight on my front leg. My two hands are on the footbar. My back leg is getting getting a really beautiful stretch in my hip flexor. You're welcome to use the glute back there to help you stretch more, you're welcome to not use the glue.
Decide what suits you. Take another breath, see if you can go maybe just a little deeper. For me, the longer I stay, more I can kinda sink into the stretch. And I'm enjoying the view. So find something to look at.
Let's move into the straightening of the front leg. So we're going to look down. Gonna flex the ankle. And as we do, we're stretching the front leg to straight. Tipping the pet the tailbone back, really getting a nice stretch through the hamstring here. Now I took my head too low.
I just realized. So I'm gonna change my gaze and look just above my hands here. Remember where your eyes go, your head will follow. So if I take my eyes down, my head's gonna be alignment. If my eyes are in alignment or if my head is in alignment with my spine and my eyes are looking in the direction that, you know, in the proper section, then everything is more likely to be where it needs to be. Bend that front knee, come all the way in, and we'll just do that for one round today. And let's go to the other side.
So here, you're gonna put your foot up near the foot of the reformer, and then the other foot up against the shoulder rest bend that front knee and allow the back knee to rest down. Remember, your gaze is going to be forward. You're gonna try to sink a little deeper into the making sure that you feel stretch. So stretch in the front of the hip, perhaps stretch in the back of the hip, but not a kink in the back. Here to deepen the stretch. Think of pelvis slightly forward and perhaps sink a little deeper. You do wanna feel that you have weight on that front leg.
Not as much weight in the actual knee of the back leg. Let's take one more breath and go just a little deeper. Moving into the hamstring stretch. So you'll look down, press your front leg in the direction of straight, flexing your foot, Tip your tailbone back so your back is straight. So I'm looking down so I could see my leg, but I realized my head's too far down.
So let's be aware of where our head is in relationship to the rest of the body. Noticing that where your eight eyes go, your head will follows, So be mindful of where you're looking and try to make your gaze in alignment with where you're hoping your head will be. Take a breath. Go just a little bit deeper. And let's come on out of that.
Beautiful. In, it requires you to have a fair bit of control, and that's where we're headed now. I'm on 1 red spring right now. I think most people, it's ideal to use a green spring or If you don't have a green spring, you might wanna use a red and a yellow, so just a little bit of extra help. If you're unsure about this and you feel unsafe, You can use even more spring without actually moving the carriage.
So feel free to do that. Okay? So I'm on 1 green spring right now. I'm going to place my hands on the footbar, and I'm going to step up carefully onto the platform. I'm going to control my body as I step back and place my heels up against the shoulder rest. Now, for many people just getting into this shape, feels like a lot So if it feels like too much for you, feel free to add a spring so you feel secure. I've got my heels up against the shoulder rest. I'm gonna try to lift my five toes a little bit.
And then I'm gonna change my gaze and and look forward just beyond the bar so I can try to feel what it feels like to make a more flat back here. So my tailbone is back. My chest is open. Now if I can keep that flat back, I'm going to shift my body until it feels as though my body, my upper body is in a straight line with my arms. Once I've achieved that, go ahead and hold the bar with your hands rather than keeping the hands open.
Just slide the carriage back a little and pull the carriage in. Now, again, if you feel unstable here, add a little bit of spring and just hold this as a stretch. You don't have to move. But if you feel comfortable, we're inhaling to move back. As you pull in, you're using your inner thighs and your abs. Inhale to move back, think of squeezing the legs together a little bit and use your belly muscles.
As you come in, think of tailbone backing up so you're getting a nice stretch. Also notice that when I move back with my legs, my upper body stays completely stable. What I often see with is a lunging of the arms or a lunging of the chest, and that can put the shoulder in harm's way. So keep your upper back nice and stable, and pull in. Whoops.
Inhale back and pull in. We are going to carefully step forward with one foot and then the other foot and then carefully step off of the reformer. Take a moment because you have been upside down and you wanna make sure that you don't feel light headed off that? 1 red spring for our arm work. So I'm gonna recommend a red spring.
If this feels too heavy, you'll move to a lighter spring, a blue spring, which is a half. We're going to have a seat for an arm sitting series with your bottom right at the very back edge of the white part, reach forward, hands and straps, sit up nice and tall, straight arms, and we pull the arms behind us. Now what happens if you can't sit up straight here? This is so uncomfortable. You could bend your knees.
You could use a towel and sit on that. You could sit on a block. But if you're able to sit up straight, please practice it. So two straight arms are pulling behind us, opening the chest, gaze is above the horizon, inhale forward. I'm not thinking about my hands.
I'm thinking about opening my chest as my straight arms pull back. Inhale forward. And as we pull back, we're opening the chest, really activating that back arm, So this is to the back body and pressing the arms into the mat. So think about that feeling here. Get to know it. Just one more, please.
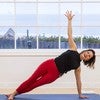
Beautiful. Alright. That's it for now. We're going to move on because I wanna hit all the different pieces that one would like to hit. So here, we're going to be a little creative doing our sideline work. So, if you have a mat available, you may find it's more comfortable just to lie down on your mat.
But since we're going to stay on the reformer, I'm gonna suggest that you put your bar down all the way. K. And I'm going to add just one spring for stability, so I feel comfortable. So it's a little bit more stable. So here, we'll lie down so that your head can rest on your arm and your legs will rest on the foot bar.
So we're borrowing from the mat work, but we're doing it on the reformer. Okay? So here, will you if you wanted to have your arms straight or wherever you need to be. That would be fine. And like I said, if you wanna be on a match, that's fine too. I'm holding the peg with my hand and letting my head rest on my arm, and that feels nice to me. Think about where your hips are. They should be stacked.
Think about where your shoulders are. They should be stacked. Create the little mouse hole underneath your rib. And you can do that here by pushing down through the leg that's on the foot bar, and it's gonna create just a little bit of space there. You can put your hand on that shoulder rest if you want, or you could put it down in front of you.
I prefer down in front of me, so you choose. And then see if you can just kinda feel by pushing down with the foot or the leg, it it creates a little tone in this oblique here. So I wanna keep that tone as I now float my legs up. I'm gonna flex 2 feet, reach through those heels, feel the shape, and then we'll lower the legs to tap the foot bar. It's not a lot of movement.
And we're gonna lift away. And let's do just a few more there and lift away. And lift away. I'm endeavoring to be in a straight line. So I'm trying to avoid my feet being in front of me. One more time here, please.
Lift away, and let's rest. So we'll just go to the other side. A little hard to roll on this this one, so I'm going to just kinda come and walk around to the other side, and then we'll be able to go ahead and lie down on the other side. Okay. So we're going to make our way onto our sides just like we did on the other side. You're you may hold on to the peg. If that suits you, you can do whatever you need to do with your arm, or remember, you could always go down to the mat.
So I'm stacking my legs And I'm feeling my body. What's nice about the shoulder rest I forgot to mention is if you feel your body leaning into it, it's an indication that you're probably not so stacked. So you can try to figure out how to to feel that you're just between these two panes of glass, if you will, here, that are your shoulder rest. So use your bottom leg or first think about your pelvis being stacked and your shoulders stacked. Use your bottom leg to press down and help pull that bottom rib up like a little mouse hole down there.
Use your hand either on the shoulder rest or on the the platform or on the reformer flat. And I'm pushing pushing through my leg, and I'm feeling the engagement in my oblique. And then now I'm going to keep that engagement, and I'm gonna float my legs up. Flex the ankles because I like it, push through the heels, feel energy through your whole body, tap the footbar, and we're gonna lift. And exhale to lift.
And breathing and moving, there's 3 And we're just gonna do 2 more here. Just a handful. And one more time, please lift. And we'll rest. So let's climb up out of the reformer.
And the final exercise is using the box, a little bit of back extension. Probably a good idea to put the bar up first, actually, because sometimes that's difficult to do if you have the box on already. So bar is up, and we'll be on 1 spring for this. Any spring you want, red or blue or green, the spring is more of an assist than it is to challenge the exercise, so be mindful of that. I don't think it matters too much.
Which color you choose on this one, though. So we're gonna line the box up so it's up against the shoulder breath, rests, and even. And we're gonna climb on the box on our belly with our face facing the foot bar. So once we climb in oops. You wanna arrange yourself so your chest is off a little bit, about halfway and feel so for me, it's like my nose is just above the bar. I'm gonna put my hands on the foot bar. I'm not going to use the spring yet.
I first wanna feel a basic light back extension. So what am I doing? I'm keeping my face close to the bar. Not resting. I'm going to press my pelvis into the mat and try hovering my legs just a bit. We're going to think of chest forward, hands are gonna press a little bit to help you create that. Elbows are coming down, and it's like I'm pulling my body forward.
Looking forward slightly. Let's try that again. Little upper thoracic extension. So chest goes down. Shoulders pull away from ears.
And I'm pulling my body a little forward bearing down a little bit into the foot bar. One more time. Creating that same shape Now the goal is to keep that shape and press those arms to straight and gently come on in. So the shape of the body is staying exactly the same. We're in this beautiful little thoracic extension, Your abdominals are engaged here. If the legs if lifting the legs feels like too much, just relax them. But if you can keep them energized, that's a really nice variation here.
One more time. It's a beautiful little back extension. And then let's go ahead and come on in. Climb off of our reformer, stand just like we began with our feet underneath our hips, feel. Open through your chest. Take a breath.
Let's roll down together. Roll head, upper back, Bend your knees as needed. Have your hands face one another. Feel your abdominals engaged. Take a breath.
And roll yourself up. Looking forward, chest is open. Let's do it again. Head, upper back, Remember, it should feel like a good idea. Feel free to bend the knees, plug the shoulders, engage your abdominals. Notice if it feels different than when you began.
And roll up. And one more, please, inhale. And exhale. Standing tall. Your eyes just above the horizon.
Take a breath. Thank you very much for playing, and I hope to see you again soon.
Beginner Reformer: 40-Minute Classes

Mention
 |
Sarah Bertucelli (Teacher) |
 |
Darlene |
|
|
Vanessa R |
|
|
Stacy F |
 |
Tara A |
Comments


You need to be a subscriber to post a comment.
Please Log In or Create an Account to start your free trial.
