Description
About This Video
Transcript
Read Full Transcript
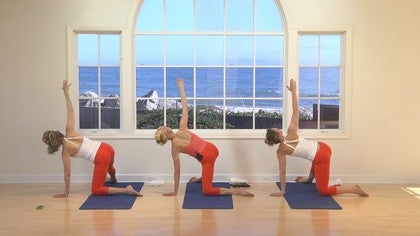
Welcome to Pilates Anytime. I'm Elizabeth Larkam. I'm here with my colleagues Ronda Priestner and Gay Barnes. And we're on our best behavior to show you and do with you the Pilates mat using the wall to correct computer posture. So any time that you feel you need a break from your laptop neck and computer shoulders, just join us.
And we'll refresh your spirit and reframe your posture. And you'll be on your way. Join us now. But first, let's just put these things away. We're going to start standing at the wall.
And for that, you might need a towel for your head. So come on up to stand. And plant yourself, heels against the wall, the back of your sacrum against the wall, the spine between your shoulder blades against the wall, and intend the base of your skull up and back to the back, so the back of your neck lengthens, bringing the back of your head in the direction of the wall. Now, this is asking a lot, truthfully. So you may be more comfortable to have a folded towel and then bring the wall to the back of your head.
So then, without straining your neck or causing a double, triple chin, you can elongate the back of your neck appropriately, not flattening your cervical curve, but having an elongated cervical curve. So then your chest bone is directly above your pubic bone. And, ideally-- now come away from the wall-- ideally, when you stand, the axis of your femurs, your hip joints, will be directly above the axis of your ankles so that, without a forward shift, you can hover your heels and then lift your toes up. Come away from the wall now. Put your towel down.
And here you are standing, with the pads of your fingers on the corners of your pubic bone and the heels of your hands on the bones at the front of your pelvis so that you can feel and intend to have all four points, all four bones, level with respect to the wall in front of you. Now, without shifting backwards, as you inhale, lift your toes up. As you exhale, lower your toes down. Minimizing your forward shift as you inhale, hover your heels. Exhale to bring your heels down.
Without shifting backwards, inhale and lift your toes. Immediately, your deep abdominals will activate. Exhale to lower your heels. And minimizing the forward shift, inhale to hover your heels. We'll do this once more.
This subtle weight shift on your feet is intended to align your central axis directly above the axis of your ankles. Lift your heels, minimizing your forward shift. So at all times in this maneuver, you can balance your femur heads high above the axis of your ankles. Now come down onto your mat. And we'll angle this direction so that you can see that we're in a neutral pelvis, neutral spine, for femur circles, knee circles.
Come to lie on your back, aiming your sitting bones right over the corner of your mat. We're angling this way so that you can see us and we can see you. When you do this at home, you don't have to be on the diagonal, unless you'd like to join this group. All righty. So your palms are on your shins just below your knees.
Keeping in a neutral pelvis, neutral spine, as you inhale, draw your knees towards you and open. As you exhale, internally rotate, dorsiflex your feet, drawing the little toe side of your foot back. We'll do two more of these. And you might ask yourself, why are you doing this? I thought the focus was on mat for computer posture.
Here's why that is. It's so important to give some elasticity to the pelvic floor-- particularly, the posterior pelvic floor-- and some mobility to your hip joints. Now reverse direction. As you exhale, internally rotate, dorsiflex your feet. As you exhale, point both feet and draw up.
I think I had the breathing wrong, sorry. As you exhale, lower your heels, intensifying your abdominal seat belt. As you inhale, knees go wide apart. One more round of these-- exhaling drawing your ribs towards your pelvis. Inhale wide to the side.
Now roll to the right side and come on up from here. Now we're going to stay on this same diagonal. And this diagonal will be the top of our head towards this corner. And we'll be lying on our left side. Having taken care of, in a short period of time, the pelvic floor and hip mobility, now we'll address rotation of the thoracic spine, because rotation is the gateway to extension.
Come to lie on your side. Those of you joining us at home, feel free to put a cushion or pillow between your head and your upper arm. Bend your right elbow so that your fingers can be on your shoulder. As you exhale, roll towards your front, aiming your bent elbow forward. And as you inhale, aiming your bent elbow towards the ceiling, and roll slightly towards your back, turning your chest bone towards the ceiling opening your elbow behind you.
As you exhale, roll towards front. The right lung nestles around your heart, broad between your shoulder blades. As you inhale, roll in the direction of your back, aiming your right knee forward as you aim your right elbow back. Now, do one more of these. Exhaling, your right knee slides forward as you roll to your front.
And as you inhale, roll from your side in the direction of your back, fanning wide across the front of your chest, elbow open to the side. Now we're going to stay on this same side. Leaving your head on your left arm, slide your right hand forward in front of your chest bone-- the xiphoid process, to be precise-- sliding forward. Now as you inhale, reach your hand towards the ceiling as if your fingers could sweep the sky. And turn in the direction of your back, aiming you right knee forward as your head, neck, and eyes turn to see your right hand behind you.
Inhale to sweep to the ceiling. As you exhale, slide your right hand along the floor. And if this position is uncomfortable for your neck and for your head and your left arm, roll to your back now. Remember, you could always bend your left hand, left elbow, and cushion your head with your hand. We'll do one more of these, showing how you could rest your head into your left hand.
Exhale to roll forward. Now as you inhale, the light from your chest bone illuminates your thumb, supporting your head. And the light from your chest bone and the light from your nose, Rudolph, continues to illuminate your thumb, aiming you right knee forward, and your right arm back. Sweep your hand to the ceiling. Using your hands to help, push up.
And here you are on the new side. We'll just turn our back to you for a different view. Here you are sliding long on your new hand, new side. And as you wish here, perhaps you could start this time with your underneath arm bent and your palm supporting your head with cushions, pillows, towels, as you like. Bending your left elbow, as you exhale, roll towards your front.
Your left knee will slide forward a little bit. And as you inhale, aim your bent elbow forward. Aim your bent elbow to the ceiling. And cradling your head in your hand, turning towards the ceiling so your left lung turns behind you and your right lung turns in front of you. Again, twice more, exhaling to roll forward, both lungs turn in the direction of the floor.
And inhale, aiming your bent elbow a long way from the center of your chest bone, a long way from your spine, turning the lower ribs, middle ribs, upper ribs, head, neck and eyes. Then, aiming your eyes to the right corner of your eye sockets, that will bring you back. You can keep your right arm here or straighten your right arm and slide your left hand forward. As you exhale, slide your fingers forward, turning your chest bone, your lungs, towards the floor. Reach out long and illuminate your thumb with your chest bone, with your gaze, turning your lower ribs, middle ribs, upper ribs, head neck and eyes, following your thumb, but only going so far with your hand as you can see it with both eyes.
Sweep your hand to the ceiling. Exhaling, slide along the floor, increasing the distance between your shoulder blades. It's as if your fingers started at your spine, which actually, in terms of the fascial connections, they do. Keep your hand in the orbit of your lowest ribs so your hand is even with the level of your lowest ribs, not even with your shoulder. Turning your right lung to the ceiling, your left lung back to the floor, illuminating your thumb with your gaze, sweep to the ceiling.
And we have one more of these. As you exhale, slide your hand further forward, taking the longest possible arc, driving your left knee forward. And as you sweep your fingers to the ceiling, your left knee continues to go forward, ringing out your waist. The tendency is to lift your hand more to the level of your shoulder or ear. Don't do that.
There'll be more interest in using your arm as a handle to the rotation of your lower rib area. Sweep your hand to the ceiling and come on down from this. Now, using rotation as the gateway to extension, come onto your front. Here you are on your front, pressing the soles of your feet, the soles of your metatarsals, and the soles of your toes into the wall. If a wall is not available, no problem.
You can intend one. But this will be a richer experience for the superficial back line and the spine extensors if you can have a close chain opportunity for your feet. Enough, already. On with the move. So here you are on your front.
And your right palm is on top of the back of your left hand so that the large knuckles of your right hand are above your left wrist and your right wrist is above the knuckles of your left hand. Now place the center of your forehead in contact with the center of the back of your hand. Listening with your right ear to the right, slide the center of your forehead, the direction of your third eye, along your right forearm, as if your right ear could listen beyond your right elbow. Slide back to center. As you inhale, slide the center of your forehead along your middle finger in the direction of your left elbow.
Left ear listens to your left elbow. Hark and come to center. So this is a lateral translation of the thoracic, upper thoracic spine. It's so difficult to activate that area. So we are taking a page from the Feldenkrais playbook.
Thank you very much for the genius of Moshe Feldenkrais. Now, when you bring your left ear to listen towards and beyond your left elbow, press the sole of your right toes, your right metatarsals, into the wall so you can create a long diagonal from right toes to left ear. Start now. Don't wait. Push the sole of your left toes, your left metatarsals, into the wall so that your right ear can get some impetus from the ground force of your left foot.
Side glide to the right, elongating the right side. Come back to center. Do this once again. Planting the sole of your right foot, your right metatarsals, elongating and side, a lateral translation, not to be confused with side bending or rotation. Instead, it's a side glide, so your left ear can listen beyond your left elbow.
And come back to center. And then your right ear listens beyond your right elbow, creating a diagonal across your back body, the back functional line, or the posterior oblique sling system. Now put the new hand on top. And as fascinating as that is, surely there must be some additional variations. Oh, there are.
This time, instead of the middle of your forehead being in contact with the back of your hands, this time, it will be the tip of your nose, not to be confused with the side of your nose. That would be the tip of your nose. Place the tip of your nose in contact with the back of your left hand. Now as you slide the tip of your nose along the back of your left hand, press with the sole of your left toes and bring your right ear towards and beyond your right elbow. Exhale to come to center.
Start now to press the sole of your right toes. As you inhale, a lateral translation. Left ear listens beyond your left elbow. One more of these. Creating a strong diagonal from your left foot towards your right ear, beyond your right elbow.
Meanwhile, back at the shoulder blades, they are nestled down on your rib wall. Come all the way over to that side. And come to center. Now, come up onto your forearms and interlace your fingers. This is going to be the Pilates mat exercise, the single leg kick.
So to be creating a tripod base, a stable base, we're going to change to a diagonal, so you can see more easily that this is not the original Pilates single leg kick. So here you are, placing the hands at the corners of your mat, on the diagonal. And from here, when you press your forearms and elbows into the floor, you create a downward draw of your shoulders as if your elbows could go past the little toe sides of your feet and connect up from pubic bone up underneath your chest bone, as if you could drive a little bit into a posterior pelvic tilt, a little bit of lumbar flexion. Now hover here. And bring your right heel to your sitting bone.
Heel to your hip, once, twice. Abdominals are you support team. Lift them first and then hover you right knee off the ground. Put it down. Straighten your right leg, bend your left knee.
Heel to your hip once, twice. Zip up from pubic bone, up underneath your chest bone as you hover your thigh. Alternate sides. Inhale, heel to your hip once, twice. Exhale, broaden your shoulder blades and wide across your collar bones.
Heel to your hip, once, twice. Back of your neck long. Look at your thumbs that are crossed as you hover your footprint towards the ceiling. Once more, each side. So it's hip extension, keeping your pelvis level and steady.
Last time, heel to your hip, once, twice. Exhale to hover. Come down from this now. And come onto your front. Place the soles of your toes, the soles of your metatarsals against the wall, back on up.
And now we're going to build on the previous lateral translation using your gaze, the movement of your eyes, to facilitate spine extension, lateral flexion, and rotation. Come on to your front. And plant the palm of your right hand on top of the back of your left hand, as before, aligning your large knuckles and your wrist. Your forehead, the center of your forehead is on your hands. And just before you give up on us and say, oh, no, not that again, just wait.
We've got some good tricks to connect your eyes with your spine. So here you are. As you inhale, look up underneath your eyebrows. As you exhale, press your feet into the wall. Keep looking up underneath your eyebrows.
Keep your forehead in contact with your hand. And here are your spine extensors at work. Now, look behind the cheekbones of your face and plummet to earth. Because when you look down behind the cheekbones of your face, that takes all the wind out of the sails of your spine extensors. Let's do that again.
Looking up underneath your eyebrows, as you inhale, lift and hover. Now look to your right ear, the top of your right ear. Side bend, pressing the sole of your left toes into the floor. Look up underneath your eyebrows and look towards your left ear, side bending to the left, pressing your right foot. Again, look up underneath your elbows.
Press your left toes. Side bend to the right, looking at your right ear. Look up and side bend to the left. Come back to the center and land on down. Put the new hand on top, because every small change makes a difference.
Here you are with your forehead at the center of the back of your left hand. This time, we're going to go into rotation rather than side bending. Look up underneath your eyebrows. Plant your feet. Inhale to lift.
Now, look towards your right elbow and towards the ceiling. Rotate to the right. It's extension and rotation. Look up under the center of your eyebrows. Move your eyes towards your left elbow, rotating.
And then come back to center. Move your eyes and rotate your entire spine, thoracic spine and cervical spine. Look to you right elbow, pressing the sole of your left foot. And pressing the sole of your right foot, look up towards your left elbow. Rotate, come back to the center, and land on down.
Come up from here now. It's time for all fours with thoracic rotation. So we're going to turn in order to have the left foot against the wall, left heel in line with the sitting bone. And this time, with the palms of your hands in line with your shoulders, you create a neutral pelvis, neutral spine. Now, it's so important to develop the strength, as well as the organization, of your upper body in helping to correct computer posture.
So we'll take a couple of rotations and then a couple of single arm push ups. So turning towards the wall, bending your left elbow, rotate to the wall. Bend your left elbow. Bend your left knee, spreading your sitting bones wide, elasticity of the posterior pelvic floor. Exhale to push up.
Plant your right hand. Now bending your right elbow and bending your left knee, turn to see the ceiling above you, connecting your lowest front ribs. And push up. Do a one arm push up. Plant the palm of your hand.
Turning towards the left, hug your right hand to your left ribs so you can feel that your left shoulder blade descends to your right hand. Rotate around your central axis, sitting bones wide, bending both knees. Exhale to push up. Plant your new hand. The reason for bending the knee that's at the wall, and bending both elbows, is that when you bend your left knee at the wall, it makes it easier to have some more mobility in your hip joints and posterior pelvic floor.
And push up. Now, keeping both elbows straight, inhale, sweep to the ceiling, turning, and turning, and turning, luxuriating in your huge wingspan. Exhale to come down. Now, this other one will not be so luxurious. Sweep your hand along the ground.
But through no fault of yours-- it's just the way we're built and the way this exercise is constructed-- pause here a moment and revel in it. You see, the position of the legs impedes the ability of your pelvis to turn away from the wall. So it's the just you show-- just your lower, middle, and upper ribs, and moving your gaze towards you thumb. Come down from this now. Spin around.
And the new side awaits. Plant the sole of your foot where the wall and the floor meet. Finesse your neutral pelvis, neutral spine. And organizing your shoulder girdle, bending your right elbow and your right knee, turn towards the wall. Hug your left arm underneath your ribs.
Left ear listens to the ground. Slide your right shoulder down first. And then you do a one arm push up. Plant your palm. And turning away from the wall-- in our case to the left-- hugging underneath your ribs, your waist, bring your ear to listen to the ground.
Slide you shoulder down away from your neck first. And then do a one arm push up. I'm going to do one more of these each side, because I forgot the count. But anyway, we might as well do this because it's interesting and fun to do. Now, when your bring your ear to listen to the floor, don't sit your pelvis back toward your heel.
Stay with your shoulder girdle relating to your arms. Here's why that is. There will be more demands on your upper body-- you see-- when you keep your torso forward, rather than rock back towards your heels. Believe me, if there's a way to make it easier, I've probably been there, done that, and seen it too. Now, keeping both arms straight, turning towards the wall-- when your feet are arranged like this, your legs like this, you can turn your pelvis around the head of your femurs-- and why not?-- taking the longest distance between your hands.
Exhale to come down. And as you know from the previous side, when you turn away from the wall, your pelvis and lumbar spine can't rotate so much. So don't overdo it in your neck or your shoulder. Instead, ask your right lung-- that's the lung closest to the ground-- to turn to the left and the left lung to turn behind you. So use those proximal cues to organize with your lungs.
And come down from here now. Now come onto your front again. And it's time for sombrero thoracico with rotation and lateral flexion. And that means-- here we go-- press the pads of your thumbs and fingers against each other. And now your thumbs will be two inches from the top of your head.
Create a closed chain opportunity for your spine extensors and the extensors of your hips by pressing the soles of your toes and your metatarsals heads into the wall. Now, leaving your elbows where they are, as you inhale, lift your hands up, making a hat for your head. As you exhale, lift your elbows up. Now look up underneath your eyebrows. And here you are in spine extension.
Now look towards your right ear and side bend. And then look towards your right elbow, towards the ceiling. Rotate, come a little higher. Moved your eyes up underneath your eyebrows. And move your gaze towards the top of your left ear.
Side bending, pressing the sole of your toes into the wall, rotate, and rotate, rotate-- I didn't tell you where. My mistake-- aiming your gaze towards your left elbow. Look up underneath your eyebrows. Side bend to the right, looking towards your right ear first. Then move your eyes to the right corner of your eye sockets, as if your eyes could see the ceiling.
Extension, side bending, and rotation, and look up underneath your eyebrows. Look towards your left ear, side bending. And while you're there, rotation, pressing the soles of your toes into the wall. Come back to the center. And come on down from this.
Now, reaching both arms long and both legs long, its our variation of swimming. Start with internal rotation. Pigeon toe your thighs broad across the back of your pelvis. And slide your hands further along the floor and just a little bit wider. It will be easier to bring the bottoms of your shoulder blades down towards your pelvis when your arms, hands are wide apart.
As you inhale, broaden across the back of your ribs. As you exhale, left foot and right hand reaches long. Reach long and hover. Maintain the internal rotation of your left leg and draw your abdominals in. Bring this arm down.
Inhale to prepare. As you exhale, slide your left hand and your right foot against the floor. And slide so long that you just can't stay on the ground anymore, maintaining internal rotation. Hover your chest bone more than your chin. And come down.
Inhale to prepare. As you exhale, all four limbs reach long. Reach long, and hover. Live long and prosper. Internal rotation-- go quickly.
Inhale, exhale. Reach a little longer. Inhale to come a little higher. You can have your gaze on the floor between your elbows or between your thumbs. One more-- inhale to come a little higher.
Exhale to reach a little longer. Parallel legs now. Palms towards each other. Inner aspects of your big toes brushing past each other. Now externally rotate.
External rotation-- palms come towards the ceiling, and heels brushing past each other. Lift everything up, bend your elbows, and come on up from here. Now, as fun as that is, it's time to move on. So come back to standing. Come all the way up to standing.
And do a towel check now to see if you need the towel, to feel if the back of your heels, if your sacrum and the spine between your shoulder blades could press against the window. The back of your head goes there as well. Feel now if it's easier to keep your posture up. And by all means, if it's the more comfortable thing to do, you can put a towel behind your head. Now come away from the wall.
And we'll do this standing balance challenge. So here you are, lined up, with the center of your chest bone directly above your pubic bone and your hip joints high on your femur heads. Drawing your inner thighs towards each other, laterally translate. Shift over towards your right. And shift so far that when you plant the sole of your right big toe, you can hover your left foot off the ground as you hover your right heel.
Shift to the new side. It's a lateral translation, bringing your left greater trochanter towards the left. Plant the sole of your left big toe. Create a foot, a leg, a side, to stand on and hover your right foot off the ground. As you inhale, shift to the right.
As you exhale, plant the sole of your big toe. Shift so far to the right that that lateral translation makes it impossible for you to keep your left foot in contact with the ground, not by hiking your left up. Don't be doing that. Reach your inner left thigh towards the adduct of your left foot, towards the floor, and hover your pelvis, level to the ground. Inhale to shift.
Create a leg, a foot, a pelvis, a leg and a side to stand on. Shift so far that you can hover onto-- there she goes-- the sole of her toes. All right. Thank you so much for joining us. We look forward to seeing you next time.
Bye now.
Back Care: Improve Your Posture
Comments
You need to be a subscriber to post a comment.
Please Log In or Create an Account to start your free trial.
