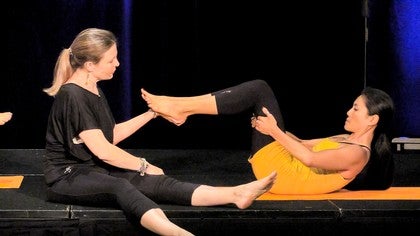
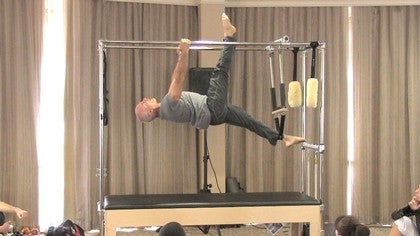
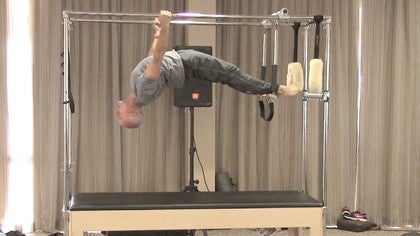
Premium Continuing Education workshop

You can view a 2 minute preview. For details, scroll down below the video.

Workshop #1290

Work Smarter Not Harder

2 hr 40 min - Workshop
61 likes

Description

How hard should Pilates be? In this workshop, Shelly Power teaches you ways to use as much is necessary in your body to obtain efficient movement patterns. By using much simpler information with your clients, they will have a better understanding of how they should be moving. She starts the workshop with a Mat class, then goes into a lecture where she breaks down each of the exercises. It's not just important for your clients to learn the choreography, they also need to learn the best quality of movement they can do.

Objectives

- Learn tips and tricks to help clients

- Learn how to put these tips into practice on your own body

- Gather information so you can find an ease with each movement

This workshop was filmed at the 2013 Polestar Life Conference in San Diego, California.
What You'll Need: Mat

About This Video

(Pace N/A)
Jan 17, 2014
(Log In to track)

Transcript

Read Full Transcript

Trailer

I'm Shelly Power, curriculum director for Polestar Education. My workshop Working Smarter, Not Harder came about when I saw a lot of people really struggling to do Pilates and teachers who were unsure how to help their clients. So, in this workshop, you're gonna find tips and tricks to help your students do better. You're gonna be able to give them much simpler information and hopefully, the way that they perform the exercises and understand them is better. The workshop is structured with a mat class first which covers a lot of the information that then we go into in depth and you'll see me teaching on a real student so that you have an idea of how to put these things into practice and what you're looking for.

The exercises are grouped together with similar concepts that can definitely be used with more than just those exercises. You might find that you can use those concepts and bits of information with a many more exercises. So what we're gonna do today

Chapter 1

Mat Workout

is we're gonna start with a mat class and we're gonna do some of the movements that we're gonna talk about in the workshop. And this came about over many years. Those of you that know me have heard a lot of these things before and this came about just looking at people move, watching the really great movers in Pilates but in also every other discipline, what do they look like?

So thinking of a professional dancer, somebody in Cirque du Soleil, a professional athlete, how do they move? What do they look like when they're moving? And do I wanna do it with them? So that's my cue to my clients and do it like you're inviting me to do it with you. And that was something that was really important to me because I would watch these gorgeous movers and they looked effortless.

I thought, wow, I wanna be like that. I don't wanna be doing this work looking like or feeling like I was expending a huge amount of energy. As Dove very, very cutely said at our lunch today, he says, "You know, I've heard this great thing before and it's this as much as necessary, as little as possible, I think you should use it. Maybe we should tell Brent about it." And I said, "Yes, let's do that." So, we are definitely, this is the, as much as necessary, as little as possible class today and workshop. So we're gonna go through, once we do the class, we're gonna go through groups of exercises that I paired some things together, you'll see that in your booklet, so that we can talk about a concept and apply it to several different things.

Now, you could put all of those exercises and concepts in a hat, shake it up and pull them out in a different way and it would still work. So there's lots of different ways that we can organize this and make it really meaningful. So please don't think at all that this is something that you have to follow word by word. It's just a way to get this information out and you will have your own ways of using it and putting into practice, okay? The next thing I'll say is please, please, please, move for you.

Don't move for me, don't move for the video, don't move for the person next to you. Take care of your own bodies, do what feels good. If you have an injury or something that you're dealing with, just take that into consideration right from the beginning. If you have questions, you can let me know. If you need help with some sort of modification, most of you probably know your bodies well enough to know what to do but please, don't do something that is uncomfortable, that you don't feel good doing at all, okay?

That's our contract, okay. (chuckles) All right, I got the verbal, I got the verbal and the nod so I think we're good. All right, so let's start lying on our backs, please. All right, let your legs stretch out and reach your arms overhead, give yourself a big giant stretch. Make it feel good. You can wiggle around a little bit, reach through your fingertips, your toes, your heels, move your shoulders, move your pelvis.

Taking a deep breath. And as you exhale, float your arms to the ceiling and bring them down beside you on your mat. And if you're comfortable continuing with your legs extended, please do that. If you need to bend your knees, you can. And we're just gonna pay attention to, no, you can leave your arms down.

And we're just gonna pay attention for the moment to the breath. So you're gonna begin to inhale and exhale. Remembering all the facts and figures from this morning's lecture. And breathe in and out in the easiest fashion that you can. Notice, do you feel that there are parts of your body that are moving?

And are there parts of your body that are being more quiet or still? Pay attention to what's contacting the floor, what parts of your body are touching the floor and what parts of your body that are not. And just make some mental pictures and mental snapshots of how your body is and we'll compare to that as we get to the end of the class. So when you're ready, you can bend your knees and put your feet flat on the floor with your knees pointing up to the ceiling and feet a comfortable distance apart. And begin to let your pelvis rock forward and back, so this would be the beginning of the pelvic clock or if we were thinking a little bit more scientifically, anterior and posterior tilt of the pelvis.

And do it in a way that makes ease in your body. So sometimes, when we start with a movement, it might feel like it takes a little bit of effort either physical or mental. And as you continue to practice, have it be easier and easier as if maybe you were moving and you fell asleep and the movement kept going. So you're rocking the pelvis back and forth with this few muscles and if you can't tell, if you don't have a good sense of am I using too much or not, purposely use more. So purposely squeeze and activate the buttocks muscles and squeeze and activate the abdominal muscles.

That's gonna tell you that bit of information. And then let that go and see if you can keep the movement the same. So it's gently rocking back and forth. Notice are you inhaling or exhaling at a particular point? Right now is just gathering information.

Come back to the center. Lift your head. Just wanna get something a little under your, yeah. Come back to the center. Now, we're gonna go from right to left.

So you're gonna start to tilt the pelvis to the right and tilt the pelvis to the left and hopefully, as we get into this, the knees are gonna stay mostly in the center. So we're not gonna move the knees from side to side very much. You're gonna keep the knees in the center and you're gonna allow the pelvis and the weight to shift from side to side. Now, if you need to, if it makes it easier to understand in the beginning, you can let your knees go from side to side. It's an easy way to feel the weight shift onto one hip and then onto the other hip.

And then see if you can keep the movement of the pelvis and then don't move the legs, okay? As you're rolling to the side and one hip is coming down, it should feel like that femur, that leg is pulling into the socket and as you're going to the side and the hip is lifting away from the floor, that is starting to reach away. So one knee and thigh feel it's like it's pulling in and one knee and thigh feels like it's reaching away. Mm-hm. And now, start to connect all of those points and create a circle.

That's it. And continue to notice what's happening at the rest of your body. So as you're rolling the pelvis around on the mat, it's like you're tracing a circle around your sacrum. What's happening to the rest of your body? Is your head nodding or your shoulders?

Do you feel a little bit of a slide or maybe a pull on your skin around your shoulder blades or the tops of your shoulders? If you do, that's great. When you're ready, go the other way. So you can feel, again, like you're tracing around the outside of your sacrum, that big triangular bone at the base of your spine and in between the two halves of your pelvis. You could also think about the front of your body, if we put a marble around maybe the belly button area and then you began to let it roll to one hip down to your pubic bone around the other hip and back up above your belly button, that would be another image of the circular movement of the pelvis.

As you finish up, come back to the center. Good, so we'll call this for now our neutral position. You should feel like the back of your pelvis, the back of your rib cage and the back of your head are all touching the mat. A little space under your neck and a little space under your lower back. Now, continuing again to bring your awareness to your breath, as you exhale, I want you to have a sense of narrowing around your waist without changing any of the positions of your bones.

So as you're narrowing, you have the sides of your waist pulling in, the front and back of your waist pulling in all toward the center. Let it go a little bit as you inhale. And as you exhale, draw in front, back, side to side. Two more times. Inhaling, allow that pulling in to go away and allow the abdomen to move a little bit.

The next time you exhale, draw back in. And one more time. Inhaling, allow the abdominal wall to stretch a little bit. And exhale to draw back in. Now, keep that little bit of activation around the abdominal wall.

You could talk, you could tell a story, you could recite your address, you could count to eight like Brent did in mat class this morning. And now, we're gonna start going into our dead bug and our femur arcs. So position your feet again where it feels comfortable. So you might have to move them a little closer or farther away. And you're gonna again to lift one leg up to tabletop position and then place it back down and go to the other side.

And as you're doing that, pay attention to a couple of things. One is can you maintain the neutral position of your body? And you might feel like when you start moving your legs that the position changes a little bit and actually gets better. So that's great. If you can on your first couple of repetitions of any movement, allow the body to get into even better alignment, that's fantastic.

Then once you get it, then keep it. Exhaling where you feel like there's the most amount of effort and hopefully, on something like this, there's not a huge amount of effort. It's just a bit. Now, on your next one, it doesn't matter which side, leave your leg up and hold it there. And feel the weight of your leg, the weight of your thigh drawing back in to your hip.

So if I came, if I had, I don't know how many people in here, 67 hands, I could push on everybody's knee and the feeling that your leg is going to glide backward toward your mat. That feeling of the heaviness. We wanna keep that because that's gonna allow the hip flexors to do a little bit less work. And then place that leg down. Find that same feeling on the other side.

So as you come up, have the sense that the leg can kind of rest back in the socket. Good, leave that leg up. And while you're there, do just the right amount of extra work. You might need to just pull in a little bit more through the abdomen and float the other leg up to meet it. And then check, what happened?

Did anything change while you lifted the second leg? Make any adjustments you need to and then begin to lower one leg down toward the mat and bring it right back up. And only lower it as much as you can maintain the body position. So you might notice on the first ones that the movement's a little smaller and then the movement will gradually increase as your body gets used to doing the movement and let's do one more on each side, exhaling again where you feel like you need the most support. And then place one foot down, the other foot down and hold there.

Stretch your legs out, stretch your arms out, give yourself a big reach. Oh! And bring your arms back down to the mat and bend your knees again with your feet flat. Reach long through your fingertips now and allow your arms to just hover off of the mat a little bit. So there may be in line with the side seam of your T-shirt. And reach your arms up to the ceiling and then pause when your fingertips are reaching up.

That's it. Now, we're gonna do something a little different in this arm arc. Arms arcs are often taught where the ribs must stay connected to the mat and we don't let the ribs move at all. We're gonna break that rule a little bit and allow for some movement in the rib cage, which hopefully is gonna feel very nice. So you're gonna start to move your arms overhead.

And as you get back, almost as far as you can go, I want you to inhale and allow the ribs to fill up with air. Start to exhale, gliding your ribs down towards your waist and then reach your fingertips back up to the ceiling so it'll have timing like this. It'll be arms overhead, inhale. (inhaling) Exhale. (exhaling) Arms to the ceiling. See, so you can start to do that at your own timing. What I'd like to see as you're reaching your arms and going all the way overhead is that you do allow your rib cage to expand.

And then allow it to come back in and then allow the arms to come back up. So that's kind of breaking the rules that we're told not to let the ribs move. Allow the ribs to expand from the inside and then glide the ribs down and then move the arms. They can come up if they do, mm-hm. Now, what's important about this is that you're not using your spine extensors to arch your back.

So don't purposely arch your back, allow your back to arch if the breath tells it to. Let's do it one more time. Take the arms over, start to inhale, let everything expand, expand, expand, glide the ribs back down toward the waist and let that bring the arms back up and then continue to let the arms come all the way down beside you and take a break there. Good, and we're gonna talk about all these things. So we won't do questions now but we'll go into questions afterwards.

So now let's change and get into a little bit of spine movement, a little more than we did before and get into some bridging. So we're gonna do bridging a little bit different. Oftentimes, bridging is taught and the cues are to bring the pubic bone toward the navel and have that kinda firm pulling in. We're gonna do it from thinking about the backside of the body instead of the front. So what I want you to imagine, without actually moving your feet, is that you can pull your feet toward your sit bones.

But don't actually move your feet, just have the activation to do that. And then notice when you do that, do you feel an activation in your hamstrings, in the backs of your thighs or do you feel it in your hip flexors? So our goal is to feel it in the hamstrings, not to activate the hip flexors. So some of you may have to just allow that to happen that the hip flexor soften a little bit. There, okay.

So, now, when you start your bridge, your pelvis is gonna travel toward the back of your heels or the back of your calves or the back of your knees depending on where your pelvis is in space and then you'll roll back down. Okay, so let's do that. So start to put a little bit of a pull with the feet toward the buttocks and then roll the pelvis off of the mat, reaching through the backs of your thighs so that you feel a lengthening of the back part of your body, good. And then start to roll down by widening your shoulder blades first and then continue to roll down. Good, inhale before you go.

And as you start to exhale, let some air out before you start to move. So exhale a little bit and then roll up. And what that's gonna do is make your body a little bit more pliable. Start to roll down by widening, not here first, go here first. Yes, that's great, and all the way back down.

Good, couple more times. If you feel like your hamstrings are getting a little crampy, just do it less. We don't have to do that, we don't have to do that a lot. So the back of the pelvis, the back of your sacrum are gonna reach away that's gonna lengthen your lower back. As you exhale, let the shoulder blades slide apart.

It's like you're making room for your spine as you roll down. Good, one more time. Roll up to the top and pause when you're up at the top, hold there and do a little bit more pull. Again, the feeling like your sit bones are gonna travel toward the back of your knees so it doesn't make you arch. It actually you a little bit of the feeling of lying in a hammock.

And then continue that as you roll down. Great. Widen here and come through. And hopefully, your spine should feel a bit longer as you do that. That's our goal anyway.

All right, bring your knees in toward your chest, give yourself a little bit of a squeeze. You can roll around from side to side. Let's get into a little bit of assisted roll up. So you're gonna place your hands behind your thighs and we're gonna do a partial one first. So, you're gonna start to bring your legs to tabletops so there's a little bit of activity and you're gonna press your thighs into your hands as you begin to roll your head, neck and shoulders up.

And what you'll feel is if you pull your knees in towards you, it makes you wanna roll back down. So that's not very helpful when you wanna go up, right? So press your legs into your hands a little bit just to find that point and then roll back down. So we're just doing a small one to start with. So allow the legs to lengthen away, the arms can even lengthen.

So you might get to the point where your arms are completely long. Right, and then roll back down. Right. So now, keep going and at a certain point, you're gonna find the weight transfer is gonna take you all the way up to sitting. That's it.

Now, at the top. Come all the way down. You're gonna pull on the back of your legs and you're gonna lift your heart up a little bit and feel an expansion at the front of your chest. So it's not to look up to the ceiling, it's to look more out in the distance and then you're gonna come back up to sitting tall. Now, imagine, Brent's not in the room.

We can use his iPad. Brent's iPad sitting on the top of your head. I'm not gonna use my own, I'm not silly. And you're gonna begin to roll back balancing Brent's iPad on your head only to the point where your feet can stay down and the iPad stays on your head. Good, and then roll back up.

When we practice this in our pairs, we'll just use our conference books. We don't need to have any electronics. So again, roll back and roll back up. Now, can you, when you roll back, keep the front of your legs in a bit of a softened way? So it's not completely lax but your hands are supporting you.

So your leg muscles actually could be a little bit jiggly and that would be okay. Yeah, and then come back up. Let's do two more of those. Rolling back. So again, invite me to do this with you.

Make it look so good that I can't help but to do it with you. Wonderful, one more time. Roll back, Brent's iPad is still there, it hasn't fallen off yet, has it? And then continue to roll back and allow your feet to glide on the mat until they naturally come off and come back into tabletop. So you're always gonna keep your hands on your legs.

Inhale before you go. Start to exhale, let some air out so your body's pliable and roll yourself up to sitting. Inhale when you get to the top, open the chest, open the collar bones, open your gaze and then roll back. Keep the iPad balanced on your head for as long as you can. Let your feet glide on the mat and then roll back in.

Good, one more time. Inhale, feel a lengthening in your spine as you inhale. Exhale, curl yourself up all the way to sit tall. Beautiful, open up and then just come up to sitting where you're right on top of your sit bones holding there. Crush your feet.

All right, you guys can turn if you want in face front. All right, so I'm gonna do a little bit of mermaid prep. Some of you've done this with me in the class. So we're gonna go into the right hand being on the floor and we're gonna use the arm to mobilize our spines. So mermaid, we think of it as this big, luxurious stretch.

Some of you think of the sitting position as maybe not being so comfortable. My, everybody thinks about something different. So we're gonna do with the legs crossed and we're gonna have the right hand to the floor and I want you to put a little bit of weight on your arm just a bit, just kind of get over on it and start to move your shoulder around and explore all the different ways keeping your hand on the floor that you can move, safely, your shoulder around. Anybody who feels like they're having trouble sitting in this position, it's just not comfortable, roll your mat up and sit up on top of your mat. It'll make it easier.

So, from that exploration of movement, I want you to get to the point where you feel like your arm bone is right into the side of your rib cage. It's not exactly there but it's definitely not pressing forward and it's definitely not pressing back. So if we think center, it's probably gonna put us in the right position. And then I want you to start to press the heel of your hand into the floor and start to move your ribs in the opposite way. So if I can push here, that might help me to access a little bit more movement higher than I might when I'm just doing the mermaid like this.

So I wanna be able to press up and expand the ribs to the side. So you can take your arm over if you wish and just do that a couple of times. Pressing through the heel of your hand and see if you can move your own body. And then come back up and do all of that to the other side. So you can start with your hand down if you want or you can go right into arm overhead, it's up to you.

But explore the movement a little bit and we can do this because we don't have a lot of weight on the arms. So it's nice to know all the different options that there are and then choose the option where you have the best alignment, the best congruence so it's not pushing forward and then begin to press and start now as you're mobilizing your ribs to feel like your body's going up and over your arm. If you weren't sitting on the floor, could you go up and over the other way? Right. Couple more times of pressing and you can move your hand around.

The closer it is or the farther it is, it's gonna change how the movement is in your body and then come right back up. Good, bring your legs back around in front of you. Stretch them out in front and reach out through your arms. Let's go into a roll down just to get down to the mat. So you might wanna scoot forward on your mat a little bit.

And then begin to roll yourself all the way down. Remember back to having something balanced on your head and see if you can maintain that as you roll the pelvis back. Stop when the pelvis is horizontal and then continue to let the rest of your body roll down. You got it. Interlace your hands behind your head and let's get ready for chest lift.

So bring your knees up and let's go ahead and do this today in tabletop. So often, we do chest lift with the feet down, today, we're gonna lift the legs up. And when you have your hands behind your head, I really want you to interlace your fingers together. What I want is you to create a cradle or a hammock for your head to rest in. So if you just have your fingertips there, it was not gonna really provide the support that we want.

So while you're there and while you're exhaling, I want you to lengthen the back of your neck. You're gonna give yourself a little bit of traction just on the floor, so don't lift yet. Keep your head on the floor. That same movement when you're drawing the back of the necks long, I want you to let your rib cage start to glide toward your waist. It makes me think of those tube dresses, right?

It could be a tube top but it could also you pull it down low enough and it becomes a dress. The girls know that. So that's what I wanna have happening at your ribs. All right, so, you're gonna start doing that and you're gonna exhale about a third of your air and then you're gonna begin to curl up just to look at your thighs. So your shoulder blades may still be touching and then roll down.

And do it again. So wait for the exhale. So exhale some of the air out. That's gonna make you have a little bit more flexibility in your ribs and then curl up just a little bit. And then back down.

This time when you go, we'll go continue on with the choreography. Go to that point, hold there, reach your arms so that your hands can hold the backs of your thighs and now, press your legs away from you a little bit like we did in the assisted roll up to deepen the curl. Great, hold that position, allow your hands to float back up and support the back of your head and then roll yourself down. Good, so let's do that not so slow this time, yeah? (chuckles) All right, so lengthen the back of your neck, start to exhale and curl up small. Inhale gently as you reach your arms, exhale, press your legs away from you to help go a little deeper.

That's it, reach your arms back up. Now, completely support your head, so let your head rest in your hands and then roll down. Beautiful, two more times. Inhale before you go. Exhale, lengthen the back of your neck, let some air out.

Reach up to grab the backs of your legs and begin to press your legs away from you. I actually wanna see your legs moving away. Good, hold there now. Float your arms back up, support the back of your head completely, let your head rest in your hands and then roll down. Good, good that we're only doing one more of these.

Inhale, exhale, curl up. Reach the arms, hold on. Exhale, go deeper, feel your back lower ribs expanding. Let your arms float back up. Support the back of your neck.

Now, stay there for a moment and breathe gently. Just breathe to keep yourself alive, not Pilates breathing, just breathing. Can you find a way that you can support your head and be there fairly comfortably? And then roll yourself down. Good, that's the right amount of effort is just to sustain the position.

Good, let yourself stretch out. You can reach and lengthen and move around a little bit. Okay. Reach your arms to the ceiling and roll yourself up. You can use your legs for assistance if you want but if you don't need that, roll yourself all the way up to sitting.

Beautiful. All right and come on to your hands and knees. So just swing your legs around and come up onto your hands and knees for quadruped. Now, just watch that you're not lined up directly with somebody behind you so that you can stretch your arms and your legs without running into anybody. All right.

So find your best elongated neutral body position. So if we remember back to how it was on the floor, back of head ribcage and pelvis touching. If I lowered the ceiling, those three points of pelvis, back of rib cage, back of head would be touching. If you lengthen the tips of your ears, if you looked like Mr. Spock with pointy ears, you could lengthen the back of your ears and that would help lengthen the back of your neck. Actually, tip down a little bit.

Yeah, that's it, good. Now, while you're there, very gently, when you breathe in, allow your abdominal wall to expand a little bit and move into the front of your T-shirt. As you exhale, that same feeling of drawing front, back and side to side narrowing the waist to pull in. Inhale, allow the abdominal wall to lengthen and think about it taking a little bit of time to do that. So it's not just a relax and let it flop but can you allow it to lengthen and allow it to come back in?

It's kind of the feeling of it's like what I imagine when belly dancing is happening. There has to be a lengthening for the movement to happen. It can't be too contracted. One more time. Inhale, allow the abdomen to expand.

Exhale, allow the abdomen to draw in. That looks great, everybody. Good. Now, with that sense of support, I want you to reach out one arm and one leg. Let's do opposite to be nice.

That's it, and just stay there for a moment and notice how your body up around your shoulder is balanced over the heel of your hand and how your hip is balanced over your knee. Beautiful, and then let everything come back in. Do that same thing on the other side. So you feel like there's a little bit of an activation of the abdominals and then you stretch long. Stay there for a moment and float back in.

We're gonna do one more on each side. And I really like to see that little bit of wiggling and losing your balance because that's teaching your nervous system something. That's telling your body information that it didn't know before. Eventually, those wiggles become less and less and less and less and they're very small. Good, do that on the other side.

Exhale, find the support first and stretch out. Good. And come back in and for fun, let's do the same side. So, right arm, right leg stretching long. Hold there for a moment.

Now, the wiggles sometimes are a little bigger. Good, stay there for a second longer. And very gracefully put yourself back down onto the floor and change it to the other side. Wonderful. Beautiful balance.

And then come to the floor and sit back in child's pose. And then bring yourself when you're ready all the way down to lying on your front, face down on the floor. All right and for now, put your hands down and let your head rest on your hands. And like we did when you were lying on your back, we're gonna start to do a little bit of breathing. And all this is just noticing.

It's not to change anything, it's just to notice what's happening. So really gently, inhale and exhale. And like we did before, notice, do you feel some parts of your body moving? And if you can remember to how it was when you were lying on your back, is it different? Do you feel different things moving or a different, they're moving in a different way?

Notice what parts of you don't move. Start to add in that extra little bit of narrowing around your waist very light, we're not doing a movement yet. All we're doing is activating the muscles just to kind of remind body what's happening. So when you exhale, feel like there's a narrowing around the waist. A narrowing from front to back and then let it go as you inhale.

Exhale and draw in. But really gently, so if I really wasn't paying attention, I just think you're lying there, I wouldn't see much happening. And now, notice, take your attention just breathing comfortably to how your pelvis is touching the floor and we're not gonna do this a lot but we're gonna do a little upside down pelvic clock. So as you do pelvic clock lying on your back, so really small and gentle, do a little bit of pelvic clock lying this way. So emphasize putting your pubic bone onto the floor.

Emphasize putting your hip bones toward the floor and then come back to a point where that's more centered and you're in neither one of those extremes. And take two more really gentle breaths in and out and see if you can maintain that contact as you're doing that. So the breath is not changing the position of the pelvis. Alrighty, bring your hands now to the sides of your rib cage like you're getting ready to do a pushup or a press up. And we're gonna start to do chest lift but now, chest lift lying on our front.

So we call this either prone press up or prone extension or baby swan, little mini swan and I want you to begin by hovering your forehead off of the floor. And if you had a mirror right underneath you, if you had a small mirror right into your face, you'd be looking directly down at your reflection. So you're not looking out yet. Start to move your elbows and reach them toward your heels and then let that go, don't come up yet. So we're just staying down, we're just moving the shoulder blades.

So the head is hovering just a little bit off of the floor, the elbows can reach away and then let it go. And do it without coming up yet, so we're not yet doing extension. We're just gliding the shoulder blades down the back. That's it. Do it one more time.

Inhale, let it go. (inhales) And then exhale, have that sense of reaching the elbows long. Good, now, continue to allow the upper back to curve just a little bit more. So now, you're gonna start to look a bit forward on your mat and you're gonna come up to the point where you're standing on your lowest ribs. Make sure you're looking a little bit forward. If you're looking directly down, your neck position probably isn't great, it could be better.

Now, as you roll back down, put the lowest rib first, then the next rib, then the next rib, then the next rib and your head is the last point to come down. Let's do that again. Reach the elbows away and begin to peel the back gently off of the floor. Now, as you're standing on your lowest ribs, notice that they've kind of opened and spread apart a little bit. It's like you made a bigger place for that standing position and then roll down rib by rib by rib by rib.

One last time, reach your elbows away as you exhale and peel up. And then roll back down. Scoot your hands back a little bit and let's go into a full swan position, just the one that comes up onto the knees, no rolling. So again, hover the forehead. So you're starting with the neck in neutral and then reach the elbows away and very gently peel yourself to your lowest ribs and then continue to press up all the way to your knees and hold there.

Adjust your hands so that the heel of your hand is more or less under your shoulder. So, thighs are up. Now, look across the room. There's lots of people to look at. Pick somebody on the other side of the room and smile at them.

A, just because it's a nice thing to do. B, because it's gonna help you roll down, okay? So keep smiling at them and begin to roll down, first, by bending your elbows and keep smiling at them and keep smiling at them and keep looking 'cause they may stop smiling and you got to see. When your ribs start to come down, you can look down. Yeah, see how much more fun that was?

Let's do it one more time. So begin hovering your forehead, reach your elbows away and start to peel your body away from the mat. When you come to the top, two things, smile at somebody and move the heel of your hand under your shoulder. So move your hand back a little bit. That's it, so you can push through your arms and lift your hips up a little bit more.

There, lift up. There you go, great. Keep smiling and roll down, first, by bending your elbows, then roll down on your thighs, your pubic bone, your belly button, your lower ribs. Oh, some of you were looking at the ground, we better do that one more time. We got to melt those smiles for all it's worth.

Here we go. Last time, I promise. Reach your elbows away, peel yourself up, start to see that person as soon as you can. Yes, good. Stay there, hold.

And bend your elbows, keep looking at them. Keep looking, keep looking, I can see you. Keep going, keep going, keep going. When your ribs come down, you come down. Oh, so much longer.

Very nice. Press back into child's pose and pause there. You got it. Take a full breath in and a full breath out. All right.

Come back out onto your front and then roll onto your side and let's face the stage first and you're gonna come up into the kind of the normal Polestar sidekick position on your forearm. And we're gonna do a little bit of shoulder exploration here. Now, not as much as what we did when we were in mermaid because now, you're doing a little bit more weight bearing but you can, in small way, experiment with taking your arm and your shoulder a little forward and a little back but do it very small and very controlled. And then do start to do the gliding of your shoulder blade on your ribs. So gliding up and gliding down and just notice what happens in your rib cage when you do that.

So your shoulder blade just doesn't move on its own. The ribs are now starting to move apart and move together as you're doing that movement and that's really important. We need to have mobility so that we can find the best alignment to then have stability, right? If we just stabilize, we may not be in a good position so we need to have that first. So when you find your best position, you feel like the round part of the front of your shoulder, the head of the humerus has pulled back a little bit and into the socket, stretch your legs out long on your mat.

Now, I'm okay with you having your head instead of being completely over to the side, I'm absolutely fine with you having your head up a little bit if that makes it easier to balance. So I'm good with that. Make sure your elbow is under your shoulder, right? To your comfort. Don't have it out too far.

So now, let your leg float up off of the floor or up off of the bottom leg and hold it there and start to, in a small fashion, take the leg forward and back. Inhaling as you go forward, exhaling as you go back. So we've already done this movement of moving in the hip joint. Inhale, forward. Exhale, behind.

And we've already done the narrowing of the waist. So putting that together now, your sidekick comes into fashion. Check back in with your shoulder and make sure your body is aligned with the arm. One more time, inhaling, front. Exhale, behind and leave your leg behind you.

Keep stretching it longer and take your top arm and reach it up so you're reaching on a long diagonal and go ahead and let your spine twist if you wish. Make this feel good again, make me wanna do it with you. I do, I do. So stretch really long and then come back in. Good, and let's roll to the other side.

Let's go ahead and roll just all the way to the back of the room. Now, you guys can face forward. You can bend your knees at first. And begin to little exploration of movement in the shoulder, just small. And then begin to move your shoulder blade up and down so you feel that sense of gliding.

Hmm. Yeah, that's it. And notice how your ribs are moving as well as your shoulder blade. So you have the lengthening of the bottom side of the rib cage and then press back, you got it, that's it. When you come back up this next time, find your best alignment feeling that the front of your shoulder is pulled back and into the socket.

Stretch your legs out long. Can you pull a little bit of, yeah, that's it, you got it. Float your top leg up, hold there for a moment and let's do small circles on this side. So, about the size of a dinner plate circling around and around. Continue to feel that support from underneath.

Good, now, some of you are making your circle so small that they're not circles anymore. So, it's like a period, right? So circle it around and actually move your leg. There we go. And go on the other direction.

I can tell who's from where based on the size of the dinner plates. That's it. Good, three more, two more, one more and let that go. Good, very nice and come up to sitting. All right, we're gonna do our last thing standing up.

So you're gonna come into your squat position and just kneel down this way. And again, we're gonna explore this a little bit later but just teach it to you now so you have the experience of it. So, from this position, I want you to lengthen your legs and you can keep your hands on the floor if that's comfortable. You can also place your hands at the fronts of your legs and kind of rest against your shins or your thighs, that's fine. You can also bend your knees if you need to, that's fine.

And shift your weight a little bit back and a little bit forward just to feel what that's like and notice, when you stood up, did you have your weight mostly on your heels or did you have your weight more toward the front of the foot? And stop with your weight divided either equally or slightly forward onto the ball of your foot. All right, now, you're gonna take your hands and as long as this is comfortable for you, you're gonna reach around and you're gonna put your fingertips on your sit bones, your ischium. Good. Great, everybody put their hands in the right place.

I get worried when the hands go to different places. All right, so very gently, I want you to use the muscles around the insides of your thighs to draw your fingers together a little bit and then let it go. And again, feel like you could draw your fingers just a little bit closer together. Now, as you begin to roll up, I want you to kind of firmly start to trace your hands down the back of your legs and you're gonna rub down the back of your hamstring toward your knees and at the same time, start to roll up and then when your hands get down and you can't hold on anymore, just let them go. And roll all the way up to standing tall.

And one more time, shift your weight back onto your heels and then shift your way forward. Yes, exactly. So we have feet. We have these feet that stick out in front of us. We need to use them.

A lot of people are back here on their heels. You don't really use your feet very much. So put your weight forward so that your feet are helping to support you. Keep that and roll your head, roll your shoulders, roll your ribs as far as you can without moving your pelvis. How far can you roll before your pelvis starts to tilt?

When you can't go any farther, roll back up. Yeah, beautiful. Let's do it again. So now, we have to really pay attention. What's going on down here?

So roll as much as you can without changing the position of your pelvis. And that means both tipping it forward, right? And starting to go into the roll but it also means tucking it under. So did you, by trying to control it, did you tuck under? Yeah, let's do it one more time.

So roll up, it's looking pretty good. Roll up, and again, if you can't tell, try it. So tuck under and see what that feels like and that's not what we want, that's not what we want. Can I just stay there and roll forward? So again, go as far as you can without changing the position of the pelvis.

Now, continue. Roll all the way down, letting the pelvis move but as little as possible. And go all the way down touching the floor if you wish. Keep your weight forward on the feet. You can use your hands on your sit bones or not, whatever you prefer.

Narrow your sit bones together just a little bit and start to roll your pelvis over your thighs. So now, your body is hanging and the pelvis is the first to move. Good, we're gonna do that one more time without stopping. So once you come to the top, check that your weight is forward, nod your head and curl down. Keep the pelvis, keep the pelvis, keep the pelvis, keep it from moving.

What if you could roll all the way down without changing the position of the pelvis? Most of us can't so let it move. When you get to the bottom, inhale, exhale to curl back up, narrowing the sit bones first. Letting the body, almost like the body lags behind a little bit, timing-wise. That's it, press down through your feet, come all the way up to standing.

Pause there for a moment and feel that lengthening. Remember, we had that lengthening of your ears like Mr. Spock. So find that position, lengthening the back of your neck, lift your heels and lower your heels without losing the length in your body. Yeah, one more time. Lift the heels, hold there.

Keep lengthening the back of your neck as your heels come down and rest. Good, everybody. All right, great. So take a break from that. Don't leave.

The class is not done but we're gonna take a break from the class. Good, thank you, guys. God, so thank you for that feedback

Chapter 2

The Roll Down, Roll Up, and Roll Back

and we just did a little bit of talking during our round table lunch and those were a lot of the things that were kind of discussed is having the permission or us, as teachers, giving our students the permission but also giving ourselves permission to explore movement and sometimes, when we talk about exploring movement, it becomes a little too oomy goomy, you know, really undefined let's just experience all these things. We don't want it to go that far. I mean, that's good but that's not what we're doing now.

We wanna, within a little bit of a framework, go over some freedoms of movement because again, if we're trying to get people to learn, not just the choreography but to have a certain quality of movement, their nervous system has to be able to figure it out. And if we just say, good, now, do that, oh, but not like that. Oh, don't do this, oh, don't talk and don't squeeze and don't do another thing, we really start to limit our options for movement and if you think about when you were teaching probably for the first time we're doing for the first time, maybe the leg arcs, the dead bugs and the femur arcs, those movements and then somebody said, can you feel how your body's moving? And in your mind, you're thinking that's right. So in your mind, this is what's happening.

Perfect, absolutely no movement of the pelvis, the ribs everything's fantastic. What in reality is happening is, right? Every time you lift, something's moving. But you don't feel it, you don't have a sensation of that or your clients don't and then somebody makes the crazy idea to put you on top of a foam roller. Well, if you can't do it laying on a stable floor, how in the world would you be able to do it lying on top of this wiggling foam roller and immediately it's better?

Because your body had a wake up call, it's like you need to pay attention here. The nervous system gets a bigger change in what's happening, right? Big enough that it can sense what's going on and then you start to, it's like, oh, don't move my pelvis. Got it. Now, I understand. So sometimes, we have to give those larger bits of movement for people to start to understand how to make it a little bit more controlled and appearing like it's not having any movement to it.

So that's part of it for that. The other thing is, again, just giving people the permission to not work so hard and it sounds basic and kinda silly but it's okay to not work so hard. It's okay to just be able to do it, right? With good form. So that's another point to it. So, everybody okay with that?

Yeah, I'm good to you? Okay, so we're gonna start with the standing roll down, looking at chest lift, both the assisted roll up and the regular roll up and neck pull. Ugh, how could you do that to us? (chuckles) so we're gonna look at those. So, and in each of the little boxes there, there's just a couple of points and one of them is to really maximize thoracic mobility. Now, you might not be doing it necessarily in all of these, in chest lift for sure, but we're not gonna use the neck pull to work on our thoracic mobility.

We've already done that, right? To get to that point but that's one of the really important concepts. We wanna look at lumbar spine length. So that's one of the things that was happening as we were going into the roll up in the roll down without moving the pelvis so much is we actually gave time to not just move through the thoracic cage and the rib cage but we actually got to lengthen some of the tissue down through the lower back. That's really important especially when we're doing something like the roll up from the floor. So we're gonna look at that a little bit and then avoiding the posterior tilt and especially on things like the roll up.

It's like meeting yourself coming and going, yeah? I'm gonna go this way but no, I'm also gonna go this way and it's a bit confusing for the nervous system. So, those are the first four that we're gonna look at. So let's explore a little bit with a little bit more depth, the standing roll down, okay? And I think that that's a wonderful tool to use to start to understand the role of the regular roll up in the mat exercise, right?

The mat work because you have gravity to your advantage instead of working against gravity. So let's have somebody, well, actually, I'll demonstrate it just to see it and then we can take a look at somebody doing it. So, some of the things that we're, again, trying to avoid is the hinge, a lot of cervical flexion or neck flexion and then just kind of get there and the same thing coming up. I think I'm rolling because my chin is touching my chest so that must mean something and then coming up. So, if we can get the weight forward a little bit, right?

We're not as likely to sit back onto the heels and we can have that sense of a more vertical leg 'cause when we get back too far, we start to pass the vertical line. We also don't wanna look, I don't want you to look like you're downhill skiing, right? We're not going into the ski jump, so that's a bit too far. Just a slight bit forward so we have the feet for support. And then nodding the head, nodding the ribs, nodding through the lower back to come all the way down.

This is the point where I say put your hands on your sit bones and quite often, it's here, here, here. So I was very happy everybody had their hands in the right place. And then the direction is to start to draw the sit bones a little bit together and you'll feel there's a little bit of adductors, some of the deep hip muscles are starting to work and you'll sense that there's almost the feeling of externally rotating the thigh and a little bit of that as good. Don't do it too much but a little bit of that is good 'cause we're starting to build some internal support without using the glute. So it's not a glute activity at this point.

So the sit bones are gonna draw together just that little bit and then my idea is to send the sit bones down the backs of the legs. And if we can, and Ada said this really nicely, we're focusing on moving the pelvis over the femur as opposed to moving the spine, right? Which starts usually up here in the rib cage 'cause we have a lot of mobility there. So if we go first and think about the pelvis going, then the spine and then we're up, okay? Does that make sense, kind of?

Okay, all right, good. So somebody come up, somebody who wants to do that. Run up on the stage really quickly. Just looking at her position. She looks pretty good there.

We wanna have the sensation again just like we did lying in supine and in quadruped, the feeling that the rib cage and the back of the pelvis are somewhat in alignment, obviously, for each person's body structure. So if you can, without feeling like you shift your weight in your heels too much, bring your ribs back toward my hand a little bit and lengthen from here. Yes, great. Good, is that too hard to hold? Too uncomfortable?

Now keep that and shift your weight forward under the ball of your foot without changing your body, just move it through space. That's better, that's better. Good. So I just noticed, for those of you that can't see from the sides that her rib cage like mine, like most everybody, was just a little bit forward. So we wanna have the rib cage back.

Just be careful that that doesn't start to give you things like this, right? So we don't want ribs back and forward this way, we just want the rib cage itself to kind of glide back but still to have that sense of elongation. Right, beautiful. Yeah, that's nice. So now, she's gonna begin to nod the head and then every one of her vertebra is just gonna start to tip forward and I'm gonna help her in the beginning because I'm gonna have my hands here so she has a little extra information about how far she can go before something changes.

Good, so that's about it, yeah? So now, begin to roll back up. And if we had a wall here. Me, right? She could do this roll up and roll down without moving her pelvis back from where she's standing.

So let's go all the way this time. Rolling forward. Good, now, it's at about this point where most people want to start to posteriorly tilt a little bit. And you'll see that not so much from the pelvis but what changed when she did that? Her knees bent, yes, exactly.

So you'll see that. Don't, you don't have to do that anymore. You'll see that. People will start to, they'll start to move and they do this beautiful initiation of movement and then that happens and I'm thinking, okay, wait a second. We're not even close to the hamstrings yet, yeah?

And I have had people tell me that they can't roll any farther than this because of their hamstring flexibility. I was like I'm not that smart but I know that that's probably not totally what's going on. So we should be able to get a little bit farther and actually move the pelvis before we start putting a lot of stretch through the hamstring. They may feel a neural stretch, they may feel something else but, so, keep the legs straight. That's gonna be an indicator that the pelvis is tucking under a little bit.

So I'm keeping the weight forward, keeping the legs long, nod your head and roll. Good, she's doing a beautiful job of maintaining it and then she continues to go and the pelvis, you can just see the pelvis rolling over the top of the femurs until she gets to her lowest position wherever that is going to be. Good, now, from here, I wanna pretend like her body's not gonna move at all. I don't wanna see this move. I want her, it's like take it off and put it away somewhere.

All I'm interested in in the very beginning is the movement of her pelvis. So the cuing that I'm gonna use is to let the body remain heavy. Try not to move your body but obviously, that's impossible but again, it just gives us a little bit of information there on the timing and the sequencing. So shift your weight a little forward onto your feet, yes, and begin to curl from here and I want you to have the sensation of sliding down the backs of your legs as if your sit bones were growing longer. The pubic bone is drawing up toward the front of her rib cage as this is going down.

Now, right here, start to press down through the floor. So your legs are reaching down and the body is able to stack up all the way. Beautiful. Great, thank you. How did that feel, okay?

(Shelly laughing) It's nice to move when you guys have been sitting, sitting for a while. Good. So any questions on that? Major questions on what we're doing or why we're doing it? It seems like not a big deal and then when you find somebody who's really having a tough time getting movement through their spine because it's just so much easier to move right at the cervical spine or the hips and the pelvis, it makes a big difference in their movement.

Yeah, the back does hurt. Right, right. So, looking at, if you're looking at somebody with scoliosis and the way of delaying the pelvis a little bit to get the lengthening, the eccentric lengthening of the spine extensors can often mitigate a little bit. We're not changing scoliosis a huge amount and we're not getting rid of it but it might mitigate a little bit the holding that can sometimes go on and so, and Ingrid just noticing that when Louisa was doing it, she actually saw that a little bit that it evened out just a little bit for her. So yeah, that can often happen and it happens in everybody and that's why we have things like the chair and the push down or hamstring one or washerwoman or the other 17 names that it has.

That's what the chair provides for us, right? It gives us even more of that ability, tells the body to allow that to happen so that we can have that smooth elongation. Yeah, good, good comment. Okay, so, let's put that into the roll up. One of the things about the roll up is if you do it on a very hard surface, it doesn't matter how great you are.

On a very hard surface, the roll up is just really, it's really challenging. Mm-hm, so let's give you a little extra padding there. All right. So come and we'll start in sitting instead of lying down. Presto chango, iPad.

Okay, so hold onto the backs of your thighs and we're gonna start with the assisted, just the assisted roll, okay? So, you can help me with this if you wish. Okay, here we go. I'm ready. So I'm ready, are you ready?

Yeah. Okay. So, what I want you to do is you roll back, I want you to maintain your feet on the floor and you're gonna begin to, just like we talked about now in the roll up and the roll down in standing is I want you to feel like your pelvis is rolling on your leg bones, on your femurs so your pelvis is starting to roll so that you're going behind your sit bones and you're approaching the tailbone area and then you're rolling a little bit, maybe into your sacrum just a little bit of it and keep a hold of your legs but allow your arms to lengthen as you go back. Good, great. Now, where my fingers are, so I'm just kind of right at the point where her pelvis is just about to touch the mat, just a little bit kind of above her tailbone, you're gonna maintain this contact with me and you're gonna roll through your body to come back up.

Gorgeous. Oh! Ah, minus five. One more time. We have to get back some of your Polestar bucks. All right.

So, think of moving the ribs underneath your head. Good, and then come up. And it's so unfair 'cause these books are so slippery. Good, gorgeous, great. All right, enough torture.

So again, the feeling of rolling back through the pelvis. And what that's gonna do is a couple of things. One, her arms are now providing the support, her hip flexors can go, huh, okay, I don't have to work quite so much. This is lengthening here. Right and then just keep a little bit of a hole just so your arms are supporting you a little bit, right.

Now, when she rolls up, I don't want the pelvis to move first. Just like we did when we were standing and rolling down is I want her ribs to curl a little bit. Beautiful, and then keep going and it's as if your ribs and your spine are pressing up through the head. Good, now, you're gonna go all the way down this time with that same feeling. Great.

Keep rolling back here. So the first part of it, you know, is fairly easy of getting to here. Anybody can get to this point. Yeah, that's it. Wiggle your legs around a little bit.

Yep, so they move easily. Great, and now continue to roll back through here, so not your ribs yet. Roll through here on my hand. Right, now, let your feet drag on the mat as you roll into my fingers here. Towards my sit bones?

Toward my fingers. Yes, yeah, that's it. I mean my feet, okay. Oh, your feet, yes, towards your sit bones, yes. That's it and then when your feet just naturally come off, the legs pull in and you're gonna keep a hold.

You'll hold onto the legs the whole time, okay? So, here's what we did in the very beginning, the legs going away, the neck lengthening and if she pulls her legs toward her, she's gonna roll back down. So I want the legs to go that way. Lengthen the back of the neck. Start to reach your feet away and see how far you can go without really changing anything.

Yeah, now, keep sending the feet down. Delay the pelvis, move the ribs. Yes, beautiful, and sit tall. Roll back through your pelvis opening up through the front of the hip. Roll away from your legs.

So your legs are there. They're not going anywhere. Yeah, keep rolling back through your pelvis. Let the feet glide toward you. Yeah, good, and and you pull your legs and you keep a hold the whole time.

Right, that's it. So she had a moment, I don't know if everybody has a different perspective. She had a moment where she was rolling back, there was a moment of oh, my hip flexors would like to do a little more than they need to and she quickly changed that and came back into better position. One more time. So lengthen the back of the neck.

Now, right away, we want the legs to go away from you. So bring your head back down. Good, bring your knees into you a little bit. So as you exhale, lift your head and let me put my hand here. So just put your head down in my hand.

That's it. So now, send the legs away and we're gonna work on the chest lift. So, our next event here. Start to send the legs away, the back of the neck lengthens. That's it.

Now keep sending the legs away from you and let that reach you down. That's it. Good, keep this and sit tall, inhale. Good and roll back away from the legs. The legs are jiggly, legs are loose.

The pelvis is rolling, pelvis is rolling, pelvis is rolling, keep a hold of your legs. Good, draw the abdominals in a little bit more. Now, don't lift them off the floor 'cause that's gonna tell your hip flexors to work. So just allow the hip flexors to lengthen 'cause your spine is moving away. Hold on, yeah.

Oh, I see, bring them up the same time. Bring them up at the same time. Yeah, exactly, exactly. Does that make sense? Anyway, yeah, so it's very weird not to pick your feet up because we're taught that, right?

Let's get into assisted teaser here, right? We roll down and we roll up to assisted teaser, which once you learn how to manage all this, it's perfectly great but if you have somebody who is hip flexor dominant because they don't know another way, it's not so great, yeah? Okay, all right, good. So we're gonna practice this altogether. We're gonna do a couple more things here and we're gonna practice it all together.

So sit tall and roll back. Just go. Feet come with you. Beautiful, that was it. You got it, great.

Feel different? Yeah. Yeah. Because it's very natural to have a camera and 45 people watching you. That was beautiful and you could tell, her whole expression changed as she was doing that.

Good, so stretch your legs out and stretch your arms out and let's go into the roll up. So now, I've changed this. I don't like roll down any longer, I've changed this to roll back. So we're gonna do the roll back, change the name of it and you're gonna start again with the pelvis. So the pelvis is the mover.

So we really, at the very beginning, should be able to roll behind the sit bones and back up without much change in the upper body. So she should be able to roll behind her sit bones, yeah, and then come back up with very little change. I don't wanna see the body get short, I don't wanna see it go back, I just wanna see it stay more or less and roll in the pelvis first. Yep, see if you can do it without letting the body get short. So let's let the body stay almost like they're completely separate and just roll a little bit back and roll up and roll back.

That's it, with less muscles. We'll do if you didn't have any muscles. Yeah, that's better. Good, now, I'm seeing movement at her hip joint. So now, continue that feeling and roll back.

That's it. So I'm gonna give you a little help because I'm gonna make you hold it for a second. So pretend I'm, yeah, you can hold on to me. There you go. Really hold on to me.

Use me, yeah, there you go. (laughs) So now, continue to lengthen the front of the pelvis and allow your pelvis to come back to the point where it's horizontal. Keep going, keep going, keep going. Now, the spine goes so it's just as if she was standing up and her body goes to the point where she's, that was very nice. So again, what we're looking for is not allowing the pelvis to tuck back, we wanna keep the pelvis more or less horizontal. So let the hands come up and begin to nod the head.

Now, leave the pelvis horizontal for as long as you can and look right over my shoulder and continue to open the back ribs. Beautiful. That was very nice, good, and sit tall. Yeah, how did that feel? Good.

Different than normal? Yeah, it felt open to me. Good, good, great. Thinking of the hips or anywhere else in particular? Just the hip and also my back.

Okay. So hip and back. Yeah, just felt more open. Okay, good, beautiful. 'Cause usually, I'm clamped, yeah.

Yeah, yeah, as we all are. (laughing) Good, thank you, thank you very much. All right. So that's our roll. So again, things that we don't really wanna see too much of. Right?

Principle number seven, axial compression. So you should probably not sitting in a long sit but in a chair or sitting on your reformer box, you should have a little bit of movement of your pelvis around the femurs. Everybody should have that. Sometimes, we don't though and especially in this position, it's complete disadvantage but if you were sitting in a chair, you should be able to move your pelvis a little bit in both directions. That's telling me that you have the mobility through everything, through the muscle, through the vertebra, through the fascia and just how your nervous system holds, you should have that movement.

So make sure your clients can do that with ease. So this little bit of movement here without affecting the upper body, okay? So that's where we wanna be with that. The pelvis staying horizontal, really important, okay? As I start to roll back, if I start to tuck, then that's telling a whole lot of other things to happen including my legs lift.

So if you've done the Polestar screening before, you know one of the things we're looking for is the legs can stay on the floor, right? So we don't wanna have that feeling of tucking there. All right, ready to do a little bit of chest lift?

Chapter 3

Chest Lift and Neck Pull

All right, so, lie down for a moment. And we'll do it all together once just to remind you what we're doing.

And for this part, we're only gonna be doing the first little bit. We're not gonna do the full chest lift. So you can put your legs flat, feet down or tabletop, whatever you like, whatever's the most comfortable, it doesn't matter. And we're gonna work on the timing of it or the sequencing. So hands underneath your neck to start with, which sounds completely wrong.

So once your hands are behind your neck, glide them up to the back of your skull. So you can cradle the back of your skull in your hands and you can give yourself traction, you can lengthen your neck, okay? So if we break it down a little bit into the parts, the first thing that's happening is we're inhaling and with that inhale, let there be a little bit of lengthening of the spine. Second thing we're gonna do is start to exhale. If you inhale really deeply, not only does that tell your body to extend, but it also has stiffened you a little bit.

So start to let some air out, you're a little more pliable and then you're gonna continue to do that small little curl up. Mm-hm. Come back down. Let's add another part to it. Inhale feeling a gentle lengthening of your spine.

Exhale, lengthen the back of your neck. Simon Says now, right? You know the game Simon Says. Don't do it until Simon says. Simon says to start to lengthen and curl up and you should be looking just across maybe the tops of your knees and then back down.

Okay, add another part. Inhale, lengthen your spine. Exhale, don't go anywhere yet, just exhale. Lengthen the back of your neck and start to open up your back lower ribs as you curl. Feel your back ribs expanding.

And then roll back down. All right. Somebody come up and let's give that a go. All right, so you're only gonna wanna sit up and you might actually wanna just come a little bit closer, just leave a little space in the center. All right.

So, go ahead and put your hands behind your head like we're starting to. Good. So, what I'm after is this lengthening and this gliding this way. So it's as if the front of her body is doing that and the back of her body is doing this, okay? What I wanna avoid is this roll up, right?

With the chin coming forward or this is my favorite one, with the hands here. I've never totally understood that. I'm not sure what that is. So, as we go, again, in slow motion, please, don't teach this slow to your clients for very long because it's very taxing. So inhale to feel a gentle lengthening in your body.

Start to exhale and feel this lengthening but don't lift. So you're just gonna stay right there. Inhale. Exhale, lengthen the back of the neck and feel your ribs gliding that way. Good.

So if she does that enough, there will be a point of weight shift, right? The inhale kinda makes her go this way, the exhale starts to move her the other way. So on your next one, you're gonna inhale. And as you exhale, do all of that for a little while until naturally, you feel like your head wants to float off of the floor. Exhale for a good while and then start to come into your curl.

Good, now hold there and let your head and your hands rest into my hand. Good, stay there and take a breath in. As you exhale, glide the ribs but stay on my hand. Good, now, start to move. That's it, inhale.

As you exhale, open and widen the back of your ribs to come this way. Beautiful. And she's got the shake, yes, that's what I'm looking for, good. And then roll down. It is, it's like you've accessed new territory.

Good, and back down, great. How was that for you? Is that? I've never lifted from the back of the ribs that way. Mm, okay.

So never lifted from the back of the ribs. I bet. (chuckles) I make all these weird things up here. Yeah, so again, we can shorten the front, which is effective in the task of getting you off the floor it's not very graceful, yeah? So if we think about lengthening from the back, it's a little bit easier. So inhale again.

Exhale at your ribs, glide down, feel the length here. Now, moving your ribs, your head's attached. It's gonna go so you don't really have to move at your neck very much. Beautiful, and widen from right here. Make this part.

There we go. Let this part come down and this part go around. That's it. Beautiful, good. Stay there, reach your hands towards your legs.

Reach your hands back behind your head. Excellent and roll down from here. Mm-hm. Very nice. Great, good.

It feels okay for you? Anything to report? Good. All right, thank you. Yeah.

Yeah, and think about it, again, if you have trouble doing it from the floor, do it sitting against the wall, right? You can have the same feeling and very good awareness of how, whoop, is that moving? No, this is moving. And you can feel the ribs expand a little bit more, okay? So you're gonna practice that with your partners to help them with the chest lift.

Yes, Meda. Absolutely, so she's asking about the importance of the eyes and how we can use that to our advantage or disadvantage. So again, we teach this, we hear it but sometimes, we don't put it into practice, the importance of looking where you wanna go and again, another thing I don't understand that I've been taught at the gym, when you do your crunches, which I don't do anymore, when you do your crunches, look toward the ceiling. And maybe they were just trying to facilitate more work, I don't know. Maybe there was a reason behind it but we really do wanna use the eye gaze because that, neurologically tells us we can override it but it tells us where to go in space.

So if you wanna make it easier for somebody, make sure that their gaze is moving where they wanna go. And it's incredible how we don't really pay attention to that, sometimes, in our own movement as well and it takes a lot of movement away from the head and neck if we can move the eyes 'cause you could see on her neck position didn't change all that much, which was great and it's a weird feeling. You have to unlearn a little bit of that. If you're used to this, that feels like you're doing a lot of flexion and you are at about two or three segments, okay? All right, good.

Yes, Deidre. I hope I said exhale but we'll see what I said. Yeah, so explaining the sequencing of the, the timing and the sequencing of the breathing. So, inhaling just to get ready and if you can have the inhale, have the sensation of length, that's very helpful. We don't wanna overdo it.

So a gentle inhale. When we start the exhale, this is happening that gliding of the ribs all the way toward the pelvis at the same time that there's lengthening at the back of the neck. So that's the start of the exhale and I usually do about a third of it before I move. So there's an inhale and exhale. A continuation of that exhale to start to curl and that's where the expansion of the ribs is.

So it's like the, if you go first half and second half, that expansion is happening there, okay? And one of the reasons we wanna stay connected to the floor is because that's what's really happening if we think about how the ribs or moving. If I move all my ribs and my spine at the same time off of the floor, I've now created a really long lever that doesn't have a lot of pliability. If I keep my lower ribs connected to the floor, that allows all of that tissue to lengthen and if we think about how the spine is moving in comparison to the rib cage, as the spine is going into flexion, the ribs relative to that are going a little bit in the opposite direction. It's much more, it's not much more complex than that, it's a bit more complex than that but if we think everything goes in the same direction, then we start to move like a brick.

So we want the ribs to be delayed a little bit so that we give time for this to move and allow for the movement at the actual rib and vertebral segments, okay? So that's part of that as well. Yeah, yeah. So often, when they're doing the neck pull, so the question was around the position of the elbows and the typical pull in of the elbows, once people start to understand letting the weight of the head go back into the hands, that almost corrects itself, that almost takes that away because it's hard to have your head going this way and your elbows coming forward. So if they can get to that point where they start to understand that, that'll help a lot.

There is a sense of reaching out. Sometimes, I will take a piece of TheraBand and just wrap it from elbow to elbow and underneath their hands so they have something to press out into and that's helpful sometimes, yeah. But getting the head to rest and just pausing and letting that happen is probably one of the best things because they have to have some integrity here to hold and that's helpful. So, Darlene had a question about students or clients or us who have a lot of hamstring flexibility, really good hamstring flexibility. Some people would even think maybe a little too much, if there is such a thing.

And what happens at the end of the standing roll down, can you get to a point where you do, let everything kind of relaxed to a point and go farther into the stretch? And as long as that's the intention behind it, I'm completely fine with that. So somebody could roll quite far down and instead of maintaining that little bit of activation here at the bottom when they get all the way down, it's fine to release. Just make sure that to come back up, there's that sense of re-engaging to then initiate the movement, yeah. So lie down on your backs.

So you're gonna keep one hand behind your head in the more traditional neck pull position and then you're gonna put one hand behind your lower back. Now, be careful on your shoulder. If this is really funky for your shoulder, don't put your hands so far across. Change it, move it so that it's comfortable and if it's just really not comfortable, just take your hand out. You can still, we'll still get the point of it.

So, lengthen the neck. So lengthen your legs too 'cause we're gonna go into regular neck pull. And again, this is a little bit of a disadvantage because if you're on a little softer surface, it's a little easier 'cause your pelvis will remain in the horizontal position a little bit easier. You'll be held a little bit by the mat. So you're gonna lengthen the back of your neck and you're gonna start chest lift just like you did a moment ago.

So you're gonna exhale some of the air out and you're gonna start to open and spread out the back of your ribs to curl up to look across the room at the person on the other side and smile at them. Oh, and then roll back down. Okay. So you're gonna do that again. Inhale.

So we're putting into practice the chest lift. Exhale, let your ribs glide down, start to curl up. Now, keep opening and expanding the back of your ribs and start to make your way into your curl up and the hand here is gonna start to help you in two ways. One, it's going to keep the space behind your lower back and the floor so you don't get into the pattern of tucking and you can push just a little bit with your hand which is kind of helpful. From your rolled forward position in spine stretch, begin to lengthen from your sit bones and the top of your head, come up to sitting tall and hinge back that little bit.

Now, roll the pelvis on the femurs until the pelvis comes to horizontal. Good. Very nice, everybody. Wonderful. Wonderful, let's do that one more time.

So we've got a few different concepts to put in. Inhale for length, exhale for mobility. Start to look forward at the person in front of you over your own toes. Continue to open the back of your ribs, stay on the floor as long as you can and then curl forward, maintaining a little space between your chin and chest. Start to roll up or lengthen, either is fine.

From your top sitting position, hinge just at the hip joints and then start to move your pelvis so that it's rolling over the femurs. Good, that's it. Stop when it gets to horizontal and come down. Good, so you can you can also do that. Go ahead and come up to sitting.

You can also do that with a little something behind the lower back. And what it does again, what we're doing with that is for a lot of people, the strategy to come up is oh, my gosh, this is gonna be really hard. I better get all of my muscles working and I do this. Right? And there's no way I can get up because all of this is going this way.

So I can say don't do that but that's, it's not always that effective. So might be a little easier just to have, again, one hand under and what you're trying to do is you're trying to prevent the pelvis from rolling back, right? So if your hand is too high, you might miss that. You might not get that feeling. So take it, it's gotta be down at the lower back and you're preventing the pelvis from rolling back and you're allowing the spine to take its time to go, okay?

So that's helpful for a while to start to learn that. It's helpful for the roll up to do that, right? We're not doing anything other than affecting the position of the pelvis and we can give a little proprioception to the lower back into that padding or into your hand so that you start to learn where to keep the pelvis. Next part has femur arcs and bent knee opening

Chapter 4

Leg Circles and Single Leg Stretch

but what we really wanna focus on is the leg circle. So, leg circle for a long time and those of you that have worked with me before have seen me do this demonstration of leg circle, it becomes, again, so much muscular effort that the only possible place that there can be movement is under you against the mat.

The whole body moving from side to side. And what we really wanna do is promote the movement of the femur in the socket. So if we think about how we would do femur circles and the bent knee opening which we've changed, those of you that haven't been to a Polestar course for a little while, it's no longer bent knee fallout, which I thought was not probably the best name for it. Bent knee opening. So, when we're doing those, again, we talk about those as stability exercises, which they are, it's important.

But I think sometimes, we forget the mobility part of it. So we're creating a sense of stability so that we have more mobility, right? We get that sense of the disassociation in the, for this exercise in the hip joint. So if we can take that concept and stick it into the leg circle, that's gonna really help us do a leg circle instead of doing a body weight shift, okay? So common things that are said during leg circle, press the leg that's extended on the floor, press it down into the mat.

Press your arms down into the mat for stability. If you do both of those things enough, what will happen to your body? You go into extension, right? You either lift your pelvis up off the floor or you start to recruit muscles in your back. This starts to bring your spine into extension, which is pretty counterproductive when we're trying to move in the hip joint and keep our neutral alignment.

So go ahead and stretch out on your backs and we'll feel this. And there's a little bit of a process to it. So if at any time, you wanna take a break from it, you can. The goal is to be able to do this whole thing that we're going to do, this whole little sequence of movement without over fatiguing the hip flexors and at first, that might not be possible. You may feel like, whoa, that's getting a little bit crazy.

So just take a break if you need to. We're gonna start with the left leg pulled in toward the chest. So just hold on to your knee and pull it in and let your right leg bend and put your foot flat on the floor. Hold behind your thigh so that you can start to extend your leg toward the ceiling but it doesn't have to be all the way straight, so just extend it a comfortable amount and flex your foot and imagine that you're a cup of coffee, tea or water that you just got is sitting on the sole of your foot so that when you bend your knee, you're gonna bend in toward your chest and the foot is gonna stay parallel to the ceiling and then you're gonna press away. Now, at first, because you're pulling your leg in, your pelvis is not gonna be in neutral and that's completely great.

So feel your lower back touching the floor a little bit as you bend and stretch. As you bend, pull with your hands a little bit and very slightly resist with the leg. As you straighten, press with your leg and slightly resist with your hands. Now don't do this so much that the body starts to really shake. Just do it a little bit.

So you're doing your own contract-relax stretch. Bending and stretching. Now, gradually, and keep holding onto the back of your leg 'cause you wanna give your legs support, you want your hip flexors to be kinda quiet at this point. So your leg is being held up with your arms. As you keep going, I want you to start to gradually tip your pelvis back toward neutral.

Take three or four to do that. So don't just do it all at once but gradually do that. Now, you're gonna have to start letting your hands loosen a little bit on your leg, that darn reality thing, as you're going so that you don't keep your legs so pulled in and your leg is gonna start to be more vertical, yeah? Get to the point where your pelvis is back to horizontal. Yeah, can you find that point?

You may have to let go a little bit and you may not straighten your knee fully and that's okay but once you get to that point, pause, holding your leg even if it's not all the way straight and do some femur arcs with your right leg, the other leg and see how easily you can move your leg. Now, make it movement, not an exercise. Just move it around, move it out to the side and move it around. Let it be really mobile. That's the position that your pelvis is probably gonna be best in.

So now, take your right leg and lengthen it out onto the floor, let go of your left leg and start a leg oval. So we're not gonna do circles right away, we're gonna do an oval. So you're gonna come down to the floor and back up. And you're gonna gradually take that into more of a circular movement but at first, just do an oval. Everybody can get their leg down to the floor.

Yeah? Yeah, so do it. How about that? Yeah, go the other direction and notice what's happening with the leg that's on the floor. It should just be resting there, yeah?

Excellent. Beautiful leg circles, everybody. And rest, pull your knee into your chest. Good. All right, come up to sitting.

Let's see what that was all about. Feel different than what you are used to doing? A little bit. A little bit. A little bit different.

Oh, John. So, here's our normal leg circle. All right, that's the normal one. Pressing down and lots of activity. And here's the option, right?

For a different kind of leg circle. Now, at first, it may feel like it's a little bit sloppy 'cause you're not activating so much. You can still point the foot, you can still have energy through your arms and legs but not a lot of gripping, okay? So all of this in the beginning was just to access more of the flexibility that you already have. So, the contract-relax, you're just working the muscle a little bit and you're facilitating what you already have.

We're not increasing your range of motion more than what you have, you're just having, now, you have access to it which is helpful in your legs circle. At first, your lower back is more on the floor and then gradually, I had you go to more of a neutral. Just taking your time about every, quarter the way about every leg stretch. So at some point, you're gonna be back to your neutral position and now, instead of moving this one right away, just see what happens. Can you move this leg around?

That's gonna help you to find your optimal position, right? If we forget even the term neutral and think of optimal position here, now, I'm set. Now, all I have to do is make the circle and I can make it an oval 'cause everybody can come down here, yet, that's the place that most people don't ever explore in their leg circles. They're up here like this, right? Trying to do the leg circle at a point where we just don't have the flexibility.

So allow the leg to come down, allow it to move, allow there to be lengthening of the hip flexor, right? We've worked on that in our bent knee opening and we've worked on the flexion extension and all of our femur arcs. So if we put it together, right? We've got that circular pattern. All right, let's do that on the other side.

So lie back down. Right knee into your chest this time. Bend your left leg and put your foot flat on the floor and pull your knee in enough that you feel your lower back lengthen on the floor. Don't push it down, just let it lengthen there. Flex your foot and begin to bend and straighten your leg.

Again, as if you had a cup of something balanced on your foot or Brent's iPad, whichever. I don't know which gives you more motivation. Good, in and up. And just resist lightly in both directions, just a little bit. In and up.

Yup. Now, gradually, as you're continuing to do that gentle contract and relax, start to move your pelvis about a quarter of the way toward neutral and then the next quarter of the way and the next until you come back to a position where your pelvis is more or less horizontal. That's it, yeah, so it goes up this way. That's it. All right, once you find that point, the pelvis is more horizontal, move your other leg around.

So do some femur arcs and you can still hold your leg, that's fine. Wiggle it around in the joint a little bit. Fine-tune the position of your pelvis and now, stretch that leg out on the floor and start your leg ovals. So allow the leg to come down and then as you feel ready, allow your leg to go out to the side. Remember back to the bent knee opening of how the inner thigh musculature has to lengthen to allow the leg to move out.

Good. Go the other direction. Now, you can put a little bit more into it so you can point your feet. You can stretch your arms long but keep the integrity of the movement. Beautiful.

And finish, bring your knee into your chest and take a break. Good. How was that? The movement looked fantastic. There was a lot of range of motion that we should have maybe done a pretest. Everybody, lay down and do leg circles to see how it is but it was really nice.

I saw some beautiful range of motion and very little movement of the pelvis. So again, if we think back to allowing some exploration of movement, it's okay if the pelvis moves a little bit. That's okay, nothing bad is gonna happen. Work to refine it and sometimes, you have to let it move before you understand how to keep it a little more stable, okay? Does anybody have the why does my hip pop thing going on?

Yeah, my hip always pops when I do leg circles. So quite often, we adjust the position of the leg, which can be really helpful. So if you just turn in or out a little bit and change the change the motion a little bit, that can help. What I found helps even more is doing these types of things. So getting a little bit more access to the mobility that you have, encouraging a little bit more internal stability so as we're getting that press and we're moving back toward neutral, some of the deeper muscles are having to wake up and work a little bit.

The internal support is a little bit greater which allows for greater mobility on the on the outside and quite often, we'll take away that pop. Not always, but often and it's moving the pelvis from being more poster which is where we wanna be to more relative anterior or more neutral, which often takes it away even though that feels like it would be completely the opposite. So try that with your clients or if that is happening in you, you can try that a little bit more. Yes, you could definitely do it with the other knee bent. Absolutely, yeah.

So, can you do it with the other leg bent? Sure. You're not gonna be able to do the crossover part of it but that's okay. Yes, you could definitely do something like that, yeah. Absolutely. Great question.

Yep, so question is what do you do with the other leg? Can you just let it kind of flop out and be relaxed? If it helps, yes and no. I'm a libra, I have to go on both sides. Yes, if it helps you learn how to do it better and then once you learn how to do it better, that's why I say now, you guys can, you can point your feet a little bit.

you can have a little more full body attention than I would want it to come back to a more parallel position you're doing it in parallel or externally rotated if you're doing it internal. But if it helps at the beginning, sure, yeah. I'm willing to let anybody do just about anything if it helps them learn how to do it better. Yeah, good, okay, let's go on. Single and double leg stretch.

Now, we've already kind of done this in the assisted roll up and we've already done it in chest lift. So when we're doing the single leg stretch, I think of that as a preparation for every other partially rolled up in flexion exercise, especially things like the hundred. The hundred is really challenging to get all the parts where they need to be in doing and breathing and holding and not holding too much and having some mobility. That's a lot of work. So if we can take away some of the work of the abdominal wall that it has to do to hold us there, we can use our arms instead, then we can actually be able to flex a little bit more on our spine.

So we are gonna take the flexion part of our chest lift. So we've learned already how to do this, we're gonna keep reinforcing that but I can't get to here yet. I don't have enough endurance yet to hold this for a long period of time so I wanna be able to use my legs to help me. Again, if I pull in, that's a little bit counterproductive, that pushes me back toward the floor. So I wanna use my hip extensors a little bit to assist the roll up, right?

Trap table, we have the springs, reformer, we have the cords, here, we have nothing. So use the leg to press into to get you up here. That also takes away this part of the movement that we don't really want this, we want up. I relearned this exercise with Lolita and she made a big point about saying, "This was a vigorous exercise and a single leg stretch and this is what we wanna do here so it's not so pulled in toward the body." My other preference, you can of course, you can do whatever you like, my other preferences that you really hold on. There's a lot of this which is like this, okay?

I was like, did you forget to shave? Your hands are dirty? I don't know what's happening but it's not useful. It doesn't teach us anything, it doesn't help us to do it. So hold on and use your leg, okay?

So sit up and probably, sit with your feet on the carpet. So you can sit on your mat and you can face however you want and have your feet on the carpet and take your right leg in and stretch your left leg out and be as up on your sit bones for now as you can within reason and hold on, again, our traditional outside hand to the ankle and coming across the body with the other and change. So very nice way to teach people how to get the arms and the leg organized without a lot of strain in the body. So lying on the ground and trying to teach this can be very taxing, very challenging for people. Now, keep doing that but just roll behind your sit bones a little bit.

Can you get the same feeling from when we were doing bridging earlier where it's the heel and the foot sliding in that gives you a little bit of activation at the back of the leg versus the hip flexor pulling you? Keep going. Keep smiling. There's somebody across from you. You guys have to really sit tall to see over the stage.

Just smile at each other. Good, okay, keep rolling back a little bit more. Keep rolling back a little bit more. Keep rolling back a little bit more and keep going in your single leg stretch holding onto your leg and pause. See if you can open up your back lower ribs and roll a little deeper.

Press your leg away from you. Yeah, and keep going. Do a couple and then pause on the other side and hold there for a moment. Is your shin kind of parallel to the ceiling? Stay there, hold there.

Yeah, see if you can press your hands and your leg together in a way that helps you to curl deeper in your rib cage. Yeah, good. One more time on each side. And then pull both knees into your chest and roll down. Phew! That's a little bit of work.

Good, so let's use that feeling to help us with double, right? Any major questions on using the leg on that? You really have to work on it and make people pause because it's just so easy to pull in. So the feeling of pulling out is sometimes you have to wait for that to happen a little bit.

Chapter 5

Double Leg Stretch, Rollover, and Corkscrew

So lie down, let's do double leg stretch.

Place your hands on your knees and again, hold on like you mean it. You don't have a lot of activation but just really get contact with both knees. Start to send your knees a little bit away from you, lengthen the back of your neck, let's see really good chest lift, rolling up into this assisted curl up position and pause there. Remember how it felt to have your hands at the back of your head from before and press your head back that little bit as if your hands were still there holding you. Now, just your right arm leg, reach them forward in front of you.

So it's like you're doing half of the hundred. Pause there for a moment, come back in, change and do the left. Hold there for a moment, feel what that's like, pull it back in, inhale. Exhale, do it on the right. Stay there for a moment.

So this allows you to go a little bit lower than you would, come back in, if you weren't holding on. So it's gonna allow for the hip flexors to lengthen. Take your leg a little lower, see what happens. Yeah, good. And then bring everything in and roll down.

Okay, so sometimes, we can't do things because we've never done them before. I know, the wisdom I've come up with in the middle of these workshops is tremendous. Okay, so, what that means is that anytime we can experience something without having to commit to the full movement, we can actually learn to do it and feel it before we're having to hold ourselves up against gravity. So holding your leg and let the other leg come all the way down. You just did that in leg circles.

Your leg was all the way to the floor and you were moving around so you know you can do it, yeah? So it's just having that opportunity. All right, so now, hands on your knees. Lengthen the back of your neck, curl up, feel the opening at the back of your ribs, stay there for a moment. Press your hands into your knees and your knees into your hands.

Good, now, right arm and leg again but this time, the more traditional position so one arm back and the leg forward. Stay there for a moment and experience what that's like holding there. Great, change, go the other side and move around a little bit. See if you can lower your leg or if you move your arm in a direction if that's helpful. That's it.

Now, in the last one, whichever side you're on, do this side, hold there for a moment and curl back up to where you started. Thank you. Uh-huh, all right and come back in. Okay, so we've had all the experience of all the positions we're going to be in. Now, we're gonna do it with both arms and legs.

So no assistance. So we'll do a couple one way, a couple of the other way, we won't stay up there too long. So press your knees into your hands and curl up, widening the back ribs, spread them apart like you're opening vertical blinds, I mean, horizontal blinds. Stay there for a moment. Go into the hundred position first just like we started.

So as you exhale, stretch long, see if you can keep the curl in your ribs. Bring back in and stop, hands on your knees. Don't roll down, stay up and exhale, stretch. Let the front of the body lengthen and pull back in. One more time.

Pause there for a moment. Some of you have brought your knees in so far that you've rolled down. So roll back up. Shoulder blades should not be on the floor. Exhale, last time of this.

Stay in that position and lengthen. Good, stay in that position as you bring your knees back in and roll down. Yes. Phew! I thought this was supposed to be easier. All right.

Last time, traditional arms back, legs long. You felt it all now so now, keep the feeling of it even if you can't go to that extreme of a position. So the front of the hips are lengthening, the abdominal wall is doing enough, the back ribs are open, those are all the things that we're focusing on. Here we go, last time, hands on your knees. Inhale with a little bit of length, exhale, curl up and pause, hold there.

See if you can wiggle around a little bit and open up the back of your rib cage. Stay there as you inhale. As you exhale, open the arms and legs away from center, circle your arms, pull back in and stay up, stay up, stay up. If you happen to roll down, press into your knees a little bit more, go again. And pull in.

And one more time, go again. And pull in and roll down. Good. So there's your leg circle in a different exercise, right? So having that capacity to do that.

Good, any major questions on that? Position of the pelvis. So, easier for most people if the pelvis is tilted back just a little bit. Generally, people feel a little bit more stable there and it's the position that people often migrate toward. Absolutely, possible to do this with the pelvis more toward neutral and that's fine as well.

Cynthia McGee is a physical therapist in Miami that many of you know that I worked with for many, many years and she brought a little different perspective to that, which was if you start with the lumbar spine lengthened and a little bit of flexion and you mess up a little bit, you'll get to neutral, you're still okay. If you start at neutral and you mess up a little bit, you're gonna probably start moving toward anterior, which is not where we wanna be, right? Potentially, you could do this in extension as well, most people we teach, probably wouldn't be able to do that without not feeling really comfortable but it could be done there but most of the time, we wanna keep it back, challenge people by going toward neutral. We're gonna do one more flexion thing and then we'll get into extension. I promise I won't make you do any more flexion for a little bit.

Here we go. So we're gonna go into bridging, a preparation for corkscrew and then look at the rollover and the corkscrew exercises, which are sometimes a bit, a little bit misunderstood. So, in today's bridging, any questions on what that is or what should look like? All right. So, traditional bridge.

All right. Very short and constricted to the point where I've moved into so much like the most amount of lumbar flexion that I have that I have almost no capacity to move anywhere else. So I can move still at my hips a little bit and I'm moving up here but I'm not truly getting segmental articulation. So instead of moving this this way, I wanna move this that way. I wanna feel like my sacrum is a plane taking off at the airport, not a stunt plane which goes around this way.

So it's a long takeoff into the bridge. So I'm going to, again, have that little bit of activation of pelvic support. So I'm getting the deeper hip muscle or deeper pelvic muscles and my hamstrings a little bit. Everything's a little bit active and I'm gonna start to pull my pelvis toward the backs of my legs to be able to roll to my long position here. It's fine to stop a little bit lower.

It's also fine to go higher although that's just not what we're doing now. And then feel like the shoulder blades, if they're too close together, it's almost like they stop the spine from touching the floor. Not really, but that kind of sensation. So allow the shoulder blades to widen gently, create some space for the spine to come down. Keep that little bit of tractioning and hopefully, the spine will feel a little bit longer when you get to the bottom, okay?

So that's what I'm after. More of decreasing this space here without getting the hip flexors too active, okay? That's our bridge. All right, so lie down. All right, so feet in a comfortable position.

If you get your feet too close to you, it's often difficult to find the mobility in your hip joints and if it's too far away, sometimes, it's hard to get the strength. So find that point where it feels optimal for you and then just do a little bit of activation where it feels like the space between your heels and your pelvis just decreases by maybe a millimeter, very small. And then continue to roll into your bridge, feeling the back of your pelvis lengthen through your legs. So quite often, we hear the cue of lengthening the knees away, which in theory, is really good but it often gives extension in the spine. So if you think about lengthening the back of the leg, it's a little bit more effective.

Widen between your shoulder blades and then begin to roll down. Keep the sense of lengthening your pelvis toward the back of your calves and the back of your heels so there's length. Roll up again to your top position. Great, this is looking really nice, everybody. Once you get to your top position, then stop there for a moment and just barely shift your weight towards your right shoulder.

So just shifted over a little bit, not much. Begin to roll down across your right shoulder blade, your right ribs, your right waist, your right hip. Go into the six o'clock position of your pelvic clock 'cause you circle around and then roll back up on the left side. Pause when you get to your left shoulder and then roll down through your left shoulder, your left ribs, your left waist, your left hip. Go around your tailbone, come back up on the right.

Come back to the center. Widen between your shoulder blades and roll down. Very nice, bring your knees in toward your chest and for those who want to go into roll over, extend your legs up to the ceiling, otherwise, you can come up to sit and observe is fine. So extend your legs to the ceiling but keep them bent, keep them soft. Doesn't have to be major straight legs.

And feel how when you bring your legs towards you, your pelvis just naturally starts to come off of the floor. It's not very much but it's just that little inclination toward up, I'm gonna go, right? It's what we try to stop people from doing all the time on the reformer, right? Feet and straps, whoa, and their feet are going over. So continue with that feeling of allowing your legs to come over you and start to roll into your shoulder stand with your feet reaching to the person that was behind you.

Pause when you get there and see if you can bring your legs so that they are horizontal, parallel to the ceiling and then begin to roll down slowly, widening your shoulder blades so you create some space for your body to go. Very nice. Inhale when you come back with your legs pointing to the ceiling, we're gonna do that one more time. Roll over. Now, when you get to your roll over position, checking to make sure that you don't put too much weight into the back of your head, without lifting your feet, I want you to feel like you're gonna press the backs of your thighs toward the ceiling.

So if the ceiling was lowered and the ceiling was touching you, you could press your legs into the ceiling but remember the ceiling's there so your feet can't be higher than your bottom. Oh, yep. And now, roll down with that feeling. It's almost the feeling of a little bit of hip extension. Right, and that's gonna help you, go ahead and start to roll down.

That's gonna help you maintain a little bit more axial length. That's it, great. Let this lengthen in the front. Beautiful. All right, so who wants to come up and give this a go?

All right. So, extend your legs up to the ceiling. Okay, so you can gather around if you want or you can, yeah, just make sure we leave a little space in the front. All right, so again, the initial part of what we're doing is often that feeling of going up. So we really wanna make sure we get to the going over part.

So just like we did with the pelvis and the other in the other movements we did, there's just some movement that's happening and we wanna get to a point, bend your knees just a tiny bit where she has the capacity to do this with ease. That's telling her body, right, we're going over, we're rolling, good. And if you watched from the beginning to now, you can see a little change in her abdominal wall before it was doing the oh, I hope I make it (grunts) kind of feeling and now, she's just moving, she's just mobilizing or spine. She's not doing as much work with her abdominals 'cause they don't need to do quite so much work. So now, you can keep your legs like this or you can lengthen them, whatever you prefer.

You're gonna do that to start and you're gonna begin to roll over. Good, and then pause here. So stay there for a moment and roll about one more vertebra down in your upper spine. So, right in here. See if you can put this down on my finger.

So create some space here. There you go, that's great. Lift your feet just a tiny bit. Good, now here's the ceiling thing that I was talking about. So I want her to press ever so gently up into my hands.

Yeah, so I don't want her feet to go up, that's different. I just wanna have the feeling of creating space here by using the back of the legs. That's it. Now, you're gonna maintain that. If you do it too much, you're gonna go too fast so it's just a tiny bit and you're gonna have the same feeling from your bridge as earlier.

You're gonna allow the shoulder blades to be wide to the sides. You're gonna keep just that little tiny bit of activation there and you're gonna begin to roll yourself down. Now, as you're rolling down, the front of your rib cage, including your breastbone, has to lengthen. Good, very nice. So it's important to remember, even on a bridge that at some point, the front of the body has to lengthen a little bit, right?

If we're continuing to do this, then we've lost, that's when we get the flop down. So cues that talk about lengthening the breastbone, gliding the ribs, opening the chest, all of that can be really helpful. It's just a reminder to let everything move, okay? So on this, it's really important, all right? So let's do it one more time.

How's that feel? It's okay? Same thing in bridging. If I tell her to really press your arms down, she's gonna start to activate some spine extensors, which is not what we want. So a little press is absolutely perfectly fine.

A big press is probably not, okay? So now, start the legs going over, draw the abdominals and just that little bit. Good, yes, that's it. And remember where you stopped when you came up to this position. Good, now see if you can maintain this and continue to send your feet to the back wall.

Right. So if I could push her, I'd wanna push this part that way a little bit to pull this part this way a little bit, right? That way, she's not gonna increase the pressure up at the top of the chest, okay? Not gonna really do that. That's just where my eye is going, okay?

So she's got a little bit of a press up here and now, she's gonna start to roll down, widening the shoulders gently and allowing all of the front of the body to lengthen. Each ribs lengthening away from the next rib, the next rib, the next rib. Beautiful. Good, ready to go into corkscrew? Oh.

Oh, I didn't sign up for that. (chuckling) Good, so we're gonna do it. We can even just do the beginning of it if that's better for you. So let's go over again. I hate when they get out the manuals and I have to put it somewhere. Good, now, send these guys down again like you did before.

Yes, and these guys long. That's it. So, see if you can open these ribs like you did during the bridging. Lift your feet up judges a little bit. Good, hold there.

So, platter of drinks. Depending on how you feel, it might be coffee, might be water, might be champagne. I don't know, okay? Take your feet to your right shoulder without spilling anything and come back across and come to this side. Very good.

You have a preference of which side you wanna roll on? Okay, so go to whichever side you wanna go to. Good, from here, begin to roll down on the left side of your rib cage. That's it. Take as big of a circle as you want and in the middle, there's that moment where you go am I in the right alignment?

If you're where you started, you're in the right alignment. She's doing great, she's looking at me like (gasps), so. Okay, so come across. That's it. Right away, you're gonna pick up that tray of drinks and bring it back to the center.

Good, one of the most common mistakes on corkscrew is that, right? So this hip starts to come up and the spine starts to side bend, right? Or the side bends this way. This is sticky enough, it's not gonna, it's probably not gonna fall so do it incorrectly, go this way. Right, so there's the, ooh, right? Falls off.

So we wanna keep the body in this position and simply rotate. What exercise do you know in the mat work that would be a perfect preparation for this? Spine stretch or spine twist. So it's the same feeling of one part moving and the other part not. Go ahead and roll yourself down.

Widen through here and allow the front of the body to lengthen. That's nice, good. And then take a break when you get down to the bottom. Good, very nice. All right.

All right, so we're gonna have a little experiment.

Chapter 6

Back Extension

Those of you that wanna do this, we're gonna do rollover quickly. Not quickly, just quickly. I'm gonna test my theory. I have a theory about the rollover.

So, lie down, legs to the ceiling. Go into your rollover. Again, with that sensation of pressing the back of the thigh up toward the ceiling in a way that gives you axial length but not pressing you into your head and neck. Now, stay there and allow your arms to float back to the floor behind you. They may touch the floor, they may not, your choice.

All the way back toward the floor and begin to roll down from there, lengthening a little bit through the fingertips as you do that. Inhale when you come back, roll over one more time. Hands stay behind you to start. And then roll back down. For how many of you was that easier?

I only see feet, I only see a couple of hands. (chuckles) So my theory is that about a third of the people in any class, it will be easier for them. Even though everybody, 100% of people will say I can't do that, it's not easier, about a third of the people, it's actually easier for taking some weight back and also getting the sensation of length and taking away the potential for extension. Right, so the question is about the potential that often happens of the shoulders and everything being constricted and the neck being constricted. One thing is you want, I mean you need to make sure when they're doing things like bridging that they really understand what that stopping point is like and cuing from the front to make sure when they're rolling down, which they may need to roll down a little bit to get into the right position, that's very helpful so that the musculature has a chance to lengthen and making sure they have good mobility in their upper back. So the chest lift, if they're doing chest lift like this, that's not promoting any flexibility here so we wanna make sure that that's that that's happening, okay?

Those are some of them best things 'cause they need to learn that internal awareness. Yeah, yeah, okay. All right. Extension, yay! So some of you are happy and some of you are thinking ah, extension. All right, so going into this, we practice this a little bit in the class.

And again, if we think about what we talked about for chest lift into flexion, this is chest lift, it's the same movement into extension. We wanna maintain contact with the mat, we wanna maintain contact with the floor. If our goal for the prone press up is to get away from the floor, we've missed the opportunity to actually have movement in our upper thoracic spine. So that's one of the things that we need to watch in our own queuing is how we're talking about this and lift way up and come away from the floor, very often said. What we need to be talking about is going into the floor, right?

So the ribs need to almost sink down. So I use the image of the memory foam mattress, right? The one where you push your hand into it and it stays that imprint. So if we have that opportunity to stay down, then again, we're telling the ribs to do their slight forward rolling motion to maintain good articulation where the ribs attach to the spine. If we move it as one piece, again, it becomes that long lever, all right?

So that's what we wanna have that sensation of. So let's practice a little bit with this sensation with the hand starting under the forehead. So some of you have done this before. I'm borrowing this from Sherry because I liked it so much in differentiating upper, middle and lower movement in the thoracic spine. So take position lying prone with your hands under your forehead and while you're there, see if you can widen through your elbows so that your shoulders drop heart a little bit and more of the front of your body is on the floor.

Keep facing down as you start to disengage your forehead from your hands. And we're not extending yet, we're just lifting. And then place your head back down. Make sure when you're doing that that you're not moving any other part of your body. If you can let this go.

There, now, just put your hands there. Uh-huh, that's much better, great. So lift your head away from your hands and place it back down. You have that imaginary mirror in front of you, lift your head away from your hands. Now, with that intention of moving in your upper back, start to allow the front of your chest, right under your collar bones to lengthen and go into extension.

It's maybe you feel like you're doing an inch of movement and then stop and come back down. Continue to feel the ribs in contact with the floor as you keep going, so lifting the head. Yes, and then coming back down. And again, lift the head. Start to go into extension in the upper back.

Now, hold there, switch on the abdominals just a little bit more if you need to and start to bring your hands to your head. Hold there. See if you can maintain everything and the only change is your arms floating off of the floor. Place your hands back down, let your body roll down. Lift your head straight off of your hands.

It's just hovering. Go into that little bit of extension in your upper, upper back. Bring your hands to your head. Stay there, just to your forehead. Just in front, yeah.

Now, from that position, open your arms out to the sides to your capital E position and place your hands back down on the floor. Arms and hands are down. Stay up though. Don't let your body come down. Mm-hm, just the arms.

Yep, good. Now, continue to peel up that next little bit and as you do that, shift the weight down into your lower ribs. Your lower ribs make more contact with the floor, they're pressing down. Hold there. Move your hands to the pushup position, hands beside your rib cage.

You're gonna go that extra little bit. Reach your elbows back for your heels and let your lowest ribs, that band of cartilage connecting the lowest ribs go down into the floor just a little bit more. Stay there, take a gentle breath in and as you exhale, sink into the floor. Don't change the position, just sink into the floor. Inhale (inhales) and sink into the floor.

One more time. While you're there, lift your hands from the floor. Hold there. Roll your body down. Good, reach your elbows away, come back into that same position.

Hold there. Feel and see the indentation of your ribs into the mat. Reach your arms back towards your feet. See if that little bit of reach helps you to get into the position more. Stay there.

That's it, think these ribs down. And turn your head to the side and come down. So let's just start with the hands next to the rib cage in the pushup, the press up position. Elbows bent. Yep, okay.

So, very common position. The head is down farther than the body, right? So the head is not in line with the body. So again, that sense of hovering the head up. So lift your head so you are looking straight at the floor.

Now, as you exhale, let your body come back down as a whole piece. So just go back to where you started but don't let your head go down, so keep the head as part of it. There, that's it. So just that is a huge amount of extension work for him. He has to be able to lift the head but not use his extension down here.

He has to start to access things up here which is great. How's that feel you? It's okay? All right, so reach your elbows away. Good, and that's that point where, again, that Mr. Spock lengthening through the tips of the ears is very helpful. Now, as you start to come up, John, I want you to feel like the front of your rib cage is going to move into the mat.

Good, stay there for a moment and take a breath in. And as you exhale, allow there to be some mobility in the body to come back up. Right, so normally, we inhale for extension but in this position, if he inhales a lot, it's actually kinda pushing him away from the floor so I'm gonna get more extension out of him when he exhales and allows there to be space at the front of the ribs and let your body sink into the mat away from my hand here. There, yes, that's it. One more time.

Sink into the mat away from my hand and let this come around at the same time. Good. And there's a lot of conversation going on. It's like hmm, should I go here? Should I go there? Yeah, now, as you roll down, let this start to roll down first.

So remember how we lengthened the sacrum away like the jet taking off? His breastbone is doing that same thing. Okay, one more time. Lengthen through the back of the neck, reach the elbows away. Take your breastbone this way.

That's it. Keep taking it this way and sinking into the mat. Great, hold there, lift your hands up. Reach your hands out I'd like a capital T. Nice, reach them back for your feet.

Exhale at the sink into the mat. Good, now as you roll down, yes, beautiful. As you roll down, keep lengthening the breastbone long, like it's lengthening the front of your body. Beautiful, turn your head to the side and come on down. Good.

And he was talking about having better, feeling better range, more range of motion which is coming from accessing a little bit more up here and not just simply relying on coming into the lower thoracic and upper lumbar. And that's so calm, we're so goal-oriented. It's gonna turn into swan and I've got to get up off the floor. The feeling is going into the floor and around which is the exact same thing that we just did with bridging which we just did with chest lift. So they're all connected.

We just think about extension totally differently than we think about flexion and really, they're not the same but they are. I mean you can approach it in the same way. If we take that movement into something like scarecrow, now, we've got to deal with the arm and the shoulder. So we've accomplished the thoracic extension part of it. We now have some strategies for getting bits more, more, more extension by breaking it up into the different parts but now, I got to deal with our arms and what's going on there.

So when we're in this position of the scarecrow which is here, what we're after is an external rotation of the humerus. So our first activity is going to be to lift the hands and the forearms from the floor and then we're gonna continue to lift the elbows off the floor and those of you that have done this movement before, what we normally see is lying prone. I just wanna be up so you can see it, is the hands lift nicely. There's a sense of external rotation and as soon as we lift from the elbow from the floor, it does this. So, I wanna use this.

If you think of this movement as a preparation for swan on the trap table with the tower bar, think of how we move the bar to here and to here. I wanna continue having external rotation because that's gonna tell my spine to potentially go into that movement, right? So if we can connect that together, that's gonna be really helpful. So, let's bring, somebody come up, somebody who hasn't done this very much. Okay, so your starting position, have you done this scarecrow before?

Yeah, but it's always the one that gets me. Got it, okay. So, arms are gonna start at a capital E position so you're gonna go out here and down. Great, okay. So again, our first thing that we need to do is we need to bring the head in line with the body.

We can't start with the head down, it's the equivalent of starting in supine with the head back, right? We're not even at the starting position yet. So start go all the way down. Yeah, exactly. So without changing this very much, I want you to feel like you're just gonna hover the head up.

Good, and that's plenty. So now, from here, you're gonna lift your hands and your forearms. Good, not your elbow though, just the elbow stays down. Right. So what I'm looking for, what I'm looking at is what happens to the humerus as she lifts her hand and it's a very small lift.

Some people think, again, goal-oriented has to be really big. It doesn't. Just do it enough to be able to do it. Bring your elbows a little bit up if you can. This way, yeah, great.

And what I'm seeing is that the head of the humerus, the front of the shoulder is as she's lifting, it's dropping in just a little bit, not much but a little bit. So when you start to lift your hands, put them back down, when you, yup, keep going. Bring yourself back into position. Yeah. (chuckles) So head lifts a little bit. Now, bring your head off the mat first, there.

So when you lift, keep the sense of this being pulling up away from my hands just a little bit. Not your body. Not your body, bring your body back down. Yeah, and just lift and come back down. Just lift into my, yes, that's it.

Just that little bit and lift that just, good. So we're trying to keep the humeral head in the socket best as possible. Now, lift your elbows and continue this feeling of external rotation this way. Yeah, put your elbows down. Put your hands down.

That's it, hands up. She's so good, she did exactly what I said. Elbows down and down. Lift your forearm off the mat this time. Thank you and lift your elbow off the mat.

Now, keep lifting your form when you lift your elbow. There, good. Now, allow the front of the rib cage to just expand, pause there, take your breath in. There she did. And exhale, these ribs down.

Good. Uh-huh, set these ribs down, these ribs down, these ribs down. Take a break for a moment. Yeah, take a break. One more time.

So start already with this pulled in. That's it. Bring this forward just a bit. Lift the hands and lift this. That's right, and come around.

So instead of lifting off the floor, go into the floor. Go through the mat to the floor. There you go. Lengthen the neck just a little bit more. That's it, don't come so high.

You're trying to come up really giant. Let's go small. That's it. Roll down through here. Down and down.

Good. Stretch your arms overhead. Let's see if we can find a little bit more easier. Take your hands apart a little bit. All right, so one of the things you can start with this is to start to encourage a little bit more activation around the shoulder girdle and you can feel if you get into the inside of the underarm that sense of serratus and different, some of the internal muscles there working.

So from here, just really gently press into my fingers, just, yeah, good and then let that go. Lift your head from the mat again. That's it. Yeah, and as we start to lift the arm, so let your body come down a little bit. Don't go so, not so big.

I want you to have the sensation of pressing into here just a little bit to lengthen the arm to go along. Mm-hm, but don't lift everything yet. You're trying to be too much. Too much everything. I'm gonna sneak in the front just so I can get a little bit better feel for her shoulder.

Okay, so bend your arm and put your hand down under your forehead. You got it. So stretch this arm long. Right, and I can feel her strategy already is to do this. Yeah, which is why scarecrow is difficult.

So I want you to get that little bit of activation under here. No, way too much and Simon didn't say lift your arm yet. That's it. And then slide your hand on the carpet. That's it, and let it come back.

Find a little bit of under here just a little bit. Yes, glide. Good, there we go. And I'm not pushing her, right? I'm not doing anything other than turning her skin to create the movement that I want.

So I'm not mobilizing her shoulder or doing anything like that. So find a little bit of activation. So, wait, wait, wait, too fast. So find how you can meet me under here. So that shoulder depression, so if you can do it without depressing your shoulder and do this.

There you go. Now, mm, slide your arm. Thank you. So she doesn't really wanna go into any upward rotation of her shoulders so that's where I would start first to make sure that that's active. So press into here just a little bit.

That's better, slide your hand. Mm-hm, without so much going here. Yeah, just slide your arm away from you and slide your arm away. That's it. And one more time, slide away.

There we go. Good, now, come back to your scarecrow so just quickly look at that and see if that gives you a little bit of information here. So lift your head, not so much, just a little bit. That's it. Now, lift your forearm.

Lift your elbow. Better, good. And let your elbow come down and your forearm come down. Good, yeah, so she found some movement of the arm in the socket, which is really important, right? We have a lot of overhead movement that we need to do.

Remembering that we have that sense of upward rotation, we don't wanna take that away. There's so much depression taught so we wanna be able to facilitate that and move in the shoulder joint and not move the scapula, which is what she changed a bit of. Yeah, so practice that a little bit, that feeling of getting connected underneath and to the side. You can feel it on yourself. You can put your fingers into your underarm and externally rotate a little bit and press in there and you'll feel that connection and allow yourself to allow the shoulder to move as you're going overhead.

If you're doing this, you're moving the scapula. Move in the socket. Right, and you'll find that ease of movement. Meda, yeah. Yeah, she used a lot of force at the beginning mainly because that's what she thought was the point of the movement.

That was the point of it, yeah. So, again, being clear with what's the intention of that movement. It was just to get external rotation of the humerus, not to do that. And again, that's what our expectations will fulfill for us. So what are some common things

Chapter 7

Teaser

that you see happen during the teaser?

Things that you don't really wanna see? You go into extension. What else? Yeah, so there's some uncontrolled movement of the abdominal wall. We don't keep the connection whether it's just a global press out or possibly that rectus pufus, yeah, right?

Too much hip flexor, yeah, that's the dominant pattern. That's probably enough, yeah? Okay, all right, so go ahead and lie down. Do you wanna do a test one first? That's a little bit mean but- Whatever you want.

We can we can do it, all right. So stretch your legs out. I will let you keep the underhand position for the arms. I'm not a huge fan at first have people with their arms overhead this way because I feel like it just kind of throws the movement. So what I wanna have is more of a scooping underneath but I'm not gonna tell her too much about that because I don't wanna do the do the, mess up our test one.

So start to roll into your teaser. Pretty okay, and roll back down. All right, so let's see if we can make it better. Do you have a couple of things that you'd like to see happen more? Little smoother, more flexion.

Let's make one of our goals spine flexion. So what we talked about with in regard to bridging and in regard to the leg circle is important here. So what often happens is the legs will start to lift before anything else starts to happen and it just becomes too long levers, long levers of the legs and long levers of the body. So the first thing I want her to be able to do is lengthen her legs a bit. What you have to be careful is that often starts to turn on the quads which then becomes hip flexion.

So the feeling of lengthening this direction is really helpful. So if I can pull just a little bit on her legs, she can start to understand how much she has to contract her abdominals to keep me from moving her into extension 'cause normally, if we do this, if I pull on her legs, that's often gonna pull her into extension, right? I can push her into flexion and extension and move her that way, okay? So I don't want that to happen. That's what normally happens and she instinctively, when I started to pull on her legs, she instinctively gave that little bit of girdle connection around the center narrowing the waistline so that she didn't move.

Let the ribs glide into that movement like you're gonna glide your ribs over your legs. That's it. Good. So that's the feeling I want you to have at the beginning of the movement. So that's what's gonna happen at the legs.

Okay, so I'll let that come down. The other thing that's important is all that stuff we talked about in the roll up which was keep the pelvis more horizontal, right? Before you start to roll up. So we're gonna do the roll up and then we're gonna add the legs, all right? So, start with the hands reaching and just go into the chest lift with the palms like you're scooping up something light under your hands.

Stay there for a moment. See how you can continue to do this and exhale and just expand your ribs a little bit but don't go anywhere. Good, and expand, good. Now, from there, you're gonna start to lengthen like you're gonna reach out to the wall on the other side of the room, keep that sense of lengthening through the legs and open the back of your ribs as you begin to roll up. Right, and then roll back down.

Beautiful. Much more flexion. Let's add the legs to that, okay? So the timing is head, neck and shoulders roll up and then the legs are gonna start to lift. Okay, so, you start, I'll follow you.

Good and you take over whenever, yeah. Good, beautiful. leave your legs here. Roll your pelvis back just like we did in the standing roll down, the regular roll down and then whenever it feels natural, let your legs come down. Inhale there, exhale.

Head, neck and shoulder, they're working, yeah. They'll work, they'll work. Head, neck and shoulders roll. Scoop through the arms a little bit. Lengthen this way, go around, around, around.

Beautiful, keep going, keep going, keep going. I'll keep the legs for a moment. Roll away from your legs. Roll away and lengthen inside deep in the pelvis, lengthen. Keep doing it, keep doing it, keep doing it, keep doing it, keep doing it.

Keep going, keep going, keep going and release. Yeah, so much better. (attendees applauding) So. That's a hard spot, yeah. Yeah, it's a tough spot to get through.

Oh, my gosh, especially, again, in front of 40 of your closest friends. What we'd work on next, again, is a little bit less gripping here. That would be the next, that'd be the next point to go. But again, if we move in the hip, then we only have to do a little bit of spine and a little bit of hip and not all one or the other. Right, thank you, thank you.

All right. So we didn't get to get to everything. So if there's something you're dying to do from the bottom of that list, come into the Movement Village whenever I'm teaching or actually find me any time that I'm not teaching and we can do stuff. You can just move in with me, absolutely. Teaching, yeah, question is how would you get rid of that gripping?

One is to keep improving spine mobility. She improved it a lot just from one minute to the next minute but it was not natural for her. She had really think and work about it. So that would be one of the goals is to get the spine mobility part where it doesn't even have to be thought of. And then teach the legs how much again is that, how much is necessary to lift and right now, she's still recruiting her hip flexors a lot to try to create the movement.

So finding that balance. Maybe something like reverse swan on the chair with the legs resting on the trap table so that she's able to understand how to do this movement without that to where she could eventually lift because she's just moving in her hip joint and she's not having to work so hard to stabilize and try to create movement almost with the hip flexors. So that'd be my plan for her. Come see me after Michelle and we'll work on that. Great, any other last minute finish up questions?

Does this give you some ideas of how you can approach the movement a little bit differently? Yeah, great. And you'll come up with your own ways. This is just some ways. You'll come up with your own ways of doing this that makes sense for you.

So, great. Thank you so much for coming. (attendees applauding and cheering)

Continuing Education Credits

If you complete this workshop, you will earn:

3.0 credits from National Pilates Certification Program (NPCP)

The National Pilates Certification Program is accredited by the National Commission for Certifying Agencies (NCCA)

Comments

3 people like this.
Thanks so much for bringing more of the Polestar educators to PilatesAnytime! Very much appreciated! Miami is so far away from NH! :)
1 person likes this.
I have a CSCS from NSCA. Do these CEU transfer to NSCA?
Lisa ~ At the moment we only have CECs for the PMA available. Sometimes different organizations will allow you to petition to get workshops approved for CECs. I recommend contacting NSCA to see if they will do that for this workshop.
2 people like this.
Just wonderful information! I particularly liked the scarecrow piece and how you explained moving from the humerus in the socket rather than the shoulder girdle. I would love another shoulder mechanics workshop here on PA! Thanks for a terrific workshop!
3 people like this.
Wonderful workshop! There is so much to learn and explore, - I will have to watch the videos several times! Nevertheless, I envy everybody there in the room for the script! Couldn´t you offer a download for that paper - for some additional cost? I often feel that we are missing some information by just looking at parts of the workshop.
thank you anyway!!
1 person likes this.
WOW, my rib cage DOES move segmentally into thoracic extension! I have NEVER felt thoracic extension like that, that progression really helped. I felt like I was destined to be the girl that would never segtimentally extend, breakthrough! :)Thank you for all your wonderful insights.
DJ
DJ
Are we limited to the number of times we view the workshop ? does paying for it mean we can download it rather than view it via the internet?
Diane ~ When you purchase a workshop, you can take as long as you like to watch it, and you can watch it as many times as you want. There is no limit. We don't have a feature that allows you to download our videos, so you will still need an internet connection to view the workshop. I hope you enjoy it!
any possibility of getting the handouts that went with this workshop?
Martha "Mars" Hart ~ Unfortunately we don't have handouts for this workshop.
1-10 of 12

You need to be a subscriber to post a comment.

Please Log In or Create an Account to start your free trial.

Footer Pilates Anytime Logo

Welcome to Your Pilates Era

Experience Your Joy

Let's Begin