Premium workshop

You can view a 2 minute preview. For details, scroll down below the video.

Workshop #1819

Cadillac Techniques

50 min - Workshop
20 likes

Description

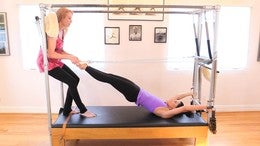
Jillian Hessel shows you how to get the most out of your training sessions on the Cadillac. Accompanied by a handbook (linked below), listing each exercise in sequence with the video, Jillian describes the equipment set up, body position, recommended repetitions, modifications, special cautions, and benefits for each exercise.

Special Note - Jillian's Cadillac, featured in this video, was originally built by Joseph Pilates for Carola Trier.

This video was filmed in 1997 by Jillian Hessel and digitally remastered in 2006.
What You'll Need: Cadillac, Magic Circle

About This Video

(Pace N/A)
Jun 06, 2014
(Log In to track)

Transcript

Read Full Transcript

[inaudible] [inaudible] [inaudible]. Hi, I'm Julian has the led light to introduce you to my Cadillac. This Cadillac was built many years ago by Joseph [inaudible] or my mentor Corolla treer. When Corolla retired in 1988 I shipped it out to California. The bottom platform has since been rebuilt by Ken Andelman of current concepts, but the rest of what you see if the structure is original, this here is called the open end where all the last springs attach.

This end down here is called the tower end where we have the push through bar. Let's start a little tour of the anatomy of the Cadillac here at the open end. On this end you'll find many, many springs. There's a set of springs attached from the outside that are used for the double leg wear mine supine. There's also a set of springs with handles used for arm work either on the table or freestanding on the outside of the open end.

We have a cross bar here which is not commonly found on all Cadillacs and on some Cadillacs. This is actually adjustable up and down. Mine is fixed here in the center. We have two more springs, one white and one heavy four single leg spring work done either supine or sideline. You also have a crossbar here which is quite unusual, which can be used to stabilize the body while lying on the arm. The Cadillac attach from the top.

We have the movable sliding bar here with the swing attached to it. Swing was curled. This name for this piece of equipment. It's also known as the trap. He's a straight a swing here with us for a strap hanging and two springs. This should be freely movable on your Cadillac.

The final item on the open end we have here the roll back bar and the role. That bar can be attached from the top of the Cadillac frame or moved down to the center here depending on what kind of exercises you're going to be using. And now let's move to the tower. So here we are at the tower and the Cadillac starting with this piece of equipment here, which we call the push through your bar. The push through bar has two setups, either with springs, the bottom when we have springs from the bottom, very important first to put on the safety chain which hangs from the top to secure the bar so it's not falling into a client's face to secure the safety chain. And then we can attach the springs from the bottom.

The famous exercise called the is actually done with this setup, what we named the tower and four. So that's our set up with springs from the bottom. We can also perform exercises with the springs coming from the top with the push through bar like so. So we have the two options springs from the bottom springs from the top also on the tower end we have the hanging fuzzies for certain exercises and this strap down here put strap and loops on either side of the Cadillac during the feet when we are doing legs springs from the open end, the final piece of equipment which we can move on and off the Cadillac for certain exercises, the Woodstock or board, which becomes the floor for the standing leg in the open, open and legs spring work. And that's it. We're going to start at the open end.

Now using the roll that bar to do the roll back. The springs are attached here from the top for this, and if you don't have this bottom foot stop or Bar, you can take your teeth to the width of the upright poles. I'm going to keep my feet about hip width apart here, sitting right up on the sits bones. Taking a breath to feel the plum line before I begin. [inaudible] [inaudible] [inaudible] [inaudible] [inaudible] [inaudible] plane roll back and be added onto with a spine arch and rowing [inaudible] and the reverse [inaudible].

The rollback can also be modified for scoliosis or strengthening the weak side of the body by placing one hand in the middle of the bar. The other hand can hold the rib cage and we work on, in this case, on the right side of the back, coming down to the back evenly with the left [inaudible] another version of rollback. He's done with one ankle crossed over the other at an oblique angle. Again, using both hands and concentrating on drawing back on one side of the body. [inaudible].

I feel my left obliques here. [inaudible] and then the other side will be the right [inaudible]. The emphasis on the role back, however you're performing it should be on beginning through the plumb line of the body and returning to the plum line. With each performance, we're going to do this spine lift with the knees over the bar. Now [inaudible] it's important to move down and lock the elbows and hold tightly to the bar. Springs are attached from the top and the knees are over the bar. If the bar tends to slip, you use a pad under the knee.

[inaudible] [inaudible] [inaudible] okay, I'm going to show you several ways to do the breathing. 100 here on the Cadillac. I'm only going to show about three sets of each one. Okay. You can use your roll back bar attached.

Now from the middle of the of the structure here, [inaudible] [inaudible] well, I may also plays the role of back bar under the legs or Romana special [inaudible] be careful not to lock the elbows on your reading. 100 and the last one is using the handles here. Okay. [inaudible] we had moved down to the tower and now we've set up two springs from the top. You may prefer to have only one and I'm going to show you the setup combo either using magic circle or the swing. I'm gonna Start with the magic circle between the thighs and to set up properly. For this exercise, you want to be approximately arms length from the polls.

What we're looking for is when you grab the bar, there should be a vertical line between your shoulder joint and the bar. You can start off with an extension of the puppet arms from the fundamentals extending and protracting the scapula and pulling them back down to work on upper body stabilization. Inhaling and exhaling, finding a neutral position for the scapula. Once that neutral is established, you want to hold onto it and begin the exercise. Inhaling [inaudible] [inaudible] [inaudible] [inaudible] [inaudible] [inaudible] [inaudible] [inaudible]. For those who don't like using the magic circle, it's possible to use the swing and also avoiding the arching of the neck. [inaudible] [inaudible] [inaudible].

I'm going to show you the Cobra into this one. Die Now and move right into the cap. The Cobra and swan work on spinal extension into hyperextension and the cat is going to go in a full range of motion from flection to full extension and some hybrid stantion. So here we go. Starting on the Tummy first we work on extension [inaudible] and then straight arms into the Cobra into hyperextension. If the client's back is healthy, okay, we can go into a full back then [inaudible] maintaining the stability of the scapula.

[inaudible] just before perform this one dive, I need to move sled before and I'm so tall [inaudible] no, I'm moving right into the cat exercise. We want to kneel as close to the bar as possible. Some people even teach this with the knees right underneath the bar. My bar is a little high for that, so I'm going to start just slightly behind it in a nice kneeling position without losing the integrity of the posture here. [inaudible] out into the cab.

[inaudible] and can you think that [inaudible] [inaudible] [inaudible] if your client is advanced, they can take the head back in the hinge. [inaudible] [inaudible]. Here we are on the tower and with the springs from the bottom using the safety chain, I have two springs and you may wish to use, they're quite heavy. You also have the option if these springs are too heavy or borrowing the legs springs from the open end and using those for your client. I'm going to do a series of exercises here, starting with Ben and stretch with both legs. Moving into an ankle, exercise for the single leg bend and stretch on the single leg supine.

Bamiyan stretch on the side tower and moving into the monkey. So here we go. Double. Then in stretch I'm positioning myself with my head level with the top of the table, pressing the bar up and placing all five minute tarsal bones around the bar. I want to be careful to maintain neutral spine here and not going to a posterior tilt. This exercise is for the lower leg and foot and the hamstrings. I'm flexing at the hip and knee here and I go as deep as I can without curling the tailbone off, pressing the legs out, flexing the ankles, pointing, flexing and watching the tracking of the hip, knee, ankle and foot as by band.

[inaudible]. This exercise should be performed 10 times with both legs and then we remove one of the springs. I'm not going to do 10 reps here. You move one of the springs and moving into the single leg. We're going to do the ankle exercise next, wrapping all five toes over the bar and stabilizing the upper feet five here with my hands and working just the lower leg, flexing and warranty. They should be done five times and just going to chose three on each leg. Again, just working the lower leg and back on the first leg.

I extend the supporting leg down now to do and stretch same routine as I did with both legs, extending the legs through the back of the hamstring heel leading, flexing the ankle, pointing, flexing and bending and the other side. Hi. Why don't you be careful here on the single leg. Not to hike up the hip on the working leg, but to keep the pelvis level that's been in stretch supine on the single leg. I'm gonna turn it to my side now and show bend and stretch on the side. For this exercise, the food has turned out that pinky toe will not be in contact with the bar bottom leg extended. I want to be careful here, not to fall backwards, but to keep the hips one hip vertical over the other to the side and the same routine. Flex the foot, point the foot, flex the foot and bending the knee behind the shoulder.

[inaudible] is exercise should always be done with the screen behind the body. You don't want the spring crossing in front of your face. It's quite dangerous. However, I'm going to show it that way for the purposes of the video so we don't have to stop to the other side. Do not try this at home. [inaudible] I'm going to move right into the tower here. Again, this spring is too heavy.

You may find you need to use one of the legs springs from the other end of the table. I'm moving down to arms length from the Poles, pressing the bar up and placing all five toes over the bar. This exercise is not for anyone with a lower back problem. In particular I have a herniated disc or a fused spine. It's too much pressure placed on the lower back. Here we want to begin with a modified tower by rolling the hips up and back down to determine if there's too much pressure on the back.

This is comfortable for the client. They may roll into the hip lift and extending the legs and rolling back down within [inaudible]. If all is going from here [inaudible] we roll back down with straight legs, repeat the flex point, flex and then here the knees are tracking open to the armpits, not parallel. Full Tower. The legs extend straight and the curl comes from the pelvis all the way up. [inaudible] it's a great stretch there.

The last exercise I'm showing here is called the monkey and moving off to the end of the table and placing my feet. Once again hit with the part over the foot bar. The hands come alongside the feet. Let me start in a fetal position. [inaudible] standing the feet out, collecting, pointing, flexing and hollowing out of the belly. [inaudible] one can also stay in the extended position and walk through the fee [inaudible] and that's the monkey [inaudible].

I want to show the mini reverse tower, which is an option for people with very tight hamstrings who can't do, Ben is stretching the position I showed you and also people with cervical problems may be able to do this variation. So here I have taken the long legs, springs from the open end and place them here, springs from the bottom tower set up and I'm going to buy in the other direction here. Again, placing the toes over the bar and as you can see as I extend my legs, they're not at 90 degrees. We have the potential here for someone with very tight hamstrings to be to work both Ben and stretch as I showed him before. Oh and why could also work the single leg, which I'm not going to show, and then also rolling up through the spine with far less pressure on the cervical and low back area. So this is a good option for those clients who are less flexible.

[inaudible] [inaudible] many rivers tower. I'm going to show the Flying Eagle. Another exercise that's done prone. It's a cousin of pulling straps wanting to on the reformer. I rolled up a towel so I don't have to smash my nose and I'm using the handles here. [inaudible] why Eagle?

We're still at the open end here. We're going to do double legs springs supine. There's a long series of exercises that we'll announce each one as I go. I'm using a pillow to maintain the alignment of my neck and you may either have your arms fully straight or slightly bent. I'm going to keep mine bent. I'm starting here with running. Keep in mind this can be performed either in a parallel position or it turned out position. What we want to do is work the extensors here, so avoid pulling the straps with the feet.

Really concentrate on working from the top of the thigh. Shh, Shh, shh, shh, shh. That was done. Turned out can also be performed parallel. I'm not going to show it. I'm going to show next this scissors in parallel starting with a slight pull on the springs.

Next, I'll show a bicycle in two directions. For this exercise, I'm slightly outwardly rotated at the hip so that when I bend my knee, the spring will pass to the inside of the kneecap. [inaudible] and reverse [inaudible] Corolla used to talk about painting the wall with the sole of the foot could also be done flexed, reaching out of the hamstrings. [inaudible]. Next I'm going to show the frog I flex at the hip and the knee without going into a posterior tilt. Maintaining neutral spine position. [inaudible].

I'm showing that the flex foot here, one could keep the foot pointed for moving into a flex reversed Fra [inaudible] maintaining neutral spine at all times. [inaudible] leg circles. Again, I keeping my feet flexed here, but you may point [inaudible] [inaudible] the challenge of all the exercises I showed was to maintain a neutral spine position here without arching the back, popping the ribs or lifting the pelvis. I'm going to move on now to short and long spinal removing my pillow and moving down so that the arms are locked. I use the traction of pressing away with the heels and my hands and reaching out of the straps. I'm going to flex my feet because this frame is a little short for me.

Here on this Cadillac. Starting with short spinals, I press out from the frog position. [inaudible] [inaudible] the short spinals can be reversed here on the Cadillac [inaudible] [inaudible], [inaudible] and now the long spinals [inaudible] [inaudible] [inaudible] [inaudible]. The final exercise here with legs spring supine is the magician where the hips remain lifted and all of the exercises I showed are performed with the hips in the air, scissors, sideways circles, [inaudible] scissors parallel again, working to maintain the integrity and height of the pellets and that's like spring supine. [inaudible]. We're going to show a single leg spring supine on the back.

This is a specialty of Corolla tree air. When I got the bed from, I'm using this foot loop at the tower and to secure my supporting leg and I'm going to be using the single leg spring from the center of the cross bar at the top. When I positioned my body, I want the club line of my body right underneath the loop here and the leg is slightly off to the side so that I can really engage underneath here on the turnout muscles at the top of the five I start the leg circle identical to the mat, work across the body, keeping the hips level and opening around to the outside. Five circles in one direction and five circles in the other direction. Really working isometrically all the inner thigh of the supporting leg and pulling up into the back of the buttock. I'm going to show this now on the other side and move right into the positives from the leg circle. So this one is secured in the foot loop, standing leg pulled up strong, and I'm going to show just three leg circles in each direction and then move into the passe [inaudible]. We're really working with deep hip rotators, [inaudible] and reversing [inaudible] nearly five circles each way.

I've just don't three now I'm moving into the passe. I draw the working leg up, the supporting leg pause and going to a posterior tilt so I really engage my deep lateral hip rotators. Open the leg to the side, flex the foot and closed. Inhale, pause, posterior pelvic tilt, unfold the leg and close the leg from the top of the thought, three Paseo in each direction and then first time and maintaining a posterior tilt here. Really engaging from the back of the hamstrings, so leg circles and passives in two directions supine. I'm going to do legs springs sideline now and really work on pelvic stabilization in the sideline position, which we haven't seen yet. Many of these exercises relate to the mat work.

I'm using the foot stop or board here, which becomes the floor for the standing leg. I'm going to align the plum line of my body from assigned view directly under the pool of the spring here from the center of the crossbar and use the heel of my supporting hand connecting to the heel of my supporting leg. So there was a line of energy right through the body. The foot goes into the foot strap and I'm going to show this exercise. First, just straight leg raises sideline.

We want to first stabilize the pelvis. There should be a little bit of uh, air under the waist here and show just straight leg raises in a sideline position. Being careful as we lift the leg, not to collapse in the pelvis, rather keeping the leg in a small range of motion, really working the ad and add doctors of the working bye. Ordinarily I would show 10 of these. I'm only doing a few here. This also can be done on a Relevate on the standing leg and it'll turned out. So here I'm engaging a little bit more. The deep hip rotators, um, both the standing and the working leg [inaudible]. Usually I teach these exercises parallel and then progress to a turn out position.

[inaudible] we can move from here into the side leg kicks from the mat where I turned the foot parallel and bring the foot forward and back forward and back here. We want to be careful not to lift the leg too far to the back and let the ribs and pelvis go out of alignment. Keep the leg in a low line to the back. Really working through the hip extensors. Flexing forward, not dropping the leg too low or the thing at too high. Working straight out of the line at the hip. Next we have ovals.

The lag extends low towards the ground in front of the body. Small little circles, not large at all, but reaching long at the hip. I'm not going to show 20 in each direction, but that's a good number and then taking the leg through and the arch to the back. Again, not too high. Really maintaining the integrity of the pelvis. Same thing with a long line of allay working through now into a full leg circle. I'm going to come up on the half two of my standing leg and turn out for a variety.

This also could be done in parallel cleaning like flower and up and around the bath [inaudible]. I usually do five circles each way. I'm doing three here and then reversing again. The length range of motion should be limited by the client's ability to maintain stability in the pelvis and upper back region. [inaudible].

From here we can go into the past. Say I'm turning back to a parallel position here. This is similar to the bicycle from the Mat. Work parallel sideline. I've left the foot forward, bend the knee and pass the foot through low to the back in here. Power. Then the knee has the leg through.

Once the fire arrives back here, we stabilize and extend. Go Up to the front and then the reverse and flexing that reaching through and to the front. I'm going to show breathing now does a wonderful traction exercise for the lower body. I've pulled the swing out and I'm going to place my feet in the sling, the leather strap of the swing beginning with the lower body first. The fee can be either parallel or turned out.

Flex door pointed, I'm showing turned out. One wouldn't turn out with a client with SCIATICA problems. One would keep the gluteals more relaxed. I'm going to show, turned out one kind of either roll up through a posterior pelvic tilt here and roll back down. Really pressing the feet into the strap there to help traction out the spine or engaging only gluteals in hamstrings. Pop the pelvis up and down. Maintaining.

I'll show without my arm maintaining more of a neutral spine position, adding arms in, holding the roll back bar. I have two cycles of breathing. I'm going to roll through the spine first. Inhaling to Rola. Exhale. Inhale, exhale. [inaudible] without rolling through the hips.

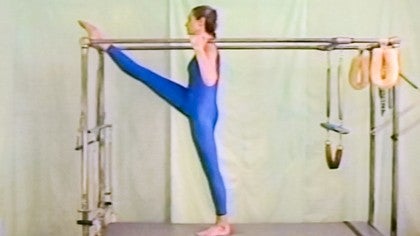
[inaudible] [inaudible] and that's the breathing exercise. Okay, I'm at the tower and now I'm going to show you some framework starting with the spreading ego, which is a pretty basic exercise and relating that to hanging up for spreading ego. I'm going to take my feet and splay them against the frame. At the base of the bed. My arms are going to class. They uprights here a little bit above waist level. I straighten my arms and they remain straight throughout the exercise.

I'm exhaling down in a capital c scooped out shape and rolling myself up without bending the arms into an arched position. [inaudible] yeah, it's ready to go. I'm going to show hanging up now. I've pulled the swing out and I'm going to attempt my Mount Ramana style. It's tricky because you have to position yourself so that you don't hit your head when you arch the back. This exercise is very related to spread Eagle, which I just showed, but there's a higher degree of difficulty. Some people need a hand pads here as well. I'm going to attempt it now.

[inaudible] he plays into the swing. Flex is sick position so you don't fall out and he was the same. Start position is spreading eagle [inaudible] to add to the upper body where we can stay up there leveling out and doing pull ups. [inaudible] notice that the swing will adjust. For my height as needed. Okay.

And hanging at the end. It feels great. I've using handball here and I'm going to show hanging down. This is a extreme arch position, not for everybody to do a, also, I don't have a lot of upper body strength, so I'm going to start with my arms bent to show the pull up section. Yeah. So I started at 90 degrees of elbow flection and I'm going to pull up and then here is the full hanging down position.

I don't have the strength to pull back up from here. So this is it both hanging down from my final exercise. I'm going to show you the catwalk over, which is really only for the extremely advanced clients with a lot of flexibility, but it's a lot of fun to perform. So here we go. [inaudible] [inaudible] [inaudible] [inaudible] [inaudible] [inaudible] [inaudible] [inaudible] [inaudible].

Related Content

Comments

Beautiful to watch, useful to perform and teach to clients. Thanks. Grazie!
Patty Hafen
1 person likes this.
I really enjoy the way you explain the movement - it makes so much sense, and you do it so beautifully. Thank you Jillian.
Thank you so much for watching my presentation, and for taking the time to comment. With so many choices available these days, I appreciate you chose mine!😀🙏
Ludovica U
your elegance is impressive!!!!

You need to be a subscriber to post a comment.

Please Log In or Create an Account to start your free trial.

Footer Pilates Anytime Logo

Welcome to Your Pilates Era

Experience Your Joy

Let's Begin