Description
About This Video
Transcript
Read Full Transcript
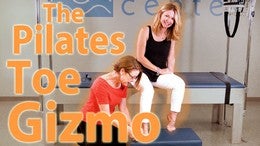
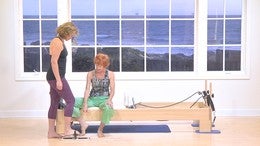
Hi, I'm Sharon Gallagher Rivera and I'm here with [inaudible] and we're going to talk about spinal decompression. Uh, oftentimes employees, we are cute to lift, lift, lift, lift, lift. And uh, in order for that to happen, we have to be aware of what's grounding. So I want to talk about a couple of movement, um, ideas. Actually, one law of the body is that the abdominal cavity here can't be compressed. So if there is shortening of space between the ribs and the pelvis and were, um, queued to squeeze and squeeze and squeeze in, that's not going to happen because there's just not enough oppositional length. So we're going to look at ways to, um, find our way into more lengths so that the core can work in a much deeper way. Um, one of the things is that we ground ground through the points of contact, which is the feet. And sometimes it's the pelvis when we're seated. Um, when I tell Colette to stand as tall as she possibly can, go ahead and stand taller. Uh, we may not even be aware that we're doing this, but our feet push into the floor a little bit and our pelvis also grounds down through the feet so that the muscles of our core and the muscles that, uh, give us axial elongation can engage.
So sometimes there is disfunction that prevents that from happening. That could be shortening or tightness in the pelvic floor. So if that's the case, we need to do some release work for the pelvic floor, uh, which could be sitting on a roller, sitting on a ball, um, or doing dynamic movement, which we'll do a little bit later. Uh, sometimes there is a stuckness and compression in the diaphragm and there is also, uh, quick ways that you can release the diaphragm just by doing a little palpation. I'm just gonna have you do this little pal patient underneath the ribs, taking a deep inhale through the nose, three more sips in without letting that go. Hold your breath. As long as you can, don't pass out.
And here we'll exhale and you can repeat that as many times as you need to. That's a really quick um, tool that I use with my clients sometimes so that this is relaxed. Okay. So we're going to look at the, the feet. Uh, I would recommend taking one of the tutorials on the toe corrector cause that's a great way to really find how to ground through the points of contact of the feet. Also, the foot corrector, what I'm going to give you, just a quick little tool, um, called short foot. That is a way to help people feel the difference between really leaning into the floor and picking up off the floor. So we're going to look down here at [inaudible] feet.
The first thing I'm going to have her do is lift the toes up. I'm going to come on this side. When she lifts the toes up, you can see that her arches, uh, activate. So then when I ask her to set her toes down without releasing the arches, we can see that still on and then totally relax. Beautiful. So go ahead and pick your toes up again. Hold your arches up as you, your toes back down and then totally relaxed. And we can see when she totally relaxed is that her feet kind of spread out and go into the floor.
One of the things you might see is that we're so trained to pick up the arches that there is no true compression into the floor and that also prevents this system of buoyancy from responding to life. Uh, it might be turning on when we ask for it to turn on, but not responding to life the way we want it to. So, uh, go ahead and lift your arches without lifting your toes. So what she's doing here is not doming and she's not pressing down with her toes. She's actually just shortening the distance between the ball of the foot and the heel and relax and again, shorten the space and relax. And one more time, shorten the space. Great. So we see that those arches are coming on nicely and then go ahead and relax. Good. So that is a quick way that you can activate the, the feet.
Another thing we're going to look at is the plum line. So I'm going to have you turn sideways. Good. So in our ideal posture where a ground force can just move on up throughout the body and not get stuck anywhere, we want the greater trow canters, which are the side bones of the femur here to be aligned over the ankle bone. Most of us tend to hang out a little bit forward and that really does prevent, um, buoyancy from happening throughout the body. So if she's back where the trow canters or over the ankle bones, then we want to make sure the shoulders and the ears are also in line with that and she looks great.
So one quick little test I do with my clients is have them put their fingers on their trow cantors so they are aware of where those are. And then just go ahead and bend your knees, stay nice and lifted. Good. And then pick yourself up from that center system. Good and bend and let your feet stay really grounded and lift up. Excellent. And one more time. Good.
And she's doing a really nice job at not shoving her knees back, which most of us tend to do. Now. Go ahead and keep that alignment and see if you can press down through the balls of your feet to come back up to come up. Sorry to come up onto the balls of your feet. Good. And we noticed that she shifted forward. Now, uh, it's very difficult to not shift forward, but we're going to work on not going as far forward. So press with the balls of your feet and see if you can rely more on that center system to get you up right.
And you take that alignment with you and lower back down. Excellent. And trow canter's back a little further. Shoulders back, years back
And then I want her to spiral her knees around to the outsides like she's screwing her legs up into the pelvis, right? And then come back to parallel. Good. And again, you're going to bend your knees spiral. See if you can imagine like standing inside a cylinder and scraping around the outsides of that cylinder to come back up one more time. A lot of times we get in the habit of just pressing the knees back and kind of coming out of that rotation. Beautiful. Great. Now here's the fun part. We're gonna do single leg. So go ahead and stand on one leg, get bend your standing knee.
You're going to spiral the knee to the pinky toe side. And when she does this, I want to make sure she has the support of her rotators, her side, glutes shortening and coming down and her pelvic floor lifting up. So I call this the, you turn around the outside, the outside of the hip has to go down, wrap underneath the pelvis and lift up through the pelvic floor. Good. Other side, if there is dysfunction, a lot of times we have one side that's a lot more challenging than the other. Uh Huh. Try to keep that knee movement a circle around the outside. That's it. Yeah. One more good. And she did a really great job.
Oftentimes it's a big surprise that how difficult it is to spiral around the outside of that. So we are going to use that strength when we do some of the chair work. So now we've grabbed a moon box. You could use anything that just gives you a little bit of elevation that's nice and stable. Uh, what I like about getting her off the floor is that this right leg gets to hang in space and her back gets to stay relaxed and I just want to see what she does with this single leg balancing. So go ahead and let your hip hike up. Sorry. This side, the left side. So there's compression, right?
If she lets this system disconnect, then she's getting short on the side. Now I wanted to ground through her foot. Yeah. Press down through the side, the uterine around the outside. Feel that wrap underneath your pelvis and lift up through your pelvic floor. And I'm just checking to make sure she's not just hiking the opposite side of her back. And again, sink down. [inaudible] good. Use your inner thigh a little bit more because that's part of this center system. Yeah, that's what the stick is for. So let's bring it over here.
One more time. Sync, push down and find that inner thigh line to lean on. Come over toward me. There you go. Exactly. And then we'll do that on the other side. Let's make sure you're, yeah, good. So she's going to go into her compression. You can see that this whole side system disconnects and then actually you probably want this on the other side. Good.
And then she's going to push down through her foot, push down through her side, glutes, lean on the inner thigh line a little bit more. So her trow canter can wrap under pelvic floor can pull up against sync. We'll just do three. Lean on the inner thigh so your knee doesn't have to shut back. Good. And I'm also looking at her plum line here. Um, she's doing a great job, but anytime you have somebody who tends to hyperextend, it's usually because their pelvis tends to go forward and it's just reacting to that. Excellent.
So now we're going to look at all of these different systems that we've taught her. Um, as we do some of the exercises on the chair, we are just gonna practice. One more way of teaching this leveling of the pelvis and the, um, the grounding system for decompression. Um, and I use this one. I feel like I'm having the leg involved adds too many factors, too many, um, too much possibility for dysfunction. So, uh, what I want her to find is how to ground from just her pelvis. So she's sitting just with her rights, a phone on the chair and I'm going to have her unlevel her pelvis and drop her left hip down as far as you can. So the left side of the back is totally relaxed and now she has to just organize this right half of her pelvis to ground down, wrap under, pull up. Good.
And see if you're gonna avoid tightening the left side of your back to do it and on level all the way. Yeah. Good. And then ground, that's your back. That's your back. Let your back though. Yeah. Right. So we want to see that it's the pelvis and not the back. One more time and ground left side. Your back gets to hang down. Keep that and feel that right. You turn organizing. Beautiful. Good. And oftentimes I'll end up doing more repetitions than this to really teach somebody. But um, we're just introducing the ideas and then you can practice them with the checks or sizes. So come on over to the other side.
Now, um, you could do this on, on the far edge of the chair. If your feet don't touch. I would recommend putting a box or something underneath your feet so that you can ground your feet as well. So here she's going to unlevel the pelvis. Good. And then let's see what happens. Okay, good. So one of the strategies that I'm noticing is that she wants to typewriter her ribs over to give her a little more support.
So just think of allowing the ribcage to yeah, stay organized over the pelvis. Beautiful. And she's starting to find how to get that organized. Great. One more time and sink. Keep your ribs stacked over your pelvis and really pushed down for this left side. Let your ribs find center. Yeah, good. Great. Okay. And come on up from there. So now that she has found how to ground the pelvis, um, I think go ahead and stand up and then you can sit on the chair.
Ready for footwork. I think of this as what stabilizes us in our short box series. And um, any exercise really, but especially in short box series and also on the chairman, we're doing footwork. So here we go. We're just going to do the Polities v position for foot work. We'll just do a few reps just to see how that goes. Inhale down, exhale up, and we're looking to see that her body is remembering her plum line and she looks pretty awesome. I think use your system to lift you apart. Yeah.
So then when, when everything is in line, when she engages the core, you really see her bloom up out of her pelvis. One more gorgeous and come on up from there and let's do some standing pumps. So stand facing the chair. Good. I like to stand all the way close to the platform so that there's less of a tendency to drive the pelvis forward. So make sure that your tro canters are back over your ankle domains.
Sometimes I have my clients actually hold their up, their tro canters while they do this. Good. Now see if you can avoid shoving your knee back. Yeah, find your, you turn on your standing leg and we'll just do a few. Inhale down. Exhale. Nice. And we want to make sure that she keeps that yes, good. The inner thigh has to work a lot more and one more on one leg. So you kind of have to lean into the inside edge of the foot. Other side.
Great. So again, we want to make sure we're not hyperextending the knee. So you're re recruiting that inner thigh line, use your, you turn to get taller. Good. And then her spine just balloons right up. Nice. Two more good. The other thing that is happening that we haven't really talked about as she really finds how to ground is her back side, back breathing is picking her rib cage up out of her pelvis.
And that's the other end of things that we're after. Good. And come on up. So we're going to just take her a little bit lighter for the next exercise for her to do her crossover pumps. I find the crossover pumps to be really a functional exercise and I often teach them when I'm introducing this concept like, so the first thing that happens when we pick our foot up, as you may have noticed that she yeah. Dipped into her outside line. So we got her to get her to stand on that you turn and to lean onto the inside of your left foot. Good. Sometimes I'll use a gondola stick here for support on your inhale.
Pull that Spring Open. Keep your knee open. Yes. And use both sides of the um, outer hip. Great. Can you find your inner thigh line? Good. Her plum line looks great. I can see it from here. One more time. I want you to stay on the inside line of your leg a little bit more.
So this stays wrapped under right. So again, that system is grounded through the outer glutes, glutamine, gluten wrapping through the rotators adductor Magnus is super activated and the pelvic floor muscles lifting up. Okay, let's do the other side. Good. And when this is in, in play, then the core is responsive and here we go. Inhale inside edge. Good. So on this side there's a little more. Yeah, a little more leaning in inside. At your leg. Yeah, keep getting over there. He can, this springs are pulling her this way so we can kind of trust that we won't fall because the springs are giving us some counter leverage. One more time and get on the inside of your leg. Get Taller. There we go.
And beautiful. Come on up. Excellent. We're going to finish off by just uh, using the pedal pole to teach the other end of that lifting up out of the grounding forces. Great. So here we are with the pedal pole and what I love about the pedal pole is that it is the plumb line that we are striving for. So when she puts her heels, her tail, her backrooms so her shoulders are back here and her ears, her skull back, she's in line. So the pole gives us that information. Now she's worked on all the systems at ground. So I want you to find that.
I want your feet to really melt down into the floor and, and find how to really push through there and then gather this you turn system so that your core system can lift up beautiful. And let the springs help you. Slide up the pole. As you inhale, pull down, gorgeous and exhale back up. She's doing a really beautiful job at keeping her background's wide. That's hard. Um, but so if you're working for that, um, just make sure that you're not letting the pull of your arms pull you off of the pole. That actually drags down the back end is kind of the opposite of what we're after for this exercise. Beautiful. Take your arms out to the sides.
Now I like to have the hands a little bit forward of the shoulders so that the arm bone can be all the way back. Gorgeous. And on your inhale, lift those back ribs up the pole. Keep that length as the springs close. So the springs are feeding into us to assist us in giving that spinal decompression. And then when they close, it's our job to maintain it and she's doing a great job and we'll do one more. Great. And let's take this into circle. So arms come forward. Inhale, pull down, exhale to the sides and forward. See if you can find that timing of your shoulders. So that they move together and we'll do one more and out to the sides. Beautiful. Reverse it in. Exhale.
Keep your right shoulder feeding back into the socket. Good. Try not to let this get forward of the plum line, right. And one more. So we're just going to have her stay here with the uh, springs open. The springs are telling her spine to lift up out of the grounding forces. Find your you at the bottom. Yes. Good. And then turn your palms toward me.
Bend your elbows. Good. Inhale. Stand in your arms to press straight. Gorgeous. Exhale bend. Can You keep lifting about your pelvis as your pelvis grounds and your feet? Ground one more. Let me see that you turn good. Wrapping under here. Nice.
And exhale. Bend and close your springs. And that's our little tutorial on spinal decompression.
Comments
Some of the other anatomy information comes from workshops and/or training with Thomas Myers (author of Anatomy Trains), Sue Hitzman (creator of the MELT Method), as well as with friends and anatomy geek colleagues - Michael Feldman, Bethany Drohman, Dallas Everleth, Lizz Roman and Janyne Edwards. The "non-compressible abdomen information" can be found in numerous anatomy books, including "Anatomy of Movement" by Blandine Calais-Germain. The way this information all fits together has come from many years of study coupled with my own experiential awareness and many years of teaching clients. Again, this is just a short list, but I hope it helps. Thank you Abby!!
You need to be a subscriber to post a comment.
Please Log In or Create an Account to start your free trial.


