Premium Continuing Education workshop

You can view a 2 minute preview. For details, scroll down below the video.

Workshop #2258

Fascia-Focused Pilates

115 min - Workshop
130 likes

Description

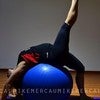
Join Elizabeth Larkam and Tom Myers in this workshop that explores the principles of fascia oriented training. Elizabeth will demonstrate sequences of exercises to train the fascia, and then Tom will break down what is happening in the body. They will share how these movements and ideas translate when you are in motion and standing. They will also show how elastic recoil is essential so the body can restore itself to its natural position.

Objectives

- Learn how the different fascial lines are organized in the body and how to keep them balanced

- Learn how to improve and maintain the elasticity in your body

- Learn about the neuromyofascial web and how it is more relevant than the term musculo-skeletal


Once you purchase the workshop, you will have access to the pdf attachment. It will be located underneath the description.
What You'll Need: Cadillac, Wunda Chair, Reformer w/Box, Jump Board, Magic Circle

About This Video

(Pace N/A)
Aug 14, 2015
(Log In to track)

Transcript

Read Full Transcript

Chapter 1

Standing Spiral Line

Welcome to PyLadies anytime. I'm Elizabeth Clark and I'm Tom Meyers. I'm very glad to be at [inaudible] anytime but I am not a lot of these teacher or a plot is expert in any way. I'm going to be talking about the anatomy of what Elizabeth is doing. I'm so glad that we're here together because I've been studying Tom's work ever since. His book, Anatomy Trains first came out, I think it was 2001 and I've used that book to inform how I sequenced material for my clients and my classes. I've chosen some material today that I've created based on some of Tom's theory and also based on the research on Fascia and principles of Fascia oriented training.

So we'll have a conversation in movement and in lecture I'll show some moves and Tom will tell us about them. Let's go. Let's go. The first sequence you'll be standing, you'll need a ring and you'll also need the loops. The chords make the chords a little bit longer than you might normally keep them. For example, if the court is usually taught when the ring is over the shoulder rest, give yourself some extra inches. Say about so halfway down the loop so that, um, when you stand, you can stand erect and not be pulled down by a short cord. I like to use a yellow spring, a yellow spring on the top.

If after you're familiar with the x exercise, you'd prefer to have more resistance. By all means, go to a blue. When you stand, stand on the center axis of the carriage, about halfway between the shoulder rests and the spring bend both knees and put the loop around the handle of the ring. And this ring goes on the bottom of your chest bone towards your xiphoid process. Now it's the spiral mile fashional meridian that I was following when I created this sequence. As you bend both knees, track your knees clearly over your second toes and turn your pelvis, ribs, shoulders, head, neck, and eyes. As you inhale, begin to ascend and turn your pelvis, ribs, shoulders, head, neck, and eyes. This ring is here to keep. Keep me honest. It'll keep you honest too. As you inhale, your shoulders descend, the back of your brain goes up to the ceiling and draws your pelvis up to in order to climb up your central axis.

You could have the idea that the back of your brain goes up, your pelvis follows that your knees come up to your hip joints and you turn. Now there are three variations here. One, the one I've been doing, the one I've been practicing is that your pelvis, ribs, shoulders, neck, head and eyes turn everything in the direction. The second variation, you keep your head, neck and eyes steady directly ahead. Your kneecaps are directly ahead also and as your pelvis turns, your spine rotates only your head, neck and eyes stay steady. The third variation would be that your head, neck, and eyes or opposite the ring. As you inhale, lengthen up through the back of your brain, the back of your neck, turning your head, neck and eyes opposite the direction of the ring.

Now this sequence takes place on three different orientations. One that we'd been practicing with your feet at the center of the reformer. The second one, turn upstream and stand on the diag and all that goes from the shoulder rest to the front corner of the carriage bending both knees, lasso the ring with the loop, but the ring at the bottom of your chest bone and start the whole project again. However, because you're in a different relationship to the resistance, you will be accessing different vectors of the um, mild fashional Meridians. Inhaling head, neck and eyes turned with the ring. The second variation, eyes aim where your toes are pointing. And the third variation, head, neck and eyes are moving opposite the direction of the ring.

Inhaling to rise. Exhaling to bend both knees, keeping your heels firmly anchored. The third orientation is the opposite. Diagonal for this change up the loop, the cord. Notice I've been using the back cord.

Now you'll change to the front court and Change your, um, footing also so that you are on the diagonal. That goes from the shoulder rest closest to the camera, to the back corner of the carriage bending both knees last. So the ring and no surprise to you, put it at the bottom of the chest bone. Bending both knees. Keep the soles of your feet steady. Keep your ankle steady.

Neither pronating nor supernatant. Okay. Continue with the tracking of your knees forward over your toes. The second variation, your head, neck, and eyes or steering forward. And the third variation, your head, neck, and eyes are looking opposite.

As you inhale, lengthen up the back of your neck, drawing your pelvis up, drawing your knee caps towards your hip joints in order to avoid knee hyperextension. Have the idea that the pelvis is coming forward and up, drawing the knee caps up towards the hip joints. Now after you finished practicing those three orientations, using the ring advanced two letting go of the ring so that you go back to the three orientations without the ring. Now the ring is no longer there to keep you honest and consequently more of your arms and your shoulders have to stay organized. Here you have to ask more of yourself to stay organized, keeping your hands in front of your chest bone. Having the idea that as you turn, you move your hands further away from your body.

The first variation, the eyes track with the hands inhaling index sale. The second variation, your eyes look where your toes are pointing. Inhaling, the tendency here is to pull with the arms instead move proximally. So the thorax is rotating, keeping your chest bone illuminating your hands. And the third variation would be speaking of chest Mont illuminating your hands. You might ask yourself, am I doing that? Turning your head, neck and eyes opposite the direction of your hands. Moving your hands further away from your body.

Change to the second diagonal. Yep. The first two variations do better with the back ring and the third variation with the front ring. But apparently the first variation also works with the front rings. Since I forgot to change, as you inhale, turning pelvis, rib, shoulders, neck, head and eyes.

Keep your chest bone turning to illuminate your hands. Second variation. Look where your toes are pointing. Inhaling, shoulders descend as the collarbones widen and the third one had mechanize look opposite where we are going. Finally change to the front cord and changed to the diagonal in which you're facing diagonally facing the foot bar feeders, greater trow cantor with the part bending both knees. Inhale, ascending your proximal spiral staircase. [inaudible] exhaling, [inaudible].

Inhaling, turning from the back of your brain rather than the front of your throat and head, neck and eyes look opposite and return. So there you have it. Many different expressions of the proximal organization of the spiral mile fashion Meridian. And now I'd like to really hear about what's going on. Yeah, I'd like to stay there, right with the keep this. Okay. All right. With you and this right with you too and set up the first one for standing. Any of the first ones with the ring. Okay. This, this axis. Sure. Got It.

Okay. So there's two things about this. A sequence about this sequence of exercises, uh, that I'd really like to emphasize. One is when she has the ring and she moves, go ahead and move through the range of the exercise that the arms stay as one ring. So that what is the completion of that ring going across the shoulder blades? In the back and then to the rib cage.

So the ribcage and the arms are moving together. So it's important that you understand that this is a trunk exercise for the spiral line, which is the two of them together. Obviously you would be doing this in the other direction as well. Um, are going to help stabilize the trunk and a very dynamic and useful way there. You can get core support that is very static and actually does not support dynamic movement. And I would like you to notice the core support that Elizabeth is generating around her rib cage with her arms.

It's not that your arms won't get stronger doing this exercise, but you will not be using the muscles through their range of motion because the muscles that are being used through those, that range of motion are the muscles of the upper spiral line. So let's have a look at those standing spiral line, part two. So the other thing that you can notice as Elizabeth is going through the sequence is really how clearly she keeps her legs. That natural thing to do when going through a sequence of rotation. Like this would be to roll onto pronation in one foot and super nation on the other foot.

So it would be natural to roll in on her right foot as she turns to the left and to roll out into super nation on the left foot as she makes this rotation, which is different the other side than what we were just doing before. And what makes this such a strong exercise for the spiral lioness that she's doing? Neither of those, if you watch her heels, if you can see through to her four foot, she is keeping the feet steady and not doing what I'm doing now as I roll from side to side, which is pronating on one side and Supa nading on the other. It's a natural way of responding. But by inhibiting that natural response and keeping the feet really grounded on the big toe and the little toe and the heel and keeping the knees coming over the second toe, um, you are ensuring that the exercise goes through the Myofascial, um, slings that we'll see that are going back and forth across the back. And also this spiral line that goes up.

I'd really like you to see the lower part of the spiral line in anatomy so you can see how the sling works.

Chapter 2

Upper Spiral Line

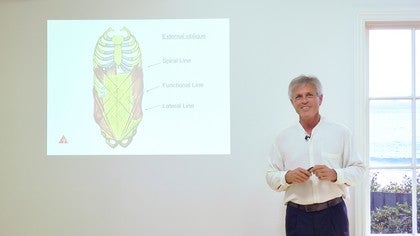
So let's introduce the spiral line here. And so that we see it cause the sequence of exercises is so much to do with the spiral line. You can see that the spiral line, which is on one side of the body here is swooping down around the upper body and then again swooping down around the lower body and both of them are a very important to this sequence of exercises and the fact that they are connected are important to this sequence of exercises. So of course you're seeing it on one side of the skeleton here and there would be an equal and opposite one on the other side, which we can, you can see here so that you can see how the spiral line wraps the body and I kind of double lattice arrangement and obviously then it's going to have to do a lot with rotational motion. Rotational motions can show up in so many different abberant ways as well as body supporting ways.

What you've just seen is a body supportive way of using the spiral line. We want to look at a little bit of the ways in which your clients, your students might be using this line in a way that would not be so helpful to them as what you just saw. Obviously the spiral Shortline shows up in lots of different yoga poses. Pilati is exercises, other training exercises that people will have been doing in an out of the pilates world. And so the idea of spiraling around the body will be familiar to people but maybe not the way that that works through the anatomy.

So here again is a, I've been looking for ways to show these lines to people that they could pick them up. Anatomy isn't easy in the beginning. And then understanding this connected and I need is double on top of that. So here you can see the two, um, spiral lines making a, a double lattice around the body and, and allowing you to gird up your loins. Did you hear Elizabeth say, rising up the staircase of your spiral line. As the spiral lines get tone, they actually will lift the body out of itself. Lift the body around its central core.

And this is of course we're talking about rotations, but if we understand that when they're in the proper tone, they are going to lift, uh, the core up. That's important. Um, we're not going to go through all the bits and pieces that make this up, but if you look up at the top, you will see where, um, Elizabeth and her variations are very important. So if you look at this upper part of the spiral line, you can see how the splenius on one side, that's the bandage muscle leads into the rom Boyd's on the opposite side, just to be confusing and onto the serratus anterior on the other side. And that stabilizes the head to the medial border of the Scapula to the outside edge of the ribs. This is really important that we keep a stability on the medial edge of the Scapula, which is what the ring does for you.

It really makes the client have to work and have to be strong at this medial border of the Scapula. Of course, you want your shoulder to be mobile, but in order to work, especially if you're doing anything with your arms where you're holding yourself up on your arms, any inversions or anything like that, you're going to need a stable medial border of the scapula. And that is completely held in place by the balance of the soft tissues. In this case, between the Rhomboids and the Serratus, you are building that, I'm going to say static, isometric, um, stability for the shoulder girdle in the times when you're using the ring. In this sequence of exercise, the spiral goes down or around the side of the rib cage and across the belly. Obviously a left one and a right one such that it makes across the Saint Andrew, it makes across across the belly, which helps with the transversus abdominis to hold the belly in to create core support. I know, uh, many PyLadies teachers of my acquaintance are very hot on the transversus abdominis and the activation of the transversus abdominis.

I will tell you from my dissection experience, they are incredibly thin and from my hands on experience, they are very hard to activate separately. That's my belief. You can have yours. Um, so that the uh, external and the internal oblique are often turned on when the trans versus is turned on. They're often turned on in any plank, Chaturanga any of the things that require a stable, um, trunk. And so building again, a static or isometric stability in these muscles across this great wide expanse with no bone on it, there's no bone all the way from here down to the pubic bone. And so these muscles are very important to stabilize. That's what's happening in the upper part of this exercise.

So we've brought ourselves around from the head all the way around to the front of the hip, but the line doesn't stop there. So what I really would like you to get, what makes this sequence of exercise really strong and really important for grounding is what's happening in the lower line. Let's look at the lower line. It's important that you understand when you're looking at your clients to see an imbalance in the spiral line. So we've looked at the anatomy, but what kind of imbalances might we see there? The, this man is it from the 30s the pictures from the 30s and he's holding onto a piece of bamboo and he's twisting himself. But uh, so it's not a deliberate postural picture, but if you are looking at your client posturely can you see that the line from the edge of the rectus abdominis on the one side over to the hip on the other side is considerably shorter than its compadre on the other side, whenever you see a disparity in the length of these lines, you know that you're starting with an imbalance in the spiral line. You know, you're starting with a rotation in the spine. That would mean when somebody is doing these exercises that they may need to do them more to one side or more consciously to one side or with that deliberate idea of just riding up the elevator that Elizabeth was just using. That's a very important part because very often people have imbalances in the spiral line, could be due to handedness, could be due to a very one sided sport or activity or job that they do.

Any of those things could create imbalances in the spiral line. Here is a woman who is a professional ballet dancer. She is very competent in her body, but can you see that her two spiral lines are not the same at all there. This measure that we're making here would be very much shorter on this side, longer on this side because her rib cage is pushed over to the side. When you see that, you know, you're working with this imbalance in the spiral line.

So if you're working with a spiral imbalance, then working symmetrically on both sides of the body is actually not a good idea. You're just going to leave it where it was. So I wanted you to understand these red flags and here are the red flags that you could be looking for. If you see that the head is shifted to one side or the other, kind of like volunteers dancing, you could, uh, surmise that there is an imbalance in the spiral line. If you see one shoulder a whole lot farther forward than the other, you can presume or at least look for an imbalance in the spiral line. If their ribcage is shifted as we just saw in the dancer, that's probably creating an imbalance or being created by an imbalance in the spiral line would indicate to go to these kinds of sequences of exercises.

And finally this x that we across the belly, if that x is not even from one side to the other, again, this would indicate that, um, you might want to work with the spiral line, but this is the upper spiral line. And uh, these are the red flags that go with the upper spiral line. But what you could notice in the way Elizabeth was working here was that she was keeping the bottom of the spiral line, very centered, very grounded, not going from the pronation to supination. That I would do if I were naturally just swinging myself this way. She's deliberately not doing that.

So let's look at the bottom of the spiral line, see how it goes. So let's go look at the lower spiral line and see what we can see here. You can see the lower spiral line in a dissection. I'm sorry, it's not very pretty. Um, and I'd like you to see how that goes. You can see how it acts like a jump rope. Um, if I put it under my arch, do you see how it goes under the arch and determines if it's pulling too much this way it's going to turn you into a pro native foot. If it's pulling too much this way, it's going to turn you into a supinated for the high arch.

It goes up from there, from the inside of the arch to the outside of the knee, by means of the Tibialis anterior. And up on the tensor Fascia Lata and iliotibial tract to the front of the pelvis. If I get to the outside of the arch, I go up to the top of the fibula on the Peroneus, or if it'd be Alerus muscle. And then on the biceps for Norris to the very back of the pelvis, the ischial tuberosity back here, or even on up the sacred tuberous ligament to the sacrum. But as you can see, I'm going from the front of the pelvis to the back of the pelvis by means of the knee and by means of the arch. Now when Elizabeth is doing this, she is softening the knees so it doesn't get turned in. She's making sure that it goes out over that second toe.

And as she makes the turn, she is keeping the feet steady, not going into pronation, not going into super nation that ensures that this line, that jump rope that's going under the leg is being strengthened and balanced during the sequence. So let me show this on Elizabeth. I think you will be able to see it more clearly there. Um, if you'll just lift your right heel up and go ahead and step on this. This represents the Peroneus longus tendon and the Tibialis anterior tendon. These are real anatomical structures. I'm not just making this up and the Tibialis anterior goes up here on the leg.

The fibular iris goes behind her ankle. I can't make it stay there, but can you see that this makes a sling on the arch? And as she goes, yeah, try turning your whole upper body toward the windows that would tend to take the foot this way and the knee in that way. And if you were watching and if you're watching your clients, this is what we do not want you to do because you will be putting strain on the medial collateral ligament. You'll be turning this whole joint noa, that will not make you happy upstairs. So if we look at what's happening to this when, if you go ahead and do the exercise now as you would like to have it done and go ahead and let your knees go into that too. As you come back so that you get that staircase you were talking about. Do you see how the lower spiral line is really staying steady?

Yes. The knee is flexing so there is motion in these muscles but there is not that giving way of the skeleton to this motion. This is not good or bad. It's good or bad in this exercise there are times when you want a promenade. There are times when do you want a supernate? This isn't one of them.

This is the one where you want the steadiness and stability of the lower body while you are exercising the upper body. I think we've got that. Wow.

Chapter 3

Arm Jumping

Our next movement sequence are some arm jumps that I've been fascinated with. The term elastic recoil, so I've been working with the Pilati sir, former in the plots environment thinking how is it possible to train elastic recoil for the upper body and for the lower body? I'm hoping this will be effective.

I'll show you and then we'll hear from Tom whether it works or not for Quadrat pet Alaska for quad repaired jumping with your arms. I've chosen to have a yellow spring and you can see that my toes are wriggling up underneath the shoulder rests with the hands wide apart, spread your sitting bones wide and hover your spine parallel to the ground. Now fortunately the previous sequence helped in shoulder girdle stability and I'm going to need that now for inhale to jump. Exhale to land. Inhale to push and land. That's two with palms down and here come to with palms up.

That was hands wide. Now hands narrow to landing on top and to landing on the bottom. Inhale the jump. Exhale to descend. Alternate apart from the top and apart from the top apart on the bottom and then close together. I was wrong. Close together. Now both hands to one side, a little bit of side bending and a little bit more side bending from either side. Alternate with crossed forearms, one hand on top and the other. Every time you jump have the idea that all your abdominal layers could jump up to your spine prior to landing.

Prepare your shoulder girdle, broadening your collar bones and scapulas sliding down your rib wall. Hours of entertainment. But really that's enough for me. Now we have the um, seated spiral jumping and that position you're familiar with from your [inaudible] work turning towards the foot bar. Both hands are wide on the foot bar. Now it would be preferable upon landing to lift your chest bone and sustain thoracic extension.

And we have pushed turn lane, push turn land and you can tell if it's honest or not by the rhythmic clap. So you alternate hands wipe. That was a good one, Huh? Hands to the back. Whoops. Now chest bone can lift here, but how about more chest spunk? I'm going to stop while I'm ahead. That was a good one. Okay. Tom, what do you say? Is this the last degree coil?

Yes, this is elastic recall. No, but let's, let's get something else in here first. Go back to the first position if you would, and what I really want to emphasize for anybody who's doing these exercises, the difficulty, I'm talking about the difficulty of doing any exercise on any machine, God forbid that I should attack the reformer or but nautilus machines, any other machine that you are using with this thing, that danger in terms of fashion training, muscular training too, but fashion is my gig. The danger in terms of fashional training is that you're always going to be training the same stuff. So the first thing that I want to say about this elastic recoil exercises, we'll get to elite last [inaudible] in the minute, but the first thing I want you to notice is the vector variation. She keeps, go ahead and do it and do with the hands apart, the hands together or whichever you're doing each time she's asking a different part to stretch and recoil, stretch and recoil. We'll talk about the elastic recoil in a minute, but the first part that I would love you to understand about this is it's not trivial that she is moving her hands from one side of the foot bar to the other.

It's not trivial that she's coming one hand up, one hand down or changing these things because each time you do that, you're training the muscles differently. That's completely understandable, but you're also training the ligaments, the tendons and the fashion that goes around it. All that collagenous soft tissue that we call Fascia, you're training them differently every time you go. That's really important. Okay. Now the second thing that makes this elastic recoil training, and we do know that you can train elasticity into the Fascia, but it has to be fast. It's stored and given back on the order of a second.

So watch as she goes, she goes out. Yup, Bam. In it comes and out she goes again. So elasticity is being stored and coming out again, being stored and coming out again. Now come there and stay there. You can't store that elasticity and now use the Az to see the bounce off the bar. You can't. You have to use your muscles to bounce off the bar, right? But when you're doing this where the reformers going back and forth in a less than a second, about a second 0.8 to 1.2 seconds, something like that, but on the order of a second, then you're getting it back.

So are all the really slow exercises that you do where you don't have this bounce, maybe wonderful exercises for training stability. They may be wonderful exercises for training muscles. They don't train elasticity, they don't train elastic recoil. You only train elastic recoil if you are bouncing in and then bouncing out again within a second. So just whatever exercise you do, this is obviously one four as she said, the upper body and the back and one of the most amazing places that you have elasticity is in the nuchal ligament for running for anything here. This is a big surprise. Nobody knew that this was a big elastic structure, but I can feel the last [inaudible] coming in and out when she's doing this.

So she's normally training her shoulder ligaments. She's putting elasticity obviously into the elbows, the wrists, the and the tissues that surround them. But it is this bounce that has to come back within a second or so. You can't store that elasticity to be used later. Just doesn't happen in human tissues.

I suppose I could take a super bowl and squeeze it and I, well I could take this theraband and I can hold it out here and store elastic energy in it and I could store it here for a half an hour and when I let it go, it would still have the last city in it. That's not true of your tissue. Your tissue only stores that for a second and then it accommodates. Then the muscles accommodate, then the fascia accommodate. It doesn't store fashional Alasta city. So those slow exercises, sorry to bring yoga up again, but yoga is great for stretching. Yoga is great for strengthening, but you're not getting the fashional training that you're getting here.

If you're moving slowly. Okay, let's do this side position thing where you were coming out because whereas locking the shoulders and coming in with both hands limits that elastic recoil to the arms themselves pretty much. We talked about the neck but it's not going so much outside the arms here. You're getting go ahead and do it. You're getting elastic recoil in these muscles that are turning much more quickly than a second. So storing, elasticity, getting back, storing the ice, just the clapping and getting of that. You forgot to glamping there. Elasticity in the clap. I don't know, but she's kidding.

She's absolutely getting elasticity in the muscles of her trunk as she does that. So this exercise by state wising the legs has allowed the storage of fashional Alasta city muscle, Alaska city too, but Federal Alaska city in these trunk muscles and you get that back when you are in some kind of functional emotion. I guess I just punched somebody. I don't know whatever you're doing, but you store and get back that fashional Alasta city. But only if you move quickly. Let's think about elastic recoil for a minute because this is something that is

Chapter 4

Elastic Recoil

really quite new. It's been out, uh, the bouncing kinds of ballistic stretches have been out for a long time since I'm very old. So I remember, um, when Jane Fonda was doing aerobics and people were bouncing all the time and they would get very loose after the class cause they were all hydrated and they would come back the next day very tight. Like, oh, I need another class because, and so ballistic stretch really went out for quite awhile. The thing is though, that ballistic stretch such as we just saw Elizabeth doing with her arms that ballistic in and out is the way that you train elastic recoil and that you can, this is the bit of the research that is just so exciting.

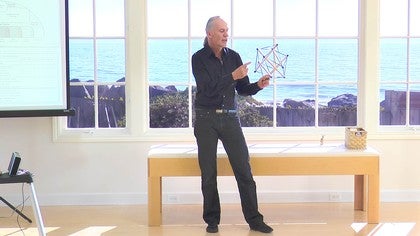
You can train elasticity into your tissues. Now to understand the elasticity in the tissues, we need to understand a little bit of a concept that a lot of people are talking about. And not so many people understand, uh, in its fullness. And I'm not an engineer, I don't understand it in its fullness. But if you'll forgive me while I get this, a little visual aid here. The um, idea of 10 seg gritty is an idea of human engineering that we don't think of very much. Uh, because we're not used to seeing structures like this around. We're used to seeing houses, so we tend to think of the body as built.

12 foot leg starts, sits on top of the foot and the upper leg sits on top of the lower leg and the pelvis sits on top of the upper leg and the spine is a segmented tentpole. It sets up on top of that and the muscles us around. And if you have that idea that the skeleton is a stable continuous compression structure and the muscles are just moving the skeleton around, then working with the bones makes a lot of sense. Working with a more static alignment makes a lot of sense. But as soon as you realize, and I really do think that something like this is the case, that the bonds are floating within the soft tissue and therefore the elasticity of the tissues around the bonds allows or does not allow accommodation to happen. Now, in the earlier sequence, we deliberately did not have the accommodation of rolling onto the inside and the outside of the foot. As we were doing these exercises, we deliberately kept the knees steady and the feet steady in order to build strength in order to build elasticity or accommodation or a little bit of give, you want a little bit of give in each part of the body.

In that way, the strain that you create from any exercise you're doing or strain that comes in from life, this is actually even applies to a mental strain, is accommodated by the body in an even handed way. These kinds of structures where the bones, the struts float within a sea of tension is called a 10 Segretti structure or attention integrity structure, and people are using this kinds of concepts in a variety of ways. But here's a sculpture by Kenneth Snelson of a 10 segregate structure where those sticks are simply floating in the sea of tension created by the wires. And I submit to you that your body is something like this. It's a little bit like this.

This is a simplified structure with just one set of strings and the one on the board has two sets of strengths, which would roughly correspond the inner ones to the ligaments and the outer ones to the muscles or the inner ones to the deeper core muscles and the outer ones to the more sleeve muscles. So you get, it's far, you know this is a very simplified model. Even this is a very simplified model. Things get very complex when you get into the body and start looking at where is what, how much proportional movement should there be in each thing and each bit of the body that's moving. But a lastic recoil is essential to the body restoring itself to its natural position. So we want to see elastic recoil happening in all the different parts of the body. This kind of accommodation of the bones in the muscles is the kind of thing that we're seeing happening here in these models by Tom Clemens. Um, he has made some excellent models.

This is still very simple compared to a human being, but can you see how human like this motion is, even though it's being controlled by the stick from above, uh, in terms of the body is accommodation and you have similar accommodations that you either tried to facilitate in PyLadies or you deliberately try to stop one accommodation in order to create elasticity or strength in another part of the accommodation. Whatever you're doing, it has to work biomechanically. If it doesn't work biomechanically, you're not going to be able to sustain it. It might be the best idea anybody's had since life spread, but it's got to be able to be accommodated biomechanically. And these 10 segregate structures can accommodate a lot of movement. If you look, you'll see this is being controlled. This arm that you see, he's uh, Tom Plemons is trying to make prosthetic arms and he created this 10 Tegrity mass. They could actually throw another 10 secretary and obviously gets quite delighted by the process. Um, and that's all being controlled by strings underneath the table. So you then get away from the idea of considering the body as a bunch of individual muscles that are going from here to here, from origin to insertion and therefore bring the origin closer to the insertion and that is what the muscle is doing.

We do that and then we think we understand what a muscle is doing and we think if we look at the picture on the left that if we sum up all the 600 muscles that we will come up with something like human movement, like walking for instance. Gait is something that physiotherapists have been studying for 200 years first for a very long time now and most of the models of gate are really inadequate when you think, oh well the first the sowers is going to contract and then the quadriceps is going to contract and then the hamstring, it really doesn't work that way. It really works more like the picture on the right. And I'm going to be a little bit provocative here and say there are not 600 muscles. There's only one muscle and it's in 600 Fastenal pockets.

And those 600 fashionable pockets allow for the elasticity within the pockets, between the pockets, among the pockets are long the pockets. That's what I've been doing with the anatomy drains is along the pockets, but other people have been doing other work. So I have the uh, audacity and the arrogance to say that really if you look at the 10 Segretti of the body, that the anatomy trains, defines the sea of tension that goes around the skeleton and is thus able to accommodate elastically to the motions of the bones in the skeleton inside of that. Okay. That's the concept. Let's look at a little bit of the research here before, right. We go back. Um, I do want to acknowledge Kenneth Snelson in the upper left. He invented this and then came a Buckminster fuller who really popularized it and gave us the engineering of how this works. And, um, in terms of taking it into the body. Dr Steven Levin, an Orthopedist who now resides in Washington, D c, uh, was the person who took it into biology bio tensegrity. You can find him@bioteinesegretti.com and Donald Ingber is also a name if you want to follow this research who has done so much work on the cellular part of 10 Segretti that each cell is also a 10 Segretti as well as your whole body.

And I didn't make this slide. One of my students did, so I'm sorry that I'm on the bottom of it, but um, it, that is the acknowledgement that the anatomy trains does present a really tempting model of how the rubber bands are arranged around the dowels of the, um, of the 10 segregate structure. Now what does the research say? The research says going for another prop. The research says that movement loaded movement. You notice that she was making a load. Elizabeth was making a load when she landed on her hands and pushed away.

That was loaded motion that organizes the Fascia within the muscles to this kind of pattern. If you buy a bottle of wine, you can have this. It's to a, to show to your students or an onion bag. If you're not into adult beverages. Um, we'll give you same kind of pattern of this double lattice. We already saw big double Gladys in the spiral line around the body, but this is the pattern of fashion within each well around each muscle cell, around each group of muscle cells, around the muscle as a whole around the body as a whole and loaded movement creates this orderly pattern that you see on the left and no movement, lack of movement, static movement on the elastic movement makes the confused felty mess that you see on the right when grandpa gets out of the chair, puts down his beer and starts to exercise, his Fascia is in a felty way and it cannot do the kind of elastic rebound that we have here. There's more than that. We'll talk about it in the neurology part without the crimp in his Fascia. Without this kind of patterning in the Fascia, he can't feel where he is or how much load he's getting either.

So when you've got somebody coming in, sorry, this is advice to pull out these teachers out there. When you have somebody who coming in there who's determined to get shape and wants it to happen in six weeks because they're going on vacation and I really gotta look good by the summer slowing down because it's going to take a little while until the Fascia gets back in a pattern like this and where they can actually feel. We'll see this in the neurology part where they can feel where they are and actually have this kind of responsiveness in the fashion, in the tendons, in the muscles, in and around the ligaments and everything. So this kind of Crimp, which is this double lattice arrangement is very important in the Fascia. We'll see that later. But just to finish this bit about elastic city, if you think about your children and your grand mom, depending on your age, maybe you're in the sandwich generation, then you have the mom and children, but children balance grand mom doesn't.

It is a characteristic of older people that they do not bounce. It is a characteristic of youthful tissue and youthful people to this that they bounce very well. They've got a lot of elastic recoil and if you look at the elastic recoil as it's happening here, you will see that the spring that you see is the Fascia. That's the Achilles tendon and the h like thing is the muscle. The muscle doesn't get longer or shorter much.

It does ISO metric contraction and the Fascia gets longer and shorter, but you can only store that we were talking about earlier. You can only store that for a second so you have to bounce off the energy that you store. This is why the Kenyan runners are keep winning. The Boston Marathon, they have long shanks and very long Achilles tendons and they store and give back that energy with every step that they take. When they are going along it. The muscle is not so much lengthening and shortening, lengthening and shortening.

It's the Achilles tendon that's lengthening and shortening and the muscle is staying the same length, almost the same. Like therefore they're using less energy. They are storing and getting back, storing and getting back. So they don't hit that glycogen wall. As soon they are able to keep the running going cause they are story and getting back the energy in this part of the sequence, store it, get it back. Of course this is an extreme in this little animation, but you get the idea. So in bicycle peddling, if you're a bicyclist, it's great for training your muscles. It's terrible for training your elasticity. You're not training reenlist density on the bike. You're training your muscles. If you want to train your muscles, get on the bike.

If you want to train your elasticity, you might do what I started to do, which was walking or barefoot running, which I actually happened to like and uh, I know that not everybody does well with this kind of thing, but I put on my five finger toe shoes and I've gone running out and I bounce on my forefoot. I don't even land on my cuboid. It's not four, it's not mid foot running or any of that's, I'm just bouncing along on my twinkle toes. And that is training. The elasticity of my ligaments. In fact are a couple of weeks. My ligaments were really unhappy. Uh, somewhat unhappy as I train myself into this, but I did not have any permanent problems, didn't come up with plantar fasciitis or anything. And now my legs and feet are much more bouncy. The age of 66 then they were at the age of 58 or whenever I started doing this and I was feeling my age and thinking, Oh, I'm beginning to Sag.

And by training bounciness into my body, I feel more youthful now than I did way back when. And that has trained elasticity into the soft tissues of my legs by having the, um, force taken in and out, in and out, in and out, in and out. But if I wanted to train now the muscles of my lower leg, then I would get maybe on a bike, maybe on something else where I wasn't doing the elastic recoil. But here's the kicker on this one, you can train elastic recoil when you start, your tendons are soggy, a bit like a tempurpedic mattress. Temporary Patriot mattress, wonderful for sleeping on. Not so good for elastic recoil. Is it you put your feminine, you take it out, it takes a while for it to come back up. It's the same deal.

It's the same deal with these at the beginning. It takes awhile for your tissue to recoil. The more you train, the faster and more complete and more energetic that recoil is so highly recommended. Train your body for elasticity. You're bringing your best self back to youth. And the second thing that we said we were working with Elizabeth is make sure you do vector variation. Don't keep training the same tissues again and again, but train different tissues each time that you're doing these repetitions.

I think it's great. Let's continue exploring elastic recoil, but this time for the,

Chapter 5

Lower Spiral Line

for the legs and for the feet, we've got a jump board here and I've put on one red spring and the headrest is up. Come to lie on your back. Slide on down so your sitting bones are almost off the edge. And then roll from your side and onto your back. For this first section of the jumping, I'm going to keep my knees extended, so don't bend your knees at all. I call this pushups for the feet.

We'll start in parallel and we'll do um, eight jumps in parallel, one end, two, three and four, not bending your knees at all. And then you go to external rotation, one in two, three and four, five and six. Next comes internal rotation. That's internal rotation from the hip joints and filtering down through the Tibia and the feet. One leg at a time. But just for, for now when you do the external rotation with the single leg, cross over the midline and then internal rotation with the single leg in line one end to three end four crossing over the mid line in external rotation. And then in internal rotation. But wait, there's more. So in keeping with the idea of many, many vectors, I'm going to go from side to side. So one m two, three and four toes leading to the side. And then that wasn't very clear. And then heels leading to the side, one leg.

Also doing my best to keep the knee extended, turning lots of different vectors through the feet. Okay. There's one more variation. Internal rotation and external rotation. You could, you could take this a little further and go into corner jumps with both knees extended. But here's where I have a saying that says, just because you can doesn't mean you should know. You could get pretty excited as I did once about thinking, wow, if I can vary the vectors in this plane, why not vary the vectors in a variety of these planes?

Sometimes that could work out, but the fact of the matter is I discovered that landing with no shop, exhaust shock, absorption of the knees might've been training my fascia but really wasn't so kind for the hip joints and the sacral Iliac joints. So you have this, I have this saying, just because you can doesn't mean you should. The corollary of that is since you can, you might as well. And that brings us to the next one. So we've explored some elastic recoil with pushups for the feet in supine now changed to all fours so that your knees are very near the front.

Ooh, the front edge of the carriage. I prefer to a lighter spring for this. I prefer to use a blue spring. So supine. I was on a red. Now change to a blue spring off with the red on with the blue here. Your knees are near the front edge of the carriage and your toes are close to the bottom of the foot plate. You could have your forearms on a box and that would be kinder for your wrists.

Or if your wrists are fine and your shoulder girdle is well organized, you can have your hands on the shoulder rests. And here the souls of your feet will brush along the foot plate as if you could strike a match. And every time the feet jump so to the abdominals, they jump up to support the spine. Alternate landing on one end, landing on the other, doing my best to kick the heel towards the sitting bone. No small amount of attention at the same time to supporting your thorax, the thoracic kyphosis. Don't let it Seg, pick it up and the other leg one at a time here. Now having worked in quad repaired for a little while, um, it would be a good idea to take this, I think to take the strain off your risks and come to sideline jumps.

The headdress comes down, slide your sitting bones off the edge and come to lie on your side. Now one leg gets its own turn. This time I'm not going to work in a with the knee extended because as marvelous as that might be for training elastic recoil, it would be horrendous for the SACROILIAC joint and causing too much of a sheer force. Instead, we'll take quote regular jumps as if regular jumps could be on your side, lifting up your ribs and lifting up your waist. [inaudible] external rotation, steering your knee wide over your second toe and internal rotation. Lift up your ribs and lift up your waist.

Okay. Perhaps you could hear my rhythmic intent there. Suspend Land, suspend land. Stay right there. Just stay and not move just for the moment, because this position, I know you're doing gonna do more, but this position is not only kinder to your knee to let it relax and come in. You're also extending the elastic recoil up into the upper leg, the quads and the hamstrings. We're so used to training. We think about training the muscles, just actually training the vascular system to fund those muscles with blood.

We think about training the nervous system all the time. We're coordinating our movement. We're talking today about training the fashion system. So when you come down into the, let's just do it slow motion, even though we know that's not elastic, is it because it's too slow? But now a lot of the last [inaudible] has happened here in the Achilles Tendon, but also Alaska studies happen here in the hamstrings and around the front of the knee with the quads.

So not only are you saving your knee and your hip and your sake real act joint, you're also extending that Alasta city, not only to the ligaments of your feet and toes, but all the way up the leg. And when you turn from medial rotation to lateral rotation, there is the biceps Femoris, there's the Semitendinosus and semimembranosus. You're switching back and forth from training elasticity into the outer and then the inner part of your hamstrings. As you do this, so you're getting, the more you vary, it doesn't really matter how you land on your feet. You're going to be, if you doesn't really matter, if you land the same way every time because you're going to be giving that elastic impetus to a slightly different bit of tissue every time and that's going to keep you in a good oh elastic condition like her. Now that we've discussed the sideline jumping, let's come back to quadruple, but this time with the variation on the previous theme, your hands are on the shoulder rest as before, but only one knee is on the carriage. The other foot, the heel is near the top of the foot plate.

Here you build on all the jumping exercises we've done to date and this is how it looks. Suspend land, suspend first in parallel, jumping your or neutral with your hip joint, jumping your abdominals up to your spine. And then in external rotation when you're an external rotation, aim your right a s I s towards your inner left knee. Then an internal rotation, you do something similar. Aim Your Right Asi s towards your inner left knee throughout the varies, very steady with your shoulder girdle and draw your chest bone up to your thoracic spine so that would be quad repaired jumps in a more advanced version for stability sake than we did previously. Finally, we'll have back to supine jumping, but this time with the supine jumps, you'll have your knees bending. Previously you kept your knees extended back to the red spring and we'll take corner jumps for a variety of vectors.

Starting with your feet in the center of the foot plate. We'll have jump up right up. Lift down, right down, left still in a neutral hip joint, up left, upright, down, left down, right toes to the outer corners, up right up left, keeping your asi es level and steady and toes to the outer corners, up left upright. And then with internal rotation for which you are well prepared with your medial and lateral hip glides heels to the outside up, left up, right down, left down right when you practice. This also include your single leg jumps so that each leg gets a turn to land in each corner with a similar pattern. Let's hear what Tom has to say about these.

Well, I just, I absolutely understand the admonition, the cue to keep your ass steady, but just watch her for a moment. Maybe from the overhead camera as she does this. Go ahead to the four corners. Do I get to choose which leg? We'll do it with both legs actually and going, going into your four corners. So regardless of the fact that she has said to herself, she's going to keep her ass steady, the pelvis does respond. That little responsiveness that I was talking about earlier when we were talking about the 10 Segretti, there's that little responsiveness of the pelvis, so she's actually training the Alasta city right up to the 12th rib here.

Your leg goes to [inaudible], your leg goes to the 12th rib. It is not even though you are keeping your pelvis steady, supposedly steady on the reformer carriage, the actual resilience, the actual elastic recoil is going all the way up to the ribcage on that. Yup. So you're training all kinds of tissues into elasticity in this last final kind of summary of everything that we've done up til now. I did want to just make one note about the number of springs Elizabeth's been telling you about the number of springs there. Obviously people have different strength levels and if you get to a place where it's just too easy, you will get more elastic recoil training if you add another spring.

Now, I'm not a Polonius expert, so I don't know how you add the springs or which color spring means which, but if you want to train more elasticity, if you want to train more bounce into the tissue, then you can increase the resistance. So the trick when you're adding springs or adding resistance to any of the exercises that you do is to hit the donut or the Bagel. You don't want to be in the hole in the middle of the Bagel. That's what a lot of teenagers do is give themselves no training at all. And that if you don't stress the body, I don't mean stress in the sense of distress, but if you don't give a stressor to the body, it doesn't leap in response to that training.

So when you get to the place where this is really too easy, then add some more resistance to it. But you don't at the same time want to go outside too. So far beyond your capacity that you injure yourself. The trick of training yourself and training your clients is to be in that Bagel or the donut in the middle where you're not doing so little. You're not training yourself and you're not doing so much that you're injuring yourself. You're hitting that spot in the middle.

So here we are all rigged up for some squats. You can see that I've lengthened the courts as much as they will lengthen and then added a couple of extension straps so that I can be fairly vertical and have the carriage sprung with a, with a yellow spring people stronger than I will be able to handle more, more spring resistance, more weight. So in one of the previous sections we were working on elastic recoil, elastic recoil for the arms and shoulder girdle and trunk as well as the legs and the feet. And you know, I was pretty self congratulatory cause I thought, isn't this fabulous that in Pele's we can train elastic recoil. But you'll notice in the previous, uh, jumping sequences, I never stood up, never got off the tarmac and last I checked, the lot of life takes place standing up. So who are you going to call in the [inaudible] environment if you're not very skilled at doing squats, which is such a superb standing exercise.

And I thought, why not? We can do some squats with rotation and with Plantar flection or Relevate right here as you inhale, why near sitting bones. Aim your sitting bones back, lift your chest bone forward and up and steer your knees right over your second toes. Inhale to come to vertical. That was two inhales, but I'll fix that. Inhale and come to plant a flection. Rise right on up. And here we go. Now as you exhale, sitting bones widen, um, arms externally rotate or supinate steer your knees forward and your sitting bones back as your shoulder blades come down. Now it's the inhalation that will help to bring the spine forward and up the pelvis forward and up.

One more of these before we add rotate before we add the trunk rotation, Thoracic rotation. And I'm doing my best job to keep equal weight on both legs, even though that's difficult for me to do. Now when it's time for a rotation, I'm going to think about turning the left lung forward and the right lung back so that the trunk rotates and that puts more load through the, through the right elbow, through the right arm, and puts a lot more load on the left foot. Creating that diagonal. Inhale to come up. As you exhale. Turn your right lung in front and the left lung behind.

Drawing your left elbow back. And the diagonal of interest is left elbow to right foot forward and up. One more each side. Timing this now external rotation of the arms. Hmm.

Inhaling forward and up all the way to Plantar flection. A Su exhale. Draw your sitting bones back, turning the right lung in front and the left lung behind. So Tom, would you aluminate this? Yeah. Well I have a question for you. First is how much pressure are you putting with your knee on the foot bar? Oh, I'm not touching the, I'm not touching the foot bar at all. Not touching them.

Just wanted to check that the, we weren't leaning against it as you were getting close there, but not touching. Okay. So the thing that I'm really goes with squats that's so important when you undertake this is the balance between the three sagittal lines. Now let's leave the rotation out of this for a minute that she was doing a sagittal motion. It's flexion and extension of the hip and the knee and ankle. And uh, the, um, upper body is staying fairly upright, but the balance is between the back line, which if we could get you to just step on this, we could see the superficial back line roughly going from toes to nose along the back of the body and the front line, which is going toes up the front of the body. I'm going to go inside your arm here to the ear.

It's a funny one. It comes to the back, but it goes up the front of the body for most of what's functional here in this squat. And then the deep front line, which I'm going to have you take a step back with this foot and then we're gonna put this under here and you're gonna forgive. It's step step right on that. And you're gonna forgive my temerity cause I'm gonna come up the inner line of your leg and I cannot go because it would be right up the front of her spine where that third, let me have it back where the the third line that's involved in a squat, that's very important that people think about their flection extension in terms of the superficial front and backline, but now let's watch this again with the core in mind. So just the straight one without the rotation and the core strength that has to come up, the inner line of the leg and the integrity that has to stay in front of the spine. For this not to be a damaging exercise and I'm especially speaking to those people who are going to load themselves and the squat, we're looking at the motion between the front of the body, the back of the body and the middle of the body. The middle of the body runs right up the front of the spine. Very, very important that you keep that engaged and keep the inseam of the leg would be just right up the inseam of the trousers.

If you keep that engaged in your leg, your squats are going to be much happier. Now I'll go ahead and do a rotation on top of that. You don't lose the core as you go into the rotations. So many people will, they will fall onto one leg, they will twist a, they will lean the trunk as they twist the body. The cue that Elizabeth was giving you to connect the one elbow as she goes down.

Again, I will slow down. So this will happen when on doggy about it. Yeah, the, the connection between her left elbow and her right foot must happen through that core. I would almost say, don't take this on. Don't ask a client to take this on if they don't have any core support because you're asking for trouble in the body without the core support. So if you can do this exercise with this kind of integrity, you do have core support and squats are just so much a part of everybody's gym experience that they go into the, the, the gentleman, they do all these squats and they want to look good so they're loading them up. But for the core of the body is ready. And as a therapist, I have to tell you I, well I can tell you, I sent my daughter to college on these kinds of injuries of people who are loading their body before their core was ready. So I hope you can see the core preparation that's going on in this.

And when I say core, I'm not just talking about your pelvic floor and your transverse abdominis. That is part of a line that goes all the way from the inner arch all the way up to uh, uh, just behind your throat. That whole core is going all the way from where you make the letter g all the way down to the inner arch or from your tongue all the way down to the inner arch. This is a much more complicated exercise then it looks like, or that it's given credit for in the gym

Chapter 6

Lateral Line

onward now to a movement sequence with the chair. When we were doing the squat. I mentioned that last I checked, life takes place standing well, here we are standing again and I'm hoping to indicate some material you can do with the chair which will be relevant to improving your gate, the of force from the sole of your foot, the ground force of your foot all the way up the chain. I have a a heavy spring and a light spring on the chair.

The heavy spring is at the top. The light spring is at the bottom. That suits me fine. Please adjust the springs as you like and I have a platform here to stand on. This happens to be a sturdy foam foam box from balanced body. I'm loving it.

It's a new piece and then you might wonder if this is a chair sequence. What are we doing with the trapeze table here? Because I just needed a rack on which to hang this Caribbean for side a side, bending lateral flection coming up a little bit later. That's the why of it. You need something to hang onto. And if we had the chair poles, the chair handles in place, they would clutter up the shot. We have to take these things into account, you know? All right, so here you are with your legs in parallel, the big toes lined up with each other.

And we'll start with pelvic on leveling hip on leveling, pushed down below sea level and then hike up down and hike up as you do this. Keep a little bit of tone in the lateral pelvic stabilizers here so that we're not, it would be fun, but that's not what we signed up for. Okay. Discreetly in the mathematical sense, you have pelvic on leveling. Now you add on to that with Plantar flection and hip hiking, plant reflection and hip hiking. Add further. So both legs go into plant reflection and then knee flection.

Raw keeping. The left has left sitting. Bone left is skimmed towards the inner right ankle push and Ben now turn away from the chair and turn towards the chair. So here would be the navel turns to the right towards the supporting the standing leg and the naval turns towards the left and finally as the chair pedal pushes down, reach up and over to take hold of the handle and you have lengthening or fanning, open the side of your ribs into flection spine fluxion and in despite extension, twice more lateral flection and rotation in the direction of sagittal flection, lateral rotation maybe and extension. Now this same sequence of events takes place with three different positions of the box. We've already been in a pelvis and hip joints level.

When you move the box all the way back and move your foot back on the box, then you can have your other foot forward. This would be as if to take a step in hip flection and we start the whole project again. Hip on leveling hip on leveling with Plantar flection and knee flection. Don't think I'm nervous being examined. Doing my best. Alrighty and [inaudible] and lower stay level best you can rise and level.

Turn away from the front leg, turn towards the front leg, but you're not noticing the white knuckle grip on the trap table. Hmm hmm. And then up and over. Now this hand can go forward or it can maybe go back. I'm not gonna make it back. Or You could put up a third carabiner with the handle right in the middle.

That's Cetera. Finally, after being in hip flection, we'll move in the direction of hip extension. Slide your box forward, move your foot forward and come to the top of the chair pedal from a standpoint of safety, do make sure that your first three toes and your first three metatarsal heads are firmly placed on the top of the chair. Pedal, hip, on leveling, and during hip on leveling, especially in hip extension. You could go into hyper extension at the Thoracolumbar junction, but that wouldn't be prudent. Zip Up from pubic bone up underneath your chest bone and keep the asi es in one plane. The plane of the watch, uh, not a digital watch, but a watch face, um, with numbers on it. Think Pelvic clock and then Roz and bend your knee. You can probably hear in my voice when it gets difficult, starts to shake and have all three variations.

This one is the most difficult and them has some most functional value apparently turn away and bend and turn towards and bend and up and over the top rotation in the direction of extension and rotation in the direction of flection. So Tom, what do you say? Just put your foot on the forward one. So you're in the parallel position again. Yep. And I don't know if you can do this with the springs there, but can I get this underneath your foot? Yup. And just come down it because now we're turning our attention to something that we haven't paid attention to before, which is the lateral line, which is going, I'll just go in front of your arms so they can see, but it actually goes under the shoulder from the ear to the outer ankle down the outside of the leg. So you will see that as you go up and down on the bar, just allowing your hip to unlevel on this. Yeah. So that first thing that you are requiring stability out of this lateral line while you're getting mobility.

And that's the thing about letting the hips swing as she just did. You are losing that stability in that lateral line. If you're doing the Samba, it's great if you want to do the Samba or the Roomba or any of that. But if you want the stability in your hip San Gate, you have to maintain that integrity in the right lateral line while you're exercising the left, seemingly exercising go left leg on this. Okay. The thing that's quite hard to show on here, um, perhaps you can see it on the skeleton here, is that the lateral line, I actually go external. Oh, oblique internal oblique, external intercostals internal intercostal sternocleidomastoid, splenius capitis. It's really an set of exes that goes down the side of the body.

And those set of exes are almost like an accordion or a Chinese finger puzzle. So that when you're, again, if we just have you standing on the bar and yeah, making the motion. Yep. So now we're doing it with the flexion and extension that the uh, lateral line as is key keeping a stability as she goes up and down. But now when she adds reaching over to one or the other of the carabiners, we're putting a lot of stretch on the lateral line on the right side and compression on the lateral line. On the left side. It's the design of the exercise. And what I really want to make sure didn't get missed in this is the change in angle of the rib cage is essential to this so that you get a very different stretch and a very different exercise if you turn your sternum towards your standing leg and a very different stretch, not better or worse, just different if you turn your attention and thus your ribcage toward your moving like so very slight changes in the angle of the ribcage or the flashlight in the sternum was I think an image that you used before, um, makes a really different big difference in how this exercise, uh, affects body. So try both. Try them all.

Keep that variation going because your lateral line needs to be stable for reaching back, for reaching forward and reaching right on the side. Only training it for reaching right on the side. We will train you for when life comes at you directly from 90 degrees from the right. But you know what, just like lots of life is standing, it sometimes doesn't come at you at right angles. Just the one that you prepared for. So prepare for all the angles you may, she was saying that she was nervous being examined by me. You may notice how many of these exercises that I'm doing. Yes, I'm not even going to put myself out there in front of her doing these exercises.

So now if you watch the hip on leveling that she was doing as the first part of this exercise where we restricted the Samba, swinging the hips movement, I'm a new England male. We don't swing our hips no matter what, something terrible might happen. Um, but having the hip come up and down like this, I draw your attention not to her microphone but to what's happening here in the lower back, which a crucial part of the deep lateral line is the quadratus lumborum muscle. And we often think of exercising it as if we were moving the rib cage over the top, oh, that's going to stretch and move the quadratus lumborum and we don't pay so much attention to how it moves as we let one hip down and the other hip down. So if we come over here and look at the skeleton skeleton happens to have a quadratus lumborum on it and the quadratus lumborum is as it is very much always in the books, uh, straight up and down muscle in the body functionally. And some anonymous believe, and I've seen it sometimes in my dissections that you have this, there are fibers that go down and in that would look like the letter v that would be like an oak tree if we were to look at it. And there are fibers that go down and out that would look like a pine tree as well as the fibers that go straight up and down that looked like what, I don't know, a coconut palm or something, but what I want you to imagine is that you can see fibers in and certainly functionally fibers in the quadratus that look like this, ones that look like this and ones that look like this.

The straight up in one down ones do the stabilizing when you're walking, when you're doing the kind of dances that New England males do without moving their hips. Then you use the straight up and down once to make it. When you do the kinds of things that I've seen Elizabeth do where she really swings her upper body around on the lower, you're using the oak tree type fibers, the down and in fibers to stabilize that ribcage on the lumbars, but in this exercise you are uniquely training the ones that will just do the dip now. Yup. You're now uniquely training the ones that look like pine tree down and out inverted the Chevron like fibers as she goes down. The question is not that she has the strength to pull it up, but does she have the resilience, the elasticity, the give in those fibers to allow that hip to go down. You give this exercise to a lot of your folks and especially those folks of the male persuasion and they will not be able to drop that hip at all.

This becomes the crucial part of this exercise before they're reaching around for Caribbean owners or doing anything that smacks of strength. The ability to drop that hip away from the lumbars is not an ability that everybody in our society already has. So I'm really drawing your attention right into here. Right into here. This is a crucial part of making this whole large lateral stability exercise work is that you have dynamic stability going on in the QL area worth making sure that they have that before that you take them into this whole exercise.

Chapter 7

Myofascial Meridian Festival

Let's turn now to the trap.

He's table for real mile fashional Meridian festival. I'll do a sequence of moves that you may recognize from your polarities training, your early Polonius training and when you watch this, consider which muscle are you using or is it possible to think of just one muscle that it's not. So sit next to the push through bar so that when the back elbow is bent it's about at a 90 degree. When the elbow is at shoulder height, that can indicate to you that your the proper distance, the correct distance from the bar, you can see that I have this sprung with two short springs, a short blue and a short yellow. These two blues were a little bit too heavy for me. All right. As you inhale, draw the bar down and as you exhale, press down with the heel of your right hand and your rights sitting bone.

So you're right. Sitting bone will make the ground force for this side bending this lateral flection. I'm having the, I have the idea of pouring the ear over to listen to the table, pouring the ribs over the pelvis and then when I just can't keep the right sitting bone down anymore. Swing out and a little bit of elbow flection. This is just to ensure that you're able to lift up your ribs and lift up your waist. Then for the return, aim your rights sitting bone down. Pour your pelvis down, pour your ribs into their pelvis and push the bar up. Pulling with your right hand, pushing with your left hand rotation and extension, pulling with your right hand and pushing with your left hand swing around and you have a different view. Inhale to pull down.

As you exhale, sowing out over the table and to return. Aim your left sitting bone down. Pour your ribs into your pelvis, push with your right hand, pull with your left rotation and extension. Then you only swing halfway around and plant the souls of your feet into the uprights. Get ready for the circle saw or the Tom Myers called it this morning. These circular saw.

That's when he and I were rehearsing on the plane ride to get here. Inhaling shrugging your shoulders up to your ears, hiding your neck as you exhale, shoulders descend and it's opposed. Steer your pelvic Tilton spine flection. Create a ground force with your heels into the bar and then it's the right arm only that swings down. And this under curve of the right arm encourages posting your pelvic tilt and spine flection. Creating a ground force with your left foot.

Reach long on a diagonal from left foot to right hand. Now create the ground force through your right foot and you continue with flection and side bending as if you could reach that bar. Now continue in flection. Add more side bending. Press the sole of your right foot, creating an anchor with your rights sitting bone. Then you come further over into flection and side bending.

Retrace your path. Inhaling sweeping for the ocean. Exhaling plant your left foot. Reach your right hand, plant your right foot, reach your right hand, swing out over your right foot internally, rotate and then come over in the direction of your left foot. It's as if both sitting bones, she said to herself, including the left, both including the left, could be on the table as your ear listens towards your knee. Come up and take the same glacial pace. The other side, no, really pick up the pace. Inhale to shrug up. Exhaling, roll back, round back, hanging off the bar flection.

Push with your right foot, going to your left hand, push with your left foot going to your right and then swing around. Okay. Both sitting bones on the table. Reverse your trail side bending flection rotation. Reach for this bar for that bar.

Reach for the waves and coming across internal rotation with the top arm. I guess you could imply external rotation with the bottom arm. That's one version. We'll go on to the next event which is bridging. Inhale, shrugging up starts the same as you. Exhale, curl back, round back in the spine.

Fluxion bending both knees, Skim your pelvis along the trap p stable and then peel your pelvis and spine up. Getting length through the front of the thighs and roll down. This is a segmental bridge. Nod your nose downwards. See behind the cheekbones of your face. Push back, leaving your mic box on the table. Inhale to shrugger as you exhale round, back, curl back, slide in.

Peel your pelvis and spine up, drawing pubic bone to chest bone. And then here, launch yourself up as if your chest bone could be parallel to the ceiling. Now keeping your cervical spine in neutral. Land on your shoulders. Roll down your spine and Pew your head up.

Push back and come up. Now lift your chest bone, lift your gaze widening across your collar bones. See the ceiling above you. And thank Paulie's any time for this fabulous overhead camera. So Oh, we could do that again with a better mic box or take a pause and put it back on.

Now we have a transition onto the parakeet, so come forward enough lifting your chest bone and lifting your shoulder blades round back just little bit and put one foot on top of the foot bar the other foot underneath and roll down your spine. Now for this parakeet perch, measure your distance from the bars so that you can have your hands comfortably on the bar. To get a grip for your shoulder stability. If you don't have bars at this end, no problem. You can stabilize with your arms down by your sides. I'll work here first. All right, measure your distance. Hmm.

Check to see that when your legs are outstretched, you can have the sole of your foot just below your metatarsal just to the rear of your metatarsal heads. Don't have the metatarsal. What camera am I going to? Don't have the metatarsal or just toes. Don't have the metatarsal heads or gesture toes on the bar. It has to be closer to your rear foot than that to get a stability point. All right, bending both knees. Inhaling, exhale to slide away and bend.

Anchoring the heels of your hands into these uprights. Lift your pelvis. That's a neutral pelvic lift off and then land and push away a neutral bridge. Push with the heels of your hands while you are up. Aim your right sitting bone toward your inner left ankle. Okay.

Aim your left sitting bone towards your inner right ankle and then stay up. Pull with your hands, slide away and come up. Making sure that the, not the metatarsal heads, but behind them are stabilized on the bar. Anchor through what would be your first ray of your left foot. Your right leg comes over the back. Exhale to go away, pulling with your arms for stability. Change to the new side, aiming your left sitting bone towards your inner right ankle. Push away and come forth.

Now bring the bar down just once more. Nod your nose downward. Seeing behind the cheekbones of your face. Interlace your fingers. Press the palms of your hands towards each other. Take a hold of the bar. Dorsey flection looking forward towards the ocean there. Nod your nose downward round in.

And there we have it. So Tom, tell us about this move is indeed a festival. So many lines that I really want to go back to something right at the beginning because you were using all the lines all the time. There were spiral lines, functional lines, all those things. We could spend an hour just explicating that exercise. But at the very beginning, you sat at the side of the table and you reached over and then you switched yourself from Ba on the bottom of your pelvis to your side of your pelvis. And I want to add that was one strong [inaudible]. If you, I don't know any parakeets that are that strong, but uh, at this beginning, and let's make the trend position again coming back.

What I'm inviting you to notice as she comes back is that the weight starts here on both sitz bones. It's going to come up onto one sitz bone. Watch the weight on the pelvis, nevermind what's happening. Well, not nevermind, but with all this happening in the rest of the body, she is going onto the troll canter and then on to, in this case the side of the pelvis, but a little bit the front of the pelvis. So I'm gonna ask you to imagine that you can see where the weight is going from the bottom of the pelvis. We're going to do this transition a few times, okay? To the side of the pelvis. This is a transition that many western people who live in chairs don't make.

So I want to take my clients back to this very first motion and have them be able to do this without throwing themselves from one to the other. But using the trapeze to ease yourself one on one end of this transition to another. Can I for just one moment, take your place on the table. Do that Tom, because I have for 40 years had a body work practice and you finished this lovely session and people are lying there and they're in a state of bodily bliss and you say okay this session is over. And they go, oh yeah. And they reestablish all his shortness and all of this crimp that you have just been working for however long you've been working. And the transition that um, Elizabeth was just making or that we were making together is the same transition that at the end of a yoga session, I don't know, or the and have a body work session when I am relaxed and I want to keep that relaxation. If you watch, I am transiting from the sit spawn over the trocanter.

It could be to the side in this, it could be to the back. If I were in body work or if I were a small child. It's usually more from the front and the child's looking around to see the cat, to see the cat, see mom, see something, and they transition from this lie on the belly or lie on the side or even lying on the back to sitting. And because we had chairs, chairs, chairs, chairs, chairs. From the moment you go into kindergarten, people don't make this transition. I just really think it's so important for your client to really understand the transition in the pelvis from being on the sitz bones to being on the side or if we were looking at it developmentally from being on the side to being on the sit spawn. So that was a piece of your exercise there that I just thought was so important for people to understand. Thanks for that.

So you said when we were doing this that this was one version and I would like to from the outside because, uh, I'm not a politics teacher, I just would like to explore what could be two versions for two different types of people. So as you go back into towards the table, you could be flexing your lumbar spine, which was the version that you did. Yes. Was keeping that lumbar spine inflection. So not collapsing, but keeping the strong connection between the rib cage and the hips. This is Joseph PyLadies and my teacher, Ida Raul, we're working a lot in the forties and they were working with a lot of people in that interwar period. And just after the war with an anterior tilt pelvis and a hyperlordotic spine and both Ralph's work and Palladia, his work was really designed for those types of people and not so much for those types of people who already had a flexed spine and a posterior tilt pelvis.

So it seems to me that some of the clients, it occurs to me that some of the clients might need a little more hyper extension, a little more extension in that which the queue is keep your chest up. Yeah. That keeps that extension in the lumbar spine. Keeping your sternum coming up. That would be more of a corrective for those people with a post teary or pelvic tilt and it reduced lumbar lordotic curve as opposed to the first version that she did that would be more designed for those people with a lordotic curve with a sway back with an anterior tilt pelvis. Um, being able to modify my manipulations that I do, my manual therapy that I do, being able to modify the exercises that you give according to the body that's coming to you is a skill that you really want to rise to after you have mastered the basic training that you've been given. And that's why I think working with, that's why I enjoy so much working with Elizabeth because she is going to tailor everything to the person who's in front of her and what they need, not some perfection of some exercise, which after all is just a progression of an exercise and not something that happens in daily life

Chapter 8

Neuromyofascial Web

after looking at uh, such a festival of lines there and understanding, I hate to do this to you because I know you've spent a lot of time learning the muscles and their origins and insertions and actions and all of that as part of your training. And I'm sorry to tell you this because I spent a lot of time learning these same things that it's fairly useless because muscles do not work individually.

They do not only work from their origin to their insertion and trying to understand human movement from the point of view of individual muscles is really a mistake in a way. It's not not true. It's not not true that the moon and the sun go around the earth. You know, you can imagine that the moon and the sun go around the earth. But it's a lot easier to do the math if you think that the moon goes around the earth and the earth goes around the sun. In the same way. If you look at the musculoskeletal system, it is possible to think that muscles only act from one end to the other, but you're missing a whole bunch of stuff if you do that, and I want to play a little bit with that concept here.

So you have been learning all this time about the musculoskeletal system. I have to say that that musculoskeletal word leaves out the entire system that joins them up. In other words, to say musculoskeletal is fashion this thing, so I really strongly recommend that you take on the term that Robert's life her gave me and that I'm giving you the neuro myofascially web. That's what you're exercising when you are, that is what you are engaging. That is what you are working with when you come in to do a Palati session deed. When you come into use your body in any way and thinking of training the neuro myofascial web rather than thinking about learning the musculoskeletal system I think will stand you in very good step. There are, um, four things that you miss when you think Musculo skeletally the first thing that you miss is that the Fascia transfers force from one muscle to the next north and south down the body.

These can be seen in the posterior and anterior oblique slings of, um, Andre Fleming, um, as in the physiotherapy world and the lines of, uh, France Wiseman's. Yeah. And the appalled buscape. Um, and he would call, they would call the anterior oblique swing, the Lenier the fair Matthew, uh, the line of closing and the line across the back of the line of opening the lenient [inaudible]. It's, uh, these things are not, uh, it's obviously it'd be anatomy trains too. And uh, I'd like to lay claim to that, but honestly I can't because these ideas have been around for a long time. I happened to make a modern rendition, a modern map of this, but it's the idea of muscles transferring force from one to the next has been around. So we have tried in doing that to um, look at that. And this is a wonderful piece of what you're looking at. Along the bottom of this slide is the superficial back line dissected as one piece all the way from the Plantar Fascia all the way up to the scalp at the very left. But the research by Franklin Miller, that's on the slide here. Um, what they did was they took unembalmed cadavers, then they put a string a meter into something that measures the fashional strain into the hamstrings. And then they did a straight leg lift test, standard physiotherapy thing for ability of the hip to flex. That means putting your hand under the Achilles Tendon under the heel and lifting the leg with a knee straight. And having done that, they then measured at the top how much strain was in the hamstrings. Cause this is usually thought of as a test of the patency of the, of the open ability of the hamstrings.

And they checked on what was happening in the other surrounding tissues. It turns out to everybody's surprise that the iliotibial tract is having nearly two and a half times the amount of strain that's in the hamstrings for that straight leg lift test. That plantar Fascia had 25% of the strain that was in the hamstring and you're not even doing any plantar flection. It's just putting your heel under your hand under the heel and lifting it. You're not doing anything to the Plantar Fascia and yet the Plantar Fascia gets 25% of the strain that's on the hamstrings.

You are not just measuring the hamstrings when you lift this, you are not just, when you do that bridge that we just saw with the parakeet legs on the perch and you either come down with a straight spine or you do the bridge lending one vertebrae at a time, you're not just exercising one muscle that is going through the body and through my actual forced transmission is working with all kinds of muscles. You can't analyze movement in terms of individual muscles. In my opinion, people have tried but I don't think you can. If we go back, the next thing that you're missing are the east west connections between the muscles that muscles attached to their brothers nearby and not only do they attach but those attachments carry force. So here is a place where you can see two muscles. This happens to be the Brachialis and the biceps in your arm right here. And usually they would say, well the biceps goes from here at here and does this and the Brachialis goes from here to here and only does this.

And you would analyze the muscles individually and somebody with a scalpel would go in between those muscles and separate those two. And in going in between those muscles and separating those two, they would break all this tissue that you can see here that Gil Hedley has called the phys should watch the first speech if you haven't seen it and the revision to the first speech as well. But anyway, this fuzz turns out to be force transmitting so that when you are doing a preacher curl and you are out at the limits of what supposed to be an exercise for your biceps, you are actually transferring force all the way over to the triceps. The triceps may even fire to reinforce that Fascia to take some of the strain that would normally be on the biceps. This doesn't go to our sense of biomechanics, but if you think as a creator, as a designer, of course you'd want that to happen. You'd want to distribute the strain across the muscles so that when I land like this, I'm not landing just on my soleus muscle.

I'm not relying on just one muscle to stop the whole force of my body from coming to the ground. It gets distributed to all the muscles of the lower leg, all the Fascia of the lower leg. So if you're thinking muscularly and you're trying analyze your epilogue, these exercises are any others simply by what's happening to individual muscles. You're missing the north south connections that happen in the anatomy trains and you can find in the anatomy bullet trains book where I have outlined these for you to see. We've talked about some of them today. If you go to the research of Peter Hoeing, Hui, G I N G or [inaudible] Vanderwall because it's Dutch people that have done this research, mostly you will see that muscles transfer force to muscles locally, sideways. So that's not the anatomy trains. That's I dunno, anatomy trains, bus service. That's the cross town service for the, uh, the subway system of myofascial force transmission in the body. And there's this third thing that you miss if you think musculoskeletal Lee, which is, we have thought that the ligaments work in parallel to the muscles.

We think, oh, the muscle is controlling my elbow joint. The muscle is controlling the elbow joint. The muscle is stabilizing my elbow joint. The muscle is stabilizing my elbow joint. Oops. The ligament is stopping the joint and saving it from damage.

That means God put a system in there that means your mom or Darwin or whoever you think made your body put a system in there that wasn't even going to be in action until you were out at the extremes of motion. How often do you get out at the extremes of emotion in yoga class? Maybe maybe in something that you do in your life, but most of your life swinging hay bales, which is what I do every summer. I measure my age by every summer when the hay comes in for the horses, I have to swing 500 bales of hay up into the loft and I know at the end of those 500 bales how my body is doing, but I'm not going to the extremes of my emotion am I? I'm not taking my arms out to really straight.

I'm not taking my spine into full extension or full flection. I am grabbing our load and shoving that load sideways. So why would you have this very expensive ligaments? Any system in your body is expensive in terms of maintenance and all that. Why would you have this very expensive ligament system that only works at the very extremes of the motion?

It turns out that the muscles are tensing the ligaments. It doesn't look like this. It looks like this. The muscle is tensing the ligaments. So guess what? Those ligaments are stabilizing my joint ligaments are stabilizing my joint. The ligaments are stabilizing my joint.

The ligaments are stabilizing my joint though once they're stopping the joint from having action, from having damage. So yes they act that way at the end of the motion but they're acting all the way through the motion because of the muscles are activating, the ligaments are tightening the ligaments. They are not in series. They're in parallel. This is worth reading about in yacht Vanderwall. This is worth taking into your mind and thinking that your muscles are not working just from origin to insertion. They are working sideways, they are working length rise. They are working superficial to deep and there's one more thing.

A fourth thing that I would like you to understand about this and that is that all of your nerves and your arteries and your veins. Here you can see the nerve, the vein, and the artery inside a facial bag. That Fastenal bag is running right here. This is where this dissection was done, so that's the biceps. You can't quite see the biceps in behind and the triceps underneath and this. If you strum your finger right here, you'll feel a nerve.

That is where this fashional bag is coming with a nerve in it. If there is entrapment, if there is scar tissue, if there is inflammation, if something happens that grabs the fascia around that nerve, you'll be putting your arm up like this and he say, oh. Or you'll say, oh my muscle is short and it's not. It's that the Fascia of the nerve or the blood vessel is caught and would rather stop the motion. Then take that, take the pain or take the reduced circulation. That would happen if you cut off an artery. There are so many things going on with the biological fabric of the Fascia.

The muscles are organs that float in that Fascia. The same as the bones are organs that float in that Fascia. And if you can see that facial net as the thing that you are working within, as you start the specificity, the wonderful specificity that [inaudible] provides you for this, that wonderful coordination that you get with the parties, it is not to build up individual muscles. It is to build up coordinated motion across your body. Range of movement of a particular joint is so unimportant.

I'm saying this after 40 years of work, I'm sorry, but it's really not that important. Range of motion in life is very important. That's emotional range and physical range. I actually think those are quite well related, but I'm not so worried about whether this muscle will stretch enough so that I can put my palms on the floor. I'm worried about whether my body is coordinated enough so that my joints will last through my sixties which I'm in now.

And I still plan to be sailing my own boat and I hope making life pleasant for my wife even into my eighties. So, um, in order to do that, I'm not thinking about individual muscles. I'm thinking about whole range of motion. That's why I really love watching Elizabeth work because this is a longterm project, not a short term fix. Thank you so much for being with us at [inaudible]. Any time. I really love to work with Tom and I learned so much today. Tom, thanks so much.

Yeah. So did I. It's really great to take so many years of experience. Uh, I've been at it for a long time and I wouldn't want to say that Elizabeth spin at it for a long time, but she has had a lot of different kinds of experience. When you bring this in pilates system, not something that you're just doing for a short period of time or just to get in shape. It is preparation for life.

Continuing Education Credits

If you complete this workshop, you will earn:

2.5 credits from Pilates Association Australia (PAA)

The Pilates Association Australia (PAA) is an independent and not-for-profit organization established by the Pilates industry as a regulatory body for control of quality instruction, member support, and integrity within all legitimate approaches to the Pilates Method.

3.0 credits from National Pilates Certification Program (NPCP)

The National Pilates Certification Program is accredited by the National Commission for Certifying Agencies (NCCA)

Comments

Roberto Cerini
It must be the future of video workshops! I love this "conversation" approach, where two of the most interesting minds around meet to move beyond a simple presentation. Each of them explain some blind spot of the other, and push the workshop to a new level of clearness. I hope to see workshops like this again and again
5 people like this.
I have done the Pilates exercises with Elizabeth and read Anatomy Trains. I have done pilates while contemplating what I learned in Anatomy Trains. WOW! THIS WORKSHOP! Dovetailing the two, guiding my thinking and giving me guided experience in the lines of my body gives me the confidence and depth of understanding I need to BEGIN to move to the next level in my teaching. I'm sure I still have questions..... Thank you Tom Myers and Elizabeth. The synergy between you is evident
1 person likes this.
necesito traduccion por favor, quiero hacer todos los talleres pero necesito que esten en español o traducidor, se los agradezco
Ximena ~ Desafortunadamente no tenemos planes para traducir este taller en este momento, pero esperamos hacerlo en el futuro.
1 person likes this.
Wow! That was two evenings well spent. My head is spinning with excitement!
1 person likes this.
Fantastic workshop. So helpful. Thank you so much for this opportunity.
3 people like this.
interesting comment in Chapter 2 that the transversus is (1) very thin and (2) very difficult to engage in isolation. Should make Pilates instructors rethink their queuing.
1 person likes this.
I loved this workshop and can not wait for part 2 ...
1 person likes this.
Amazing and useful! Really enjoying this workshop! My sense is that a movement practice like aikido would facilitate facial elasticity in that it requires amongst other things conscious but quick movement. Paying attention in a playful way allows the whole system to respond with bounce, so does this bounce that is brought about through the variety of ways of landing with the arms in the first sequence of chapter 3 also translate into the principle of reversibility that is integral to Alexander and feldenkrais work?
Mastaneh, Thank you for your insightful comments. Collagen can shorten much more quickly than muscle fibers can contract. Human fasciae has a kinetic storage capacity similar to kangaroos and gazelles. Elastic Recoil may occur when the loaded collagen tissue has a high elastic storage capacity. Training techniques that require specific timing responses to resistance and gravity may develop the elastic storage capacity of fascia. It is possible that some aspects of Aikido develop Elastic Recoil. Alexander Technique and Feldenkrais Awareness Through Movement are exceedingly valuable somatic practices that offer tremendous benefits. Neither excels in training Elastic Recoil. Moshe Feldenkrais earned his black belt in judo prior to developing his own Practice. He create some Awareness Through Movement Lessons inspired by judo that may contribute to Elastic Recoil.
1-10 of 35

You need to be a subscriber to post a comment.

Please Log In or Create an Account to start your free trial.

Footer Pilates Anytime Logo

Welcome to Your Pilates Era

Experience Your Joy

Let's Begin