Premium workshop

You can view a 2 minute preview. For details, scroll down below the video.

Workshop #2399

The Guillotine Workshop

70 min - Workshop
9 likes

Description

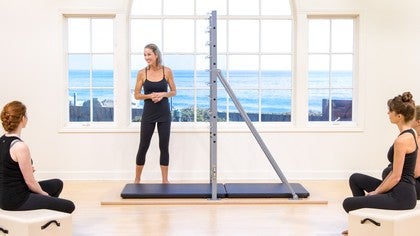
Join Kyria Sabin in this workshop where she discusses the history of the Guillotine in Pilates and specifically in the work of Ron Fletcher. She shows many ways you can use this piece of equipment and how it feels different than movements on the Tower or Cadillac. She also shows how you can use the Guillotine to get feedback as to how your body is working.

Objectives

- Learn the setup and action of different exercises to work the entire body

- Use the settings of the Guillotine to give you feedback about where you initiate the movement

What You'll Need: Guillotine

About This Video

(Pace N/A)
Jan 15, 2016
(Log In to track)

Transcript

Read Full Transcript

Chapter 1

Leg and Footwork

This is the Giga team tower. And um, we will be starting our workshop program with leg and foot work. Um, Mckenna Dosa. We'll be starting a cell. Thank you for being here. Uh, the, the, um, bar is spring loaded from below with two blue springs. Um, this is really the only, um, set up that we, that we use for this, for this bar. Occasionally we'll use two yellow springs. If someone has, uh, has had a hip replacement or has nia shoes, well we'll use a slightly lighter spring in general. We'll use two blue springs from below. Um, notice how her body is length and out her pelvis is directly underneath the bar. And what we'll do is start with a heel position. Um, then going into prehensile, then going into Relevate, Flagstar, LFA, um, and then a single leg pattern. Um, so anyway, thank you.

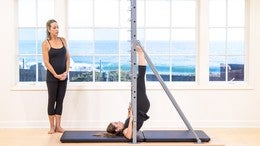
Traveled like San and place the heels on the bar and extend the legs up. So the first thing we want to check is, is just the setup is the pelvis in the right position. And to gauge that. We want to look at the, the plum line from the center of the heels down through the center of the hips. And um, one of the wonderful things about the gay chain shower is that it gives us that, that feedback through the hip socket, um, that you don't get on the Cadillac. So with the ankle of the, the tower bar or the push through bar on the Cadillac, um, it gives a slightly confusing as, as Ron would say, uh, information to the hips.

This is a much cleaner line and we can really feel what's happening through the legs and through the lower body in a more precise way. So what I'd like for Mckenna to do is simply flex at the hips into a jammy play and exhale, extend out and she's flexing the bar down as far as she can, keeping the hips, reaching long on the mat, and then keeping the legs extended. Let's change the breath just to emphasize that reach of the hips. Take a deep breath. So stay at the top. If you would take a deep breath in and exhale, flex the hips.

Inhale up and you feel that that accentuated reach through the lower body. And again, reaching up deeper fold in the hips. And we generally start with the heels because it gives the feedback through the back of the pelvis. And one more time, inhale and exhale, flex the hips and then press the bar up and hold it here. Let's do that same pattern with a double breath in hale. Exhale. So a little more challenging at the space. Age Two more sets. Keep flexing the outsides of your feet back.

Last Satch and inhale at the top. Exhale, draw the bar all the way down and extend the legs out onto the mat for the prehensile and the relevant positions. We want to draw the hips further under the bar again to get that same line through the hips. Draw the legs in and place the feet on the barn. And Ron Fletcher coined the term prehensile. Um, sometimes you'll hear the word or the term bird feet or curled toes. Um, he, he really felt that, that wrapping the toes actively around something, um, was more of a prehensile movement like a monkey. And, and I really loved that idea because it along gates the toes around the bar.

One of the wonderful things about the Gig of chain is that it doesn't have padding on the bar and said that there's, that there's that additional articulation that we get through the feet by wrapping around a hard surface and a more, a smaller, more precise surface. So you'll notice that Mckenna doesn't quite have that vertical lines through the legs. So I'm going to ask her to release her legs from the bar and move the hips underneath of ours slightly. And then again, place your feet on the barn and extend the legs up. Do you feel the difference? Arms down by your sides. So again, it's an inhale to lengthen. Exhale to play, reaching long through the heels and reaching out through the hips, closing the ribs to accentuate that along.

Gaycation two more times to reach last time. Emphasizing the hip foamed and then a full breath to extend the legs. Zap, same movement with a double breath. So how deep can you fold the hips without releasing the pelvis? Last one, holding it here.

Press up to relevance. So notice and relevant, we're pulling the toes away from the bar, so there's metatarsal flection. And then from here, simply flex and press to point. And again, flex press to point. Each time you press up through the balls of the feet, try to feel that oppositional. Reach down through the pelvis two more times.

Flex and point last time and point holding the point. Take another deep breath in. Exhale, flexing into the hips. Inhale, extend up and flex down and up. Lax down. Try to deep and the hip flection. Last one, closing the ribs and a full breath to press.

Holding the reach. Flex one heel to the ceiling, bending the opposite leg. Exhale, press up. Keep equal. Reached through the sides of the hips. And again, flex and press flex and press each time. Drawing those legs together. Last one, and again, we can speed it up slightly with a double breath in panel. Exhale, equal way to cross the feet. Two more sets. Last set and hold it there.

You're feeling this place the right foot just on the opposite side of the Barnes. This time we'll do, um, oppositional work through the legs. So as she flexes the left hip, the left leg, she reaches the right leg long to the mat. Full breath and a full breath to lift up and touch the bar. And again, full breath to reach out and full breath to lift up. So the challenge here is to keep equal lines through the sides of the body and to keep the tower bar tracking evenly last to reaching out and lift up and touch the bar. One more. That's it.

Place the right foot and to release the left and you can see how the bar, um, it's, it's very difficult to maintain that even tracking with the single leg work, full breadth to reach out and full breath to touch. And again, waiting into that left chair. Maintaining the relevance with the right foot. Yes. Last two.

I said initiate with your breath and lift up, placing both feet on the bar and just to center the body and heel flex. Flex the feet, I'm sorry. And press to point and flex a little deeper. Reach through the hips. Beautiful. And again, flax and press to 0.1 more, pressing up, holding the Relevate. Take a deep breath in and fold into your hips.

Release the Bar, extend the legs out. And let's take two breaths to imprint the spine. And one more reaching arms forward. Curl up through the upper body, coming all the way up into contraction. Two sets of pulses here. Opening up the back and roll up with your arms, lifting up and lower the arms down by your sides. Lovely. Thank you Mckenna.

Chapter 2

Plié Series

This next piece is also part of like an footwork. Ron called at the play series. Um, and it really works on the opening across the hips and the deep fold in the hips in a turned out position. Um, one of the things that, that Ron was asked several times this why he worked such a wide turnout, um, in his place and he said, well, I have one. And um, he, he, he felt that that shows show's turnout was, uh, possibly somewhat limited and, and that's why he worked in a, in a slightly narrower position. Um, what Ryan felt is that we can, if we can maintain the organizations for the lower body and the pelvis and work with an act of turnout, not a released turnout, that we should because the body's capable of doing that. So I'd like for Martha to draw the leg San and extend the leg straight up to the ceiling. Okay. And then from here, just work your turnout turnout and parallel warming up the hips for what's coming next. Parallel two more times. Turnout last time, parallel, turn out, draw the legs and to a diamond and place the feet on the bar and a turned out position. So what I'd like for you to notice this, the equal lateral triangle that she creates with the feet, the opening through the hips and the ankles, the news and the hips are all on the same line. So we're not rolling in through the knees, um, or through the gang calls from here. She'll take a full breath to extend up and prepare the body.

It likes for drawn together. And again, the pelvis is reaching long on the mat, starting with a flex and a point. And the flex for LFA feels completely different in the turned out position. Yeah. And again, flax press to point. Last one, flax and Cross two point.

The other thing I'd like to point out is that because of the angle of the bar and the position of the body, um, the client or whoever is performing the work can easily see the alignment through the lower body and the ankles and see which side is initiating the movement and correct move on through the lower body. So maintaining that turned out position. Take a deep breath in and exhale. Flex just a quarter of the way down. Inhale, draw the legs together and initiate that movement from the hips, not the knees. And think of the knees following what the hips guide and one more time do fold in the hips and inhale up. And then deep in that play coming down a little bit further. Inhale up, starting from the hips.

Let's do that two more times. Little deeper play last one and press up and then come about three quarters of the way down. And again, the emphasis is from the hips reaching the pelvis. Two more times. Last one. And then let's work here. Full range, coming all the way down.

Inhale, draw the legs together and fold down. Two more on this. Next one. Draw the bar down, keeping the bar down, Rachel Little longer through the pelvis and pulse the bar down a little bit further. Paul's two, three, four, emphasize the hip fold and then full breath Triggs. Extend the legs up and together. Reach the pelvis as you pulled down into that deep wide plea, a holding that position. This time we'll pulse the legs out.

Paul's to working from the back of the legs. Six and again, press the legs up and together. And then four times emphasizing the hip fold and the turnout. Inhale. Ah, and feel a little wider. Uli. Two more times. Starting at the hips.

Beautiful last time. Start with the hips. Work your turnout, the pole breath to extend the legs up and draw the legs to parallel. Parallel in the turned out in the separated position. That's it. And then from here, flex and point, bend the legs and extend. Reach the arms back and press down. And again, flex and bend.

And extend and arm reach back and pressed two more and bent the box all the way down. Release the Bar, extend the legs out. Okay. Set and curl forward. Reaching under the bar, which Martha can do. Pulsing forward and roll up to press the arms down. Lovely. How did that opening feeling your hips? Good. Yeah.

Really good in the nose. Yeah. Only Brian would do that. Thank you Martha. The next series is called the pole down series.

Chapter 3

Pull Down Series

Um, even though it seems like an arm movement, it's really about getting the length through the spine and the lift up and out of the hips. This can also be done on the powder pool, um, and be done on the Cadillac. Um, it feels quite nice on the Gig team. Um, so this is Michelle Lee from Santa Barbara. I'd like for you to bring your arms forward to reach for the bar that's set and she'll start with the arms. Um, basically in a 90 degree angle.

So the elbows are in line with the shoulders. There's a lift up through the crown of the head. Reach out through the toes and lift up and out of the hips. So everything is reaching in different directions. Take a deep breath in and exhale. Draw the bar down as you lift the chest.

Ah, inhale, lift the bar up and comes slightly beyond 90 so you have a little more range of motion coming up. And exhale, pull down. And again, inhale, lift up, lengthen the neck. Do you draw the bar down? Beautiful. And again, inhale, lift, working evenly true. The sides of the bath. Two more times. Inhale left or a longer through the lumbar spine.

Last one, lifting up and pulling down. And then find that 90 degree angles. So the elbows in line with the shoulders. Maintain that ankle. Take a deep breath in. And as you exhale, contract back away from the [inaudible] bar, pulling the bar down from your contraction. Take a full breath to lift up through the spine and a full breath to contract the bar down. Opening up. [inaudible] the back. Draw the shoulders down with you and breathing.

Ah, and breathing the bar down. Hollow through this, the center of the body. Draw those shoulders down with you. [inaudible] beautiful. Two more times. Lifting up. Sure. And Hollow.

Yeah. One more time. Lift up this time as you can track back. Draw the legs into a diamond folding at the hips where everything's moving together. Full breath to lift up and out of the hips. Sure.

Allow the bar to lift up a little bit higher. Yes. And then contract down. Draw the legs to a diamond. Two more times. Full breath half. Sure. And full breath to contract back long through the night.

Show that contraction. Reflect up through here. Last time. Lifting up and out of the hips. Sure. And contract back. Cool.

And lifting up and out of their hips. Uh Huh. Lengthen the bar up and circle the arms and down by your sides. Very nice. Thank you.

Chapter 4

Press to Sit

This next piece is called press to set. Um, I'll have Arden a Camry too at first with no springs. Um, and it's, it feels wonderful with no springs.

The Bar simply guides the body into the position. Um, it starts with an abdominal contraction and then continues through into a rector work. And again, it's wonderful because the bar is directly over the shoulder girdle. So we get this wonderful plum line, those straight lines for the body that you can't find on the Cadillac or really any place else in the pilates program. So again, this, this the gay teen provides feedback and support, um, that is invaluable to the body art. And I'd like for you to lift your arms up and reach the arms over. Head shall first do this with no springs. Inhale, lift the arms up. Exhale, curl forward to place the heels of the hands on the bar. From here, take a full breath to roll up and lift up and out of the hips and notice how the work transfers from the front of the body into the back of the body. Take two breaths to roll down, opening up the front of the hips, and then reaching the spine long to the mat. As you extend the arms overhead, shoot a fall. Inhale, lift the arms, exhale and to an upper contraction. Take a full breath.

Place the heels and feel that length up through the sides of the body. As you stretch up and out of the hips, look straight ahead, rolling down through the lower back. Try to fill that space between the vertebra as you lengthen out onto the mat. Let's do that two more times. Two breaths to roll up. Lifting up and out of the hips. So even with no springs, this is a lot of work.

Two breaths to roll down, reaching each bone into the mat with control. [inaudible]. Sure. This piece is all about oppositional energy, reaching long feudal lengths, lengthening up through the sides of the body. Two breaths to roll down, reaching through the spine, out of the hips, and take a full breath to stretch all the way out onto the match.

Okay, thank you. So I'll have Martha show the same piece with springs and we're using two yellow springs. So you would never want to use anything heavier than a yellow in this position, um, because it could compress the spine. So again, the hips are placed right underneath the bar and we think of the side of the hips is the side bolts in the Pletcher works. So we want the side bolts to be even with this with the upright bars.

Slide back, I think just okay, so reaching the arms, sober hedge, try the ankle bones together. Inhale, lift the arms, exhale, curl the body forward and again, full breath to lift up. Finding that length to this fine. Two breaths to roll down, reaching out of the hips and stretching all the way back. Okay, let's do that one more time. Press up and then hold that lifted position.

From here we'll just had some very simple shoulder shrugs. Lifting the shoulders are, draw the shoulders down and as she draws the shoulders down against, she's finding that length in the sides of her body. Two more times your hips could be slightly further back. We'll do it for the next one. Last one. Lifting the shoulders out and I'm rolling downs for the lumbar spine [inaudible] and reaching long overhead.

[inaudible] lifting the arms, curl the body forward and pressing up out of the hips. Keeping the shoulders down, bend the elbows. So it's a play of the arms and press a and notice that even alignment across the shoulders, reaching wide through the elbows. And last one pressing up and then the lift comes from the line lifting up. Reach the lower [inaudible]. Yeah.

And take a full breath. Just stretch back overhead. Okay. Do you want to come slightly back for the inches? And again, inhale, lift up curly or one. He also had the hands on the bar so we're not holding onto the bar. [inaudible] pressing the bar away. [inaudible] this time as she bends the arm, she hinges forward in the hips. Very difficult to do and actually sell the uh, [inaudible].

So we're trying to keep that spine long and just fold in the head. And Mike [inaudible]. Ah, and again, so taking the lumbar spine forward. Beautiful. Wow. All the way up. It's for the neck. Take the whole shape forward. That's it. Nice. Yeah.

And up that same movement, folding at the hips, even deeper drawing [inaudible] and [inaudible] and a full breath trick stand up and it can have full breath to fold into that. The hips, elbows wide. Try not to keep, cross your back. Some of they limit the range of motion slightly and again, oh, open the chest, draw the shoulders down. [inaudible] and lengthen up. And last one folding and those hips. So Nice and [inaudible] d pip fold and lengthen. Ah, keeping the length through the spine so then can track down and reach out overhead. Lovely, wonderful pace of movement. Thank you Martha.

Chapter 5

Tricep Press Down

This next piece is the tricep press, um, with ad-ons.

So this is Eve Salazar. She's from Los Angeles, one of our teachers in Los Angeles. Um, and she'll be performing this pace. We're, we're doing this on with two blue springs. This could also be done with two yellow springs. So depending on upper body strength and also depending on, um, what you're trying to do in terms of balancing the shoulder girdle. Sometimes it's easier to work on balance with a lighter spring. Um, so I'll have a work with two blue springs today, circling the arms out to the sides to place the heels of the hands on the bar.

The elbows are in close to the body, the shoulders are down in the focus of straight ahead from here. It's an inhale to press and an exhale to bend. And again, inhale to press at Shelter Fan. So the Giga Chin again again gives feedback as to whether she is initiating the movement on one side or the other. She can immediately feel that. So really brings balance to both the upper and the lower body.

And then two more times press and Ben. Simple but not so simple, right? And again press. And then, and then from here I'll ask her to take a full breath. As she presses the bar down, she'll lift the body up to Rella Bay without shifting the body forward and a full breath to bend and lower the heels. And again, pressing down to lift job and like the op to lower down.

Let's do that two more times. Press down to lift jobs. That's it. Keeping the shoulders down. If you bend those arms last time, pressing down to lift up and then hold the lift as he bent the arms, flex one heel to the floor and press up. So it's a walking pattern, bend and press, ah, and again, Benj and um, Benj and adding a double breath in. Hail. Exhale. So this is the Fletcher percussive breath.

It's audible, it guides the movement. Two more sets. Last set lengthening out of the neck, beautiful and brass. Hold that there. Take a deep breath, then flex the elbows to lower your heels down to the floor. Nice. And bring the arms down by your size and take some air in and press down.

And again, inhale, lift and press down for all the shoulders down your back. Two more. And that's a very Fletcher thing to do to begin movement with breath and end with breath because Ron felt that breath was the most important plot. He's principle and breath is philosophies. So we, we really do emphasize the breath quite a bit. Thank you.

Chapter 6

Reverse Tricep Press

The next piece is the reverse tricep press. Um, again, this could be done with either to blue springs for two yellow springs. Um, Martha's performing this piece with two yellow springs today. Um, and this again will help with, with shoulder balance and scapular stabilization. So it won't be so much about strength as as balancing the upper body shall reach the heels of the hands up to the bar and press the bar down.

Okay, so just coming to this position, um, there's a tendency bring the spine into spinal extension. So one of the things that she's really working on here, and I can tell that she's already working on it, is maintaining the length through the spine, keeping, keeping the chest open. I'll ask her to start just with shoulder shrugs and moving from the back of the body. Draw the scapula down. And again, two more times just to set the upper body. And one of the things that we're looking for is length too.

All four sides of the neck. Let's do that one more time. Inhale, draw the shoulders up. Exhale, press the shoulders down. Cheaping the shoulders down. Bring the heels of the hands a little closer together. Bend the elbows up behind you and exhale down. So we're all only bending the arms as much as we can.

Maintain the length through the spine and the depression or the lowering of the scapula. And press two more times. Bend and extend last time bend and extend. So something that Martha and I recently played with is adding contractions and extensions to this piece. So it's a full breath to bend the elbows, contracting the spine forward and press it down to lengthen out. This feels wonderful on the upper back and again Ben to contract [inaudible] Preston down to lengthen up. And one more time Ben to contract.

I will do for contractions the middle back and press down to lift up. Adding a play folding at the hips as you've been to contract and press are okay, dressing up to relevant to a high release and lower down. How does that feel with the Relevate? Would she rather kick the heels down than to contract? And let's go straight into the Relevate. As you press down, I'm trying to get more lifts to the opera that [inaudible] and again lower the heels and contrast and press down to lift up, bending up to the upper back. One more time, Ben to contract and press down to lift up through the [inaudible].

Just the [inaudible] center, the body, lower the heels down and bring the bar all the way up. And let's lift the arms up and around to the side. Yeah. Yeah. And left and Andrew [inaudible] last time. Lift up and around. Yeah. The size.

Thank you very much.

Chapter 7

Bicep Curl

This next piece is called the bicep curl. It's an upper body piece. And one of the wonderful things about the gay teen is that it provides so much opportunity to work the upper body. Um, oftentimes I think that with, with our female clients, we tend to focus more on the lower body. And, um, as Ron Fletcher and Kathy grant both emphasize this, this work came from a man. It was developed by many men and we need to keep the masculine and more upper body work in the work. Um, and, and this, this is a wonderful piece to emphasize that on a woman. So again, it's Mckenna Mendosa and she's working on two yellow springs. This could also be worked on to blue springs. Um, uh, if, if, uh, one can maintain form and the length through the spine, one could also work this on to red springs.

So I'd like for you to take an underhand cram notice that she's standing in a parallel position. Her hands are open, elbows are close to the sides of the body. And one of the things that we're focused on here is not only upper body strength but again, maintaining the length in alignment through the, through the lumbar spine and how flax and exhale extend and again flex and extend, initiating evenly and extend two more times. Flex and extend. Very basic simple movement but difficult to maintain the lift through the body. Last one and extended.

I think one of the wonderful things about this, the simple movement, go ahead and release the bar. Incident teaches, um, our clients that Claudius is not just about working muscle parts, it's about working the whole body. So as we're working through the biceps, the emphasis is really on pulling up through the midline of the body. There's a lot more work happening here than there is happening here. I'd like for you to come to a turned out second position. So that would be a valet term and it simply means a wide turnout, creates a more stable base for the body. Now she's going to take an overhand grip and then from here it's pulling up and lengthening down.

So we're trying to lift the elbows in line with the shoulders without lifting the shoulders. Uh, so this is an exercise that you might see in a weight room. And again, lift again, there's emphasis on pulling up evenly through the gay chain and it will give a lot of feedback. Last one. This next as you pull up, come down into a place. So working the upper and lower body and unison and again a little more focus here. Nice. Beautiful. Notice that nice even turnout. This time holding the play, holding that opening through the chest.

Turn your head to the right and center. Turn left and center. Lower and left arm turning left. First left and center. So this helps keep the chest open and lower and lift up.

One more time. Each side and lower. Lift up. Last one. Churn as center. Elbows, a little higher center and lower and then just lift up and lower the bar down. How did that feel? Yeah, sorry. Goodness. Word Good. Yeah, I liked the head turns with that pants.

Thank you. So again, a very um, basic movement.

Chapter 8

Reverse Bicep Curl

Upper Body movement. Again, the focus is on alignment through the lower body. Um, I'll ask garden to take an overhand grip. So reaching behind, um, actually the other way under 10 grip and this, um, it seems like it's working that the triceps, but it's really a bicep curl and he'll bend the elbows up behind shale and exhale, extend and again bend trying to keep that width through the back and extend. So lift the elbows directly behind she of keeping the shoulders down and extend for more and extend. Do you feel that work through here? And again, three more.

Two more. So working the biceps with the chest open. Last one, bend legs together and extend and release the barn. Thank you.

Chapter 9

Teaser

This next piece is the Teaser, a classic Pilati sex, your size that can be done on the chair, on the reformer, on the mat. I'm on the Cadillac and on the Giga team. Um, and so this is eve performing the teaser with spontaneous disaster and pleasure.

Um, I'd like for you to lift your arms up and reach the arms back of her head. We'll start with an inhale to lift the arms, exhale to curl forward. And as she engages the bar, she lives up through the lower body toes, that eyebrow level. Two breaths to roll down, reaching out to what we call the canoe position and then a full breath to extend all the way out onto the mat. Beautiful. And again, curl forward, full breath to lift up, finding that long positions. So she's going from the u shape up to the v shape. Beautiful.

And then roll down to the canoe halfway down and another breath to extend all the way on imprinting the spine. Next one, curling forward and peeling up. Find that left, maintaining the length through the spine. Lower one leg to the mat and lift up. That's it. Lifting from your center and again, lower and lower and lift up. Rolling halfway down and lengthening all the way out onto the mat.

Let's do that one more time. Lift the arms, upper body forward, coming up. Find that position. Now from here, just scroll halfway down and then take a full breath to lift up and find that light. And think of length in the legs of way from Usu roll down. Lift from the center. And one more time contracting back. [inaudible] out to lift up and then rolling halfway down. Rolling all the way out onto the mat.

Reaching the arms long over has lift the arms up and press your arms down by your side. Take a full breath to imprint the body into the mat. Thank you very much. Okay, so let's curl forward. We can do the same piece without springs. Again, the bar guides the body into position.

And I'll have Martha come up to do this piece. Um, we'll add an interesting twist on the teaser. So again, the bar is placed right at the base of the ribs. So I think maybe slide back a little bit further. Does that feel right to you? Um, legs for length and down on the mat. Arms reaching back over hand. Try the ankle bones together. She already knows what's coming up.

Lift the arms up, curl the body forward. Let's just do a couple to warm up without the reaches. Lifting. Yeah, often finding that position. Beautiful and rolling halfway down. Then lengthening out. So again, very much like the press just set that we did earlier as soon as she engages the bar. Okay.

It's all about oppositional energy, lifting up [inaudible] and rolling and reaching out so she could do the same movement and eve to just the leg lowers. But we're going to ask Martha to do something, um, slightly different lifting up. And then from here, [inaudible] at least the right arm and left leg lowers and rice maintaining her Saturn. This could also be done on two yellow springs once it's been practiced with no springs and place. Two more times, three inch and up last time. And find the lift through the body rolling halfway down and stretching all the way out. That's the arms. Press the arms down by your side. Okay. And again, take a breath just to imprint and feel that work in your body.

Next for us to curl forward under the barn. It's a deep contraction and roll up through the spine. That was beautiful. Gorgeous. Thank you Martha. The next piece is called the limbo. Um,

Chapter 10

Limbo

because we're limbo going under the bar, um, you'll notice that the crossover glide bar is secured from above with a safety strap. Um, you could also do it without the safety strap, but I think this is a much better set up for safety reasons. Um, and this is the preparation for rolling in and out, which is a, a slightly bigger stretch for the shoulder girdle for the spine. This is a wonderful prep for that pace. Michelle d is performing this piece, so I'll, I'll ask her to circle the arms out to the size, place the hands on the Crossover Barn, and then breached the hips out behind you holding onto the bar.

In this position, we're looking for a long line for the spine. So I want you to draw your ribs up just slightly and draw the shoulders down your back. So the pulse from here is very small and all we're trying to do is just the fold in the hip socket. So it's a fold here, right where my fingertips are. Keeping the length through here. Think of reaching your sitz phones out behind shoe.

I said two more sets, keeping this long reach they have out behind shoe. Last set [inaudible] and then from here, contract the hips under bending the legs and folded the hips to extend the legs out and it's a poor breath to contract the hips under bending the lice control a little deeper contraction each time and then start the extension from the hips, lengthening through the spine and again, contract the hip center. Draw the shoulders down and keep the shoulders down as he reached the hips out. Straightening up one more time. Contracting the hip sender, Jaipur contraction and lengthen out through the hips.

Finding that line, this time. Contract the hip center all the way to place the knees on the Mat. Continue that movement, pressing the hips forward. Open the shower shoe to fall and then contract back. Sure.

Holding onto the bar where each would they hips to extend the line? Sure. And again, contract the hip center. Place the knees and oh, open the chest, lengthening the spine. Contracting back.

Sure. And reach with the hips. Trick. Stand the legs. Beautiful. Michelle. One more time. Contracting the hip center. Yeah. Pressing forward. Get that long line for the crown of the head, using the focus and contracting back.

Reach for the hips and extend the spine shut. And then bring the hips forward over the feet to roll up. Shut arms down by your sides and just take four breaths. Lifting up and down and open the arms and down two more times. Sherita for gaping herself. And, and exhale. Luckily Michelle, just recently or not so recently had a surgery on her left arm. So this, this was quite challenging for you to find that length. It was really beautiful.

Yeah. Thank you. This next piece is called rolling in and out. Um,

Chapter 11

Rolling In and Out

it is a very big stretch for the shoulders. So if you have clients who are, you've had shoulder injuries, separated shoulder, dislocate and shoulder, this is probably not the case for you, although the, the preparation going into it, um, is a wonderful stretch for the lower back. Uh, this is the piece that my daughter comes into the studio and does right out, right out of school. And then she does flips over the Gig, a team, um, which is another use of the Gig. And Tina's more of a gymnastics piece of equipment. Um, this is a wonderful piece performed by Martha. So reach for the Upright Barn. Okay.

Except placing the feet. So notice how the fader in a turned out position. This is to create a more stable base and it also allows for the, the press through of the hips. So from here she'll fold at the hips, reaching the hips out behind and just like the limbo, we're going for that long and call that long flat back with a date day pip phone. I'd like for her to do for shoulder shrugs here. Shoulders are up and length thing. Two more. Lengthening the sides of the neck, warming up the shoulder girdle, last one. And then try the shoulders down, keeping the shoulders down, the sides of the back.

And again, it's a pulse of the hips. Falls two, three, five, six, seven. Contracting the hips under reaching your hips out. Yeah. We can track the hips, Andrea A. Little bit further. Reaching the hips out two more times and on the snack one full contract for him.

Andrea, continue the movement. Okay. Oh, open the shaft. I noticed how there's a lift at the top of the movement and then she can tracks. They have SPEC. This is the hardest part of this pace. I agree. It shows out through.

Yeah. Do you want to do one more contracting? The hips under press. Sigma had felt better to lift at the chest on fig. Shoulders stretch and then she pulls back from her center. Breaches the hips. Oh, I know. Not Long on coming to an upright position. [inaudible] same. Thank goodness. That was beautiful.

So this is one, um, to to most likely try in a private session first. Um, and I, I would encourage you to study with a teacher before you try this on your own.

Chapter 12

Guillotine Tower

This next piece is the tower. And um, this is one of the seminal pieces for this piece of equipment. It is called the tower. Um, I believe that Ron was the first person who called it the gay chain. So it's, we now call it the gay chain tower, um, and our clients, uh, instead of shying away from it, asked to go to the gay guillotine chain, which is amusing to me. Um, so this, um, this pieces of wonderful piece for opening up the lower back spinal articulation, um, and it gives us wonderful feedback through the spine that you don't find through the short spine stretch or any of the other shoulder stand exercises in plays. Um, Arden is performing this piece and you'll notice that she has her arm set up and, and a bit of a goalpost position.

The elbows are in line with the shoulders, um, and she's actively pressing her hands and her forms into the upright bars to engage the upper back and the upper body. She'll start by drawing the legs and in place the feet on the bar. It's loaded with two yellow springs from below. And this is probably the most weight that you want to put on for this. Um, for this exercise, um, to blue springs. I've, I've seen done, but I think it's too compressive for the back. She'll start with the legs extended up to the ceiling.

And this is a much deeper hamstring stretch than leg and foot work. So, uh, if you have a client or you can't performed, um, basic leg and foot work with, with the pelvis down, work through that piece of movement for a while before coming to the tower because this can put too much pressure on the back of the knees and also the lower back, which is counterproductive. So what I'd like for Arden to do in this position, she sent a prehensile position is um, to a very small pelvic curl just to find that position, the initiation of the movement and then take a full breath to roll the pelvis down to the mat and again, curl the pelvis up and reach the pelvis long to the mat. And let's do that two more times. Curling the pelvis tail to the ceiling and rolling down no shading from your center and currently, yeah, and rolling down. And now that she's found that initiation, I'm going to ask her to do for progressive shoulder stands coming up a little bit higher each time. Um, to find the beginning position for the tower, curling the pelvis, massage and rolling down, and then curl up a little bit higher.

So curling up to the waist. She had sent an a full breath, Trevor, roll down. Sure. And then curl up to the base of the ribs, reaching long through the heels, coming up a little bit higher, a little bit higher, and then feel the weight of the bar. Stretch the back out as you come down and then take a full breath. You're doing okay and curling up fresh from vacation onto the guillotine.

Coming all the way up to a shoulder stand. Keep coming up to see if you can keep those elbows in connection with the bar and then maintaining that position. Take a deep breath in, exhale into a play. So then the legs inhale, extend up through the heels. Exhale, bend, deepening the contraction. Let's do that two more times. Inhale, extend down and then hold the play began rolling the body down to the mat, keeping the bar still through the first breath, and then allowing the bar to move. She reached the pelvis long to the mat. And then from there, let's maintain the play and curl the hips up on. Two breaths. Peeling up.

Try to keep the bars still as possible as you curl up to the shoulders, extend the legs up, reaching long to the heel, and then take two breaths to roll the spine long to the mat, reaching out through the crown of the head, long through the pelvis. Shh. And then just reverse that movement. Curling up, peeling through the spine, pressing all the way up to a shoulder stand from your center, pulled down into a play. Let's sit and let's keep the burst still as you roll down, reaching long through the pelvis. Can you do one more repetition? Good. And then from here, curl up. So keep the play for a lap all the way to the shoulders, reaching long through the heels and roll down.

That's it. Feel that stretch. Nice. And then bend the legs. Draw the bar all the way down and extend the legs long on the Mat. Got It. Just extend your arms down by your sides. Take two breaths here.

Sure. And lift the arms up to curl forward and roll up through the spine.

Chapter 13

Lateral Leg Work

This next piece is the lateral leg work. Um, it's, it's a wonderful hip opener. It also provides, again, a wonderful feedback for the differences from right to left, um, and mechanists performing it. So I'd like for you to just lift your left leg out. Actually, let's extend the leg out for just a second. Um, this piece is only done on two yellow springs.

I would never do this piece on two blue springs, um, too much on the hips. Um, and notice how our hips are centered right up underneath the bar. So unlike the mat work where we're focusing on bringing the hips to the back of the mat, she's right in the center of the Mat and you could even move your body slightly forward, especially for the second part of this. Um, her top hand is oppositionally pressing into the mat to get the shoulder down and her body is a long gated down on the mat. Lift the left leg up. So let's just, um, extend the leg out out and just lift it up away and then turn out parallel. So again, warming up the hip for the peace, parallel turnout and parallel last time, turnout and parallel. Churn the leg out, bend the leg and placed the foot right in the center of the barn.

It's important to place the foot right in the center of the bar so that it tracks properly. And as she extends to like up, notice how the hips are still stacked, one on top of the other. She'll start just by articulating the foot, pressing up through the ball of the foot, and then reaching the heel. And again, without going into prehensile and flax and flex last one and lax, and then take a full breath, depressed at like that foot up to Brella fe, maintaining Relevate. Take a deep breath in and flex the hip and again, and she's only flexing down as much as she can maintain that alignment. And what we're looking for, especially here as a tracking of the knee in line with the hips.

So if the knee starts coming forward, um, and they can't maintain that, it's gonna put too much pressure on the knee and this piece is probably not good and flex last one, press up and flex and then take a full breath to extend the leg up. And then from here, let's wrap the toes and reach the heel. So more a prehensile position. I'd like her to pull the hip back from her centered and then press the hip forward from the back line of the leg. And again, pulling back from her center and then pressing forward. And I think you can imagine how wonderful this feels on the hip.

Just getting that opening in both directions last too, and come Saturn last one and press the hip open and then pull the hip back and holding the hip back. Rotate the upper body and opposition up in a way from the mat. Beautiful, full breadth. Depress the hip forward, reaching out to the leg, contract up and reach the hip back and again, press the hip forward so we call this the spiral and reach two more times and up and over and try to feel more. Work in the back of the left leg and press the hip open nice and contract forward and then come back to center, placing the hand, play a bend and take the foot off the bar. Good lying on your back and take two breaths to center the body in this position and then rolling onto the left side again. They have served right up underneath the center of the bar. The body's a long gated lift, the top right leg just above the left and work the turnouts, turn, ouch and parallel and churn out parallel.

A little lowers your working right from the hit. Turn out parallel without letting that hip fall back. Churn out, bend the leg, place the foot right in the center of the bar and extend the leg up. Flex and point pressing the top hip forward over the laughed and again, flex and flex and point holding that pointed foot. Take a deep breath in. Exhale, flex the hip and again without losing the foot press ah, and flex the hip that says he might limit the range of motion and flax. Last one, press uh, flex the half and full breath to press up, holding that position, wrap the toes and reach the heel. Flexing the back line of the leg. Take a full breath to pull that hip back and pressed the hip forward and feel that low contraction to assist with that movement folding into the hip, pressing the hip forward. Two more.

Last one, pull the hip back, holding that position. Rotate the upper body forward so you're in a hover position up and over the mat and full breath to press, to your midline. Finding that position and contract upper body forward. As you pull the hip back harder on this side and press and often over and try to feel the focus with the movement and up and over. Last time, press the hip open, holding that position. Place the hand, flex the hip and bring the bar all the way down.

Turn onto your back and step. Place the hips right up underneath the bar. That's it. Lift the arms, reach the heels of the hands to the bar. Curl for relisting up to an upright position. Bend the elbows and bring the bar down behind your hand as you come forward with the body. That's it. That's what you can release the far OHA round over the legs and roll up to a sitting position. Not all the way down.

Okay, so thank you all for coming today. Thank you for driving in from Los Angeles and coming across from Santa Barbara. Um, this is really exciting for me to have this piece out in the world and have it available to a much wider audience. I think at this point, there are only two or three that exist installed in California, so hopefully that will change every time and we'll get these up and around the world. Um, so this is a different piece. Um, a lot of the same pieces that we perform on the Cadillac, we perform on the gay teen tower. Um, but it's a completely different, uh, it's completely different feedback to the body. And, and I'm just wondering if any of you experienced something different on this piece of equipment than you have on the Cadillac or maybe on a reformer, different pieces of equipment in the [inaudible] studio. I was gonna say that that articulation, like what you were saying, it's a bar and there was no padding. So I really feel that I can effectively know where my foot is on the bar and I've got to make [inaudible] so the fact that the bar isn't patterned. Yeah.

The fact that the bar and pattern and instead it's a lot more precise feedback through the foot and the ankle. Yeah, I agree. I believe that you can integrate, um, the standing forward with upper body weight resistance work. So integrating upper body standing work with, with weight resistance so that you feel the work all the way through the body. Yeah. With the bar work, that Fletcher murderer, right. You can use this piece of equipment as a bar, which is wonderful. So we can, we can actually bring this bar up and secure it from above and we can, we can do all of our bar program at the gig chain. Um, which is another use of the GIG team.

Well like on the pulldown stability of the bar because the push through bar will, when you're top loading, right. There's just a little more stability and I can find as I was tracking back that you were, you were able to find more length, um, with the sparring. Yeah. It's also a much more stable piece of equipment. So the whole thing is more stable. And one of the things that we didn't show today that you can do, um, uh, obviously with the different hooks is you can do all of the standing, the boxing work, the butterfly, the hug a tree, which is a lot more stable here than it is at the end of the Cadillac.

I think the Cadillac doing a lot of that work on the Cadillac, it's actually a liability. So this is a very stable, solid piece of equipment that isn't going to go anywhere. Even with the 300 pound person, not that your 300 pounds mckenna physicians that are tighter on the Cadillac. Yeah. So physicians on the hips or are tighter on the Cadillac and on the Gig too and you can find more space. Um, this is a wonderful piece of equipment, especially for men. Um, I find to find the back line of the body to find that, that stabilization and it is nice that it has the stopper here. So even though it's called the gay teen, it's not going to come down and cut you in half.

Martha, um, I have the feedback that it gives from one site to the other. So you tend to have imbalances from one site to the other. Like I do, gives you a lot of feedback as to which side you need to stabilize, warm, which site you'd find more lengthen. So, and you really find that, I think all the pieces of movement here on the gay team, the feedback from one site to the other, even from front to back the body. So Martha was saying that the feedback from one side to the other, um, so you can easily see if, if the bar is tracking more on one side than the other, if you're initiating more on one side than the other, um, more so than on the reformer, on the chair, on the Cadillac. Um, one of the things I'd like to mention is that we always work with the two springs, that same purpose. So I've seen people work with one spring, um, the one spring, um, obviously changes the load from one side to the other and changes the tracking, which changes the feedback through the other side of the body. So we generally work with either to yellow to blue, um, occasionally to red springs. So thank you all very much. This is a first, it's a first for plots, anytime. Um, it's one of the first in the world. And thank you for being a part of it.

Thank you for being a part of it.

Related Content

Comments

1 person likes this.
Hello Kyria , this workshop give me the desire of getting a guillotine !!
Wonderful workshop. Thank you for sharing
Jamie H
Thank you for the lovely presentation. I am wanting a guillotine!
1 person likes this.
This was a GREAT workshop Kyria Sabin !! I am going to keep doing more self practice on the Guillotine and love that you mentioned we can do our barre work here too!

You need to be a subscriber to post a comment.

Please Log In or Create an Account to start your free trial.
Footer Pilates Anytime Logo

Move With Us

Experience Pilates. Experience life.

Let's Begin