Description
About This Video
Transcript
Read Full Transcript
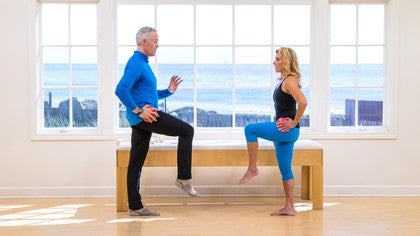
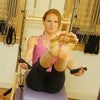
Hi, I'm Tom McCook and I'm back here at [inaudible] anytime with Christy Cooper and I'm super psyched to be here again. And um, this particular class is a lesson on the pelvis and how it relates to the sidelines series so you can understand the function of how the pelvis moves in relationship to the legs, strengthen your side body more efficiently and learn how to actually self cue better. So I think you'll find it's really useful. It's functional movement and there was some dynamics in there that are really interesting. I think you'll find super useful. So the first thing we're going to do is we're going to understand where our hip joints are. So what I want you to do, I'm going to show you what the pelvis, pelvis actually moves that'll come in a moment. And your hip joint is that the level of your pubic bone. So what I want you to do is I'll just give you a brief overview.
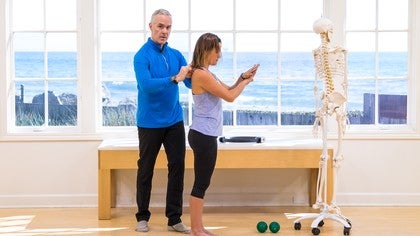
You have two pelvic halfs and Eylea. One Eylea has a sit bone, which is called the Isha and Ilium on the top. And the hip joint is in between on the back you have a sacred and a coccsyx and your sacrum is functionally are anatomically part of your spine, but functionally part of your pelvis and they have a relationship with each other. They move. So we're going to experience that a little bit. So how to couple of different ways to find your hip joint. What I'd like you to do is touch your, and Christie is going to do this with me with your right hand touch your right sit bone. You might need to lean a little forward to feel that and then come back up.
And now with your other hand, you're going to keep your right hand there with your left hand. Touch your what's called your right Asi s same side. So you're here and here. What's and what's interesting, which is kind of wild, it doesn't feel that way, is these bones are almost directly on top of each other. And you might think I've first time I did this I thought my sit bone was way back there somewhere like out in the next room. So in between the two is the hip joint.
So the way we're going to get to a better clear location is Chrissy is going to take your left hand. I'll take my left hand to take it just inside the ass, into the soft tissue towards the midline. Bend the knees slightly and slide the left hand straight down to you. Feel the crease. Now where she is right now is right here with her front hand in front of the hip joint so you can image that your left hand is about an inch and a half in front of your hip joint and your bottom hand is about an inch and a half below your hip joint and then stand back up. Now keeping your hands there. Imagine that when you lift the knee, the ball of the femur rolls back and down and then forward and up. It rolls back and down.
And imagine as it rolls back and down that it also slightly drops and rolls back and down. You might notice it gets a little easier to lift the leg shouldn't do that. Future positions. That dynamic of how your leg is designed to differentiate from your pelvis. So you learn to put a lot less pressure on your lower back. So that's, that's flection extension.
Now the next movement would be to take the leg out to the side. Now when you take the leg out to the side, you can image that the femur head rolls in towards the midline and then it rolls back out in those. So you can do that without changing the shape of the spine. It's just the glide of the femur towards the midline and then out. And now notice you can take the leg holding it in front of you and you can turn the leg out and turn the leg in. But again, it's just the ball of the femur gliding in the joint.
You don't have to change the shape of your pelvis or your lower. Very cool. We'll do one more. So the first that just to lift the ball rolls back and down. It rolls forward and up. It rolls back and down. It rolls forward and up. One more back and down for NEP.
Not Take the leg out, it rolls in, it rolls out, it rolls in, it rolls out. One more, it rolls in, it rolls out. And now turn the leg out and turn it in. That's it. And then let it [inaudible] go. Now just take a moment or we're just going to notice how does our hip feel on the right side. In comparison to the left, you might even notice that the hamstrings are more flexible, which affects the function of the hip. So that's pretty [inaudible]. Pretty simple. You learn how to warm up and differentiate the legs. Let's just take the other side. We'll do it a little quicker.
So we'll touch your left. Sit Bone, right? Asi Us, take your right hand just inside the Asi s and bend the knees slightly. Not slide that right hand straight down to you. Feel the crease, which is directly in front of where the hip joint is. The backhand is directly below it and then stand back up and you can image the ball. The femur is in between you two fingers. So as you lift in the EFC, the [inaudible] ball rolls back and down, forward, not back and down. Forward and up. There you go. Back and down or not very nice [inaudible] back and down for enough at Walmart.
And now from here, as the leg goes out into abduction, the femur rolls in and rolls out. So the more you get that feeling of that's where the movement is, you don't have to overly brace or work from the wrong places. One more. Now, holding it in front, turn the leg out and then turn it in and just see that the femur rolling in the joint is where the movement is not coming from your foot. It's coming from the top for the leg. And I just one more time lift. The ball rolls back, it rolls forward, it rolls back, it rolls forward, it rolls back, it rolls forward and taken in front.
As you abduct it, rolls in, it rolls out. So as you're doing this, you're improving the function of your hip, which is lubricating the hip joint. Great to do. If you sit during the day, just get up and do these movements in and of themself. And now turn the leg out and turn it in and feel the movement is the, the ball in the socket and my hand is going the wrong way. I just corrected that. Sometimes you've got to come back to yourself. Two more and one and we're just going to take a moment to notice and compare.
A little nicer. Huh? So that's step one. That's step one. Just that's a primary joint. We want to know where it is and how it functions. Now your pelvic bones actually move only animal on the planet that has a mobile pelvis. Yes sir. Yeah. Why? Well, a couple of things. Birth, we all came out the bottom walking the pelvic halves counter rotate. Um, force absorption, how the body absorbs and transfers force and then elimination. We all go to the bathroom a couple times a day. So for those reasons, the pelvic bones are mobile and you know, we're on two legs and a four legged creature, they're on four so they can absorb their fourth force with their four limbs.
And their spines more fluid. So their pelvis is actually a rigid bone. So I want you guys to just to touch your asi es in the front and just notice what happens to them when you walk. Just take a couple of steps forward and a couple of steps back. You might notice this some movement going on there. I'm not going to tell you what it is. I will in a moment.
So you might've noticed on the leg that's going forward, the ASI s goes up on the leg going back the I a s I s goes forward. So in walking, same as side leg work, we're gonna do the Illia becomes an extension of the leg. So when you go like this, you're Ellia on the front leg side rolls back, that takes the joint more forward. On the back leg side, the wheel rolls forward and that takes the joint more to the back, which gives you leg more length in both directions. Just try that on the other side. Feel that roll. That's it. And that countering is actually how the body absorbs force.
So the whole notion of keeping everything the same isn't actually how we're designed. Really important to know. Yeah. So basically this is happening, so we're going to actually use an image to feel that. So I'm going to give Christy a wheel and I have a wheel and we're going to image that the wheel is the Illia that Yulia is the whole pelvic half. And when I go to lift my knee up, the wheel spins in place and rolls back and then it spins forward. It spins back and expense forward.
It spins back and it's been swore, not just for comparison. Think the wheel spins forward. You lift your knee. Oh wait, say that again. Think it does the opposite. Just for a moment, imagine that this ass goes forward and you'll notice that whenever you're confused, do the opposite. And your body will usually tell you what's accurate. That's where you can self correct suspense, force spins back. So this is a, another important piece.
When you lift your knee, the pelvis as a whole doesn't do the same thing. So when you lift your knee, imagine cause the wheel is rolling back. The sit bone is going slightly forward, the asa is coming slightly up, but the tail is going the other way. Your tail is going to the back when your Asi es is coming up. That's what makes your pelvis look dynamically the same. Otherwise you tuck and you'd arch cause they'd both be going in the same direction. And that's happening because the movement of the sacrum or the the Illia and this and the sacrum are countering each other.
The wheel rolls back as the sacred tips forward. That's called, that's a movement called nutation. When your sacrum nods a little bit forward and that happens and basically leg bending or when you lift the wheel when you lift one knee. So we're just gonna image that. So we'll take our wheel one more time and just think of this information is what we're preparing you to be able to image that when you do the side leg work because you have an understanding of what's supposed to happen, we can go much deeper into it. We could spend a whole day just on the pelvis or two days, but we're just giving you a little bit of useful information.
So now as you lift the knee, just imagine that the wheel rolls back and the tail goes slightly the other way. And then as the leg comes down, the tail goes slightly forward cause the wheel and the tail are countering each other. And that's the dynamic stability that keeps you in the middle without overly bracing. Yep. Over the, yeah, cause we all really brace. We're actually inhibiting our dynamics. That's it. Very nice. Now from there we're going to take that into a, a hip hikes.
So what we're gonna do is just feel that the hips can do a number of things. The pelvis as a whole can curl. So we'll bend the knees and we can curl it. That's flection. So curler tail forward or the pelvis can roll forward over the legs. We'll do that a few times.
That's a tucked pelvis and the pelvis can roll forward. So now the interchanges between the pelvis and the hip joint or the pelvis and the Femur, those are two options. Another option is you can lift one hip up. That's it. So the lift is coming from the obliques and the QL. And that's a nice way we can use this in our sideline work to strengthen the obliques, which we're going to do in a moment. All, all right, now we're gonna take the lesson into some exercises in the side plane.
So I'm going to have Christie take her feet about a foot forward. Everybody, and I'm just checking that her alignment from her head to her pelvis is, is neutral and nice. Nice aligned with her hips stacked. So from the standing lesson I gave you, I want you to consider that at the pubic bone level is where the, where the hip joint is. So right here, this is her greater trocanter. This is her outer thigh stare right now. Her thighs like that. So I'm touching right there and there's no missing that cause it's just skin on the widest part in bone. You can't miss that guy. So what I'm going to have Kristy do is put her top right hand right above her, Leo on her hope leaks. That's it.
So these are the muscles right here that draw her hip towards her shoulders. So this is just for her to locate them. So all they want her to do is on the Xs, lift her hip towards your shoulder. That's it. And then inhale to let them go. And what I can do as a teacher is that she's lifting, I can give her a little bit of press to get a little more range. Then you get full sliding together, the muscles. And what you're looking for is that when the person does it, that they don't arch their back. Because from sitting a lot, these muscles will be stronger and tighter and these ones will be a little weaker.
So you wanna make sure their ribs are in and then she's just doing that hike. And the first part is just to locate the muscles. So when she lifts, she wants to feel, oh, that becomes toned and taught that I know that I'm doing it correctly. It's not mystical. One more. Now from there, she's going to put her hand on the floor in front of her chest. Now with her feet flexed, she's gonna use those same muscles to lift her hip, to lift both legs off the ground and then lower. That's it. And I can still give her that feedback that it's the obliques lifting your legs.
This is a great way to decompress the lower back, and this tends to be an area of weakness for a lot of us from too much sitting and just in general. This is like no man's land and again, she's gonna lift and lower and she's just going to do four more and I'm just giving her that feedback and I'm queuing. I got my, I'm just watching that or are is sliding up and she's getting those obliques to work and two more. That's it. Now the next one, she's going to lift and hold as she's going to hold here, but she's just going to lower and lift the bottom leg and use her inner thigh on the bottom leg while she's still using your oblique for the top lick. Now she's feeling the work from her inseam of our lower leg to her inner knee along with her top of leak. It'll just do three more. That's it. And one beautiful. Now she lowers both. She's going to bend her bottom leg, like she sit in it and she's sitting in a chair that's an now this time, instead of having a leg in front of her, she's going to bring it back in line with your body and then keeping the hips stacked.
I'm just going to roll this hip a little forward and she's going to reach out of this leg with a flex foot. So she feels your waist come away from the floor. So now both sides of the wastes are equally long. So now the hinges, the hip joint, so when she lifts her leg, she can image the femur rolls into the socket as she lifts it in parallel, but she's not changing the shape of her lower back and then lower. So it's just that rolling into the femur. Now she's feeling your outer hip and hopefully both sides of the waist and then lower and again lift and lower and has energy out the top of her head and nice long waistline. That's it. One more number of reps is relevant as you know, not as relevant.
You can kind of just go to where you can do good numbers of repetitions anywhere from four to eight. Now the next one, I'm just gonna give her a cue that the trick cantor is gonna turn towards the back of her pelvis as she lifts your leg, but her pelvis isn't gonna move. So as she lifts her leg, her little toe is going to rotate towards the mirror behind me or the wall behind me, and then she'll lower back down and she knows she can do that without shortening the lower back. That's it. And she can even image as she's lifting the leg, the wheel is subtly rolling back.
And then as the wheel rolls back to keep her alignment, she can think of the tail is going back, has the sit bone is going slightly forward and it stays in an organized position.
Now imagine she's going to move from the hip joint and she's just going to trace a figure eight and in that figure eight she's going to challenge yourself to get a little bit to the back range, which gets her more into her glutes and her top of her hamstrings and or outer hip. That's it. And again, it's just the femur gliding in the socket, but the waistline is thing relatively the same.
Now do one more and hold the leg to the back. Now, what she can add here is she can resist this knee towards your chest to like she's striding up a hill so that gives you more power and she can kick forward again and as it goes back she's got that opposition. That's a very fluid two more and one now this time is the legs back. She's going to hold it back now. Just draw the heel to the butt bending at the knee, knee to the chest into bicycle and she just sensing that it's still the wheel. The quad lengthens, the wheel rolls back. That's it. And the movement is nice and fluid. There we go.
Just two more. I'm just giving her that tactile feedback of what the wheel does. So she has a little bit of an added feedback loop. One more and then rest. Beautiful. Now from there, she's going to take that into side plank. So she's just going to come up onto her forearm and bender legs like she's sitting in the chair. But benomo budgeted like a third of the way, just like that. Now what she's going to do first is push draw her front ribs or low ribs away from the floor. So that lengthens out both sides of your waist. The hinge is the hip joint and the shoulder.
So on the excess she's going to push into her elbow and take the pelvis up and forward. And actually you can even leave the knee on the floor. Just think of a, yeah, like that. And then lower back down and the hinges way down here. So as the, as she goes up the sit bones and narrow a little bit, and actually you can even leave the knee down. That's it. There you go. Now lift this more. That's it. Now we're talking and then hinge back. That's it. So it's up and forward. That's it. And down. Now try it with this foot in front where they're straddled.
Now you'll lift a straight legs. So as she goes up the sit bones narrow the wheels roll forward. But the tail is going through forward countering the wheels. As she's comes down the wheels roll back and as she can start to sense that she's going to go up, tail goes forward right here. But if we take everything forward, then we tuck the pelvis and we don't want that. So now you'll come up, this is pretty quick. That's it. And then hinge one more and lower. Beautiful.
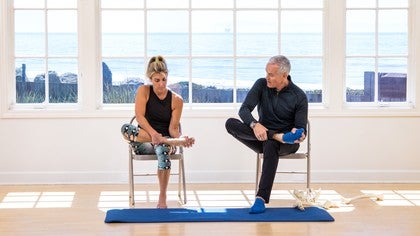
Now from there we're going to come right onto her back to do a stretch, cause she just did a lot of work for her hips. That's it. She's going to take her right foot or left foot and cross it over. So the heel is on the outside of her thigh and she's going to walk her right foot out a little bit to the right like that. So this is a resistive stretch for these muscles. So what I wanted to do is exhale and resist your right leg towards you guys, but left her let her left leg win and pull the leg across the midline.
That's it. Then inhale back without resistance. So she's resisting the Femur head is gonna roll in the joint and the pelvis rotates across. That's a nice stretch for the muscle. She just worked. And again, she's resisting towards you. And the resistance is, you know, 25 to 50% of your effort, just you want the movement to be. If it feels ratchety or too intense, back it off a little bit. That's it. One more against six to 10 reps. With this, you just get those muscles to start to release.
And from there she's going to take it into what's called a figure four stretch. Now she's gonna cross the other way where the right leg is crossed over the left knee and now she's going to hold the back of her left thigh. So this is a stretch for the back of her hip on the leg she worked. Now the resistance is she's going to push both her legs into her hands that way, but on the XL letter, elbows bend to bring both legs a little closer to her and then inhale at the arm straight and release the resistance. Resist in, then let the arms win. That's a great stretch for hip rotators and glutes.
That just got worked and it's a nice way to finish. You don't, you finish, you don't finish with a ton of tension. You take the tension out a little bit so the body restores faster. He'll do this. Do that two more times. There we go. One more, and that's your side series. I hope you enjoy and we'll see you next time applies anytime. Thank you so much.
The Teacher's Corner: Embrace How You Teach
Comments

You need to be a subscriber to post a comment.
Please Log In or Create an Account to start your free trial.
