Description
About This Video
Transcript
Read Full Transcript
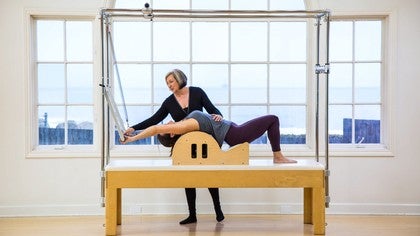
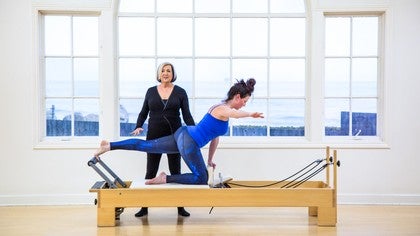
Hi, I'm Cathy Corey and I'm here with Aaron today because we are going to be doing a balance control on the reformer. The balance control exercise really takes us into many of the elements of philosophies and one of the main things is how we maintain a correct plank position while we are moving the arms and the legs. So our plank position we see in our mat class and we see in many reformer Cadillac and one to chair exercises, but very often I see it not done properly or not maintained in the way that we would like to have when we are going into advanced exercises. So let's go into some progressions of how to create the correct plank position. And we are going to start on the one to chair. So Aaron, I'm going to have you kneel on the floor and we're going to use a pad for her knees.
And what I would like to do is I'll move this out of the way for the moment is just have you kneel and place the pad so that the bar is directly under the center of your shoulder to your arms. So go ahead and enhance the knees. Good. So you need to move the pad back a bit so that the knee is under the hip and the arm is under the shoulder. Now what I learned from Cathy grant is that you want to think about the wonder chair is always starting with the pedal down as if it's on the floor. And so when I see here is if we're starting in this position that already the shoulders and hips are tilted.
So I like to build up the floor for Aaron and you can use a block or you can use a weighted ball or you could use just a regular ball. But what we're doing now is we're creating not just a height for Aaron, but also a bit of instability. So from here with the shoulders and the hips level, I don't want you to change the hip position or the shoulder position, but the arm is just going to raise and lower by bending the elbow out to the side and pressing it down. So we are on one medium spring, it's the black spring. But, um, again, whatever spring you need for your client or your body so that it doesn't throw the body off and out of alignment. And then eventually you can build up. If you want to increase the power with additional spring using the breath, you're going to inhale up and exhale to come down. How is that for you? Good. Now let's go into a progression.
So when the next thing we're going to do is maintain the levelness of the hips and we're going to slide the leg out on the floor without changing the hip, without changing the weight so that it slides out on the floor. Let's do three more of those up and down using your breath with the movement. Very nice. Now let's see if we can maintain the shoulder alignment and the leg alignment as we lift the leg. Just float up off of the floor without changing the hip. And again, three more and two good.
And on three. So now we're going to place the foot down and come in. And once again how changing the hips, we are going to slide the opposite leg out. And three of these. Now, once again, what we're seeing here is we have to really pull in to the core. So without leaning, don't touch my leg.
There you go. And full up. Try not to lean. Do you want less spring on that? So I'm going to adjust the spring down because I want the exercise to be really successful for Erin in her work so that when she is doing this she is going to progress at her own rate of speed in order to make the exercise really successful. What we're looking for here for here is not in the fact of how many arm exercises she can do, but how many arm exercises she can do, maintaining the position through the pelvis and the shoulders. And let's go on one. So come up. Good.
Now once you come down, don't, don't compress all the way down. Okay, come up. Try not to lean. Okay. Again, present to me and come up. Oh there it is and down and one more time and come down. Now let's go ahead and work. Now bring the leg back in. Let's work with the upper body.
So the pedal is going to be down. This leg is going to slide out. Try not to shift. Do when you slide, come back in. So now what I mean by that is I really want you to not think about your leg. I want you to think that we have this line across your hips. We have this line coming in through the center of the body.
Now think about the maintenance of the center of the body and think, now concentrate that this way, this leg is weightless. There's no weight in that leg. And see how much, how different that is. So instead of coming from this position, we're coming into this position. So the idea of that is wonderful, but that's not enough. So now that it's there, the arm, I want you to go onto your fingertips on this hand. Try not to shift again, just coming up good on the fingertips.
Now once again, think of the ribs. Think of the center without changing your shoulders. You're going to roll the ball out. Just roll it, roll it. There it is, and roll it back. Roll it back and roll it out.
That's it. And Roll it back one more time. Roll the ball out and roll it back. Now keep it there. Now we're going to keep curry your toes under on this foot. Try once again not to shift anything. Good.
Now I want you to do the same thing on the opposite side. So when you really need to think about the center of the body, I want you to think about the energy going in opposition. So there's energy going out at the top of the head. There's energy going out that back foot. Now this leg is going to become weightless, no weight at all in the leg, and it slides into your plank position.
Beautiful. Now from there, if you can go ahead and just bend. Think about bending the arm. Just bend the arm soft. No, just let the panel come up with it. Let the pedal come into it. Lift it up this way. Yep. Try not to shift and try not to shift. Try not to shift.
That's it. So I want you to press into both my hands. Press into both my hands. No shifting and anchor yourself and let it float up. The pedal is not going to not hard. The pedal is easy. Let it float up.
It's got a spring on it. So it's going to come off. If you let it, let it come up and down and let it come up and down and bend one leg in and be on the other leg and sit back on your heels. Good. So what we would work on here again before we go onto the reformer is that idea of the movement, where the movement is coming from. If you are waiting yourself into your arm, then the weight, the movement is going down. If you think that huddle is going to pull me up and you're pulling back under the shoulder blades and under the Scapula, then the movement is going to come more into the body.
So these are things we're going to work on. And um, and once again it's, you know, Mr Potty said Rome was not built in a day. So that what we want to think about is progression, persistence, perseverance, and really working every day on the concepts of [inaudible]. And applying them to the work. We have another side that we are going to do.
Now I want you to think about every part of your body and when you're coming down with the pedal, don't think about it pushing into the floor. Think about it being as light as a feather. And as master teacher, Eve gentry used to tell me, I want you to think if there's a breath between the pedal and the floor. So it comes down and down, ready to go. Back Up. You got it. It comes down and down. Ready to go back up one more time. It's down, only ready to come back up.
How different is that and it really looks different and feels different. Now it's going to come down but still have that same feeling of lightness and lift and the outside leg without shifting. Now remember the leg is weightless. Hold from the center of the body and come back out. That looks great and three of these and up.
Once again, wonderful and again the concept is don't fight with the pedal. The pedal wants to come up and comes down. Good. Now let the leg is wait lists and it's not going to change the pelvis. It just lifts itself off of the floor. Three more of these up and down so that you really have that full concept all the way through.
Now don't leave my hand. Don't leave my hand. Beautiful. Now don't leave my hand and let the leg come up and three more. Beautiful. That's great. Activation. Fantastic. Fantastic.
And bring the leg in and down. Now the next thing we're going to do is we're going to to slide with the hands. We go on the fingertips and let's go ahead and try it with the leg out again, it's like it's going to slide. That's it. And now fingertips out.
And one more time and come back. Now hold it underneath. Curl your toes under. Now remember you're going to keep that pelvis aligned. We're going to keep the leg out good. And from that position, slide this leg underneath. There you go. Fantastic movement. And if you can let the pedal do its work, it wants to come up.
Try not to lean. Stay in both my hands. Try not to lean, just let it come up. Let don't mean shift. Good. Let it come up that it float and one more time and then bend in and in. So this is how we're going to develop a really good plank. And so once we get onto the reformer with our plank position, we're going to be able to maintain it through the pelvic alignment crate.
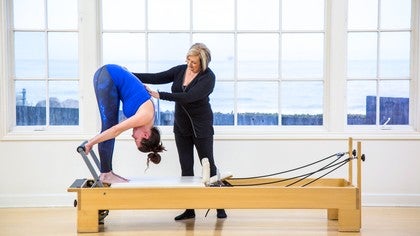
We are going to begin our long spine stretch on the reformer. And once again what we want to be doing here is we want to be looking at our plank position before we go into our balance control so that we are looking at different progressions and we want to really build up into step by step as to how to make the exercises work for the bodies in front of us. So what we're going to do is, the first thing is I've got all the springs on because I want the carriage to be very, very stable for you and you're going to place a hand in a foot onto the reformer and stand up just in the center of the carriage. Good. Stand up here first. So what we want to see here is getting into our plank. So similar to what we did on the one two chair, what I want you to do is I want you not to think about shifting the weight side to side but about keeping the stability in the hip and stepping one foot back, just bending and stepping good and placing the foot on onto the head rest and the other foot back as well.
Now from there I would like you to think about pressing the hips up and forward so the shoulders are going to go over the risks and the body is going to be in this beautiful long line that looks fantastic. Now from there we're going to add one extra thing and that is we're going to stretch once again in opposition so the head is going to stretch away from the hips and the heels are going to stretch down to where the shoulder rests. Those are the headdress so that we have this long, long, straight spine. Now we have all the springs on so the carriage is not going to move. And all I want you to do from here is a small break at the hip to lift the hips up. Good.
And then that press through again so that we're pressing and feeling the length of the spine, the stretch in opposition, and then not changing of anything so that the spine is really long. Ribs are in and go a little bit more forward. Try not to squeeze in good. And once again come back. Good and press in to that long plank position. And one more time. Use your breath. Inhale and exhale to come.
And the neck and head position looks really, really great. So the plank is really important and in maintaining and holding that. Now I know the carriage isn't going to move. I just want you to think that it is. So I want you to draw from under the shoulder blades and I want you to press equally into both hands and think about moving yourself away and back even though the carriage is not going to move without changing the hips.
So we're coming right from here and bring the heels down. That's it. And back up, not changing, heals. Come down good. And reach it up and heels come down and come up and good. Come high.
And now bend your knees and come down and around your back. All right, now that nice feeling that you just had about that lengthening, it should once again be right from that center so that even though we're pressing here with the, with the body, we don't want it to be pressing and moving the hips in any way. So we're going to go on to I think two red springs. Is that good for you? Standing in the center and that scene positioning without moving the carriage.
And now from here, thinking in opposition, the heels are reaching toward the head rest. The head is reaching away from the heels and just go ahead and move back. Yes. From, from the center of the body. And then let the carriage bring you in. Good. So Clara applaud you used to say, think of the reformer as your partner.
And so as your partner is going to work with you so that you're sliding out. And then think of gliding back in without changing your body position. Two more. Inhale
And the other foot up. So we're going to step back onto the bar, feed in the parallel position. Good. And now come into your plank position, anchor here. And the first thing we're going to do is I would like you to just move the heels rolling one
But let's take the spring down just a little bit and let's have you try that. It might be a little bit light now, but we're going to adjust again. Again, the spring should be adjusted to the body and not the other way around.
You're good and come back all the way in and just come down and just rest for a moment. Now, just as we were doing on the wound, you chair, we want you to think about having that way leg waitlist so that we're going to do one. They get a time. So let's try it with the progression, however, to see where we need to go with that movement so that what we are going to do is both legs will be out and I'm just going to have you just lift one leg. Just let it go. Wait, listen. Then it lift up and come back down and just up and down. Just a tiny, tiny inch. Come back and aren't and yes, good. Now stay in that position and don't change anything.
[inaudible] one foot up. Good and down. Other foot up. Try Not to shift the weight side to side and come up there. That side is good. Now anchor, anchor, anchor from here. There it is. Beautiful. Now this light comes up. Okay, and come down and yes. Okay, so from from there when it's into the wrist, what I want you to do is to think about pulling back and anchor across the shoulder girdle. So the weight is not coming forward, but he's pulling all the way back for you.
Take your time and one foot and the other foot into your plank. Open the hip flexors, length in the spine. Good. Now from here when they got and heal one and two and three and the other side, foot down and lift and he old one and two and three and come down and come in and come in. Now we're going to add something to that. What I want you to think about doing now is we're going to just place one knee along the shoulder rest,
So even open more pressing down. Very nice. And now from here I'm going to have you progressed the the same foot thing. So it's a roll forward and roll back and roll forward and roll back and roll forward and back. Now let's lift this arm up and roll forward and back. Press in length in that hip flexor.
Open the hip flexor and roll it and come back. Good change sides. Press into the hip. And three of these flip forward, good and back. So we're training the foot through the hip, so we're really getting that long alignment and good. Now arm up, very nice. Find your balance point. Again, we're training the muscles so that when you go into your plank, we have that openness in the hip flexors. We have the idea of what's going on from the foot all the way through the leg and we have that weightless feeling so that we can really maintain our plank position and hand down, leg down, and just relax for a moment.
I want to finish with one more plank. So go ahead and stand. And now from here, one leg goes up, level your hips, bend the knee, other leg up, press the hips and oh, open into that plank position. That is a beautiful plank for me. Looks Great. And now we're open, we're balanced through the hips and we have everything working together and step off for just a moment. Very nice. So once again, what we are looking at is how do we get to the exercises?
Too many people want to do the advanced exercises without really knowing the breakdown or the essence of the movements. And what we want to do is really get into what [inaudible] is, which is both mental and physical conditioning. And just by me changing the focus of my queuing, it changed the work for you, which we all, which we saw and how beautiful it was to really have that expression come from the body. I'd like to share a story with you. When many years ago when I was teaching in New York, every time I taught Cathy grant would come to my workshops and you know, I was the teacher, I was, you know, in front of all these other wonderful Polonius teachers and teaching and, and exploring movement with this group. And every single time I heard from the back of the room, right.
And I knew, I knew this was going to be something and she would correct me and she would, um, you know, have me Redo the exercise under her watchful eye. And at first I was, you know, frankly embarrassed they were, I was the teacher. But what I learned from that experience was that she was actually making me a better teacher and making the entire group better teachers in the fact that she was helping us go deeper into the work. And so I'm hoping that with this experience, with the wonder chair, and with new exercises and new things that you haven't done before, that's going to take you on that deeper level, on this great journey we have in Palazzo days. Thank you.
The Teacher's Corner: Breaking Down to Build Up
Comments
You need to be a subscriber to post a comment.
Please Log In or Create an Account to start your free trial.


