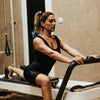
Premium Continuing Education workshop

You can view a 2 minute preview. For details, scroll down below the video.

Workshop #3544

Shoulder Biomechanics

1 hr 50 min - Workshop
131 likes

Description

Immerse yourself in Karen Clippinger's workshop that bridges the gap between scientific anatomy and practical shoulder biomechanics. This engaging session transforms complex information into actionable knowledge for your teaching practice. Discover how to enhance exercise execution and effectively address client injuries while promoting injury prevention. By optimizing shoulder biomechanics, you will cultivate beneficial habits that will have a lasting impact on your clients' well-being.

Objectives

• Master the fundamental anatomy of the shoulder

• Explore exercises that target and benefit all shoulder-supporting muscles

• Seamlessly incorporate these techniques into your existing programs

Once you purchase this workshop, the accompanying PDF will appear beneath the workshop description on this page.

What You'll Need: Reformer w/Box

About This Video

(Pace N/A)
Dec 07, 2018
(Log In to track)

Transcript

Read Full Transcript

Chapter 1

Basic Shoulder Anatomy

Welcome. My name is Karen Clippinger and I'm a master's in exercise science and taught at cal state long beach for many, many years. And really my passion is to try to bring scientific information about anatomy, biomechanics and make it practical and usable so that it can help you both in terms of your teaching and in terms of your own execution of the exercises to be more effective, try to prevent injuries and try to help your clients that do have injuries. So the topic for today, as you know, is shoulder biomechanics. And what I'm trying to do with this topic is kind of narrow down a lot of information to what are the most important things that we really want to think about in terms of selecting exercises and also how we execute those exercises so that we can get the best benefit from each of those individual exercises and help them to improve the mechanics of our shoulder rather than reinforce bad habits.

It a little review of anatomy before we begin. If we look at the basic anatomy, we have multiple joints and so we have the Sterno, clubbing Cuellar joint. Where would the sternum, the clavicle, if you put your fingertips right here, so find that notch and then find the clavicle and move your arm across your body and up and down. You can feel that there's movement occurring at that point, at that joint, right? And then just follow the clavicle out till where it hits that flex shelf. And that's your chromium clavicular joint. And again, if you move your arm forward, back, up and down, you can feel it's a gliding joint. There's a little bit of motion occurring there, right?

So those two joint are very important for allowing the movement of the Scapula itself. And we often refer to that as the scapulothoracic joint, but it's not a true joint. It's how the SCAP list sits on the rib cage and those other joints contribute to it. But for simplicity purposes today, and for many practical sessions, we focused on just what are the main movements of the scapula. Whereas in research, you'd want to look at each of those individual joints by themselves. The other joint, the fourth joint is the glenohumeral joint or the shoulder joint proper, right? And this, if you feel that flat shelf coming out and then there it drops off and you can start feeling the humerus, right? The upper arm bone, that head there.

And that is what's going to be responsible for the movements of the arm itself. So all of those joints are intimately interconnected. When we look at the concept of optimal biomechanics and when we look at queuing exercises to try to get the best benefits. So the classic way we can talk about in a more simplified way, those movements of the Scapula or if we lift them up towards their ears, we call it scapular elevation, right? And the opposite would be scapular depression, scapular depression.

And if we moved the scapula away from the spine, we call it scapular Ab duction or protraction, right? And if you move the scapula back, abduction or retraction I and coming closer to this spine, the those movements. And then the one, the ones that are kind of hard to create by themselves are upward and downward rotation. And so with upward rotation we have that scapula rotating upwards like this. And what that does is allow that socket to face up so that it makes it easier for your arm to go overhead. And then when you come down, the opposite occurs. So one way I think it's helpful to think about the Scapula is that it can enhance movements of the humorous movements of the arms.

And normally they're linked together in a way that will allow that optimal movement to occur. And there are subtler movements of the Scapula we're not gonna talk about today, but I just want to bring up that relate to tilts and forward and backward rotation. And those are still in process of research as far as what muscles, how much is normal. And that's why we're not going to address them. But you'll see, I think it's easy to think about that the rib cage isn't flat, right? So f those scapular coming around the side, it's not going to just be a single plane, it's going to be a multiple, multiple plane type movement. And that's what our new technologies show is that we need in every joint.

But very much so with this area is that we really need to think of things three-dimensionally, right? That there's the movement is more complex. So if we look at movements of the Humerus, right? Movements of the arm itself would bring the arm to the front. We call it shoulder flection, right? So think about forward as flection.

I know I had the arm that sometimes it helps to think about this is hip flection. We all know that, right? So arm going the same way is flection and going back is extension and going away from the midline is abduction. Abduct someone's to take them away at it, back into midline would be ad duction and then this would be extra internal rotation and this would be internal rotation, right? So those are again, the basic movements. And the, the reason why we make a point of this is that's the way we defined the actions of muscles. Do they create shoulder flection or abduction? That's the way we can think about designing a program to make sure that we're getting, but in reality, when we look at complex movement, is it just in one plane? If we lift something, no, often it's a multilayer if you're reaching right your, it's a Multiplanar or multi-directional type movement, but it's still very useful to think of this as for organizational purposes. So those are the basic movements of the Scapula and then the basic movements of the arm at the shoulder joint.

When we look at what provides stability to this joint, we also have many ligaments and a capsule that help give it stability, but they are not strong like we have at the knee. They're not as strong as that. There. There is some laxity in them because what the shoulder is designed for mobility. And so for example, we have a, a little, a bit of a curve at the bottom right slackness in that capsule so that we can bring our arms all the way overhead, which is great for mobility but makes it less stable then. So they're important. If someone has disruption of the ligaments in the capsule, the joint is less stable, but we consider it a muscle dependent joint. That's simply not enough. Right.

And this is a joint that's very prone to dislocation. Whereas some of our other joints like the hip joint, right, are much more stable, designed for stability rather than designed for mobility. So our next layer, we've got bones in their movements, we've got ligaments and capsule. Our next layer is those muscles and the movements that they create. And one of the ways of organizing those muscles is to talk about them relative to the scapula realm, the realm, the rotator cuff, and then the large muscles of the shoulder.

So if we look at the muscles of scapular stabilization, that first one that you can see on the upper left there is the trapezius muscle, and this is kind of triangular shaped, but because of it's it's complex arrangement. You can see what this circle right? That the upper part is in a perfect position where it can elevate, right? So it can pull that scapula up. Whereas this bottom portion here is in a perfect position to create depression together because they attach onto the spine of the scapula here. They're oriented so that they can create upward rotation of the Scapula.

And that's really an essential point because whenever you raise the arms overhead, whether it be to the side or to the front, that Scapula has to upwardly rotate. So that means your trapezius muscle is working all the time when you raise your arms front or side, and that's one of the reasons that many of your clients, and you may feel that muscle get really fatigued and really tired, particularly working at computers, et Cetera, is that it's, it's so primary in those movements of the Scapula. Also, if you think about that arrangement where it's all connected to the Scapula, towards the spine, when all of those muscles contract together, they're going to create scapular duction, right? They're gonna. The trapezius on each side is going to pull towards the spine. And so are movements like rowing movements where we pull the scapula together are used to strengthen the trapezius. So in summary, trapezius crates, scapular abduction, upward rotation, and then upper creates elevation, lower creates depression, and that is something we'll come back to and look at mechanics in a bit. Underneath that trapezius muscle.

We have this muscle on the upper right that elevates Levitra scaffold, that elevates primary function is to elevate the scapula. And this muscle right here that you're more familiar with going between the scapula and the spine, the Rhomboids, but the important difference, they do create ad duction pull a scapula together like the Trapezius, but they create downward rather than upward rotation. So they can't help when we raise our arm overhead, they help if we're pushing Ebert coming down or bringing the arms back, like in chest expansion, right? That those muscles are going to be important. And so that, that is often a distinction is that for many individuals, the lower trapezius and maybe the middle Trapezius are weak, right? In that they're not able to do their function. So basically the, those muscles all located on the back share that function of abduction, Rhomboids, [inaudible], scapular, downwardly rotate, they also elevate and then it's just the lower fibers of the trapezes that depresses.

So not surprising that we have such a tendency for people to have that excessive elevation occurring. Right. And then as we mentioned before, two pzs creates the upward rotation. That's so important. This is balanced and what I mean by balanced, if you look at the, at the bottom there, this is balanced by the serratus anterior on the front, meaning that it's located where can pull the scapula forward, whereas all of the other ones pull the scapula back ad Ductus Scapula. So this is the powerful abductor of the Scapula and it's a muscle that's been given a lot of attention recently and is considered really important. We'll be doing pushup plus for it later, but in terms of keeping that scapula from pinching together, keeping it appropriately wide, we often talk about in terms of cuing, right? So this muscles primary action is going to be abduct to bring those scapulae to the front, but it also upwardly rotates.

So it works in conjunction and that's what this is showing here. The trapezius is helping upward rotate from the top where all this serratus pulls down here and together they work to create that upward rotation of the Scapula. So they're coordinated. Action is very important. The last point that I want to make about this stratus is that the lower fibers that you can see here are in a perfect position to depress the Scapula so it can share with the lower trapezius. That inability to prevent that common tendency for excessive elevation. So those are the muscles which what's their primary function?

Yeah, stabilize and move the Scapula, stabilize and move this scapula. Whereas now we are moving on to the muscles of the rotator cuff and these are small muscles that basically connect the Scapula to the humerus right at the, at towards the top, and they get their name because they're particularly important for small rotation movements, but they're also essential for stabilization of the shoulder itself. So it's been shown that when your arms are not hanging by your sides, whether you're lifting in front side, back, whatever, when they're not by your sides, these muscles are constantly working. So they're essential, right? For proper mechanics and something that we often, in my opinion, don't include enough in our [inaudible] problems that we want to make sure that we do the uppermost of these.

The superspinatus gets its name from super being above the spine of the Scapula. So this ridge of bone is called the spine of the Scapula, and it's unique in that it's located like this, so that when it contracts, it's gonna create shoulder ab duction. So it's not a rotator like the other ones are. And then if we look below that, the infraspinatus and this muscle here, the Terry's minor, their position where they attached to the back of the humorous to the scapulas and they're in a perfect position to create external rotation. And there's though they're very essential in terms of creating that desire to external rotation.

The one that's sometimes a bit difficult to picture is the subscapularis sub means below. And so it's below. So this is looking from the front of the body with the rib cage away. It's actually underneath, right? The scapula attached onto the inner border and all the way underneath. But the trick is rather than attaching on the back, it comes to the front.

And so it creates internal rotation. So it's the balance in terms of these small muscles, as many big muscles that create internal. But in terms of the rotator cuff, it's the balance in terms of creating the internal, whereas the other two create the external rotation. So very small but very important muscles. And then the last group is the ones that we're more familiar with, right? The large muscles of the shoulder. And the one located on the front, we've got the Pectoralis major right? And the upper portion is important for what shoulder flection, shoulder flection and anterior deltoid shares in that function.

Middle Dell is perfectly positioned for shoulder abduction, right? Posterior deltoid and Lantis Ms. Dorsey, Terry's major for extension. So I think the, the lower pex is a little different, but if you kind of think of this upper front flection side, abduction back extension, and it's logical and in terms of those basic functions, and of course they have other secondary functions too. And the only function that I want to point out right now because it's so important for alignment, is that many of these muscles create internal rotation, right? So pex, our position on the front, so they create internal rotation. Anterior deltoid is on the front, so it creates internal rotation. On the back, that lats right, the, the liturgist Ms. Dorsey, it comes up and comes to the front with the [inaudible] major to attach, and so it's coming to the front. Deep here, it's going to create internal, so these huge muscles, pecs, lats, Terese, right, all create internal rotation.

The only one that creates external of this group is the posterior deltoid. So I think it's really easy to see why it's so common in our clients and in many of us to have this rolled shoulder posture. There's just so many muscles that create that internal rotation and unless we're doing specific exercises to counter that, and many of us are at sedentary computer type jobs, it's very easy to get into that position and from an anatomical position. I want you to think about that. When those shoulders are rolled forward, it's shoulder internal rotation, right? But what happens to the Scapula? Scapula abduction, right?

They're going to the front scapula abduction. In some cases we have a little bit of upper backgrounding, right? Kyphosis that accompanies that too, and that's more variable depending on your individual. So we'll be doing some exercises today that do the opposite, right? And this one, the shoulder external double shoulder external rotation that we'll be doing is my uh, I joke about it and being my counter rolled shoulder exercises cause it gets all three components with one exercise, right? So we're doing this, which would be shoulder, external rotation, purposely pulling the shoulder blade slightly together, which is your scapular abduction. And then if we add upper back arch, then we can come to the kyphosis part.

But whatever exercises you choose to think about, you want to include something for that external rotation and something for scapular abduction. And everyone needs something for upper back extension, whether they have rolled shoulders or not. Right? When we look at stretching, it's not so easy, right? I wish there was a magic stretch that we could do for rolled shoulders. It's not so easy because when you think of all those muscles that create internal rotation, they're going to be different. So one way we often do is with the arm side, which gets that Pexa on the front nicely and the anterior deltoid.

But if we bring the arms over head that's going to get our [inaudible] sigh right and then if we bring the arms back that's going to get our pets. So kind of multiple directions. And the reason I bring that up is I think you'll find that some of your clients, it's very distinct like they go to, they can't bring their arms higher than this without the ribs, you know, sticking out. And so you know, that's the direction someone else their there doing hug a tree and they stop here. Cause if they go any further, they're really tight going to the side and then someone else trying to do back support, they can't even get close because their shoulders are so tight going that way. So it's helpful to kind of think what, where is that tightness coming from and how can I address that? So that's ruled shoulders and the, Oh, I did want to mention abdominals that there are some people in swimmers are one of the examples, and I've seen it a few with weightlifters, but more with swimmers that do lots of crunches and small range of motion and then their swimming strokes to where they are actually tight in their abdominals and so they need to stretch that as well as the other areas. We talked about the [inaudible], the next postural deviation that contributes to biomechanics is winged scapula and wings capital is basically where the scaffolded don't lay flat against the rib cage, but either that medial border comes away or the bottom angle comes away and it can be quite extreme. Some you may have clients that may be some, someone in here that has that where they can come quite far away from the rib cage and it appears that the two most important muscles for that are the straightest anterior and the trapezius muscle that their strength in their coordinated activation as essential for having those scapulae on the rib cage and move the way that we want them to move. And so this, this is if you have a client that has that, when to just put extra effort into making sure to include something like push up plus for the serratus anterior and something like rowing for the trapezius muscle.

So we've talked a bit about alignment and to the most common problems mean the rolled shoulder and the wing scapula. And now I want to talk about a couple biomechanics issues or mechanics issues. And the first one is the Scapula humeral rhythm. And many of you familiar with it, but if you're not, sounds like a lot, but if you break it down, Scapula humeral rhythm, right? So all it's saying is that the coordinated movement between the Scapula and the humerus and that coordinated movement is, is linked and very predictable.

So the example that we're going to be looking at today is that every time you raise your arm overhead, we talked about what has happened with the Scapula. Upwardly rotates at upwardly rotate. So that's a classic linking of the Scapula and the humerus. If someone has paralysis of the muscles that doesn't allow that to happen, people can't raise their arm overhead, right? So it's that essential in terms of that concept.

And so what we look at is that a portion of this motion, so here if our scapulas is starting here, laying down here, you can see that when the arm raised overhead it's no longer in the same position, right? It's rotating. So this socket is now facing upward, which is going to allow that humerus to go much higher than if the scapulas stayed still. And when that gets disrupted, that's one of the Times that we see shoulder problems occurring. So it's very important not only in terms of the idea of getting that overhead movement, but preventing injury. And one of the exercises that we're going to do today is, is called sitting scaption. And this particular exercise, it has been shown to be really helpful for strengthening and working on the coordination of there's upward rotators at the Scapula. The second mechanics principle that I want to mention is the sit force couple and the sit force couple is comprised of three of the four muscles of the rotator cuff.

And so going back to that rotator cuff idea, we have the subscapularis being the s infraspinatus being I and Terese minor being the t and the principal without going into a lot of detail is that when arm is hanging down by the side, when the deltoid middle deltoid works to help raise that arm, it's going to tend to pull the head of the humerus up into the socket because of its line of pull. And that if that were to happen, all of us would have shoulder pain, right? And so without us thinking about it, ideally if our everything is working right, the sit fuss, forced couple works so that it helps prevent that head of the humerus from elevating and allows it to rotate so that you can raise your arm overhead. So it's a very important mechanics or mechanical principle and very important mechanics that normally works without us thinking about it. But when people have shoulder problems, it can easily get disrupted. The practical side for us is that we want to include something regularly for strengthening the external rotators of the shoulder because that tends to be the really weak component of that forced couple. And in addition for people that have problems, it's recommended to include something for internal rotation too.

And before we leave that concept or realize I didn't find force coupling and the concept of a force couple is the idea that muscles pull from different attachments but create motion in the same direction. And that's really important with this idea. These muscles attached different places, but yet they work together to create that desired movement. So the practical of that is we want to include something for external rotation. We have a couple exercises including our double external rotation that we're going to do today to work with that.

And our third mechanical principle is synergies, right? And synergies is the concept that we are using muscles to neutralize an undesired action, right? And then the reason that this is really relevant at the shoulder is that there's very few muscles that don't have two or three actions that they create at the same time. But we often don't want all three. We just want one. And so there's a coordinated linking that occurs in a healthy shoulder so that we can get that motion that we want, neutralize what we don't want and end up with optimal positioning. And Again, oh, I'll go back to our example that we talked about before of raising the arm overhead.

And if we look at this concept of synergies, if we start with the idea of the upper trapezius, if we just use the upper trapezius, we know we have to upwardly rotate that that scapula. But if we just use the upper Trapezius, we would get elevation too. We don't want that. So we have to neutralize that with let's say lower trapezius. So we neutralize that with lower trapezius so that we have a neutral position as we upwardly rotate.

But the upper and lower trapezius also produce the abduction. So now we're okay as far as elevation, but our arms are back here. So what do we have to add? Serratus anterior on the front, right? And so that's that idea here. Upper Trapezius, lower trapezius and Serita's anterior all work together as synergists to so that we get the desired motion, right of upward rotation without the undesired motions of elevation or ad duction and the example that I gave. So again, great. Normally when your shoulders are healthy, you don't have to think about it, this just happens. But unfortunately many of us get into situations where they're not healthy and this gets disrupted as we switch gears now and start taking it to the practical, what do we need to think about strengthening as a platas instructor or as bodies enthusiast? Why do we need to think about including in our programs? And so the first concept is we want to look at our client and see do they have something that's disrupted that's obvious to begin with.

So the first idea is when they raise their arms over head, you have many of your clients that have excessive elevation, right? And so in that case we're going to think about striking the opposite, which would be the scapular depressors, right? And that egg example is a press up that will do, but the concept right now is that you want to think about, you're going to strengthen something that's going to help pull those scapula down. So we don't want to hold them in place, but we want that muscle be strong enough. So when we raise the arm over head, we have that synergistic working right where the up elevation and depression cancel and we just get that pure upward rotation occurring. The second example I have on here is excessive scapular abductions, who you have a client where their arms are too far back here. What do we need to strengthen scapular abductors serratus anterior, right? And so this would be our example of the pushup plus, but what if we have the opposite?

We have someone where their arms are forward here, right? Exactly. Then we need to strengthen the scapular adductors and that would be your example such as rowing to strengthen that. And then just looking at which we'll we'll do in the practical and a few minutes. Looking at that rhythm of how is that scapula moving as the arm is brought overhead may give us some other clues of other things we need to look at. And that gets to my next point, which is when we look at that Scapula humeral rhythm, there's really a classic pattern and this is something that's really come out in the last decade or so we that there is a very standard pattern that doesn't matter if they have bursitis, tendonitis fell on their shoulder, were at a car accident, but when there's trauma, injury, inflammation, that the classic thing that happens is that we get that altered position of the Scapula at where it's winged, right?

Where that medial border comes out or the bottom of the scapula comes away from the rib cage. And this seems to be not specific, right? As I mentioned, con accompanies many, many different types of injuries and it's also associated with this early hiking. The tendency when you raise your arm overhead to excessively elevate the arm. And then on the way down that it's not as smooth coordinated movement, but there's a rapid, quick kind of drop of the Scapula at different points rather than a smooth gradation. And so what's been shown when studies that have looked at this in more detail in terms of muscles, is that when someone has pain, no matter what the source, we tend to get excessive activation of the upper trapezius and inadequate activation of the lower trapezius. And it happens very rapidly.

And again, just in everyone. So or almost everyone. So it's something that once you understand that you go, oh, that's why I'm seeing this again, that's why I'm seeing this again right there, that it's really a classic pattern. And some of it is atrophy if it's been chronic, but some of it's just a a motor pattern. So if you can start helping them defined, oh, that's my literature pcs.

Oh, I didn't realize I was hiking that so much. And I'm sure many of you had that experience that even in a session they can improve it because you're changing the firing pattern that's going on. And this is an issue not just from an aesthetic perspective, but it the biomechanics, altered biomechanics really increases the risk for pain and injury and what we call shoulder impingement syndrome. So basically if we look at this space right here, we have the head of the humerus and then overlying that we have an arch of bone and that there was a very small space right in between that. And so I think you can imagine if that mechanics altered and you start hiking that or you get swelling and inflammation in that joint and now that Bursa is filling that space, right? Or the, some of the other tissue in that area is swollen.

We have much less space and it's very easy to start pinching those soft tissues in between the head of the humerus and the overline arch. And when someone has that condition of curtain, they can have perfect mechanics and they're still going to have pain. But if you can catch them early or later and correct the mechanics, then it's a lot easier. So it just raising your arm to the side decreases that space by about one half. So that's a really important practical concept too, to realize that some of your clients that have discomfort in their shoulder when they raise their arms, that you have to work in a range that's pain free before they're going to start having that inflammation, that irritation occurring.

If we think about that idea of that we want to restore this optimal mechanics, right? We want to avoid that excessive hiking. We want to start getting that shoulder blade to move in the way that we want it. We want to focus on strengthening lower trapezius and serratus anterior because those, as we've talked about, have the depression component as well as the upward rotation component. So that's really an essential focal point. Something that we really need to think of in terms of our strengthening.

And then in terms of technique cues, we want to try to help our clients to feel how they can raise that arm overhead. Not holding the scapulas still in place cause the Scapula have to move. But where the Scapula are rotating without excessive elevation. And that's easier said than done. Right? But very important aspect. The, the last point is the set force couple that remember that we talked about that that sits force couple helps prevent that impingement of the head of the humerus coming up.

So in addition to strengthening serratus and lower traps, we want to think about strengthening the rotator cuff and, and particularly external rotation. So those are going to be really key points to emphasize. And this is the genesis of part of the title right, of today's lecture and a bunch of research that looked at, okay, how can we realistically take all of these exercises and all of this information and make it something that someone can fit into a daily program, our three times a week type program. And so four of these five, uh, exercise, not I'll talk about the fifth and his second are ones that are agreed upon by many professionals, many researchers as being some of the most essential exercises to include basically for everyone. So you're, you're thinking about from a prevention perspective for people that don't have shoulder pain and then, uh, for return to activity when it's safe for people that have had problems. So Push up plus that I've mentioned before that we're going to be doing is important for serratus anterior stratus.

Anterior rows are gonna be important for Trapezius. And when we cue to think about pulling those shoulder blades slightly down and together we're going to be emphasizing that lower trapezius. And then scaption I mentioned is this idea of lifting the arms. And the distinction we make is scaption gets its name from the idea of being in the plane of the Scapula. So the Scapula is on the back like this so that your arms are going to actually be a little bit forward if you're moving in the plane in a scapula.

So about 30 degrees in front of the body in a thumb up position has been shown to be really helpful for training that upward rotation of the Scapula in a safe position that tends to not aggravate shoulder impingement press ups where you're pressing down and lifting your body as the, the classic non plot. He's way they're done. And um, some you do shrugs on the chair, you know, would be the, you know, triceps press set and then pressing down would be a parallel and plots, right where you're emphasizing the scapular depressors and pulling that shoulder down. The controversial one. The last one that I want to mention is shrugs, right? And this, this is the idea, do we want to include something for scapular elevation? The people against it say people have are doing it too much already, right? So let's just really emphasize the depressors and try to get balanced back. But the proponents of it say just because people are using it doesn't mean it's necessarily strong and it's similar to the concept that we for many years, right size of Donald's and neglected the back and then realize we need to strengthen all of it. Right?

So one approach that that I think can sometimes be helpful is to start with the depressors. Then when people start having that control and start getting the strength, then maybe once a week throw in something for the elevators so that you have some balance in your program. If we look at the next of that's emphasized and Scapula, right? That's our first five. If we emphasize the Scapula, that's the five boom one to include in the sort of the next level that we want to look at is we want include something for the rotator cuff and which direction, external rotation being the most important. So making sure that we include something for external rotation and possibly for internal rotation, which we'll do. And then last, but in terms of the muscles is something for those large muscles. And there's lots of classic exercises that do that.

So we're not going to spend a lot of time. I just have one example. It again, if you're not too familiar with anatomy, just think of all the directions. So something for front, right, something for back, something for side and um, remember we're doing the rotator cuff so we already have that covered. The one that I think you're going to need to make the most emphasis in is shoulder abduction and so we're doing a couple exercises for that today. If you look at some of the classic patterns such as when this right supine arm series, it doesn't have abduction and it has extension and abduction in it. So abduction, the abductors are one of the most commonly injured muscles of the shoulder.

They're very important for holding your arms out to the side, lifting things. And so that's one thing I'm going to encourage you to look at. Look at the program that you commonly use and see does it have abduction? If not, just add that one exercise in, you know, or external rotation. Just add that one into the rest of years and then some finer things that are just mentioned briefly. If we had, if we were doing a six hour workshop by, we'd spend more time on is thinking about open and close, can imagine it chain including that or kinetic chain close being what, where your hands are stationary and we'll be doing for our shrugs, we'll be doing an example that where we're holding the foot bar for our press ups or dips where you're holding the foot bar, where open chain is, where the arm is moving in space. And the reason I point that out as well, there's quite a few very advanced exercises, right?

And plot these that use that close chain position. And so we want to think that we gradually build up to those and it's not too big of a jump. We also want to include something for stabilization and this is pretty easy to do on the reformer because it's moving in space, right? So it tends to create that. A perfect example would be balanced control front or balance control back for more advanced people that many of your exercises like arm circles, what you're having to adjust will help train that proprioception.

And the last point I wanted to make in terms of this is adequate range of motion and the example I like to use is chest expansion. I love chest expansion for working on posture, for working on the Scapula. You know our relationship trying to work on scapular abduction and depression if you're doing that, but in terms of shoulder extension, right? Strength is specific for the range of motion that you're using. So it's a very small range, but if you're doing pulling straps right where you're laying on your stomach and for back extension and you will load up those springs, now you've got an extension through a large range of motion.

So you may want to add a separate exercise for the shoulder or you may just look at your whole program and say, Oh, I've got it met by a different exercise. But think about that idea that those small range are often very helpful for technique, but we also want to include full range exercises as we go through the practical. What I want you to think about is that your handouts are organized along this. Our first five exercises or that basic five, emphasizing the Scapula. The next two three actually are for the rotator cuff.

And then the last ones are just examples for those large muscle groups. And so the most of you are going to want to focus more on the earlier part of the handout in terms of adding new stuff. And last but not least, I just want to mention that a lot of the graphics people often write in and asked me, where are the graphics? How can I get the graphics that are from my book, Dance Anatomy and Kinesiology? So if any of you are interested, you can purchase that from what? Uh, Amazon, lots of places, balanced body, and it has all of this stuff in it.

So we're going to take a break for just a minute while we set up for the practical.

Chapter 2

Scapulohumeral Rhythm

So we're going to start the practical by looking at the scaffold, the human rhythm, and going to choose two people to try to show that concept that we've been talking about. So if you look first at how those scapula lay on the rib cage, you can see that hers are not quite flat. They're just a small about amount of winging of where I can put my fingers under this medial border, right? And it's more pronounced on the right side than the left side. Can you see that?

And so that's that idea of what's the resting position of the Scapula. And you can see that it's slightly disrupted. Now we're going to just take this right side and she's going to slowly bring her arm overhead and come back down again. I'm going to put my fingers at the lower angle of this so that you can see more readily. So as she raises the arm over her head, you can see that this part here is not moving as soon as we'd like to see move. And now as it starts to move, as she goes up higher, we see extra activity and this upper trapezius where that shoulder blade is elevated a little more than ideal.

And as she comes back down, right around here, you see a quick movement of that scapula coming back in rather than that smooth graded motion. And now we're going to try to correct it a bit. And so I want you to think about reaching the shoulder blade towards the front as soon as you start your arm moving that set. And now as you bring the arm over head, take your time. Think about relaxing here and trying to feel the rotation without the elevation.

Relax a little more there, but that's it. Very nice. And now coming down, this part's harder to correct, but think about slowly having this shoulder blade go back towards the center. And you can see now it's starting to wing a little bit more as she's just relaxing. And once again trying to correct it. So right from the beginning, think about that scapular reaching to this side. And as the arm goes overhead, it's continuing to rotate while this stays down. Good. Nice. And then returning back to your starting position. And so from what we talked about earlier, what we would ideally like to do is strengthen that lower trapezius and strengthen the straightest anterior so she wouldn't have to think about it, but automatically as she started raising her arm that would kick in and bring that shoulder blade towards the front and hold it flatter against the rib cage.

So over time it is no longer conscious effort, but it's something that happens automatically as we restore that rhythm. Thank you. And our second person, actually let's have you stand over here. Same place and let's just get a reference point of bringing your arms overhead just the way you normally would and then coming back down. Awesome. And bring your arms overhead.

Good and coming back down. And so she's going to go more slowly. And what I want you to to focus on is right here. So as she brings her arms overhead, yeah, you may be able to see this increased elevation and activation of this upper trapezius working here. Just getting a nice rotation of that Scapula, but just a little extra elevation. And if you are from the side, like I'm standing, see she's leaning back just a bit as she brings those arms overhead and slowly come back down again. Yeah.

And so first thing I'm going to do is have you think about keeping this rib right there. As you bring your arm to the side, trying to feel that border, that lower angle. Come around now this is the spot. Try to relax here. Yes. And continue this coming around. Relax here. Take your time. Yes. Nice. Relax. [inaudible] and around. Keep that rib slightly back. Uh Huh. And continue right here. Relaxed. That's it.

Can you see that difference? And so as she's going over head and go back to your old way, it would be lifted here, right as she's going overhead. We're trying to get more of that lower trapezius to activate with the serratus and less of this upper trapezius. And one more time trying to work on correcting it. So as you begin, think of a string pulling that lower border of the Scapula to the side. Nice.

And here your arm is wrapping around. Good. Good correction. Good correction. Nice up here. Relaxing that. Nice. That low ribs slightly back. Yes. And now right from here, elevate to fill the difference and let it drop and elevate and let it drop. Nice. And come back down. Thank you.

Chapter 3

Forward Press

[inaudible]. So now we're gonna go into our exercises and the first exercise that we're going to do is for that Serita's anterior and it's going to be our forward press or push up plus, right? There's lots of versions of that exercise. We're going to start with a forward press. So from this position, yeah, you're going to sit with your back, right against the shoulder rests. And I have one red spring on there for right now. As you get used to it, and later you could increase the spring's going to take that strap onto your armpits.

Yes. And from here, press forward and then return back again. Now the challenge as you try this, I'm going to do it wrong for just a minute, is instead of leading with the top of your shoulders, what I want you to think about is that the elbow is coming down and then you're bringing that bottom angle of the scapula forward as you press forward and come back. Okay. And again, elbows going down, bottom of the scapula leading and the whole side of the scapular coming forward. And sometimes it helps at first around a little bit to exaggerate it to get the feeling and that's fine and come back. And the progression on this is after you go to this forward position, you're going to just do the plus where you go further and then come back and go further and come back and go further and back.

Last one going further and back. Okay. And if I could have someone come up please. Thank you. And so she's going to get in that same position to do this exercise.

So yes, thumbs and straps. And where? How I want to queue this is that I'm going to put my fingers right on the shoulder blade is as you go forward, I'm going to stop when your elbows are right by your side. This is the spot. Stay there for just a minute where I want you to try to feel this. Yes, going forward on both sides. So those shoulder blades are wrapping to the front at.

That's nice as you press forward. So the serratus anterior is called the pushing muscle, right? Because it's a muscle that we use a lot when we push and now bend and come back again and here going forward, think of that elbow reaching down and then here, try to not lean back. That's it. And now wrap this to the front. Good. And try to not do the top of the shoulder so much. That's it.

Do you feel that difference? Good and on both sides. Now we're going to stay there for just a minute. And think of the plus that you're going to press just a little harder. That's it. Perfect. And then come back again. And one more time like that elbow going down and forward without leaning back.

And then bringing that shoulder blade with you. Good. And adding that plus at the end. That's it. And hold. Really feel that now stay there. And now we're going to do the progressional at the shoulder blades. Come together, the elbow, stay straight. That's it.

And now separate and feel it right under the armpit working there. Good. And come back and right under the armpit, those fingers going onto the ribs of that muscle. Yes. And then come back. And so now, which is normal, you're leading a little bit with the top of it. See if you can find right where my fingers are that you're pulling forward right here where my thumb is. Pull that, find that muscle. That's better. That's better.

And then come back and last one right here, pulling forward, make this, come forward. Forward, forward. Yes. Nice. Best one. And relax. Good. Thank you. Do you feel that active activation? Yes. And it's, it's really kind of a hard muscle to find, but then when you find it's like, Oh yes. Yeah, definitely. Good, good.

Chapter 4

Push Up Plus Variation

Thank you. So I do want to show you another variation of that push up plus concept.

And it's more based on the classic exercise where you do a push up on the floor and then go further and come back. And you can do that same concept on the reformer kneeling here, put your feet against the shoulder rests and on your forums. So going into the pushup position here and let the shoulder blades come together and then consciously separate them and come together and separate. And again, at first it sometimes helps to round a little bit to exaggerate it and you're going to keep that as you press back and as you come forward and keep that separation as you press back and come forward. So you're trying to feel and find how you can use that serratus anterior to stabilize, keep the scapula. Why?

And what I find is when people start getting the ability to consciously activate that muscle more than you can use it quickly for queuing and many other

Chapter 5

Sitting Diagonal Row

exercises too. So the exercise we just did was for the scapular abductors right straight as anterior. That pull the scapular four down. We're going to go the opposite direction and do an exercise for the scapular adductors that pulls them together on the back. And so this is the, you're sitting diagonal row. So in this exercise, as you're sitting, we're consciously trying to pull the shoulder blades together. As you pull the hands back, and I want tension from the very beginning on the strap.

So grab up on on the straps. And from here you're going to pull back first just doing the basic row as you pull back, rather than elevating, I want you to think of pulling those shoulder blade slightly down and together as you pull back further and go forward. And again, pulling their shoulder blades slightly down and together as you pull back and go forward. Now we're going to add the diagonal to it. So we pulled back. You're going to bring the right elbow further back and allow the torso to rotate with it. Then add the left to it so you feel tension on both sides and come forward pulling back evenly, trying to feel both sides. Work now, right, pulls back when it can't go any further. With that, letting the ribs come out, torso rotates, left, pulls back til there's tension and we can add a little upper back arch to that and come forward on the left.

The same idea coming back, left pulls back, torso rotates tension on the right. Okay. And then going forward. Okay. And back left, rotate, right tension.

Try to fill it equal on both sides and now adding that little arch of the back and come forward. So we're getting that idea that we talked about with rolled shoulders that we're adding, right? That extension for the Kyphosis at the same time as we're working on those muscles that help pull the shoulder blade together and remember that with this rather than a neutral, pulling the shoulder blades together, we're emphasizing pulling the shoulder blade slightly down and together. So come on up so you can bend your knees and put the feet on the headrest here. Yeah.

So go ahead and bend these knees and put your feet that your knees are going to be up like this. Yes, yes. And then grabbed through on the straps so you can hold right up to there's tension there. That's it. Good. Now from this position, really try to feel that vertical thoracic spine elbows are pulling back and from this position just to pursue a couple here. Think of pulling their shoulder blades down and together. So less of this upper and more of this good. And then come forward.

Now we're going to add that challenge of keeping this low rib in at the same time. So stop right here and bring the ribs slightly down. So don't lean back, but think of keeping your shoulders right over your pelvis and it's just your arms going back. Nice. Do you feel that difference? Good. And then come forward and now we're going to add the diagonal idea. So take your time, come back now. Right goes, pulls back further. Then it brings the torso with it. Nice. Now pull the left to meet it. Keep the elbow bent on the left side to bend it. 90 degrees. Yes.

Good. Come forward and to the front end. Yeah. This is one that is harder than it looks, right? Yeah. And coming back. Keep this, keep this. Take your time. Write pulls back. Yes. Rotate left. Keep that left. Elbow bent more. That's it. That's it. Now here you're going to add that upper back art reaching over my hand.

Less head, more upper back. Nice. And come forward and going to the left. Coming back. And this is one that shows our right left. A lot of us are stronger on one side. Yes. Good, good. [inaudible] Nice. And then coming forward.

And last one, adding the arch. Take your time. Bring this down. Just a little more left shoulder blades pulling down and together. Nice and not think of here. Right to your shoulder blades. Lifting up and over without the heads. So much going up and over the ball. That's it. That's it. Nice.

And then come back to center and hopefully really feel that triangle working right here. Right of the Scapula. Pulling to the spine. Nice job. Yes.

Chapter 6

Dips

So exercise number three. We're gonna work on scapular depressors so that we'll actually be pulling in some of the muscles that we've just worked on. The lower fibers of the straightest anterior and the lower trapezius.

But the emphasis on this exercise is to really feel those shoulder blades pulled down and together like you were just feeling. Okay. So the more advanced version I like to do, either on the bar here or with your hands here, and I'm using a red spring for this, the you're gonna push yourself away like you were doing long back stretch. And from here, just a small bend, the elbows and then emphasis is the pressing down and together really trying to fill those. The scapula come down and again, just a little band. You're pulling away enough that you can just clear. And then shoulder blades down and together.

I usually hold that for about four counts and bend and up, down and together. Okay. And this concept right can be done anywhere. So if you're working with the program you want, you have a box on here, you could do it on the side of the box, you can do it on the side of the Cadillac, you can do it on a chair. And so it's, it's the concept is that you're pressing down and supporting your body weight to challenge those depressed or some of the scapula. So can I'm someone.

Thank you. So go ahead. And I think it's easiest to sit on here first with your feet there and you're just gonna press the carriage out enough so that your bottom is going to clear. Exactly. No, she's going to focus on trying to bring those elbows back as she bends those elbows. That's it. Nice and not even quite that love. Stop a little soon. Right there. And now from there you're gonna come up. And this is the part I want you to emphasize. Tried to not push away here, but pull those shoulder blades that stay just for a minute.

Shoulder blades down, more down, more downward. That's nice. Good. And now bend. And as you straighten shoulder blades playing Nice v they're pulling down down, down. Now put your bottom on for just a minute to rest because I want to see if you can use less of the effort. Trapezius. Yes. She likes this muscle. And so let elevate your shoulders on purpose.

And really try to feel that, activate you, feel it. And now pull down and try to feel the difference of this lower part. Working and relaxing this more. Uh Yes. Exactly that. And one more time. Come up. Fire that. And now relax. Relax. Nice.

Now see if you can support your weight and before you go the, and the reason I was having you go less far as, as you go further down, it naturally makes your shoulders roll forward. And I want you to stop before that point. And so just a small motion, press forward. That's better already. And now try to feel this. Activate lower, lower, lower. Yes. And as you come up, start by pulling down here. Nice, good. And hold. Relax us even more. Fulfill it low. That's it. And last one, bend, elbows.

Going back to small range and start it from low without the ribs going forward. Nice. Relaxed. That upper more. Yes. Yes. Good. Thank you.

Chapter 7

Modified Scapular Depression

So you're likely going to have some clients where to be in that supportive position aggravates their shoulders. They're just don't have the strength or the control to be able to do that.

So I do want to show you a version that's easier. This one, I would start with maybe a red and a blue spring. And then with people that are experienced, I go quite high on this at two reds, in a blue or two reds and in green. So when you lay down and go to tabletop position, what I want you to think about is that your shoulders need to be away from the shoulder rests, so you don't want them right next to it. You want them down enough that they can elevate it and you're going to grab onto these straps and from here let those shoulder blades come up. And now think of pressing their shoulder blades into the carriage.

As you bring the arms down and let the shoulder blades come up, and now shoulder blade slightly back, pressing into the carriage without letting the ribs go forward. As you press down, pause in that down position and come back up last time. Show the blade slightly back together and down and hold that position and relax. And this is a good time to mention that when I talk about springs, it really depends on the client that you're working with and it really depends on the equipment that you have. So I'm just giving you a very rough idea of where to start and I want you to go up or down as is appropriate for whomever you're working with.

Chapter 8

Scaption

So exercise number four is sitting scaption. And remember we talked in the lecture that scaption refers to bringing arms about 30 degrees in front of the body and we're going to be using a thumb up position with this. So as you start this exercise, I want you to think about reaching down just a little bit to activate those scapular depressors and then reaching out as you bring your arms just to 90 degrees and lower. And what we're trying to work with is that upward rotation of the Scapula as well as strengthen those shoulder abductors, which are commonly weak. So I'm starting with a red and blue on this and per usual, find a position when you start where you feel tension on the straps. So from here we're starting with the arms right by your sides so that as you go up and go to that 30 degree position, the carriage moves forward.

And again, coming up. Okay. And returning to this side and now I'm going to focus on that little finger reaching down and the scapula going side as I go forward. And last one trying to feel that upward rotation and widening of the Scapula. And if I could have someone come up, please, I'm going to start you on just the red spring so that you can not focus.

Yes, they're here. And so yes, we want tension on that strap. You might, I would grab through the wrapper around is the way I usually do it so that you really felt tension in that beginning. Good. And now your arms are right by your side, feeling that lift of the abdominals, lift behind the ears and now go ahead and just go once just so I can get an idea of Nice just to 90 and then coming back down again and as you come down, right by your sides, that's it. And now as you go side, really focus on this rotation, this rotation, this rotation. Good. And coming back down and you can s may see that this side wings a little bit more.

So before you go this time, I want you to feel that little finger reaching down and see if he can feel it. Bringing a cause attached to this bottom angle and it's bringing it around nice as you come overhead and lowering back down. And last time bringing, rotate. Yes, nice, good. And stay right there. And so when we talk about wide Scapula, this is what I'm really looking forward. It's not an exaggeration, right? But though the scaffold, Arlene nice and flat against the rib cage, they're upwardly rotated so that the arms are positioned ideally in the socket.

Chapter 9

Shrugs

Thank you. So now we're moving on to exercise number five and this is shrug. So it's working the opposite of what we just worked instead of depression, we're working on scapular elevation. And as I mentioned earlier, this is the controversial one where some people feel we should do it regularly. Others feel just occasionally in some say not at all. So I'll let you make your choice. But I think it's important to feel it.

And what I find is for some clients that when you start feeling that action of shrugging and using that approach VZ it's easier to let go because you get more conscious control of the muscle. So I think it can have value for that too. So we're gonna start in a kneeling position. I'm using a red and blue spring for this. And start with your sternum over the foot bar pressing away. And from this position, no.

Okay. You are going to consciously shrug bringing those shoulder blades up towards your ears and then let it come down. And again, pressing up, elevating those scapula on both sides, pushing hard into that foot bar, and then letting your weight bring them back down again and pressing into the bar, elevating towards your ears and just relax. Try to feel that Trapezius is last time consciously, that as you press away, you feel that aperture, pcs working hard, hard, hard, and then you're slowly relaxing that your pcs as a scapula come down. So come on up and try this. So just feel this position for just a moment. Yes.

And let the weight or scaffold come down to kind of a neutral position. That's nice. And now from here, actively push into the bar and elevate up towards the ears. Yes. Good, good. Good. Now slowly relax and let the scapula come down. And again, pressing the scapula up towards your ears and controlling coming down. And let's see if we can do it without the elbows.

Hyperextending just bend them just a little. Okay. And pressing with that hyper extending. Good. Nice. Up towards those ears. That's it. And control coming down. And last one, really try to fill that up. Motion of the scalp.

That's the best one yet. Yes. Nice. And then letting it come right back down on your back.

Chapter 10

Diagonal Shoulder External Rotation

Thank you. So now we're switching gears. We've been focusing on scapular muscles and now we're gonna start working with the rotator cuff.

So exercise number six is diagonal shoulder external rotation. And this uses some of the concepts that had been used in physical therapy for many years of p and f type patterns where instead of it being one plane, we're using multiple planes and basically research has shown that using these multiple planes, both for external and internal rotation is very effective at recruiting the rotator cuff. So that's the kind of theory behind what we're doing. And so I want you to think about that when you try that rather than this and this that it's a continuous rotation as you go across the diagonal. So market with me once and have your hand down by your thigh and rotate as you're rotating, you're bringing it up to shoulder height and then internally rotating and bringing it across your body back down to your thigh once more, rotate slowly as you bring it on, a diagonal up and then internally rotating grappling cause you come across nice.

Yes. So that's the concept and you're going to start with a really low spring. With this, I usually start with the yellow or a blue. Okay. So that you can really focus on that diagonal pattern where our hand is on the opposite thigh.

And from here I'm going to combine that rotation and then reverse it to come back to my starting position as externally rotate as I bring it to shoulder height. So 90 90 about. And then coming back to the opposite thigh. Really try to feel a pulling motion and focus on the rotator cuff, the back of the shoulder working. See if you can feel less of the deltoid and more lower down in that rotator cuff working. And you should feel that the intensity of the exercise increases low ripe between the Scapula and the back of the arm working and then controlling the return back.

So let's have someone come up and try. Okay, yes. And try to feel about a 90 degree angle here. And I'm going to just mark it with you once as you rotate, try to feel that happen, right. And then come back again so that it's a continuous rotation. So yes, that's it. That's it. That's it. Nice.

So it reaches that full rotation right when it's by your shoulder and come back all the way to your and now rotate, rotate, rotate, and come back. That's it. And come forward. Now before this next one, all the way here, what I want you to try to do is not elevate quite so much and see if you can feel it lower. So here, if we're kind of think about your, this flat part, if you go back, this is the spine of the Scapula. Right below. If you're working with clients, you want to feel the muscle working right here. So less less up here, right? And really focus right here. Take your time, rotate. Find this. That's it. Pulling the back of the arm to here. That's better. And then coming back to return all the way to the other side. Now take your time, relax this and take your time slowly, slowly. Right here. More here.

More here. More here. Yes, that was the best one. And come back to your starting position. Good. So do you feel that low and deep? Good. Nice. And so there's really a difference in sensation between feeling it on the uh, superficially with the posterior deltoid, which externally rotates and lower and deeper. And that's what I'm going for,

Chapter 11

External Rotation Variation

that rotator cuff working. So our next exercise is a continuation on that theme. So it's another variation.

Another exercise you can use for external rotation and kind of the other one worked one arm at a time in that diagonal pattern. So it has those advantages. This one works both at the same time. And the advantage of that is that you can't twist away from it and use other muscles, substitute other muscles as easily. Disadvantage is that you might be stronger on one side and so you're going to help more with one side. But I find that it's one that you can really help your clients find that rotator cuff. So we're going to start with a red spring and rotate with the palms facing up and the elbows by your side.

So we're just doing this simple external rotation movement first. And I want you to try to feel that you are rotating equally with the right and the left side. And then after you've done that, you've reached that point where you feel you can't rotate anymore, you're going to reach back and down and then come back in. So equal rotation, elbow, staying by your side. And then from here, reaching back and down, try to feel those muscles working very deep, that rotator cuff lower below the deltoid.

Hold that position to feel it just a little bit more and come back in. Um, I think of right there. Yeah, I think you'll be good right there. [inaudible] and we're going to start with the elbows right by your sides. And the first thing you really want to think about with this exercise is that you're pivoting at the elbow that you're rotating along the long axis of the humerus and the elbows are staying close in. Thank you. And come back again to your starting position.

So it's a very simple rotation rather than abduction coming away. That's nice and coming forward. Now the second thing I want you to think about is trying to lower it. So I want you to try to feel, here's your spine really low here. You're pulling the back of the humerus towards here as you rotate.

Good. Really deep. Really deep. Nice. Do you feel that good and come back. And same thing on the other side. Trying to feel it really low and deep. Nice. Good. And come back.

And now you're going to add the reach and tell me if you want me to drop the springs. What do you want it for? The reach. Yeah. Yes. And so when you start finding those muscles, it gets harder, which is, which is great. And so here you're an externally rotate. Good. That's it. And now as you reach back, think of reaching back. You can low right here, make that work, make that work. Good. Nice. Elbows bend and come back to your starting position first.

Feel that pivot. No movement of the elbows. They're not going out. That's it. And now from here, as you reach back, keep this activated. Keep the ribs in as you reach down and back for the back with those thumbs for the back of the SAMHSA, that hyper extending the elbows. Bend the Elvis just a little, little more. That's it. That's it. And bend the elbows and come in less time.

Yes. Good. And here, keeping this solid connected as you rotate, pivoting, nice. [inaudible]. And then from there, keeping that active on both sides as you reach back, back, back, back. Keep the ribbon, but pull back further. You can do it. That's it. Best one. And almost bend and come back in. Nice job.

Chapter 12

Internal Rotation

Good, good. You're welcome. So our next exercise is for internal rotation versus external rotation.

And remember that we talked about in the lecture that there are many muscles, the pecs, the deltoid that produce internal rotation. And what the studies have shown is that when we do a lot of the classic internal rotation exercises with bands or on the reformer like this, that we tend to get those larger muscles. And so in contrast, this diagonal pattern has been shown to activate that Subscapularis, that deep muscle of the rotator cuff more effectively. So that's why we're doing this exercise. But to help it be more effective, I think it's helpful to think of that line of Paul.

So that subscapularis is underneath the Scapula, comes forward and attaches to the front of the humerus here. So we're going to do that same diagonal pattern only starting from up this time. And I want you to think about the distance between the underside of your scapula and your humerus getting shorter. So market with me once your arm is here, 90 90 about and you're going to come across to put something in your pocket, right? And then externally rotate to go back to your starting position and come across deep, deep feeling that muscle work under the armpit. Yes. And coming back.

So between the bottom side of the scapula and the humerus. So that's the pattern that we're going to be doing in this exercise. It's a different feeling and you'd have to play with positioning so that you don't hit your face. So in this position, continuous internal rotation as I come across to my hip, continuous x ternal rotation, as I returned to the starting position, I'm a very light spring yellow spring just to teach this and then usually go up to blue and coming across to the opposite hip. And reversing that to return to your starting position.

Now really think of that smooth internal rotation, continuous, continuous, continuous, continuous, so that it doesn't fish finish until the very end and the same thing going back that it's slowly extremely rotating. And last, remember you're going to think about very deep, the undersurface of the scapular to the front of your humorous, very deep muscle working to generate this movement and returning to your starting position. Good. So yes, in this starting, really try to feel that 99 again. So you're going to bring this elbow down a little bit so it's right in line with both shoulders. And now I'm going to bring your knees just a little further away and your legs up still a little bit more just so you have room to get your hand across. Now from here, your internally rotating as you come across to this side and then returning two years. Yes. And now try to make the rotation more continuous.

So intern, that's nice. Internally rotating, keep the elbow bent a little bit more. A Huh? Come across your body more. That's the diagonal. And then here externally, rotate sooner so that it meets the final at the very end here. Think of pivoting right around. Yeah, Miss Elbow. That's it. As you go across better, that's nice. And then returning that smooth rotation. Now let's try to focus on the deeper muscle and bring your ribs down.

Just the teeniest bit and I want you to think about under that Scapula, right? Go into your humorous, very deep here. Try to feel that getting shorter. Between here and here. Yes. Deep, deep, deep right here. [inaudible] do you feel that? And then coming back, making it work smooth. East centric, controlled contraction and deep started right under that Scapula. I feel it working. Nice coming across and return.

And this is one where you can actually put your fingertips under the shoulder blade and feel the subscapularus firing, activating and get. Give that tactile cue to help someone to find the muscle.

Chapter 13

Arms Side Plus Curl Back

Thank you. Okay, so the last four exercises that we're going to do our switching. So we did scapulary, we did rotator cuff, and now we're picking one for each of the major directions of the large muscles of the shoulder. So our first one is armed side plus curl back.

And so if you think of that movement, it's going to be shoulder. What? Shoulder? Abductors right? We're strengthening the shoulder. Abductors they'll, you can do it with your palms facing this way, but we're gonna do it in our scaption position. So our arms are going to be a little bit forward. We're going to not come all the way up to 90 degrees. And so that we're combining strengthening the shoulder abductors and the scapular upward rotators.

And the reason that I'm doing that is because a lot of people that have shoulder problems aggravated by abduction higher than even 45 to 60 degrees. And this stomach position helps protect the shoulder. So it's a good variation to have in your pocket to use for your clients. So the reason we're curling back is if I do the exercise here, it's going to be horizontal abduction versus if I'm curling back, I'm going to be in a line of poleward. It's going to be more pure abduction. So back of the waistband is on the carriage.

And from here bringing the arms a little bit forward, that thumb up position, and I'm going just partway up to about 60 degrees and arms are going side, keeping that thumb up position, thinking about the Scapula, upwardly rotating as my arms go side. And as people get stronger, I allow them to go to 90 degrees with this one more time. Shoulder blades reaching side and rotating and returning to sitting. So I often, when I teach this, do six reps come up for a little break for the abdominals and then come back down and do six again. And I want to work with that idea of stabilizing what the abdominals as you're using your arms. So I'm combining that principle with it too.

So come on up. Yes. So we're starting with tension on the springs just says she has and that thumb up position and you're good. But if your arms were here, right, that would be pure abduction. And she's coming a little bit forward for that scaption position. And as she goes side thinking about keeping that upward rotation.

Good. That's far enough. And then come back down again and reaching as you go. Try to feel that scapula rotate that said you can go even a little less far [inaudible] and come back down all the way to your sites. And here rotate. Reach out with those. That's nice. And come back again. And now I'm going to put my finger here and I want you to try to feel the scapular rotating sooner. That's it. That's it. That's far enough.

And come back down. Okay, one last one. Start that scapula reach here. Rotate on both sides. Way Out. That's it. And come down. Do you feel that relationship? Yes. Good. Nice. And Go ahead and sit up. So we're really trying to work not only just the top of the shoulder working right, the superspinatus and middle deltoid, but that scapular coordination. Nice job. Big Difference.

Chapter 14

Supine Pull Down

You felt that good, good, great. You're welcome. So exercise number 10 is supine. Pull down. So we just did an exercise for the shoulder ab doctors. Now we're doing one for the shoulder, 80 doctors, adductors. Bringing the arms to your sides.

And in this exercise variation, we're going to again, use that thumb up position to help protect the shoulder. As we bring the arms down though, we're going to rotate. So the palms face in. So in that last about 45 degrees, so about halfway down you're gonna come to rotate, rotated in, and then go to externally rotated. And this is an exercise that over time if people don't have discomfort and as it gets stronger, I would increase their range to all the way in overhead position. But the protection id that's important is we're extremely rotated in the high ranges.

And then in the safer ranges we allow that motion of coming into internal rotation. Now when we talk about Ad Duction, it actually involves pairing of other muscles is different than the Phi where we have a whole group of muscles, the adductors that do that motion. But here we take something from the front and the back and put them together, such as, uh, the pectoralis major and the logist Ms. Dorsey. And I just mentioned that because there are some people that don't feel we need to do this as an abduction, as an extra exercise because you're already getting those muscles with other directions. Other people feel that it's important because one of the adductors is the Latinx, Ms. Dorsey and the Latissimus Dorsi.

That very broad muscle that we looked at earlier is considered very important for core stability as well as for shoulder movements. And so I do think it's helpful to include this and as you include it, to try to encourage people to find that which has Ms. Dorsey and activate it rather than using just the muscles of the upper shoulder, the anterior and posterior deltoid together. So the lats form this back part of the armpit, right? So if you lift your arm up for just a minute and think about pressing down, you'll feel it's part of the muscle that shows up in the back there and you can find that muscle. And that's what is helpful when you do this exercise to think about pulling down what that muscle and then pulling your arm down to activate it.

So we're starting with our red spring on this and tabletop and I want you to try to feel that sensation before you even begin of activating the lats and stabilizing the ribs. So I'm going to come down to this position with a thumbs up and before I go, think about pulling down a little bit with the lats and then packs and lats are working together. As I come down, as I go back up, I allow that external rotation to occur. And as I start down I keep that external rotation trying to feel a and pecs and then internally rotate towards the end and repeat that process. And another thing to really consider here as, as well as keeping the rib stabilized, is to try to feel the scapula are moving, but to try to fill that the shoulders are still reaching wide as you do the exercise. Rather than that you're rounding them forward that that the scapula are stained against the carriage as they rotate and reaching the shoulders wide as you go overhead.

Okay. And this is an exercise that people that have rolled shoulders really tend to bring the head of the humorous for it. So keeping that wildness in the scapula against the carriage is really important. So can I have a demo? Okay. Yes. And so in this position, I want you for a moment to really feel the front and the back of your shoulder a pie.

And now I want you to think about pushing down against my hands. Just stay right there and can you feel them under the armpit working that lap? Good. Now keep that lat working as you bring your arms down to your side. Keep it working. Yes. Nice. Keep it working.

Keep it working and come to that internally rotated position. And now going side arms are going side and reaching out. Think of that tee broad position with your arms. Nice. Now right here, that rib is staying down, connected to your core, back of the armpit, working as the front works with it. Nice, Nice. Keep powerful, powerful, powerful. That's it. And come down and returned your starting position.

And now try to feel the difference of just doing it with your top of your shoulder. Now just bring the think of moving from your arms and feel how much strength, less strength you'd have. Yes. And come back up. Find that t position, that strong position and again, pulled down with the lots without the ribs going forward. That's it. And now back in the armpit, front of the armpit, squeezing by your sides. Did you come down good and returning, reaching those arms out to this side.

Feeling no scapula wide against the carriage last time pulling down. Yes. Excellent. And reaching a little bit internal rotation at the end and coming back up wide.

Chapter 15

Bicep Lift

Scapula with the ribs. Still staying connected. Good. Thank you. So exercise number 11 we have biceps plus lift and this is combining the shoulder flexors and the elbow flexors so that we can get two areas with one exercise. It does change as the arms go higher, but in this first part, what I want you to really focus on is bringing your forearms so they're parallel to the floor.

And then once you reach that position that you're reaching the arms forward and up, using those shoulder flexors and then returning so that the forearms are parallel and then almost straightened. You're not going to fully straighten with this exercise because I want you to avoid the LPL hyperextension but almost straighten. Okay. Now I'm going to show this two ways sitting in kneeling, I usually teach it sitting on a box, a if you want to not worry about clearing the sides or sitting on the carriage and you have to have your elbows out a little bit to clear the sides and then later do it in a kneeling position where you add the challenge of stabilization. And I progress most of these shoulder exercises to kneeling for my more advanced clients so that you add that stabilization challenge. And so in the our sitting version, the back is to the shoulder rests.

And again, I want tension on the straps to begin with. Just that little bit of bend in the starting position. And from here we're coming to where those elbows are about parallel and then reaching forward. And it's really easy to want to lean back with this exercise and opening to almost straight. So and right from here. Think about reaching forward and up and returning to your starting position.

Elbows, bend, arms reach forward and back. Last one, elbows bend and reach forward. And for our kneeling version, okay, you are going to position yourself so that your feet are against the shoulder rests and bring the bottom of the pelvis really forward. And this position is gonna feel like you're gonna fall. And the same idea that form parallel to the ground and then reaching up, trying to keep the torso as still as you can, challenging in this position and forms and reaching forward and coming back. Last one. Forms reaching forward and back. So I'm going to have someone come up and do the sitting version so that I can correct you on the pattern without throwing your balance off.

Good. So you're yes. Sitting with your back to this. I know you want to do it in kneeling. Yeah. And then strap and each hand. Yes. And from him. Yes. So there's tension.

Okay. [inaudible] just that little bit of bend and Nice. So you really want to feel that lift behind the ears and now bending to parallel. That's it. Now as you go forward, think of reaching forward with those fingers as you still left here. Nice. And then bend, so they're parallel and then open back again. Okay.

And Bend and rib stain in reaching up. That's it. Nice. Good, good, good, good. And elbows back and open. Last one. Really tall the whole time. Keeping connection, feeling the front of the shoulder, working here as you reach forward. Nice and bend and come back. And so I think you can feel it as much as stabilization exercise, right as a shoulder exercise that it's really challenging and even more so as you kneel. And that's one of the things I, I really like about shoulder exercises. Is that it, it's more than just shoulder strength in the right.

Chapter 16

Tricep Kick Back

It works on that whole integration. Of course. Stability too. Thank you. So number 12 our last exercise for today is triceps kickback. And so this is the opposite, right? Of the exercise that we just did. And I would for the last one in this exercise, I usually use one red spring. Again, we can start with sitting on the carriage sitting on the box and then progress to kneeling. Again.

The arms have to go a little bit side to clear the frame. If you're not using a box. The challenge that I want you to work on, what this says is that as you straighten, I want you to keep those palms facing forward. Yeah. So arms are pulling back.

We're again trying to go for that approximately parallel to the ground. Think of your elbow staying there as you then extend with the palms facing front and going forward. Once more elbows come back, shoulder blade slightly down and together. And then from there, elbows are trying to remain where they are. As you straighten, bend, and return to your starting position from the kneeling. This is more challenging than the biceps lifts because it makes you feel like you're going to fall forward. And I think you'll find that your hamstrings get really tired in this kneeling version as stabilizers. So grabbing up on this, bringing those elbows back, same idea. Uh, risk staying front as you extend and then going forward.

But there's a tendency to lean forward and you have to use the glutes and the hamstrings to bring the bottom of the pelvis forward. And from here led, shorten the straps a little bit. I'll try it here. Pulling back. Yeah. And then extend and bend and forward once more, pulling and extend and bend and forward.

So most people are stronger. Okay. When they extend by doing this motion s so it takes a lot of focus to keep that palm facing front rather than that pronation occurring. So we're gonna practice this one city and from here, finding that starting position, elbows are pulling back to about parallel. And I'm going to take you a little further back because I know you're strong enough. Yes.

Now think of your elbow pressing against my hands so it stays there as you extend those arms. Good. And now bend and then go forward. Really a pulling motion, right? So elbows pull back, elbow stays there as the arms go back, wrist stain, front, nice elbows, band, and then go forward and coming back. Good. And here, keeping that elbow there, opening, going back without hyperextending stopping just a little sooner. That's perfect. And then bend and forward. Very last one. Nice and smooth. Now that you have the pattern here and extend. Good.

And Bend and forward. Nice job. Thank you. Hmm. So to summarize just a moment, if we think about what we talked about today, I think it's really important to expand our view. When we think about strengthening the shoulder, we think about the arm section of our workout and to think of it in three categories so that are we addressing the scapular muscles, are we addressing the rotator cuff, and then what balance do we have in the shoulder muscles that we're using?

As I mentioned earlier, one of the easy ways to, to kind of address this is look at programs that you use regularly and pick them apart. And I think you'll find from many of them, you just have to add one or two exercises to make it complete. And then if you have a client that comes in that has a history of shoulder problems, this is an area they want to focus on or are they're a swimmer and they have lots of rolled shoulders or they have winged scapula. Then I would spend more time on really doing the individual components. But basically as the name of the topic of of this today was the basic five, I want you to think about including at least for the shrugs being the controversial one, at least those four exercises in every workout and then including at least something for external rotation and each of your workouts internal being depending on the client and then last, look at what you're already doing for shoulder and make sure you have something for flection, something for extension and abduction is the one that's often neglected and make sure that you have something for abduction. If someone has any discomfort, remember that sum up can often help and keeping the range smaller, just going to 60 degrees or even less. That pain free range can be a very easy solution to that problem.

And not only is this important in terms of balance, but there is a lot I feel that we can do as these practitioners and helping prevent shoulder problems. There's an amazing number of surgeries that are done on people that have shoulder problems. There's some studies showing that as people age 75 80 85% have degenerative changes in the rotator cuff and I feel strongly that we can prevent a lot of that by being proactive and starting to work with both the scapular muscles, the rotator cuff and that fine technique cues and plots is such a perfect environment for that because we already are paying attention to ribs and placement and we're just adding a little bit more fine tuning in terms of how we think about that Scapula, is it rotating without excessive elevation? Is it delayed or is it moving nice and smoothly, but just fine tuning. Taking a little bit more time to focus on that area can offer tremendous benefits for your client. So with that, I'd like to thank all of you for coming and wish you happy. Shoulders, healthy shoulders and that you can help many.

A client in the future to prevent shoulder injuries or help them with return to activity. Thank you.

Continuing Education Credits

If you complete this workshop, you will earn:

2.0 credits from Pilates Association Australia (PAA)

The Pilates Association Australia (PAA) is an independent and not-for-profit organization established by the Pilates industry as a regulatory body for control of quality instruction, member support, and integrity within all legitimate approaches to the Pilates Method.

3.0 credits from National Pilates Certification Program (NPCP)

The National Pilates Certification Program is accredited by the National Commission for Certifying Agencies (NCCA)

Comments

Hello; I notice that this workshop suggest a reformer is necessary. Would the workshop still be of use if I currently teach mat classes only? I also have a class for older adults which attracted me to it...
Many thanks (and a Happy New Year)!

Sarah
1 person likes this.
Sarah Edwards at Positive Pilates Solihull ~ Karen does show a few examples of exercises on the Reformer, but the concepts can definitely be applied to the Mat. She doesn't use the Reformer the entire time so you would still get a lot of valuable information. I hope you enjoy it!
Bruce C
Dear teacher , Thank you for your wonderful class .
This class for myself to say have myriad benefit .
May I ask you to tell pilatesanytime.com to add subtitles to this video?
Thank you so much .
I very much enjoyed this workshop.  Even after years of teaching Pilates, I felt this organized my shoulder knowledge much better than it was.  Thank you, Karen, for always being such an edifying teacher!  I have one question if you are still monitoring this workshop.  If I am abducted, laterally rotated, and extended at the shoulder (as when reaching through the front seats to the back seat of a car) and load that (as when picking up a 5 lb package off the back seat), would pain in the front of the shoulder at the anterior deltoid probably because that muscle needs to be strenghened more?  Or, is this just a generally poor position to have your shoulder in when you load it?  And how does loading in this position differ from stretching in that position (I.e., holding 2 door frames and leaning forward )?
Thanks!
How can I get the notes?
Hi Josephine, The notes are in a PDF link underneath the workshop description. If you are still having trouble locating it, please email us at support@pilatesanytime.com 
Joanna G
Hello, once I purchase this workshop, do I have a permanent  access to it or is it only once off and I need to watch in one go? Thank you. 
Such a wonderful workshop, I learnt a lot - thanks Karen, I love your courses! 
What wonderful workshop. It helped me understand the finer points of some of the exercises. I Will be tweaking my clients arms series to get all the areas. Thank you PA & Karen
Karen Clippinger thank you so much for this great workshop. 
I have already made my first session with a patient with shoulder disharmony on my insta profile. the result is great...
1-10 of 11

You need to be a subscriber to post a comment.

Please Log In or Create an Account to start your free trial.

Footer Pilates Anytime Logo

Move With Us

Experience Pilates. Experience life.

Let's Begin