Description
About This Video
Transcript
Read Full Transcript
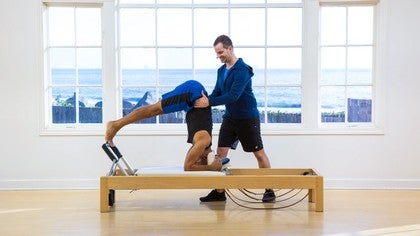
Hi everyone. I'm Benjamin Degenhart's hearts and I'm here with my good friend Steven for another tutorial on a advanced reformer exercise. We're tackling the headstand going upside down and it's an exercise that we see in a lot of the archival teaching. Um, and it's often left out in modern teaching for obvious reasons. It's a little tricky to set up, but I actually believe that if you're successful in most of your reform or work, specifically your up stretch, um, if you appreciate the traction you get through the back of your neck and exercises like the neck pole, then you will actually really get a kick out of this one. And specifically, if you also have a yoga practice where headstands are much more common, this exercise can really help you be more successful in line in your headstand. Um, a couple of things logistically before we go into this. Um, the headstand front is one of three different headstands in the original polarities work and it's the most accessible one.
So we're going to focus on that for starters. We're in a grads apparatus here with two springs set up and you'll see a bunch of accessories right here on the headpiece and there's two and I'll point out why there's two different ones. Um, these are both sticky mats, but I chose one that really is thin and make sure that we're not sliding off the carriage because that would not be a good idea in this exercise, the head pieces lifted so that we have a little nook to press against with the crown of our head so that our head pieces not flat for us to slide over again, but we don't want to put our head or our hair onto the sticky mat. So we're using something that's a little cushiony. You can use a towel, you can use a pillow, you can use something that is a little thicker and not as Abrasive as the thin rubber mats typically are. So that is going to be our setup. All right, the foot bar is lifted because that's where feet are going to be perched up against. And we're going to hold most of our body weight on our feet as well as either our hands or our forearms so that the amount of way that lands on the top of your head is very minimal. All right? We're looking for is a little bit of traction through the neck and learn how to use our center to bring ourselves into a completely inverted position later on.
So we will take our heads down off the a reformer as well and onto the math. But we'll start right here. Seeing what Joseph [inaudible] had in mind when he brought a headstand through the reformer. All right? First we have to see what the right position for his hands is. Uh, depends a little bit on your shoulder mobility as well as your upper body strength. The way you set yourself up, you stand to the side of the reformer, you place your hands around the sides of the shoulder blocks and you can sort of l shape or bring your l shape your hands or bring your forms all the way onto the carriage of the reformer, the crown of the head. The center goes right into the crease of the head rest and as you bend down you want to look towards the center of the foot bar so that you know where to place your nearest third rate against the center.
You pick your hips up to place the other foot. At this point there is no tension on the springs. The carriage is in place and he's holding most of his weight into his arms. And a good to check in with that is to see whether the person can speak. Can you say your name for us? Steven Washington or heard that loud and clear.
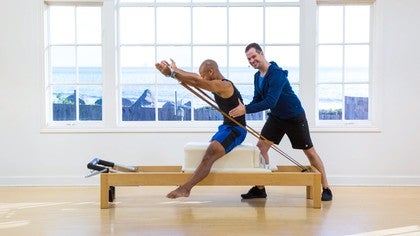
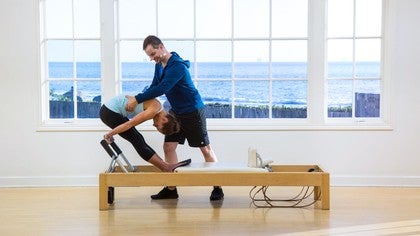
So I know the passageway for his breath is not constricted and his neck is free and his head is not bearing too much weight, which I won so far. So good. Now from here, like in the up stretch, he's using his arms against the carriage and his feet against the foot bar to begin pulling the springs apart. We begin to move the carriage forward and down. Like in the up stretch, the tailbone is lengthening towards the heels beginning that c curve to the farthest point available. He keeps pushing out as a center is starting to lift him back up, right? So this is an important piece of this. Go right back into it. When you're ready, keep your neck nice and long and free your arms, super strong.
Whatever effort he puts into getting these springs open, the outward push of feed against arms is maintained as a center of pics arb to pull him all the way back in. This is what will help you with your actual headstand. Later on, we'll do one more like that just to see if we can increase the range of motion, right, because he bends his spine nascent evenly. The traction really lands in the back of his neck right there. His central picks him back up just like a polar on the wonder chair, or you return from an up stretch or the snake. He keeps his eyes on the foot bar as he takes one foot down to the ground.
Once the other foot comes down as well, his head is now free for him to center himself and roll himself up to just reorganize the body, taking some time there to come back up to standing. All right, so there's a lot less crazy than it looks. I hope you agree. We're going to take this to the mat now to see how this informs the way that you would practice a headstand or wait from the reformer. All right, so here we are on the mat, practicing the head stand away from the reformer. Now this is not necessarily part of a proper Polonius practice, but a lot of you may work with headstands in your, in your movement experiences. So we'll just see how everything we just learned from the reformer about the headstand translates for doing it away from the polite his equipment.
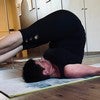
So he's going to be down on his knees because he was able to get his forearms and elbows completely onto the character. We're going to use that same technique here. He's going to make a cradle by interlocking his hands. I always suggest leaving your bottom fingers unhooked so that you can get both of your bottom fingers onto the mat without putting any weight down into those. The crown of his head is going to cradle right against that little space he's creating with his palms. He tucks his toes under any pikes. His hips up.
First Order of business is to try and get a straight align as possible, and he's doing an awesome job here. Now, just like on the reformer, what's important to me is that his elbows are participatory in the exercise he's pressing down and he's using the same technique of lifting from the center to draw one knee into the chest, and let's try to keep that other leg straight now and pick it straight up towards the ceiling. Good or unfold both legs, and I'm right here to give him a little bit of support. Now, just like on the reformer, want him to send his tail towards the heels to find that length in his lower back. And just like on the reformer when he returned the carriage, he's using a center as he brings his free leg down towards the ground. You choose which one there you go to then control the return fully down both feet on the ground. He can bend his knees, he slowly rolls himself back up. And that is how the mechanics of how the reformer informs your headstands can translate into a full headstand practice.
The Pilates Essentials: Exercise Breakdown Tutorials
Comments
 ). Really appreciate the explanation of what musculature & systems should be working and how.
 Thank you, Benjamin and Steven!
You need to be a subscriber to post a comment.
Please Log In or Create an Account to start your free trial.
