Description
About This Video
Transcript
Read Full Transcript
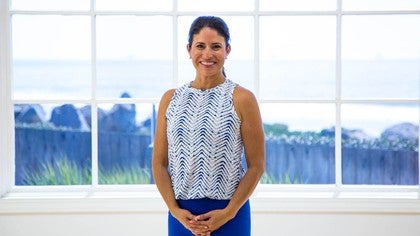
Hi, I'm Monica Wilson and I have had the pleasure of working with my good friend Tara Roadie who has a weak back and hip dysplasia. We are working to strengthen her glutes and her hips and overall her powerhouse was the most important thing. I was inspired to teach this class series. Well, every class that I teach by my great aunt Romana, Krisha Nasco, she had a way of making you feel really known. I mean really known like she was listening to you. She took the time to understand where you were coming from, what your injuries were, how you felt, and she really made you feel secure and taken care of.
She used her common sense, great intuition and of course all of the knowledge and exercises that Joseph plies and trusted to her. When you were with Romana, you knew you were in good hands literally, and I'm going to go over some spotting and hand placement in a little bit, but this series is a little different than just the real black and white status quo. I am teaching someone that I took time to get to know. It's heavily communicating with your client. It's a drawing from all your tool belt of everything that you know. It's really using a lot of intuition and not just black and white. But having said that, I want to give you the tips and tools that you need to teach someone with a weak back and for this class series.
So we're going to go over a few rules of thumb. First of all, absolutely no rolling, no twisting and no arching. Why well rolling is going to be jarring to the back and that's going to be ouch. Twisting is going to twist a weak joint, which again is going to be ouch. And the majority of people when they have a back injury feel okay rounding but do not feel okay arching. There is a small percentage of people, that's the reverse. But we're going to go with the majority here unless your client tells you otherwise, unless they say, oh, it's awful when I touch my toes.
But great when I do, I'll walk down backwards on the wall. So you can do need to talk to your client, but those are the three main rules of thumb when working with someone with a weak back. So how should you approach someone with a weak back? So say you know you have a client coming in, you want to start observing them from the moment they come into the studio, you want to observe their gait and their posture when they're entering the studio. It do their feet, leave the ground, or there's shuffling and sliding. Are they standing on one hip? When they talk to someone, do they lean their hips forward?
Do they fall back with their lower back? All kinds of different cues that are going to tell you what are the stress points? What are their weak points in their body that you're going to need to design a system to help them with? You also want observed them when they sit and they're filling out your forms or talking with someone, do they talk a lot with their head or just don't move a lot? Their arms. You just want to observe everything so that you really do get to know your client. And are going to be able to design the right system for them.
Once you finally get to meet your client and you're starting to work with them, you want to make them feel really secure. So you're going to check their range of motion. Just like I checked Tara's range of motion. How was it when I moved her arms that it hurt her shoulder? Maybe she's only telling me about two injuries. This happens a lot, but other things actually bother them.
And so even though they haven't mentioned it, you want to check all the range of motion, whether it's still lift their head up or not for the neck, how there are men shoulder move, whether their hip or knee, how that moves, and of course their back. So you do all of this with them lying flat on their back, their knees bent in their head down, and you can watch Tara's first video. The first about 12 minutes is me checking her range of motion while you're checking their range of motion. You want to start learning and getting to know your client. So here's your chance to inquire and take note.
You want to invest in their wellbeing. So while you're checking their range of motion, you want to give them your full attention and ask them questions that will help you learn more about what feels good to them, what hurts them. But in other words, what movements hurts them and what seems like, Oh yeah though that one's okay, that you want to just really get to know your client and let them feel that you have given them your full attention. So what's next? Safety. Safety is always first. We're going to be personalizing a system for them that will keep them safe.
Your client is coming to you for help and they want to feel safe so they're putting their pain in your hands and you want to make sure that you do not leave them in a vulnerable position, that the exercises you choose for them are going to be strengthening them, stretching them, and not aggravating their injury. After safety, we have challenge challenging your client so that they feel capable, not injured. It is up to you to dig into your tool belt, rely on your training and choose the right exercises. And apparatuses which will challenge him or her and get them feeling their supporting muscles. Again, during the session, you will notice that I speak a lot with Tara, that I am constantly getting her feedback and asking her how that felt. So you want to keep checking in with your client. Anything bother you, anything hurt? Did you feel your powerhouse? How was that stretch? Are you using your arm muscles?
All of these questions so that also they stop thinking only about the pain or the injury, but they start realizing, wow, I'm really getting a workout here and I'm moving and I'm okay, and it feels good. Building that confidence and trust with your client. Next I want you to push your client a little bit. I hesitate when saying that because we don't want them to feel any pain at all. It definitely no pain, no gain is not my philosophy and I don't want your client to feel that way, but you do want to challenge them when you're strengthening them. So challenge them in every exercise to engage the right muscles that will lead to strengthening their entire body and as well as supporting their injury.
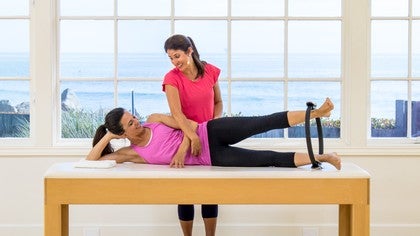
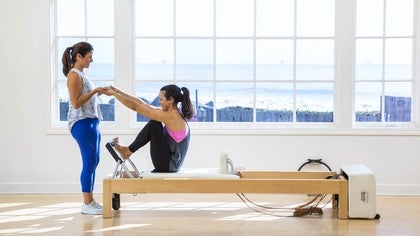
The exercises you have chosen for them are safe, right, and they're intended to strengthen them. So in those exercises, be sure to challenge them to their full potential flow. Keep them moving during transitions while you assess them while you check in with them, they are there for a workout. Some might need more assurance or breaks, but in the end your job is to lovingly keep them moving and give them a polite session. Aim to give them only one. Yes, one verbal cue. The rest you're going to be doing with spotting and hand placement to communicate how else you want their body to move. It's important to use only one cue because you want them to feel successful and that they've done a really great job, not that they failed that five to 10 qs spotting.
I like to use proper hand placement to support and help my client move safely during transitions. During the exercise. This keeps up their flow as well as assures them that I have them. Be careful not to smother or manhandle them. Use your hand selectively to help them trigger certain muscle groups as well as achieve the proper alignment. So those are all my helpful tips for teaching someone with a weak back.
Keep in mind once again that I knew Tara intimately and I took the time to get to know her injury and I hope you observed that when you look at this class series, see all the questions that I ask her and where my hand spotting is and what flow and maybe even the exercises that I choose to work with her. I got all of this from my tool belt from Romana Christian Alsco. I'm sure you had fantastic training as well, so I wish you great success in teaching someone with a weak back.
Back Care: Back Care for Beginners
Comments
You need to be a subscriber to post a comment.
Please Log In or Create an Account to start your free trial.


