Description
About This Video
Transcript
Read Full Transcript
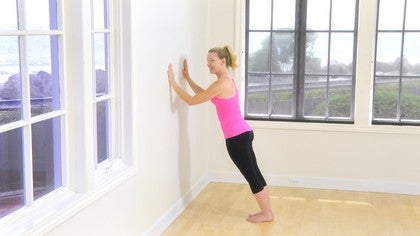
Hi everyone, it's Amy and I am here at the wall and I've got, you know, a few things. Plan what I'm using the wall for. What if it's a day? You just don't feel like getting down on the mat and doing any thing on the ground and you, you know, you've got a short window of time and you want to maybe stretch your chest. You've been sitting all day, even stuck in a car on a plane. You can do this in the hotel dining room. You know, anywhere really at home where you have a wall. So I have a pretty pretty good chunk. You need a, an arm span.
So whatever your arm span is and it's really focused on upper, upper body. So your chest, your shoulders, your spine, and your back. So we're going to start, I want you to turn around, put your back against the wall, step away from the wall about a foot. I'm five three. This works for my uh, spacing. Palladio's v works well, but you can also stand in parallel.
And I do want everyone though to stand with the knees slightly bent, uh, initially anyway, and let's just check in on our back and do a little scam. So back of pelvis absolutely has to be flat on the wall. I don't want any of us to be rolled under with the pelvis though. So just, just your pelvis, your sacrum, that flat part on the back of the spine, pelvis. So then for me, because I have a little bit more of a gap here, um, it's then some, I want to minimize the gap but not get rid of it completely. So how to minimize that. I first want to think of lengthening that space. So how do I do that?
I really think up through my head and a little bit down my tail, but if I do too much tail, I could curl it. So it's not that, it's not that. It's really then more length. Okay. Then also then the contents of your stomach or your abdominals to, to come toward the wall. That may or may not diminish it completely. It minimized mine, but I don't want to get rid of it completely. Uh, for fear. I might move my pelvis. I don't want to do that.
Then I'm moving up my spine and my back. I definitely want my ribs on the wall. Uh, I'm going to show you what that means without, so that might be my ribs forward of the wall, increasing the space. So back against the wall, shoulder blades. Now let's identify those. Just kind of do what I'm doing. I'm just moving those shoulder bones, the back of the shoulders and those bony bones, the scapula toward the wall. Now, depending on your body shape and design, spine shape and design, you may have shoulder blades that are more sloped forward naturally.
That's what I've got. Some people out there watching, have more pointy shoulder blades that are right now intersecting the wall, probably pretty firm. It's just what you've got. So ideally there, lightly touching the wall. Okay, now and then your head is on the wall. All of that. Let's raise our arms forward now as you raise your arms forward, right in line with your shoulders, not higher, the lower, what did the shoulder blades do? Did come forward into more slope. Did they poke back more? Try to again lightly touch the wall with the back of your shoulders and just take a moment. Keep working the contents to the wall here.
So what I want us to do is just some easy open close of the arm. So right away I'm going to open, which is putting a stretch across the front line of my chest to my fingertips. But I'm keeping in mind my ribs on the wall, my shoulder blades, lightly touching. And then arms are going to come in front four times total. We don't need many. Still concentrating on the height of the spine. You're going to feel your back muscles working on this class during this class quite a bit. And it's not mandatory that the fingertips get to the wall, but uh, that would be a goal. So depending on how tight or you know, short your chest musculature is and arm muscles, your arms might stop here.
And that's perfect for you. I wouldn't go any further. If you sacrifice your body placement, you're on alignment. So for today actually was able to get my hands all the way to the wall. It felt pretty good. All right. Next one is arms coming up and down, both at the same time, not too high and down. You're going to go a little bit lower now, and it's to have a, a rhythmic motion of the arms. So if you're starting to feel right between your shoulder blades low, you're on it. We're in the right place. It's okay if you don't.
You'll get their shoulder blades are touching the wall lightly. And I'm noticing I'm not really, I don't want you to talk so much about muscles with yourself. Just feel the bones lightly touching the wall. Ribs against the wall, one at a time. As one goes up, the other one's down and switch.
Don't elevate up towards your head as you're doing these gestures. All right, now I'm going to do something called a little windmill. So one arms up in, one's down, open both out to a t and then let them trade places and center. Reverse it up and open and around. One more each side and up and open.
You could absolutely trace the wall with your fingertips if you have the range in your shoulders and your chest. Then I'm going to do a little w motion, so by turn my palms face, uh, out. Raise my arms up, hitchhike the thumb and bend the elbows. I'm aiming my elbows for my waist, the side of my ribs here, and then I'm going to raise my arms back up. If you saw me from a front view, I'd almost have more like a letter v and then as they bend the elbows, it's like a w, but again, I'm concentrating on where my shoulder blades are touching the wall. They're light, they're not digging in, but they're certainly not forward of the wall. Okay, Amy, one more for right now. This might be a class that you can come back to a few times and check in with yourself. Okay. And see how you progress adding more reps along the way. Well my back feels good right here. All right, so I'm going to next go into a bent elbow position and we're going to talk about more of the movement across the side of the shoulder blade to the rib cage here.
And we're going to glide and get some more movement in that. This plane we did a lot up down. We're going to do no more front back. So elbows are in line with my underarm straight line. You could do a fist or flat hand. This feels good. I'm going to have good posture. Heels together, toes apart. Tommy zipped up.
So here I go. I want to push the wall away and it's almost like I bring my ribs away from the wall, shoulder blades more around my ribs and then shoulder blades more on the back of my rib wall. Shoulderblades toward the side of the rib wall. And you're hoping that these are working the same timing, meaning one arm isn't going before the other one. It's not an uncommon, but we're looking for balance.
The shoulder blades around the back of the ribs. Think of your ribs as a cylinder. And this the shoulder blades are going behind the cylinder silo and around the silo front one more back around the silo in the front. Let's try it with the arm straight. Same action. And then back up just a little bit to accommodate the length I just extended here. Open up that hand. Your wrist will have a wrinkle in it, but let's work on those silo, uh, rotations around. So scapular around, around glide, glide [inaudible], getting mobility in these shoulder blades around working some nice lied. One more. It's the only word I can think of right now for glide.
Okay. Now, action of the elbow. Okay. So if you look at the wall, open your hands up, right? Notice your wrinkle in your wrist. You probably have some wrinkles in the skin. I hope you do should. Now if I lower my self toward the wall, I'm going to start to unrenewable my wrist without rolling the hand sideways or in. Okay. Just lower yourself a couple of times and play with that now. No, the lower you go closer to the wall, the harder it is to push away.
You're going to feel muscles in your arms that you might like to tone. So they're kind of live behind the there. All right and here. So I'm going to now go a little further cause I think I can, I knew I can't and get my form there. No, I don't want to see too long because it's a lot harder to push away if you stay there for awhile. But you could unwrinkled the elbows wrinkle. Now what's going on in the shoulder blades at this point, they are just kind of staying in the same place on the upper back. I'm not letting him come too far forward and I'm certainly not letting him come too far back. We already did that.
Now they stay positioned as we work different muscles in the arms, in different actions. Okay, I'm good for one more right this second. Okay. Now I want you to walk in pretty close, not so close that you're tucking. Your thighs won't touch and depending on your chest and you know breast tissue, you might have to go back a little bit. That's fine. I'm going to go pretty close. My toes are almost there. Now I want to angle those arms again into that little w I did facing away and then just feel my shoulders for a moment there down.
My chest is broad and again, I am angling that elbow in toward my side ribs. All right. Now you're going to do a reach and a reach and an in and an end. Just kind of work on that one. Let's start the other arm.
I like to think about their branches. So if my back where the tree trunk say, okay, now I notice I'm not going real high up this way. I want to stay at these angles and I'm going one more time and I'm going to pause. Okay, now I'm turning away from the wall. I'm gonna Open my right arm away, step out, and slide that hand down the wall until it's in line with the shoulder height. If that does not feel good, you'll know right away it might feel pinchy here. You lower that arm. Okay, I'm not pushing, I'm just setting. I'm gonna stand with my feet, a little wide hip width.
And I want to bend my inside knee, which puts a bit more stretch across my chest line. And I want to reach my hand along the wall. I'm doing four of these now. This shoulder is feeling a little tight today, so I want to lower my arm, fingertips to palm. Okay, you can, uh, as you get more used to that, you can add repetition. So I'm going to start with arms wide.
Turn away about hip width and how far away I go is my hand starts with my palm flat. Okay? So this shoulder is different for me so I can, I can have that shoulder level and it doesn't feel, um, compromised. The other side for me does, I'm working on it. So I am going to bend my inside knee and slide that hand along the wall and in and slide. You don't have to do the knee bend, but it just gets you a little closer to the wall for the next thing. Uh, gradually it will be a bigger stretch that might look like this. You stay close. This, sometimes physical therapists give this to you if you're having shoulder, uh, dysfunction things. So again, this arm is a little high for me today.
This feels better. I'm actually following the line of my chest muscle. Okay. And you're just going to take like three or four breaths. Oh, it feels so good. If you've been sitting in the car or airplane at your desk or something. Heck, you could do this at work. Okay. And turn around, get everyone involved. Let me happier people probably.
So I'm pretty close now and hip is almost out that wall. My shoulders close and I want to really breathe and try to inflate the side toward the wall just to feel those muscles stretching. Okay, so last little bit, I'm an inter return, lower the arm and face again with my back against the wall back how I started and just reassess and hopefully feel like you're more on the wall with ease. We'll do one roll down halfway. Your head goes first. So by doing that little wall sequence, you have exercised your back muscles in your shoulder muscles.
You don't need a whole lot, no weights, no pulleys. You can do that couple times a week, but you will feel your back muscles having been worse. So this is a nice stretch for them just hanging here and then come back up the wall and recognize how wonderful you feel as you stand on up and let me know how you do. Thanks a lot.
Bone Health: Standing and Chair Workouts
Comments
You need to be a subscriber to post a comment.
Please Log In or Create an Account to start your free trial.


