Description
About This Video
Transcript
Read Full Transcript
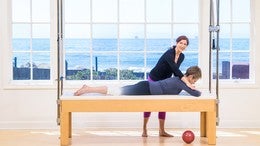
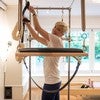
So today we'll be focusing on thoracic extension. First using the barrel and then using the other small baby arcs and the other smaller arcs and even balls to incorporate thoracic extension, especially targeting the upper thoracic. So if Amy, you could step, just stand on the floor and let's take a look. She's fairly flat in the thoracic spine, but if you notice this upper thoracic vertebrae when she leans forward, curl forward, um, you can definitely see that there's where she gets the most flection in her spine. If she stands up tall then and extends back, she gets extension in cervical, not so much here and then mostly Thoracolumbar junction. So what I want to do is help her distribute the forces through her spine, getting a little bit better thoracic extension using the barrel.
I often use this for two different conditions. One is cervical pathologies, so that people that have either instability of the cervical spine or some type of pathology where there's compression, um, if they can get more upper thoracic mobility than they will often have relief of the cervical spine pain. The other condition I use this technique for is stenosis. Because what they need is flection usually in the lower lumbar segments that are stenotic and they need better extension in the thoracic and the hip. But for this particular segment, we'll be dealing more with putting the spine in thoracic extension and Lumbar flection at the same time, which is the beauty of this exercise for us to nautic patient. They often love this exercise. All right, so by placing your feet up on the top rung, she's gonna put her hips in a lot of flection, which is we'll put her lumbar spine in, in flection.
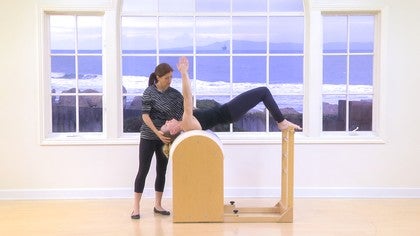
Often people avoid the ladder barrel when they have stenosis in the lumbar spine because of the extension that occurs. But because her hips are going to be in such deep flection, um, her lumbar spine will also be inflection and that'll protect those [inaudible] segments from going into extension. So please slide forward a little bit more wherever I want the mobilization to occur is what I want to put at the apex of the barrel. So if you can slide forward even more, that's it. Great. And then lower your head back into my hands.
Now if you have a license to do manual therapy or mobilization, if you're a physical therapist or massage therapist and you can do hands on treatment, you can add some of that in as you do this exercise. If you're a pilates teacher, an exercise teacher, then you would just support the head. So let's start by putting your hands behind the head. And what I want her to do first is to get her head so that it's parallel to the floor and in line with the rest of her body. So drop the head a little bit more. That's it.
And I actually want you to press your chin toward the back of your throat. So she's doing a cervical retraction here. And then again, pressing into my hands here. That's it. So you see she doesn't go very far into that position. Now let the pelvis draw. That's it. Allowing the hips to deeply fold and just molding over the barrel.
And does that feel okay? All right, now I'm going allow you to let your head come back. Now see if you can mold your head around the barrels. So let's just see and keeping a hold of your hands behind your head and see how she starts to extend through that cervical spine. If I can bring your elbows in a little bit. Um, cause she doesn't have enough thoracic extension to allow the head to come down without lifting the chin and extending through cervical. So what I'm gonna do is use her action of her body to mobilize her spine.
I'm just going to hold her head here parallel to the floor. If you could breathe and think of breathing into your chest and then breathe out. I'm going to place my hand on your chest. That's okay. And I'm going to press down on the sternum just a little bit. Encouraging that sternum to move toward the pelvis. Now breathe into my hand and burry that allowing the sternum to slide toward the pelvis. That's it.
So basically the suboccipital region is moving towards me and the sternum is moving toward the pelvis. So those two parts are moving apart from each other and that will help her get a lot more length in the spine. And again, beautiful. Breathe in one more time. Now as you breathe out, start to peel your sacrum Roman and tailbone up. Healing up. And I want you to stop when you feel the back of your waist or the back of your ribs. Start to move. So keep going up a little bit more. That's it. Nice. There you go. And now breathe out.
Slide the breastbone down and articulate from the top down. So pressing the back of your waistline into the barrel. Great. And do you feel the stretch in your neck as you do them? Okay. Okay. And then peel up, reaching up now and allow the head to come down. Now press the back of your head towards the barrel so you will be upside down a little bit. Okay. Feeling that sense of length there.
And now go down. I'm going to try to hold your head in the same position. That's it. So your pelvis is drawing away from your head and that's it. Breathe in and breathe out to peel back up. Nice. And then press your head down even more. That's it. Right.
And now see if you can wrap your spine around the barrel, keeping your head where it is. Exactly. That's it. Breathe in and peeling up. Lengthening across the room. Press head down towards the barrel so you can get your head to the barrel. Now that's it. And now go down as far as you can, keeping your head in place. That's it.
You may not be able to go all the way down. Oh, very nice. So she just mobilized herself. I just held the head and gave her cues for where to press and then she now has enough extension to wrap the head around. So take your arms up and that's it. And then peeling up. Oh, from the tailbone? Yeah, that's okay. And then a little bit higher right there. Good.
And then take it down again. So again, taking the suboccipital away from the pelvis. That's it. Nice. All right. Now as you come up, you're going to draw the chin towards the throat to bring you up. Now that's it. Being careful to come up. And so if someone had asked, you persists, you would stop here, place the elbows on the barrel, walk the feet down a few notches. There you go. And then coming up kind of planking up. Beautiful. And now we see that the, this bone is not quite so prominent at the top of the thoracic spine. Beautiful.
All right, now we'll take it to the other pieces of equipment. So if someone couldn't get on here because they were too frail or they couldn't tolerate the barrel that it was too much for them, I'll show you some other ways to do it for the more frail adult. All right, now we're going to move to the um, trapeze table with the using the spine corrector in a different way to target the thoracic spine. Um, some people asked me, does everyone need this exercise? And um, how many people really need this thoracic extension work? And everyone in life ends up rounding forward over time. There are, there's a lot of research out there that show that we gain at least one degree of kyphosis every year of our life. So, especially over age 50, we start to change and certainly with computers, text messaging, bending forward for many hours of the day. Um, we tend to round the spine and the spine increases its curvature over time. So, um, the other thing is that we have feet that point in one direction.
They're like flippers. So we tend to round forward and, and send more weight into the front of our feet instead of leaning backwards onto the heels where we don't feel as much support because there's nothing back there to stabilize us. So that's often the reason that people will end up rounding forward. Um, I always say that in our studio, we're gonna end up with the walkers behind our back. So, so who actually ends up in life with the back to extended? There's very few people I've ever seen that, um, ended up like that. So this is one of my favorite exercises to do with people. So this is typically for someone that has a lot less mobility than Amy and is more kyphotic. But, um, Amy is saying that she needs some more mobility in that upper thoracic area that cause she's not able to wrap over the, the spine corrector.
So I'm just going to have her hold onto the bars, which is nice that she can hold onto those sidebars and then press the back into the barrel. And let's just watch her roll back once and see how she does. And then you can let go once you can go further because most people can't go any further. So there she goes. That's, that's where she's stiff. So we're going to work in this area here. So the good news is that the area that she wants to work is at the apex of the barrel and that's where you're going to get the most mobilization. So we'll use the bars.
I'm actually going to have you slide forward because you're a little more mobile than most of my clients. So okay. All right. Now press back into the barrel. I'm going to help her support her head. And now I want you to push into the bars and then press your head back into my hand. There you go. So you're really gonna start to target those upper thoracic vertebrae and just breathe in. Press, that's it. Breathe in and breathe out. And then I can add a little bit of length here.
There you go. And she smiles and then breathe in and brewery that. So I'm going to give her some distraction between the sternum and the back of the head. And then just keep pressing the chin towards the throat and that's it. And you might feel something a little bit in the front of your throat as you feel those cervical vertebrae. Moving a little bit.
Breathe in and breathe out and press down. All right, into my finger here. Beautiful. One more time. And press beautiful. Now draw the chin towards the throat and then come on up. Perfect.
And I'll slide the barrel back just a little bit more and then slide back so that your pelvis touches the barrel. Place your hands on the bar here, and then press the arms straight and then hinge forward. And do a little hip hinge here and press the arms all the way up. Because a lot of times when people don't have enough thoracic extension in the upper thoracic, they and it gets, they get blocked in shoulder flection. So we're going to take the arms up and that's all she's gotten. All right, beautiful. And then think of wrapping the shoulders around the back, drawing the armpits toward the floor actually, and then widening through the collarbones here. Beautiful press into the armpits to bring you back to vertical. That's it.
Now start to curl back, molding your spine on to the barrel and then actually press down on the bar to bring you back even more. [inaudible] and what are you feeling as you press on the bar as far as an urge to throw a sty ribcage. Okay, because of the time. Yeah, in there. That's my [inaudible]. Right? So you going to keep the rib cage connected as you exhale, press onto the bar in length in the back of your neck. That's it. And then inhale, let the head relax a second and then go ahead and come back again. Stay there and you're just going to breathe, breathe in, press and press. Nice and breathe. In and press. Beautiful. Okay.
There we go. And one more that. Yeah. So I often say that, um, breathing is saws from the inside out. All right? Now let go over the bar and then keep going back, back, back over the barrel. That's it. And then take the arms up, the arms up will help a little bit. And then I've got the head. But now take your hands behind your head, press into your hands and then press your head as far back as you can. That's a good. All right. All right.
Now what I need is something to help her mobilize this upper thoracic even more because it's not actually touching the barrel. So we're gonna get out our other little magic tools. Okay. Place your hands on the bar. Take yourself back up. Okay, good. All right. We'll change out the equipment now because in the previous exercise with the spine corrector, we weren't really able to target those upper thoracic vertebrae using any of the, the baby arc, the latter barrel of the spine correctors. I'm going to use a really farm ball to work with Amy.
I would certainly use a more squishy ball on a new client or someone that's just starting out with this exercise. Please don't use a firm ball if someone is really, um, sensitive or never done this before. Often people with osteoporosis will have an aversion to actually extending because they feel like it's this bone on bone and feeling in their spine when they extend. So, um, you have to kind of work that into their routine slowly and carefully so that they enjoy it and that they don't feel very fearful about doing that extension. So I'm gonna use the firm ball with Amy because I know that she's, she can take it. Okay. All right. So you're going to come down, I'm going to put the ball around t four or so, which is right at the top of the Scapula. And then I'm going to place my hand behind your head and then just let yourself melt into the ball. Yeah. Yeah.
So you don't have to do anything with this exercise. Not yet anyways. All right. And just breathe and allow your shoulders to melt towards the floor. Yeah. And do you feel where the ball is pressing? So another thing that people often use is the foam roller, which I like the foam roller, but you really can't target the upper thoracic vertebrae with it because they, they slip out and the roller slips out from under people. So, and it also goes across the rib cage as well. So if I really want to target the vertebrae themselves, then if I use a convex surface, like a ball, that's really helpful.
All right, so let's start with the throat press. Yeah, that's it. And breathe in and breathe out and press the face toward the floor. And again, you might feel something in the of your throat there. It feels kind of weird because you're pushing the vertebrae forward and then is that tolerable for you? Yes. Okay. Now we're gonna do the same thing we did on the ladder barrel.
We're going to breathe in, let the pelvis roll to neutral. Yeah. And then breathe out, peel the pelvis up and lengthen and just peel the pelvis up until you're in a neutral position. So take it long like that. That's it. Beautiful. I felt a total change in her neck when she came out of the tech and went into neutral. And what that does is that puts more weight coming down. So we're using gravity and also the advantage of her lifting your hips to get more pressure down. Okay, so she's mobilizing her own spine. It would be as if I was doing physical therapy with her and she was prone and I was pressing on her vertebrae. Now coming back down, wrapping around the ball, that's it.
Breathe in and breathe out to peel up. Lengthening the spine. That's it. Yeah, that's exactly. As soon as you go to pelvic neutral, your, your neck changes and then you go into that extension or that retraction and then coming back down. Beautiful. One more like that. Peeling up, lengthening across the room. Beautiful. And then walk forward. One Vertebrae is two. It's like about an inch. That's it.
Now you're on the next vertebrae. Okay. All right. And then rolling down. I'm going to give her a little bit of assistance here. That's it. Breathe in. Breathe out. Allow your throat to press down as your pelvis goes up. Find neutral by reaching your pubic man across the room. Perfect.
And then roll back down. Excellent. And on the next one, roll up and lengthen and stay. That's it. And then walk forward another vertebrae. And that's it. Now you're on the very top of the thoracic spine and then rolling back down, wrapping that breastbone around the ball. That's it.
And last one, burry, then harass the head down. Yes. Now she's starting to find that movement perfectly. All right. Now I'm going to hold your head in place and then roll back down.
And then this is the cookie in a roll forward. Okay. And now you can go anywhere in the cervical spine or the suboccipital area and rest. Yep. On the pelvis. And you put your bells down. Yeah. And just rest. And so when you rest, you want your head to be not held and you want your head to be parallel to the floor. Walk forward another notch. And you see that you go more in the suboccipital area. You can also move your head from one side to the other.
To get one side as opposed to the other. You can get more of the muscles on each side and you just melt and stay. When you get that myofascial release. If you hold that three seconds, that's what Carol Davis says. Hold it. Three seconds or three minutes, I'm in order to get that release, you can actually put a box at the end of the table through your feet up on it and just rest right in that position just right. Right. But that main thing is you want the suboccipital to move away from the sternum. Got It. And really getting that extension. Okay.
And I'll have you roll to the side and then come back onto the table. I used to let people lay down for a moment or two and just feeling that maybe the head is more flat to the match. They're not, their chin is not jumping up toward the ceiling as much because they've come out of some of that upper thoracic flection. Yeah. Good. Okay. All right. Now we'll change some of the equipment for a different client. That was for you. Okay. And then, um, so if someone was very sensitive and had not done this kind of work before, this small arch here makes a great tool for introducing someone to it.
So you actually don't want your pelvis to close. Yeah. Cause you're going to come back. And I want your apex of your curves. So say if somebody was very kyphotic in the middle of their thoracic spine, this would be a nice arc to start on. So you do the same techniques and so obviously Amy is, has no problem melting over this arc. Right. And then you can do some arm work, reaching the arms overhead and then making circles and coming back up and keeping the back of the neck lengthen. So you're still trying to press the back of your neck toward the, the barrel as you do the arm work. Nice.
That's it. And then come up to sleepwalking position, I call it, and then open to a t. So this is great for thoracic outlet, things like that to get the neural glides beautiful and then coming back up and then I'm going to help her with her neck. And then you would come to here, especially if that had osteoporosis, you would come to here and then I'm going to help her hinge up and that's why the trapeze table bars are so nice to have with somebody that has frailty or osteoporosis. Okay. And then there's this other arc that's kind of like halfway between the smaller arc and the ladder barrel coming back and then rolling back. So you can see that that might be a good one for her. Lift the arms up, that's it. And open the arms overhead. That's it. And try to press the throat back again and make the circles again.
So that's actually a good size for her. That could work for her. This feels really good. Okay. I'm having to work for it. Right? Right. Littler when you aren't working. Yeah. Right, because you want to put, you want to find edge so that you have to work a little bit to hold the position. So you actually strengthen the mobilization. Yeah. Right. Okay. Now coming back up to arms over head, you can take your hands behind your head to bring you up first. So if you go back down again, so like if a client was doing it on their own, you just have them put their hands behind their head first, then help themselves up, stopping here and then hold onto the back of the legs to bring you up or planking up if again, you're trying to avoid flection. Okay. And lastly, you have, um, the baby arc is actually the same convexity as the letter barrel.
Okay. So, um, but it's just a little, a little shorter. So this is a great preparation for getting on the ladder barrel. All right. Now you can have your pelvis against it and then roll back and I can move her wherever I want the mobilization to occur. So again, you want the mobilization to occur at the apex of the barrel or that's where the most mobilization is going to occur. That's it. And then you see how she's more mobile in that mid thoracic. So actually that's, that works well for her. She's, she has to work a little harder on the other barrels and then reach the arms up and then open the arms to a t and then press the throat down. That's it. So I know when she can do this exercise or this movement on this barrel that she can probably do the latter peril. That's it.
Now draw the chin towards the throat as your arms come up and then pick your head up. That's it. So you're using your deep neck flexors appropriately, stopping their pressure, elbows into the barrel. Press yourself up. Nice. All right, well done.
Bone Health: Standing and Chair Workouts
Comments
I wish I could be in Amys Place! That is maybe the only teardrop: you need somebody do do the hands-on work to feel it in the own body. But I will watch this many times to help my clients! Can you tell us something about the brand of the small arcs? How high is that flat one? Thank you!
I agree with Silke, watching the tutorial, I wished to be lying on the barril - very helpful for some of my clients.
Thank you Sherri for sharing this with us.
You need to be a subscriber to post a comment.
Please Log In or Create an Account to start your free trial.
