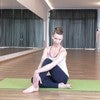
Description
These movements can be done together in a series or you can break them up individually to fit them into your day when you have time.
About This Video
Transcript
Read Full Transcript
Hi, I'm Carrie Macy and this class is the first in three part postnatal series. I was inspired to create these classes after having two kids. My second kid child was just born four months ago. And uh, one of the things that is the most challenging as a new mom is to keep movement in your body. And um, so this first class is called just don't fall apart. It is four weeks, one to six after giving birth.
And I know that doctors don't clear you to do exercise until at least six weeks after having a baby. And there are really good reasons for that. But so this is not exercise exercise. It's not a strenuous workout. It's a really just a series of very mild movements to keep your body moving, to keep you from not falling apart. I would tell myself that every day just don't fall apart, Carrie. And, uh, so this is a series of foundational movements for your body, hitting the spots that generally start to hurt or feel like they're seizing up when you have a newborn and you're dealing with their needs 24, seven and also severe sleep deprivation. So the other thing I wanted to mention about this class is that you're welcome to do these movements one at a time.
So it does not have to be the order or the s um, the flow that I'm going to show them in at all. Um, I don't think I ever got 15 minutes to myself to be able to do all of these movements together. I would do them one at a time throughout the day, wherever I, whenever I had time and it will address things in the feet, the calves, your legs, little bit of core and some upper body and shoulder, shoulder movement. So here we go. The first exercise I'm going to demonstrate, uh, with the towel to show you the idea of it. And then I'll also lie down on the map. So you can do it both ways or you can just use the towel to, um, initially figure it out and then you don't need the towel anymore. So I just call it the corset. And um, we're gonna be core sitting around the core using the transverse abdominis.
So that's the big muscle that just a big band around your, your core and obviously was challenged a lot being pregnant. So you take a towel, you placed the towel just below your chest, over your ribs to your hips, and then you cross it behind you and you're going to grab each side with your hands. So basically if you were to tug on the towel, it would tighten across and around your waist. Okay, so just standing hip with the part, holding onto the towel, those roll back in down. You take a deep breath in and on your exhale, pull the towel side to side and also tense around your waist, around the course that of your body. And then breathe in, release the towel a little, an exhale, pull the towel, tense the transverse abdominous and pull the towel tight so you feel both actions. Inhale and release a little and then exhale and do that again.
Good. And you can do this two more times right now. And the reason really for doing it as the doctor does give you a, a band, a belly band to help give you support. Um, but if you start to teach your transverse abdominis to do it again for you, you're gonna help yourself come back a lot faster. And now we're going to lie down on the Mat and do it lying down. All right, so now you're lying down and we basically do the same thing, but you have the floor and gravity to help you a little bit more. So lying down, looking straight up, just to make sure your legs are at an easy bend. Your legs are hip with the, so you have good balance in the legs and arms are just by your side. You take a deep inhale,
So the all the muscles around your center just tighten in and you breathe in again. Fill the belly an exhale, tighten around the waist. Now you're not trying to press your back down or to move your pelvis, you're just trying to stay neutral and really feel everything tense up. Inhale again, an exhale,
Next exercise or movement you can roll over to your side because of course this is probably how you're getting out of bed and bring yourself up onto all fours. You want to make sure your hands are right under your shoulders and your knees are right under your hips. Your spine should be long and neutral and not arched, not rounded, just nice and straight. And you will use that same core sitting idea that you just practice on your back, tense around your waist and keep it secure. And then we're focusing now on the upper back.
So we're going to do some shoulder rolls with a closed chain so that we'll just get lots of juicy yumminess and your shoulders. And they're tired usually from holding that little baby so much. So you just bring the shoulders up towards your ears. You roll them toward the ceiling, down to your waist, and then towards the floor and then up to your ears, to the ceiling, down to your waist and towards the floor. You're trying to keep the core sit around your waist, and you're also trying to make the biggest circle you can with your arm bones in your shoulder socket. And do one more, so about five in each direction, and then you'll reverse it. So the shoulders go towards the waist, to the ceiling, to your ears and down to the mat, waist sealing ears, Matt.
And three more of these. And again, trying to keep that core sit around in your waist, your arms stay very straight and one more and just breathe normally throughout it.
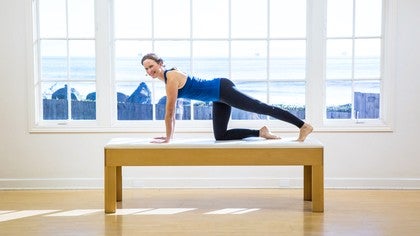
You can sit back onto your legs or sit up in a norm, in a regular seated position. Okay. And then the next one, you come back to all fours. This exercise will address your glutes a little bit and kind of stretch through the front of your hip flexor. Um, your, you sit a lot as a new mom, nursing or feeding the baby and being in and out of bed. So you stretch your leg back and just hold it stretched when you're here. Engage your quad, engage your glute and again around your corset. And then just slide your foot back in. Do the same on the other side.
Slide your leg back. Just straighten the leg, engage your glute, tense around your waist, and slide the leg in. And you can do five on each side. It's very simple movement. It's just getting some juice and oxygen to the muscles in your legs. Good. And we'll go again on the right leg. Stretch the leg back, keeping the spine nice and long and just breathe normally. Inhaling and exhaling. One more on each side, trying to keep as stable as possible in your torso and in your shoulders.
And then rest. And again, you can just sit back on your hips or you can go into a child's pose to take a little rest. Okay, next, go over to the wall to address a little bit more if some upper back. The next movement is to help open up and bring some oxygen and movement back to your upper back. Um, a little bit on your shoulders, but mostly just the upper back. So you're going to need two balls. These are some yoga tuneup balls in the little tote and you need to leave them in the tote. Or you can use tennis balls and put them in a sock and just make the sock nice and tight. Your vertebraes going to go in between the balls and the balls themselves will touch the muscles on the side of your spine.
So you'll place this just below your shoulder blades, kind of in the middle of your back and then turn around to the wall, step your feet out a couple inches and put your back against it and make sure that the balls are very um, straight across. If they're a little crooked, it's going to feel kind of funny when you roll and then walk your feet out a little bit more so that when you bend your knees and you roll down, the balls are rolling up, but you have a 90 degree angle in your knees and hips and then you just roll back up and you roll down and it feels really nice, like a little massage on your very tired body. Then you go down and up and I would do three or four in one spot and then walk your feet back in, take the balls away and move them up a little bit higher. So now they'll start up more between your shoulder blades, make sure your hair is out of the way, and walk your feet back out again. It's about two foot links, distance away from the walls where your feet would actually be, and then you just bend your knees, let the balls roll up just almost to where your neck is, but you're still on the top of your shoulders. And then roll back again. Three, four, five, six, however many times, feel good to roll up and down a little bit and your hips can stay on the wall for more support, or they can come off the wall depending on if you want a little bit more, uh, pressure on your back. Okay? Then step back in. Boom, get the balls again and you'll put them a little bit lower.
So now they'll come just above your waist. Really do the same thing, stepping away from the wall the same distance, and then go up and down in a slightly lower part of your back. And really you can do, um, any, any parts of your spine, wherever it hurts the most or feels the tightest. Just stay there a little bit longer and then stepping back in, remove the balls and it almost feels like you can take a deeper breath. All right. And the next one is for your legs. And so ideally you would get a yoga block or this is a [inaudible] moon box or just a little box to stand on. Um, so that you can be elevated and your heels can go down below the level of the ground to get a calf stretch. You absolutely want to be at the wall. I'm my first six weeks for sure.
I was dizzy a lot of the time cause I've just so tired you want to hold onto the wall so you don't lose your balance. Step up onto the block so that you are about halfway on with your foot and halfway off your legs are parallel hip width core. Sit around your waist, use that same corset. Shoulders are relaxed down and then just rise up onto your toes and let your heels lower down and stretch the calves and rise up onto the toes and then lower your heels and stretch. It's very simple, but again, you're just giving work and stretch to your calves that are just hanging out, walking back and forth from the bedroom to the kitchen. Good. And you do, I would say at least 10 of these. So we'll do two more.
Ding up and down and up and down. And then go ahead and step off. And again you'll feel some action in your calves. Yeah. Next we're going to move back over to the mat area. So the next movement is gonna wake your feet up a little bit and we'll start out with the balls. So again, I have the yoga tuneup balls, tennis balls, whatever kind of balls you have are just fine. In fact, tennis balls are even a little softer, which might be something you would want.
Um, I used to do this when I was nursing, so I was sitting back farther. And this is obviously a little too high to do it, but if you're sitting back then there's less weight on your feet, which could be something that you want. So you can modulate how much pressure is actually down onto your feet, where you sit. Since I'm sitting more forward, I will be able to put more pressure into my foot. Um, so you put the ball right underneath your toes to start and just grab it with your toes as best that you can and roll the ball back towards your heel so it goes across the underside of your foot and come back, grab it again, roll the ball again and bring it back. You just want to move down your foot a little more. So you basically get the whole underside of your foot.
I'm going to pull the ball back a little bit and massage it out. Get out any of the kinks, any of the potential cramps that might occur. Okay? Then go to the other side. And I would do all this just with my feet, right? Cause I had my baby. I still do hold them in my arms while I'm doing this. So you get a little bit of self care while you're caring for your infant.
And again, I'm just squeezing the ball with my toes and rolling towards my heel. And you might get some toe cramps and foot cramps. That's kind of normal sometimes just relax it, stretch it out a little bit and go back to it. This should help relieve it. Okay, so once you've done that, and we're going to move the ball over to the side and your feet will be ready to do the towel exercises. So I just had a towel sitting in front of the place that I most normally would nurse my son and it place your feet flat.
You lift your toes and spread them a lot. Reach for the towel, grab the towel with your feet, lifted up as high as you can, and then release it down and you spread the toes, reach for it, lift it up and lower down and you'll see that the towel comes in towards you like a little snake. If you're doing this pretty well, do it five to 10 times in one direction. So we'll do two more here. And then you reverse. So you lift your feet, you tuck your toes in, touch the towel and push it away. And this is a little less satisfying and that the towel doesn't always go back out where it was, but it's okay. As long as you're pushing and working through your feet, you're doing great.
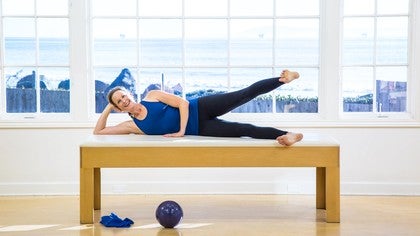
That was about five for me. So I'll do five more of these and three more. You're really lifting, squeezing, and pushing. Good on one more time and rest. And your feet should feel like they have a little bit of new life in them. Now the final exercise, we'll go back to the map lying down on a barrel. So the final exercises, so lovely, I would do this as I was going to sleep, at least for the first little stint of going to sleep. A barrel is perfect, a Pilati small barrel. You can also use a stock of two pillows, um, or rolled up towels. Basically you just want to get it so that your chest can open, but your head is supported like this.
Your legs should be a little wider, feet a little wider than hip width apart. And let your knees knock together on this one cause it's really a relaxing end pose. It's almost like the Pilati Shavasana. So starting taking your arms up to the ceiling, just touch your palms together, take a big inhale into the belly and on your exhale, let your arms fall gently to the sides. And let your chest open in how? Lift the arms up an exhale, let the arms fall down and the weight of the arms. Let's the chest stretch.
And then you can come up and actually give yourself a little hug and then up and allow the arms to relax. Do that again. Lift up, switch the cross of the arms as you give yourself the hug and then lift up and lower down. And then this last bit here, if you just take your arms to like a goalpost shape, it lets the chest stretch a little bit more and take two deep breaths here. Exhale. And then inhale an exhale. And then I suggest that you put your arms at least by your side before you fall asleep or it might get a little sore in your shoulders. And then if you don't want to go to sleep and you want to get up, roll to the side and then help yourself set up this way. And there you go.
If you do all of those exercises, even one once a day or three of them in one day, spaced out through your day, I promise your body will feel a little bit better than it would have otherwise. Hope it helps.
Postnatal Pilates: Postnatal Mat Pilates Series
Comments
You need to be a subscriber to post a comment.
Please Log In or Create an Account to start your free trial.
