Description
About This Video
Transcript
Read Full Transcript
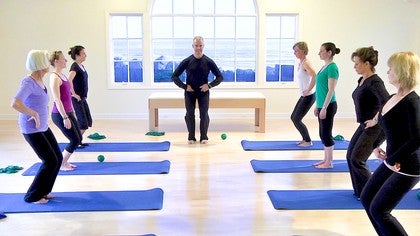
Welcome everybody. So we're going to begin. I like you to come onto your mat and take your feet about four to six inches apart and bring them into parallel and look down at your feet and lift and spread your toes nice and wide and lay them down and reaching into all four corners of your feet. Now just do it by field. Lift and spread and lay them down and start to become aware of your posture. Let your arms just be heavy and one more time lift spread and lay them down as staying connected to all four corners of your feet. Lean a little forward on your feet and lean back to center.
Lean back slightly. Lean back to center. Lean to one side, back to the center. Lean to your second side, back to the center. Now just sense where the middle is, where the weight's slightly in front of your ankle bones. Bring your head right up over your spine and close your eyes and just bring more of your attention now to your felt experience, your inner body, your posture, and your breathing. Just start to let go of what's happened earlier today, what's going to happen later, and bring your attention to this moment just to center yourself or your practice. Notice where your attention goes. As you bring your attention in. You might notice areas of tension in your body. Notice your breathing and as you're noticing, just start to formulate your own intention for your practice.
If there's particular parts of your body like to become more skilled with the qualities you want to develop, more graceful, more fluid, just like to have a good movement. Experience that, that intention. Before we begin and go to the end of your next exhale and just softly open your eyes. Now as you bend your knees, slide the shoulders straight up. As you breathe in on the exhale, lengthen your legs and let the shoulders melt down. And imagine the spine getting a little longer and again, shoulders up, hips down. Exhale to lengthen. As you relax the shoulders down and again, inhale, hips down, shoulders up.
Exhale that a meltdown. Think of your muscles are mostly water. And again, shoulders up, hips down, and let them lengthened. And just one more hips down, shoulders up and let them melt. Bring up your right arm, wants you to tap all sides of your arm. So tapping is a way to increase your proprioception. Proprioception is a big word that means to know where you are in space, but it means more than that. It also means effort level, tension.
Position is all this feedback that happens in tapping is stimulating your sense organs, so in between your sense organs, you have your perception and then you have your attention. If you increase your senses and increase your perception with more attention, you right away move better. How great is that? And it's free. Now from there I want you to brush down your arm and just brush and just imagine any tension or stress from your day is landing in that hole in the floor and we're going to recycle it for later, letting it go. Now we're going to add a little sponging techniques. You're going to come up to the top of the same hand.
Take hold of your trapezius. Just let the arm relax. Now. Just imagine you're holding a sponge and squeeze the sponge and you're squeezing all the water out of the sponge. And as you release the squeeze, see it filling three-dimensionally and again, squeeze it. Feel the weight of the arm and let it fill. That's it. And again, squeeze. See any tension running out of the muscles, down your down, your arm, down your back. One more time. Squeeze. And now squeeze your deltoid, sponge it. Work in your way, slowly down to your bicep. Tricep for him. Doesn't it feel good to squeeze? We all like to be squeezed a little more often and then the hand.
And now last time just brushed down one more time for rush. See the arm getting longer. Now come back up and just notice the difference. The two, the two arms, bring that arm up. You might notice it's longer. Notice your flexibility on that side. Take the arm overhead and compare it with the side we haven't done yet.
So that's the shoulder. The other shoulder is the one we came in with. This is the one you did just by changing your body meant cause your, your nervous system is always looking for a better way if we give it the right information. So let's take the second side. So going to tap. So, so if you're going to exercise, it makes a lot of good. It's very important and makes a lot of sense to take tension out of your body before you do conditioning. Otherwise you get conditioned on top of your tension so you get a little more fit crooked or you get a little more fit with tension, not really optimal. Now take hold of your, you're a upper trapezius at a squeeze. Now you're squeezing the sponge again. Squeeze the sponge, see it filling with warm or cool water as you let it spread and see if you can bring your mind's eye to what you're doing. The more attention you bring, more imagery, vivid imagery you bring to what you're doing, it has a greater impact on our desired results. So we're looking at releasing tension in the shoulders, preparing for our movement practice, but also releasing tension in the shoulders is something to do good just all by itself. And then do your deltoids.
Start to work your way down forearm,
So let's actually come into some more movement. So let's take the shoulders forward and draw them back and just notice that your shoulder blades can move away from the spine and can move towards the spine. So nowhere in this movement do we want to take our shoulders north to our ears, cause then we're fighting gravity cause we're going to add the movement to the spine in a movement to this. So take the shoulders forward, Bend your knees now at your belly button level. Take your lower back back, but your tail forward to round your lower back. Now let's create a long cc shaped through the spine, but gently lowering your chin. Now as you inhale, lengthen the legs throughout the shoulder blades back and lift and open the top of the chest, keeping the neck long. Exhale the curl. Inhale, lift and open. Exhale to curl.
So we begin by warming up all your joints moving in a fluid fashion. Let's see if we can keep the weight even on the front and the back of the feet regardless of you're straightening or bending the legs. And one more. That's flection extension. Now we'll go into lateral flection, XL to the side. Inhale Center, exhale side. Feel the stretch and the muscles in the lower back. You're also lubricating your lower back joint.
Nice and fluid. Inhale, middle XL side back to the center for rotation. So rotation happens mainly from above the belly button up Savannah knees a little bit, and think of keeping your hips and your knees straight ahead and bring your hands to your shoulders. Now let the show the blades fall down your back and just let the arms kind of rest on your pelvis from above your belly button. Start to turn to keep the knees and the hips straight ahead and just turn around that center line. And notice, can I keep my shoulders relaxed all the way through the movement? So you're spiraling around the center line, warming up your joints.
So they say the probably the best therapeutic intervention for your spine is to move your spine through all of its ranges every day. Here's a quick way that you can do that. Back to the center, back to the first movement. Exhale the curl. Inhale, lift and open. Exhale the curl and heel lift and open and curl.
One more time and curl. Less time up into extension, right into side bending, Xcel side. Inhale, middle and side. [inaudible] fluid might be noticing that the waistline is becoming more open, a little easier to move with less resistance. One more easy side, back to center. Bring the hands through your shoulders. Lower your center gravity by bending the knees, hips. Stay straight ahead. Turn around the center line.
See even keep the tops of your shoulders and your neck relaxed as you turn and back to the center. Lengthen up. Shake out your limbs. I'm just going to do a quick review of where the hip joints are. So likely to touch the front of your hip is the sharp edge called Your Asi. Come just inside that edge into the soft tissue and bend your knees slightly. Not Slide your fingers straight down until you feel the crease, which is basically your inguinal groove.
And now you're right at that crease where the legs meet the pelvis and straighten your legs. Now your hip joints are directly behind your fingers, the ball and soccer. It's about an inch and a half back. It's that narrow. So when you lift your leg, think of a ball rolling back in the socket behind your fingers and what you want to notice. Can I keep the standing leg straight, the shape of the spine, the same. And just imagine a ball rolling back in the socket behind your fingers. So good movement comes from good mechanics. The clearer we are knowing where things are designed to move from, the easier it is to self correct.
That's a really important thing for all of us. So that's the first move in option. The second movement option is moving at the same place. You're going to let the pelvis roll over the top of the legs to keep the shape of the spine the same and then come back up. So just notice if you're rounding your back, you're actually hindering to high s this you're, you're at the bottom of your spine right now is to soften the knees and see.
You can keep the shape of the spine the same when you hinge and then come back up. That's it. So the neck can stay long. The lower back can stay long. You can image the femur bones are rolling back deep into the socket and then they're rolling forward as you come up. So dynamic stability is your ability to move well from the origin of the movement. Right now, the origin of that movement is your hip joint. Third Movement is it. Now you're gonna include the knees and the lower legs.
You're going to squat, but the movement is happening at the same place and then straightened right from where the legs meet the body. Notice you can keep your neck and shoulders completely relaxed as you straighten that will do the first movement again. Lift the knee. You can even let your arms hang. Now let's get a clear sense of good alignment. So Sa seems like simple exercise, but this is the foundation of all your movements. Can I do the simple movements really well before I make it more complicated and now hinge at the hips? They can. Can I keep the neck long?
Can I keep the weight even on the front of the back of my feet? And can I keep my attention on what's happening in my body? And then squat? That's a lot to ask for.
Allow the pelvis to roll over the top of the legs and at the bottom. Nod your head yes. Rotate it. No. And take a breath. Now Roll your pelvis back over the top of your legs as you stack the spine. Letting the head do the last thing up into aligned posture.
Let's do that two more times. Inhale to bend. Xcel sequence down. Nice fluid motion pelvis rolls over the stable legs. Take a breath at the bottom. Exhale, stack the spine. One Vertebrae at a time in a fluid way. And one more. Inhale to band XL.
Articulate down equal weight on both feet. Smooth breathing, breath at the bottom that Xcel stack, the spine, the heads, the last thing to arrive up in aligned posture. When you come to the top, find your Franklin ball and we're going to put the ball right underneath the ball of your foot with your heel and floor busts here. So this is the warm up your feet. Now our feet are designed to twist, but because we live on flat surfaces and our feet are stuffed in shoes all the time, they don't get exercise that way. So have your back foot back just a little bit and with the front foot, have the ball, the foot over the ball and leave your heel on the floor.
Now you're going to do is twist your forefoot back and forth over the ball and let it twist or a foot is designed to twist every step you take to a smaller degree, and this is how you put the spring back in. Your foot feels kind of good to really useful thing to do before you do any hiking, running, biking. You'll see in a minute with your experience how that works. Now from there, reach into the ball and let your foot spread like you have a rolling pin onto your foot has let it spread as you reach into it so the back chain of your legs starts at the bottom of your foot. Stretch the bottom of your foot. Your hamstrings are going to be a little more useful. Now Roll through and let the ball food come to the floor.
Now keep the back heel grounded and keep your knee tracking right over the middle of the foot and relax your arms and just the lunch that is pushed away to come back up. So one of the ways you want to improve your balance is keep your center of gravity really low. Try to avoid the tendency of tensing the arms. It actually doesn't really help our balance as much as we would like it to.
Feel the movement in your hip joint, your ankle, your foot. So the way you become a better mover mover, you get really curious about what you're doing with your body. Get really curious. God, how this is pretty cool. How's this going to help me?
Leave the back heel grounded as you lunge. Then push away. And again, keep your shoulders and neck soft or notice can you as you move,
Inhale up in one more time.
Then it needs a little bit. Now as you bend your knees, you're gonna lift your elbows and draw the shoulders down. This is a rotary movement. I'm basically going to go like this and then to the center, I feel like you're rotating around the center line and think of your legs being very springy. You go down into your legs, then you spring out of your legs. That's it. Nice and fluid. This is the warm up, your legs, your spine, your shoulders. Give a little African dance to the party, to more east side. One more. Last side and up. Very nice.
Mindful Movement: Creating Awareness
Comments
You need to be a subscriber to post a comment.
Please Log In or Create an Account to start your free trial.


