Description
About This Video
Transcript
Read Full Transcript
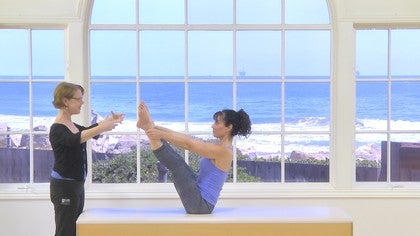
Hi, I'm Ruth Alpert, and this again is my trusty demo person, Leah longly. Um, we're talking about breath in this tutorial and there are many, many ways to breathe. There's no one right way to breathe. But there I think of it more as there's a right way to breathe for the exercise or the activity that you're doing. So if you're an opera singer, there's a right way to breathe for that. And if you're doing yoga, there's a right way to breathe for that. And in Ponies, we also have a particular way of breathing that's built in to how the exercises are constructed and breath work. And [inaudible] is very important I think because Joe Polonius himself had breathing issues as a child. He had asthma, he had rheumatic fever, and he developed a lot of the work to build up his lung capacity in his diaphragm. There's, you know, the old joke, there's really truly only one wrong way to breathe. And the joke goes that the Devo t searches his whole life for the answer to what his life. And he goes to one guru after another and he goes to Tibet.
And he goes to these places and finally he's crawling up the mountain and he gets to the guru who's sitting on the mountaintop and says, please tell me the secret of life. And the guru of course says, keep breathing. It's an old joke. I know you've all heard it. It's really pretty stupid, but it really is true. The only wrong way to breathe is to not breathe. And so it's, it's a joke, but it's actually not a joke because we live in such a culture. It's such an adrenalized culture.
Our adrenaline is pumping all the time from coffee, from traffic, from, you know, the email you just got from multitasking, whatever. So that we're always in a state of hyperness. And in that hyperness we're here right in, in an excited state. Many of us don't exhale completely. We're, a lot of us are caught in the inhale and we never totally get down. And especially if you've been in any kind of trauma of any kind, emotional, physical, whatever, a trauma response is held in the diaphragm.
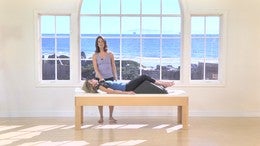
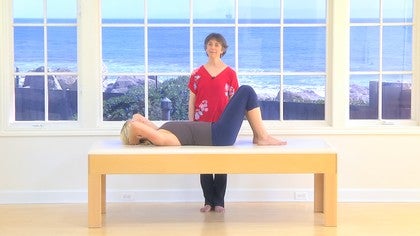
And we'll be that startle, inhale and staying there. And I've actually worked with clients who had issues when they were seven years old and their rib cages were still not releasing entirely into their sixties so we're going to do some demos of [inaudible] breathing and ways to find your breath, which we'll get to right now. So the very first thing that I'd like you to do, and everybody can do this at home, lie down on your back with your knees up or your legs on a chair or somehow supported and just find your breath. Don't do anything yet. So Leah, put your hands down. Just notice how you're breathing when you breathe.
Normally what is actually moving when you breathe normally, and just pay attention to that for a moment or two. How much of your ribs, how much of your belly does a breath go into your neck or all the way down to your pelvis? Or does it stay localized in a smaller area? And there is no right and wrong. Anything you get is fine. So you meet yourself where you are before we start and then put your hands on your ribs. And what I'd like you to do, again talking about how most of us are stuck on the inhale, what I'd like you to do is make the letter s as you exhale, which narrows your breath, makes it go out a, um, a longer too.
And that way it slows down your exhale so that you have a chance to feel more. So Leah is going to breathe in normally and as she exhales her ribs and sternum and chest descend. So notice how this place also descends. You have ribs all the way up and now she's going to add the hissing. I forgot Leah doesn't have a microphone. I do. So all his
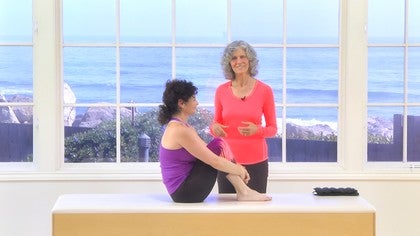
Good and rest. Take your hands away. Another thing I'd like to demonstrate is how flexible the rib cages. So you might have felt some tightness in your ribs descending, but whole front part of your ribs is cartilage, right? And there the ribs are built to move. So I'm just going to do a little bit of the Trager approach on Leo.
Sorry for my ice cold hands here. Right? This is ribs, ribs bounce. They're very bouncy, right? That's how much excursion the ribs can actually release. Right? Ribs are loose in this culture. Again, a lot. We are, our pelvises are not in our consciousness for the most part and so we ended up stabilizing with our rib cages and rib cages get very rigid, um, where really the ribs or the expressive part of us and our pelvises should be strong and grounded and we have it flipped backwards. So this can take quite a while to get your ribs.
Like I'm talking weeks and months. Doing this. Hissing XL is an excellent way to start to get your ribs to descend. There are other ways to, no, we're going to add a piece to this. Exhaling and inhaling Leah and all of you at home. You can hiss your exhale, right?
And you're not doing that for too long. The air is going to have to go into the back of her ribs when you're curled over, right when she's curled up and over, you still have to breathe, but you don't get to belly breathe. And so that's a really crucial piece of Palabra is breathing. And we're going to go into a few different ways to help you feel that. One way that I've used to help people find sending the breath into the back of their ribs, because this really is quite a new idea for a lot of you.
And also very challenging. If you have a big ball and it's not terribly pumped up, you want it somewhat soft so that it's resilient. Just drape yourself over it and just breathe. Just relax into the ball and breathe. Just normal breath.
And because of the nature of the ball, it w because there's pressure on your front, it will send the breath into the back of your ribs. And Leah's demonstrating this quite nicely. It happens naturally into the ball. You can exaggerate it a little bit if you like, but it's also a given. Just if you go over the ball and if you feel like it's too pokey in your belly, just let a little more air out of the ball. Beautiful. It's also very calming.
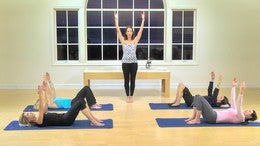
Another place to feel this. If you don't have a ball at home, you can mimic the same idea in child's pose. You could also put a pillow between your thighs and your chest, um, to have something soft to breathe into. And again, Leah's gonna be a really lovely demonstration of watching the breath go into her back, right? So it's the the back and sides of her ribs where the inhale is expanding and as you do this Leopold in your abs, let's see what that looks like. Basically, the idea with the ball or with this is that you're squishing your front so that there isn't room to breathe in your front and the air goes into the back and sides. So we're going to put this together in a very basic, simple exercise that you've probably been given in a, in a beginning lesson, a basic ab curl. So clasp your hands, really make a hammock and put them at the part of your head, the part of your head that touches the floor, not base of your neck.
I really want your head completely the weight of your head completely supported and take a deep breath in for nothing and exhale and start to curl yourself up by dropping your ribs and expanding in the back and pulling in your abs and then relax back down. Inhale for nothing. Exhales [inaudible] them has to drop. Ribs have to come down and you come up. If you don't let your sternum and ribs go down, your neck is going to eat it, right? You're going to do something really funky with your neck and you're going to hate all of these kinds of exercises.
So if you can program this in, now that you start on an exhale, ribs go down and your spine gets to curl, and your abs of course are working. So this is a breathing with abs, with spine movement, and your hands are supporting the weight of your head so that you take all the neck mishegoss out of it. Yes. Beautiful. Great. Thank you very much. Happy breathing.
The Successful Beginner: Movement Breakdowns
Comments
The main gist is that the head sets the direction with a tiny tiny nod, then the movement goes immediately down into the thoracic spine (it moves through the neck so quickly that I never cue the neck). My first workshop for Pilates Anytime goes into the head/neck issue in more depth.....
Help!!
You need to be a subscriber to post a comment.
Please Log In or Create an Account to start your free trial.
