Description
Note: This practice was designed by French osteopath, Guy VOYER. For more information visit the ELDOA Website or on Ilaria's website.
About This Video
Transcript
Read Full Transcript
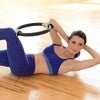
Hi. This is Elaria from Pilares Anytime. And today, we're going to release the neck. We will not only stretch will actually work also on reinforcement because it's important to reinforce all the muscles and the below the shoulders and the muscles of the neck itself to be able to have a free and, and, aligned neck. The only prop you need is imagine circle. We'll use it a little bit during the class.
This is a class that you can do to warm up for a reformer, or you can do it just alone. To feel better in your neck and shoulder area. I will use Pilates and also Eldera. You can follow along this class, even if you never practice Aldoa, but if you wanna learn more, go to the class, introduce a single dua and anti gravity dua to learn a little more about this method. So we're gonna start with easy.
We're gonna go around. We start with shoulder role. So easy just to get blood flowing in the air of the neck and shoulder. Like, neck and shoulder are so connected. We cannot fix the neck without moving and making sure that the shoulders move freely. Now reverse, and we're gonna exaggerate this hiking the shoulders up to the hears and then down, right, big circles.
And then release down. Now with the shoulders completely relaxed, I suggest to put the palms up. We're gonna do some circular movement at the I always want I I want you to picture having a marker on your nose. And with your nose, you're drawing an 8 in an imaginary paper in front of you. Okay? So easy, easy, easy. This eight can be thin and small, or a little bit bigger and wider. It really depends on how you feel today, how you woke up, And, and so on. Not reverse. You go the other way.
Reverse the 8. Nice and easy. Perfect. Now that we gave this initial warm up, I want you to focus on the alignment ears, shoulders, and hips. And to do that and to kind of become aware of that position, I want you to do a little neck pull position over here.
So you're gonna lace the fingers behind. You push your head back, And as you push your head back, you really focus on 1, 2, and 3. Right? Nowadays, we are kind of all like this or maybe just with the neck going forward. We need to stimulate the posterior muscles to work, right, and to the awareness of the position itself. So this is what we're gonna work on a lot today.
Anything we do with the arms with the shoulders. We want this alignment all the time. Now feel free to change your position as often as you need. Because we're gonna stay. We're gonna work the upper body mostly. So kneeling, setting anything, anything that feels good.
Now we're gonna go into arm movement. I want you to go in external rotation. It's good because we start releasing the fascia of the arms this way. And I want you to push out a lot. You spread the fingers, you lengthen.
We'll talk more about this position of the arms later. For now, just follow along. And if this bothers, just relax. That's absolutely fine. So remember the alignment.
You push your arms out to the side, reaching away. And now always reaching away, you're gonna go and reach up towards the ceiling. Remember, the alignment of ears, shoulders, and Now from here, the arms come forward, shoulders low, and we work on re retraction and protraction. Okay? So from here, shoulder blades go back, back, back, push, push, push, back, back, push, push, push, and my ears and pelvis are on the same alignment. Right? One more time. Pull pull pull push, push, push. Now bend the elbows by your side. And over here, you're gonna go open and release, open, and release. Again, external rotation.
Go back behind the hay behind the back with one arm. And stay. This position in internal rotation is really good to release any tension that you might have at the capsule of the shoulders. Sometimes it's a little bit of rotator cuff inflammation or adhesions really good to stay in this position and let it release. Also, try to assess and see where your fingers get in your back. Right? Because if in this side, my left side, they go high.
And when we change on the right side, they don't go as high for me, is an important thing to keep in mind. I need to make sure that my shoulders are as even as possible. Right? How can my neck be healthy and in good alignment if my shoulders are completely different from one from the other. Right? And then release. We're gonna repeat this with a slide variation. So we're gonna reach out, then you're gonna go up again overhead.
This time, I want you to stop to a high diagonal. So from here, you're going to do retraction and protraction in this different diagonal. And again, pull pull pull all the way, push, push, push, goes low and make sure that the movement is full range of motion. And now down here, change the diagonal, you go back and up, forward and down, back and up, forward and down. Let's do 2 more repetitions.
Back, back back. You shrug back a little bit and then forward reach. And again, back, back, back, forward reach. Then we talk the elbows in again, and you go open and close, open and close, open. And now let's go back again behind the back as high as you can. You maintain just a few seconds. And then slowly release. And now other side and back.
Now already by doing this sequence, if you have a little unevenness in the internal rotation of the shoulders or in any other movement, it fixes itself. Okay? So this is a great progressions to do to warm up. Anything anytime you need to get started, if you have a little bit of a delicate neck or uneven shoulders, this is a good sequence. And then you can release. Now let's get more distal just a little bit for the forearms now with all the typing and all computer stuff, we're gonna be, usually very tight over here and weak. So beside the reinforcement, it's really important to get to stretch the forearms a little bit.
I want you to place the hands on the floor with the fingers facing you. The palms are on the floor. And then you move your hips back. You move your body back as much as you can. Your arms are gonna tell you when to stop. Right?
When you feel that you cannot go anymore and you feel a good stretch, that's where you're stopping. Okay. That's where your limit is. And you're just staying there for a few seconds like 20, 25 seconds to allow the 4 arms to release properly. And then you can release. And now we start with a little reinforcement, not at the neck yet, We're going to reinforce the the arms first and specifically the delta in this exercise. I want you to reach out very long with your arms.
And because I want to target the middle deltoid, I want you to internally rotate the arm. Now you can turn their hands as well. That that's fine. But the most important thing is that you try to have the inside of the elbow facing down to the floor. Okay? That's what we're looking for. So you reach out the inside of the elbows reaching down towards the floor as much as you can.
And now from here, you go up and down just a little bit and reach and reach and reach and try not to tense the the trap muscle. Right? You want your neck, easy, free, the face relaxed, and you keep reaching away and lengthening. You can start with, 2025 reps, but then you can build up with more to more reps to make sure that the Delta it's strong and ready to support the weight of the arm, anything you do, even even when you're not doing anything, is still working to hold your arm up. Right? So very, very important to have this muscle strong for the stability of the shoulder. We do 10, 9. Keep reaching away. 87, 65, 43, 2, 1, and slowly release. Now let's get a little more into the neck reinforcement.
I'm gonna repeat pretty much the same sequence with my hands and with the magic circle. I like both ways. It really depends on the awareness of your client where they're at, and, it with what they're it's easier for them to reach. So let's start lacing the fingers, you go back and exactly what we did before for the awareness. But now we're going a little bit harder and deeper with their enforcement. So My hands are pushing forward.
My head is pushing back. And I want to feel those posterior muscles off the neck, but even lower down in my spine, waking up and being activated. So you hold, hold hold and release. And, again, pushback, hold, hold, hold, and release. And, again, push back, get tall, remember the alignment, ear, shoulder, greater trochanter, and release.
Now try to keep the nose in line with the sternum and an even posture. We do the same thing on the side. So now my hand is pushing into the head, and my head is resisting. So all the muscles on the side of the arm active are waking up. Our reinforcing, every or or doing the reinforcement. A static rain enforcement.
They're very important for the partial, alignment and release. And, again, you go push, push, push, and release one more time. You push and release. Now other side, same thing, say, keep the center and you go push. And release and, again, push. You can even palpate and feel how all these muscles on the side are active. Right? Then we'll think about how we can release them as well, but now we are reinforcing.
Last one, push Push, push, and release. With this next one, go very light. Very gentle. You're gonna raise the fingers, and you push into your forehead. So you push Now the sternocleidomastudio on both sides is active before it was unilateral when you were on this on the side. And your release. And, again, you push push push and release. And, again, push and release. And even if these grills are really simple, are actually very useful for many of us because we all have next weaker than they than we should have.
So really important to get this exercise going in this basic, strength level. There. Now let's repeat some of this move with the magic circle. I'm gonna go sideways so you can see better what's happening. I'm gonna go with the handle of the circle at the base of the skull, and my hands are inside. And I'm doing exactly the same the same thing that was happening before I pull with my arms So the magic circle is pushing into my neck and to the base of my skull, and I resist pushing back and then release.
And again, you push, push, push, and you release, and again, push, push, push, and your release. Now we go to the side. So from here, you're gonna place the handle on the side of your head, and you go push with the arm and release push push push and release, and again, push, push, push, and release other side Same thing. We go 3, 2, 1, and easy release. 3, 2, 1, easy release.
Last one, pull, pull, pull, and release. You see how I'm not doing too many reps because you really need to listen to your body. See how it feels the first time with just a few reps. And then if all feels good, you can go up with more repetitions. But in the beginning, just take it easy.
And see how your neck responds to it. Now we're going lying down because we need to take care of and serratus. That's more in relationship to the shoulder blades, but we do need those muscles, strong, and we need to have the shoulder blades moving properly if we want a healthy neck. So we go on the stomach. And I like to use the magic circle as a lift for my forehead. So I place the magic circle on the floor, forehead on the bottom handle, And then I reach out with my arms.
My thumbs are up, but if you prefer, you can also keep your pumps down. Doesn't matter. They're both both ways are good. So from here, I reach away with my arms. I keep my arms in a y position.
So just next to the circle, basically, And here I lift my arms off the floor as much as I can. Once I'm here in internal range, I go down just a little and the up just a little up, just a little up. And I do this movement, small movement of reinforcement in internal range. To make sure that the muscle, the rhomboids, are rated to be active and maintain my upper back, basically, and neck in a good alignment, in a good position, when I do anything else. Not just when I work out, also when I walk around and when I do anything in life.
And we go 54, 321, and then release. So We did about 30 reps, and you can do less than 30. You can do more. Now stretch back. Again, see how it feels and make sure that your form is good. Now from here, we go in all four position. You can keep the fingers pointing out pointing forward or pointing out whatever you prefer. And here, when the tabletop position, we're going to drop the rib cage and then push the rib cage up.
Drop, drop, drop, drop, and push, push, push. And again, drop, drop, drop, and push. This is exactly the same move we did before. Now we have a little more resistance, right, because we are against gravity. So we're not just exploring the range of motion, which hopefully is big because the shoulder blades need to move. But we're also getting a little bit of stretching over here and reinforcement over here at the Cerritos.
Now to get a little more enforcement, I want you to tuck the toes and go into a knees off position. You're hovering the floor with your knees. And you repeat exactly the same thing. You drop down as much as you can. The rib cage is closer to the floor, and then you push and you go up and away from the floor.
You go drop. The shoulder blades are behind your back. And then as you'll push, they're hugging the rib cage on the side. Let's do 5 more, down, down, down, push, push, push, down, down, down. Push, push, push, 3 more. Drop and push, and drop.
And push one more down and push and release. Beautiful. Now that we work so hard, let's go to another little release and then, some more play with arms and neck exercise. So from here, I want you to stretch one arm out very long with a lot of tension and external rotation. If you can this time get there because it's necessary to to basically, we are using the fascia to create more, stretch and release at the neck.
From here, we're going to side bend the headway. And in the big with a little bit of just a little bit of double chin, we want to be on the frontal plane. And after we side bend, we should feel some tension going on in that arm, because we're not used to this position. I want you to look go and look up towards the ceiling on the side of the straight arm. And you should feel a nice release in the lateral part and front part of the neck where the scalings are.
A little bit the sternocleid, you reach, reach, reach, reach, reach, reach, And then you turn your head and you look over your opposite shoulder. And you look down, you grow tall or position between the top of the head and the arm. And then slowly, slowly release the arm and come up with a head. Normally, a little tingling because we are pulling that fashion in a lot of tension. Okay? Let's do the same thing on the other side. Externally rotate the arm, the palm is reaching away, the fingers are long.
The head is aligned. And from this position, I side bend And I look up towards that straight arm side, up towards the ceiling, towards on the same side of the straight arm. You push down with the palm, you feel the release, more lateral and frontal on the neck, And after 20 seconds, you turn your head and you look over your other shoulder. And now you're shifting the release more posteriorly than neck. You keep reaching, you keep pushing, lengthening, lengthening, lengthening, lengthening.
And then slowly, slowly release. Beautiful. Now move your hands a little bit, move your wrist so you're ready to go. And I want you we're gonna play now with some arms and Pilates arms, both of them, because we can create this spiral tension in both. So let's start with Ildua Arms first. You will see how this is gonna put a lot of stability and anchor into your arms and freeze up everything else around it. Right? So we're gonna go out with one arm only. You go in x turn a rotation, external rotation at the shoulder, external rotation at the wrists, but now listen to me. Now I want you to try to internally rotate your elbow in this position.
I know it's weird but try to do, and you're gonna put a different tension in that arm. So repeat, external rotation at the shoulder, external rotation at the wrist, Now don't move your shoulder and wrist, but try to internally rotate your elbow. It's a micro movement. Now release this arm. We're gonna try with the other one.
You're gonna go out external rotation at the shoulder, external rotation at the wrist, Now try to internally rotate your elbow. When I do that, my arm is so strong. You can come here and hit it that it's not gonna move, right, because has a, a different level of stability within the arm itself and release. And just to play a little more with this, I want you to go into this Aldo position. It's not a cervical Aldo, but it's gonna give you the feeling of this type of work. So I want you to extend your legs, suit inversion, internal rotation. So you get into this banana food position, and then you're going to reach away with your arms, exactly like we did before.
You grew at all with your spine. Now from this big, I turnar rotation. Think about those elbows internally rotating. Think about that spiral of the shoulder going in one direction. Shown the elbows in the opposite one and the wrist in the opposite one again.
Maintain, maintain, maintain, maintain, maintain, maintain, feel those arms nice and strong, push away, reach, reach, reach, reach, reach, and now slowly release at the feet, release at the arms, set the elbows, and everything else. Now we cross the legs, and we see this same spiral applied to arms that we often use in Pilates. I'm gonna go with the arms of the hug, but the same arms are in the teaser or in many other, movement in the Pilares' repertoire. So I want you to think about, the same thing, the same thing we said. So external rotation at the shoulder, external rotation at the wrist.
Now if I don't control my elbow, my elbow drops, Okay? And this is loose. So I want you to think about rotation out rotation out and the elbow and internal rotation. Pretend you have shopping bags on your elbows, and you need to hold them up. Let's do this. You're gonna put your free hand on top of the elbow.
And that elbow pushes up into your hand and pushes up into your hand, but the shoulder doesn't come up. The shoulder is down. And you go, resist, resist, resist, and rest. Other side, external rotation, external rotation, push up with the elbow into your hand. Strong.
Strong. We are shopping bags, hanging on the elbows, keep them up, keep them up, keep them up, and release. Now we find that this pyro without resistance. So we think about those elbows lifting. And now with this super strong, arm.
We're going to open and close and open, think about the spiral, maintain the spiral, keep the shopping bags up. Good. And now if I want to do something different than the hug, it's the same thing. If I'm doing my arm circles, same thing. Right?
Same. And they don't even need to be too rounded. Okay. Even longer arms whenever I open and close, I have that spiral happening and putting my arms in the proper position. Cool. Now Let's move the magic circle away, and we're going lying down for a final neck reinforcement and then release with cervical Eldoa. We're going to lie down, comfortable, feet on the ground in the beginning, and that I want us to do a little proper for the next. So everything is easy, everything is resting, and I want us to say yes, basically.
We need to make sure that when I say, yes, I just do flexion and extension, and I don't go anywhere else with my neck. So from here, I lead with my eyes. I go eyes back, chin up, eyes down, chin in. Eyes back, chin up, eyes down, chin in, eyes back, chin up, eyes down, slide on the mat, Shannon. Perfect. Now I'm gonna make sure that my neck is in the best and straighter position possible.
And I want you to work on the reinforcement in this different way, this other way. We're not pushing and resisting like we did before. We are helping the elongation of the neck because once we have that idea of growing in acts extension, the neck is the muscles of the neck are working. So I want you to lace the fingers and put them on top of your head. And I want your hands to push down into your head. At the same time, your head pushes into your hands.
So as I do so, you see that my head wants to come off the floor a little bit. Push, push, push, push, push, push, Keep pushing into your head as you return it down to the floor and release. Let's do it again very slowly. So hands push down into your head The head pushes back into your hands, and the head wants to lift up. And my muscles in front of the neck are working.
The stereo 1 and lateral one are also working. And then slowly keep that pushing happening, slowly go back down. And release. And now with this same technique, we're gonna bring the head up, like, when we do the 100 in that same position. Okay? So we put the hands on top of the head.
The head pushes back. And I keep this as I come up, come up, come up, Now here, I'm not just hanging, but I'm pushing up into my arms. And we can bring the knees into the chest, I can stretch them out for my 100, right? I'm not pumping because I want to keep my neck in a long position, but this is exactly that position and slowly release And we're gonna try it again for the abdominal series. So we experience something different. You push, you push back with a head, Slowly up, up, up, keep that net at net active, and you go single, single, single, single. Both him.
You go double and in. Double and in. Right? And I can let go now, and my neck is still pushing up. And I keep doing my double, but I have that intention of reaching up to the ceiling with my head. Push slowly all the way down.
So I find that this reinforcement is very useful to really understand the proper neck position and understand how to do it when we do a more dynamic workout. Now from here, we stay with the knees into the chest, the flex feet, You lengthen the neck. We keep the head down. We're not gonna lift, but we keep the neck as long as possible. And now we just flow in some aldoa, a cervical aldoa, by moving our arms.
So I want you to start with the arms by your body pushing down and away, and the shoulders getting far away from the ears. And you push, push, push, push, push away. And now slowly, we're gonna change the position of the arms, and we're gonna go up to the knees. You push away. You look down. You keep your neck long.
And now slowly, we're gonna bring the arms up towards the ceiling. Every time you change position, see if you can increase the external rotation. At the shoulders. Of course, you can keep that spiral happening like we experienced before. And now we go 45 degrees back, and you push, push, push. So by changing the arm, we are changing the link in the that we are releasing.
And this is just a general way of getting into this, modality. Then you go back all the way overhead. Same thing. You push push push push push push push. And then the last one, we go to a y position with the basically with the elbows at year level. With the arms above the level of the shoulders.
You push push push push push push spread the fingers, reach away, and now slowly release the tension come into hug your knees. You can relax your feet. And then very gentle. You go into a little bit of a movement at the neck. You can do rotation.
You can just move around in a free way just to make sure that everything feels okay after this much work that we did. And then you slowly can come up And probably when you are in the sitting position, it's when you can reassess and really see where you are. And where this workout brought you to. Right? So just go step by step, very gentle movements, see how everything feels because this is a lot of reinforcement and stimulations for the neck, which is really, really good, but again, Always listen to the body when you work on such a delicate part like the neck.
Intermediate Mat Workouts: 30-Minute Classes


Mention
 |
ilaria Cavagna (Teacher) |
 |
Kathleen H |
|
|
Jordan K |
 |
Summer G |
 |
Cheryl Z |
|
|
Jacqueline S |
|
|
Claudia K |
 |
Jennifer S |
 |
Knockout Piates |
 |
Taghrid K |
 |
Gisela G |
 |
Anne P. |
|
|
Penny W |
|
|
Christina R |
|
|
Marion D |
 |
Chanda Hinman |
|
|
Niamh O |
 |
Caroline B |
|
|
Karen Duncan |
|
|
Kimberly T |
 |
Diane C |
|
|
Excelsa S |
 |
Marian Lunah |
|
|
Lelie Hughes |
|
|
Alison W |
 |
Jill |
 |
Julie Lloyd |
|
|
Sheree S |
 |
Andrea Lima |
|
|
Michelle E |
 |
Beverly L |
Comments


You need to be a subscriber to post a comment.
Please Log In or Create an Account to start your free trial.
