Description
Transcript
Read Full Transcript
Hi, everybody. This is Tom McCook. Great to be back at Pilates anytime. This class is a functional warm up that now a warm up can be done any time of day. This is something that you can do in the morning as of your day. This can be something that you can do as part of your workout in general where you get the body prepared for the work you're about to do. Also, a great thing to do if you're sitting a lot during the day to put in a movement break of 10 to 15 minutes to get all your joints lubricated align with gravity more.
It's just so good for your health and your wellness. So we're gonna start through where we go through a series of movements all done standing. You're gonna wanna have one Franklin ball. I have 2 here just in case, but you only need one, and that'll be for your feet. We're gonna start with just tapping the body, which is a great way to relieve tension and improve the proprioception, which means your body to feel yourself in space.
So we're gonna start by just tapping the chest. Big pumps up here, your heart and lungs, but also your big chest muscles, Just waking up the tissue, waking up your body. And then we'll go into the belly wall. If you wanna follow the line of digestion, that would go up on the right, down on the left. And then right around the bottom of your ribs, you feel your rib line with your fist.
Just tap front to back. And that's the level of your most important breathing muscle, your diaphragm. So we're just waking up our diaphragm. Front to back. Now from there, we're gonna go right down the front of the legs, and then come up the back of your legs, down the outside of your hips and legs, and then up your inseams.
And one more time, we'll go down the front, up the back, outside, inside. And then give your butt a little punch. Wake up those muscles. Now right around your lower back behind your belly button with your knees soft, just tap your lower back as you slowly curl your tail forward and back. So you're sliding the muscles under your hands apart.
When you curl and together as you reach your tail back and then add a little lateral flexion side bend, tap up on one side down on the other. Just giving all those muscles that feedback. And as you come back to the front, take one arm up and tap all sides, under your arm around the top of your chest all the way up to your neck. Just a great way to relieve tension and wake up your body and your mind map. Get you out of your head.
Now from there, put one hand on the muscle in between your shoulder and neck your trapezius. And now as you lift the shoulder up with your legs bent, squeeze the muscle you're holding, like you're squeezing water out of a sponge, then let it go as the muscle spreads and the weight of the arm drops the shoulder, lifted squeeze, lower, and give it a little shake, and one more. And shake. Now go down onto your deltoid, your shoulder muscle, and just sponge your way down the arm, giving you that feedback. When you get to your forearm, add a little rotation of the bone and the muscle, You'll see how your tissue and your muscles can slide around the bone and your wrists, then work your thumb into your palm.
And then give each finger a pull. Little traction. Tom then just brush down all sides of your arm from your neck to your fingers. All these different ways of touching, tapping, sponging, brushing, or stimulating different proprioceptive feedback connection to your brain. Great idea. And then just notice, take a moment to notice.
You might notice that my shoulders a little more dropped on that side. So just from that practice, I've already let go of tension, which frees up energy, and allows my body to move better. So let's take side 2. We'll tap first. All sides, up around your neck.
So think if you're going from the thinking world, whatever you're just doing more into the feeling world and tapping and touching, gives yourself that ability to sense yourself and drop out of a lot of thinking. Great idea to do that often. And then between the top of your shoulder and your neck, put your hand on that muscle. Unlock your knees. Now as you lift the shoulder up, squeeze squeezing the water out of an imaginary sponge, then let it drop and spread.
Nice to add your breath, inhale on the lift. Excel to let it drop and spread. And just two more. Lift and squeeze and let it go. And one more. Lift and squeeze and let it go. And then slide down onto your deltoid.
Just sponge your way down the arm. Value bodies mostly water and then counter twist the bone in the tissue as you get to the forearm Tom your wrists. Work your thumb into your palm. Give each finger a pull. And then from your neck to your fingers, just brush down all sides.
Sluffing it off. And then just shake all four limbs, shake them out. See a lot of athletes before events. They're shaking. That's stimulating their body.
It's waking it up, making it ready for what they're about to do. We're gonna go right into the feet. So grab the Franklin ball. And I want you to put the ball or a ball of yours, whatever you have. Put it under the ball of your foot with your heel on the floor and the knee bent.
The knee will stay bent. The heel will stay on the floor. Now first, just twist the fore foot back and forth over the ball. So we're getting the bones in the mid foot to move, which the foot does on its own when we're walking and bending and straightening, but we're just amplifying it to put in more function into those places that tend to get a little stiff That's it. So we're just counter twisting. And now from the ball, your foot to your heel, apply pressure and reach into the ball and get the tissue on the underside of the foot to slide.
That your upper body relax. And if you're looking down in the beginning just to feel find it, then bring your head up. Do it with your head up. Do it just by feel. There we go.
Now from there, as you put the heel back on the floor, put the ball under the ball behind your big toe. Now without shifting forward, press that part of the foot down into the ball, then release it. And as you press down, feel it's activating the foot to the back of your leg to your pelvis. Press it down, relax your arms, do, like, 4 to 6 reps, and now shift it over to your behind your little toe. Now press down. Press that 5th ray point into the ball.
So we're activating those 2 key front foot points that allow your leg pelvis to have a bigger connection and better leg alignment would balance 2 more. And one. Now straighten the knee joint. Now the focus is your ankle. Touch the ground of the front and the heel to the back.
Feel the glide in your ankle joint. Still keep your head up. So you're still working on your balance and posture. If you needed to hold on to a chair, that would be fine also. Then after maybe 10, Now roll it closer to you and put it under your heel with the ball your foot on the floor.
Now you're gonna take your pelvis. You're gonna shift towards that leg, squash the ball, and stand on it. You're literally transferring your weight on top of your standing leg. Let your arms just swing. Add your breathing.
So every time you step, you're stepping into a line posture. And just 3 more. And 2 and 1. And just take that moment as you come off just to notice. Like, I already feel more grounded on that leg and more up on that leg. Really important, good feeling. Let's go right into side 2.
So put it under the ball, your foot with your heel on the floor. The knee bent. First start by twisting. Little toe towards the floor. Big toe towards the floor. You might notice also you're having movement in your hip joint.
There we go. 1, 2, 3 more. Great thing to do before you're gonna walk or run before you put your shoes on. Now reach into it. That's another piece you can consider. You can break these things up and take parts of them depending on the time you have to have more frequent movement snacks.
We call them Tom snacks. Here we go. Now from there, put the heel back on the floor and put it under the ball of your big toe, behind your big toe. Press down with that point without shifting force. You're trying to activate the foot and the leg.
Press down and release. 4 to 6 times. Now put it under the ball behind your little Tom. Push down. You'll feel that ties into the back of a hip.
Lateral line of your leg. One more. Now straighten your knee joint. Touch the floor to the front, the heel to the back. Feel how the focus is now your ankle.
Got that nice smooth glide. 3 more. Now roll it closer to you, put it under your heel, ball your foot on the floor, transfer your weight towards that foot, squash the ball, and stand on it. And then shift off of it. If you'll have the arms, you can just glide.
If you're stepping into line posture, 2 more. And one. Very nice. So now we're set up to go right into our hips and spine. So put your feet right under your sit bones. Lift your 10 toes and feel your key weight bearing points of your feet.
The ball behind your big toe, the ball behind your little toe, and your heel like a triangle, then lay the toes down. In pictures, you're doing this, you wanna see, can I start to gradually feel the weight is a little more even front to back and on those two front foot points? That's your goal to have good alignment. Now from there, we're gonna go right into the movements of the hips. So bend your knees a little bit and put the crease of your hands in the crease of your hip joints or right where your pelvis and legs meet.
And in the middle of the crease, halfway between the outside in the middle, put your fingers in the crease. Then stand back up and picture right behind your fingers is where the legs meet your body where your hip joints are. Now lift one knee and just picture the ball of the femur, the leg bone. Roll, rolling back in the socket behind your fingers. And then you're reaching into the standing foot, reaching into those three foot points.
And I would do, like, 4 to 6 each side. So it's giving you something to put your attention on and monitor how you're doing it. Now from there, take the leg to the side. Now the femur is rolling into the midline. In the socket.
Now take the leg to the back. The ball is rolling forward now. Now next time as you lift the knee, bring in the hand and press it into your inner knee, It's called a diagonal press to add a little muscle activation. There we go. One more each side. Now from there, take your feet a little wider, a little wider than your shoulders, and turn your toes in slightly.
Bend your knees and put your hands on your hips. So when you turn your legs in, it helps to balance out the legs and the hips from a lot of sitting. Those muscles can get tight. So So now this brings your femur bones into the socket more. Now with your hands on your hips, curl the tail forward and reach the tail back with your head centered over your pelvis. Legs are bent.
When you curl, feel how you're using your abdomen. Your inner thighs, your glutes. When you reach back, you're using a little bit of your lower back. Pelvic floor muscles also. Now hold the curl.
Keep your front ribs dropped. Reach your arms out to the side with your palms up. Now translate from your waistline to one side. Back to center. 2nd side. Translate. Center. Translate.
Center. Translate. Center. Translate. Now we're gonna add. Translate. Side then reach up through the up elbow. Let it lengthen.
Come back up to center. Translate. Side bend, bend that up elbow, reach up through it. Let it lengthen, come back up just one more each way. Translate, side bend, lengthen come back up. Last time, translate, side bend.
Lengthen come back up. Walk your feet in. Now turn your feet out slightly about shoulder width. Now do a simple plie, meaning keep your torso vertical, then let your knees go out over your toes. Now pull the elbows in close.
This is a rotation in a press. So turn and press. Come back to center. Turn and press. Now picture your hips and knees are staying still, and the rotation is from your rib cage to your head. Feel the press is happening from the muscles under the arms.
You're just warming up your spine, your shoulder girdle, one more. Back to center. Now go back into a little bit of internal. Bend your knees a little bit, curl the tail slightly forward and reach the arms out. Now turn your palms up and take your shoulders and pull them back towards the spine and lengthen up through the crown of your head. Now do about 25 small circles to the back.
Feel how you're using the back of your shoulders, your mid back, you have a sense of length through your spine. This is for your posture and your shoulders. So we could develop balance in these muscles that tend to be held long. 5 more. Nice and slow, lower.
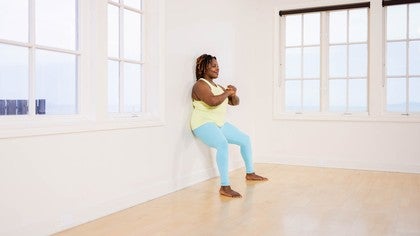
We're gonna go right into a set of squats. So have your feet shoulder width, small turnout. As you slowly descend into a squat, reach the arms to the front. Press into the floor, press your arms to the back at the top to send slow, straighten and press, inhale on the down, exhale out of the Tom. 4 more.
And 3, and 2, and 1. Finish with a roll down. Have your feet a little closer. Do a small leg bend. A picture of your head as a wheel. Slowly, roll forward with the head.
Now picture of your rib cage is a wheel. Curl down. Relax your shoulders. Now let the pelvis roll over your legs. Now nod your head.
Yes a few times. Rotate it. No. Now starting from the pelvic wheel, draw the tail forward, roll the wheel back. Let your head be the last thing up. And just one more small bend, head wheel first, rib cage wheel, pelvic wheel, take a breath at the Tom, from the pelvic wheel roll back, stack the spine, arrive, center the weight on your feet, let the breathing drop.
And there you are. There's your warm up. Do it often, and I hope you enjoy. Thanks for joining us.
Beginner Mat Workouts: 10-Minute Classes
Comments
You need to be a subscriber to post a comment.
Please Log In or Create an Account to start your free trial.


